


DIY and Crafts
Colorful Paper Cup Windmill Craft – Easy To Make Tutorial

Create a colorful paper cup windmill craft with this easy-to-make tutorial. Perfect for a spring or summer activity, this craft will bring a pop of color and a fun breeze when it spins. All you need is paper cups, scissors, markers, and a few other supplies. Follow this step-by-step guide to make your own paper cup windmill!
Welcome to this easy-to-make tutorial on how to make a colorful paper cup windmill craft! This craft is great for kids of all ages and is an easy way to bring some color and fun into any home. With just a few simple materials, you can create a windmill that will brighten up any room. So let’s get started!
Colorful Paper Cup Windmill Craft For Kids
Read More: Sunflower Seeds Flower Craft – Step-By-Step Tutorial
Material Used:
- Paper Cups
- Pencil
- A Pair Of Scissors
- Sketch Pens Or Markers Of Different Colours
- An Earbud
- A Straw
Do you need a craft that makes your kid want to use both the logical and creative areas of his/her brain? Don’t worry, this craft is to save you for all the days when the engineer inside their brains, meets the artist inside their heart!!!
Procedure
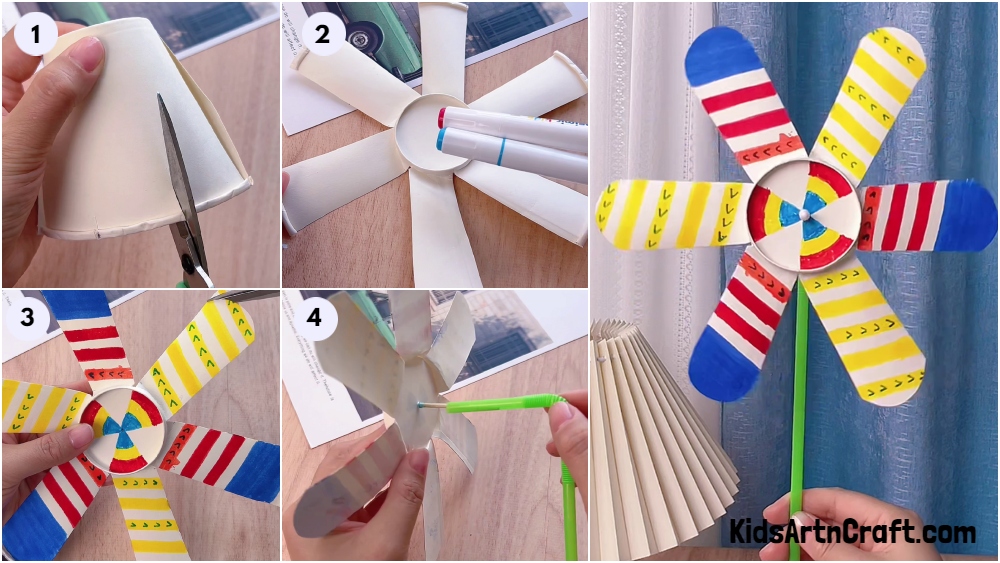
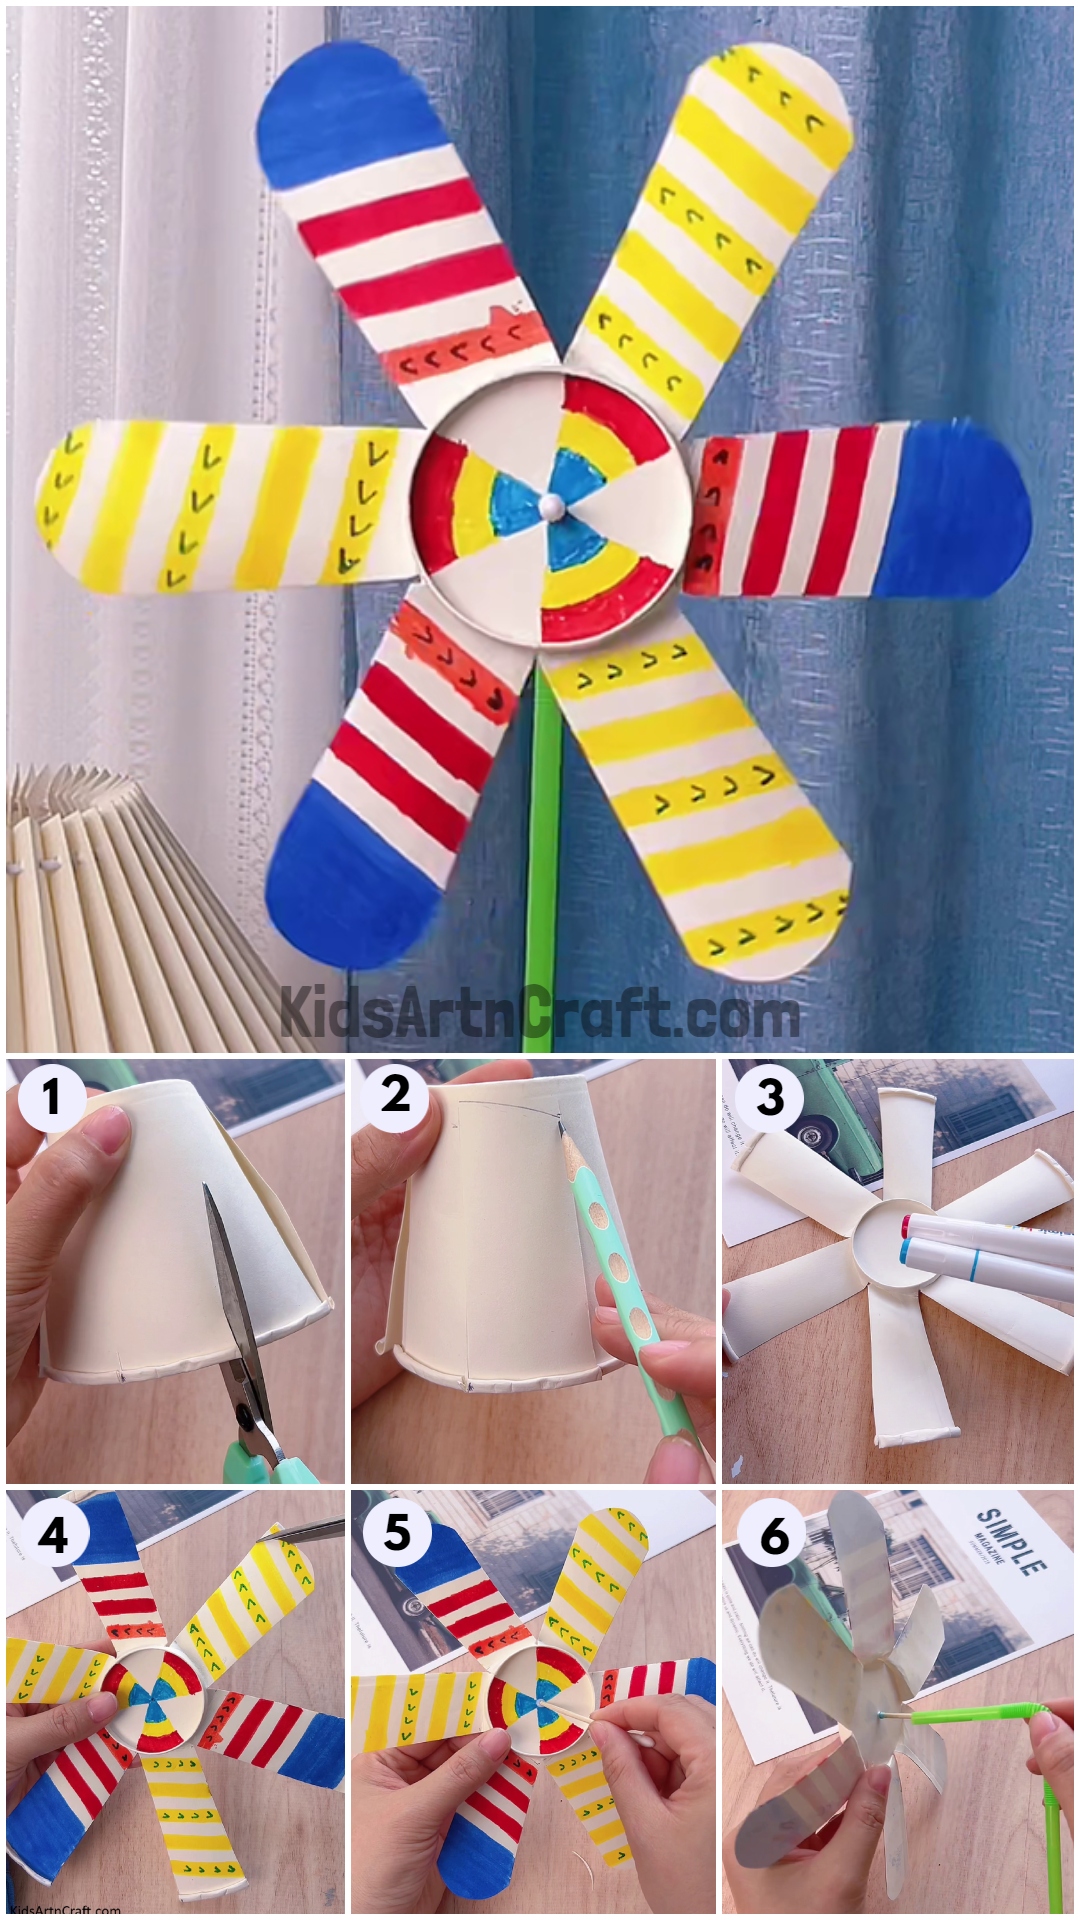
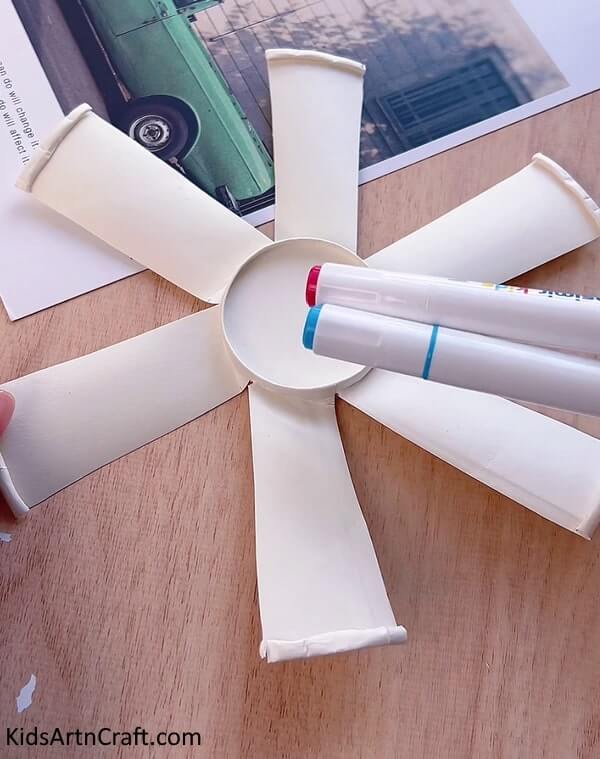
Step- 1: Cutting The Paper Glass
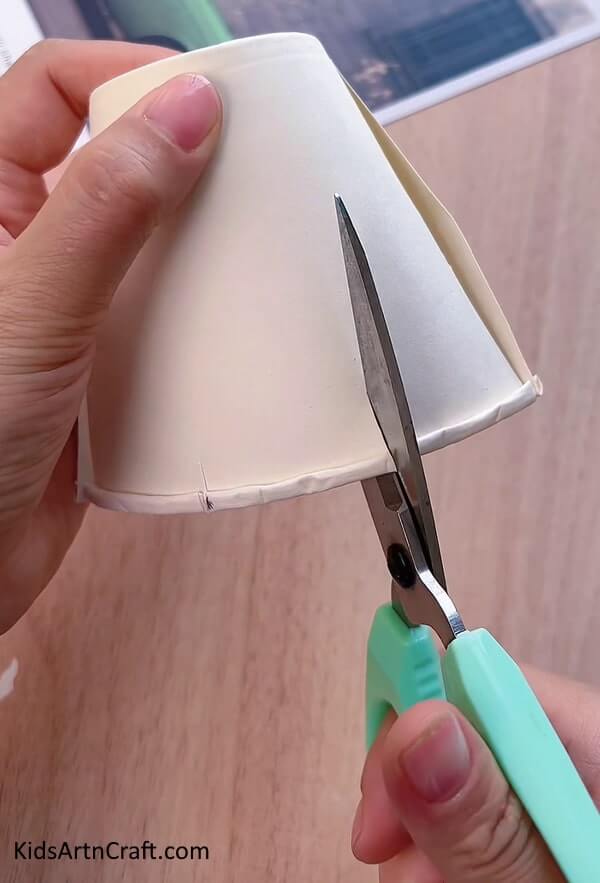
For the first step, take a paper cup and cut it from the brim towards the upper side of the cup. Make sure to create cuts at equal distances from each other to ensure the equal size of the blades in the windmill.
Step- 2: Drawing The Crease
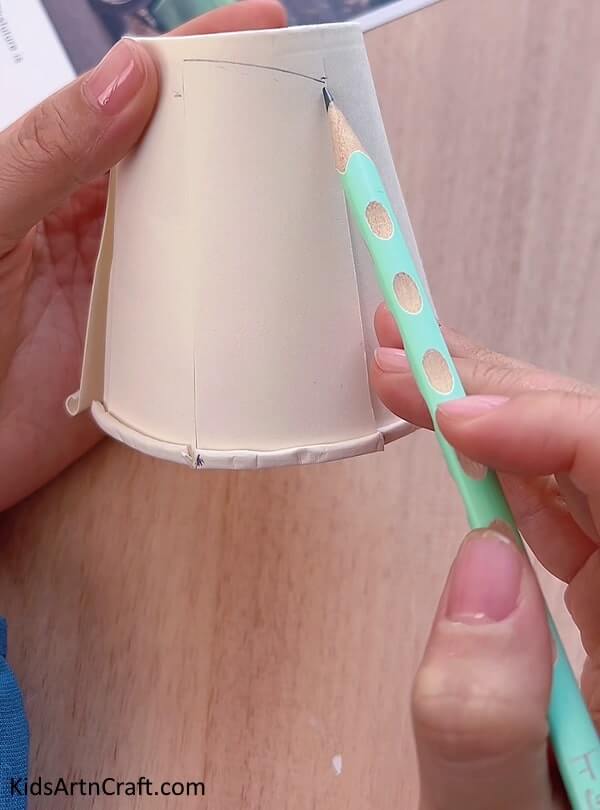
Now, using a pencil, create a crease as shown in the picture, using a pencil. And then take each blade we just created and turn it outwards.
Step- 3: Take The Markers And Paint Your Heart Out!
This is the easiest and I bet everyone’s favourite step, grab your favourite colours, markers and sketch pens and start decorating the craft with different designs.
Step- 4: Cut The Edges For a Better Shape
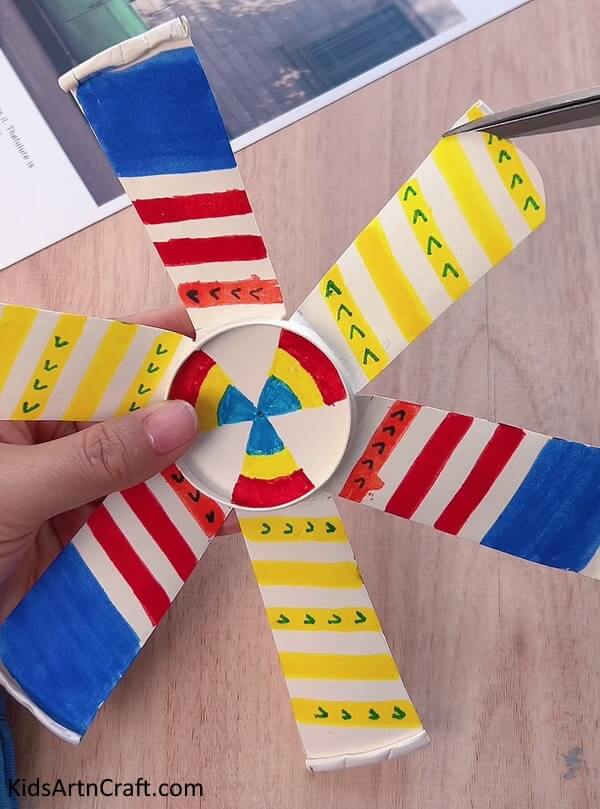
Nope, we are not done yet, now using a pair of scissors, cut the edges of the paper blades and give them a shape like that of a real windmill blade.
Step- 5: Insert The Earbud
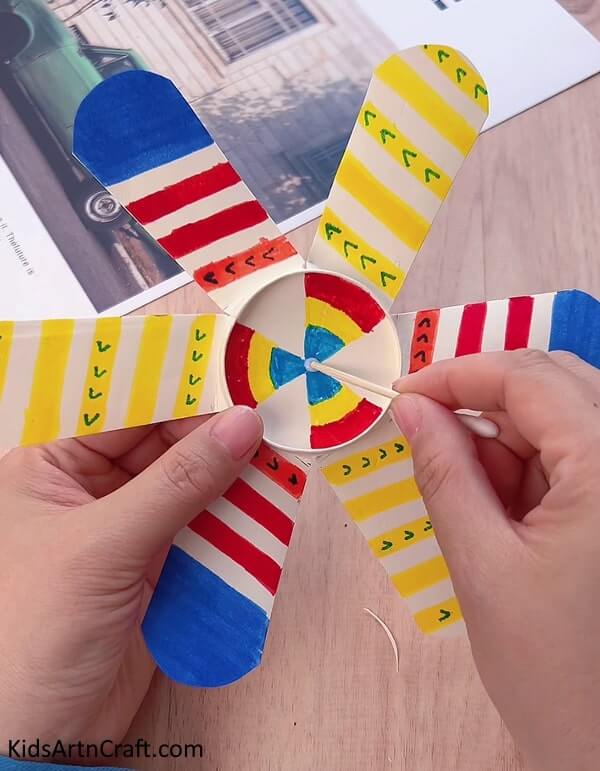
For this step, carefully make a hole in the middle of the cup and then insert an earbud.
Step- 6: Attach The Straw
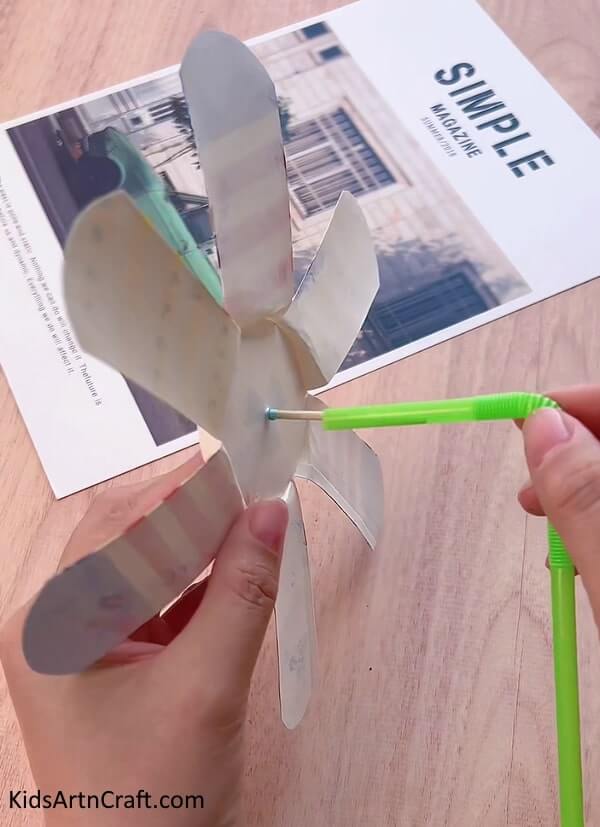
After inserting the ear bud, take a straw and insert the part of the bud in the backside of the craft into the straw.
Final Step: Play As Much As You Want!!!

Now, after securing the straw, when you blow air into the straw, the windmill starts moving.
Finally, as the headline suggests, for the last step, play with the windmill as much as you want!!
This craft is perfect for kids who are willing to create something that adds not just beauty but also practical applicability to their craft projects, have fun trying this one out!
FAQs
What supplies will I need to make a colorful paper cup windmill craft?
You will need paper cups, colored craft paper, scissors, glue, a pencil, and a ruler.
How long does it take to make a colorful paper cup windmill craft?
It should take around 20-30 minutes to complete the craft.
How many paper cups do I need to make this craft?
You will need four paper cups to make one windmill.
Can I make the paper cups in different colors?
Yes, you can make the paper cups in different colors to make the windmill more colorful.
How do I make the blades of the windmill?
To make the blades of the windmill, you will need to cut out four equal-sized triangles from the craft paper and glue them onto the paper cups.
This Colorful Paper Cup Windmill Craft is a fun and easy activity for kids of all ages. With just a few basic materials and a little bit of time, you can create a beautiful piece of artwork that can be displayed proudly in your home.
Follow us on Youtube for art and craft tutorials and much more.
More Articles from Kids Art & Craft
- How To Make Giraffe Art And Craft With Fallen Leaves
- Easy Flower Stump Painting Art Tutorial for Kids
- Creative Way To Make Sunflower Seed Shell Tree Craft For Kindergarteners
- 3D Cactus Paper Craft Tutorial for Kids
- Fun To Make Paper Flower Bucket Craft – Step-by-Step Tutorial


