


Kids Activities
Butterfly Craft Ideas for Kids – Paper Crafts, Drawings & More

Children love butterflies, and they love seeing them fly. It is astonishing to watch the caterpillar to the butterfly life cycle and see those stunning wings. If your kid loves butterfly then these DIYs would surely be fun!
Your children will be excited when they see these butterfly DIYs made only for them! Butterfly wings are particularly extraordinary for craft projects since they let kids use their imaginative skills; there are so numerous ways that you can plan and make them. This butterfly crafts for youngsters are particularly ideal for a radiant spring day or an indoor Sunday project.
Invest some quality time with the family today making one of these delightful butterfly DIYs for kids! What child doesn’t cherish butterflies? With their wonderful colours, fluttery wings, and their capacity to make any individual who sees them grin, it’s no big surprise they’ve motivated so numerous innovative projects.
Here’s a list of the same! So let’s get started!
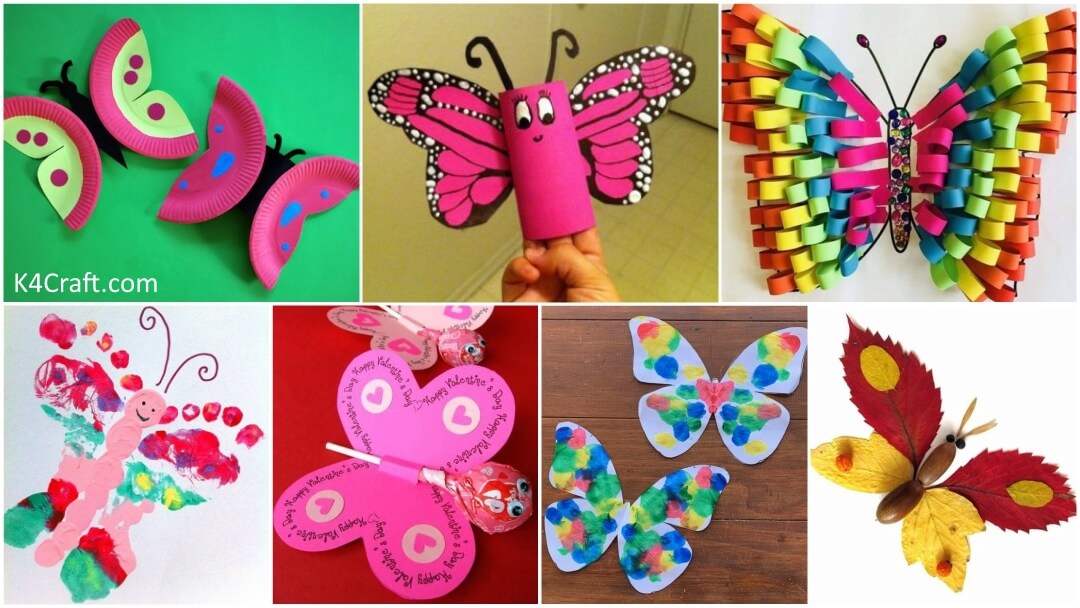
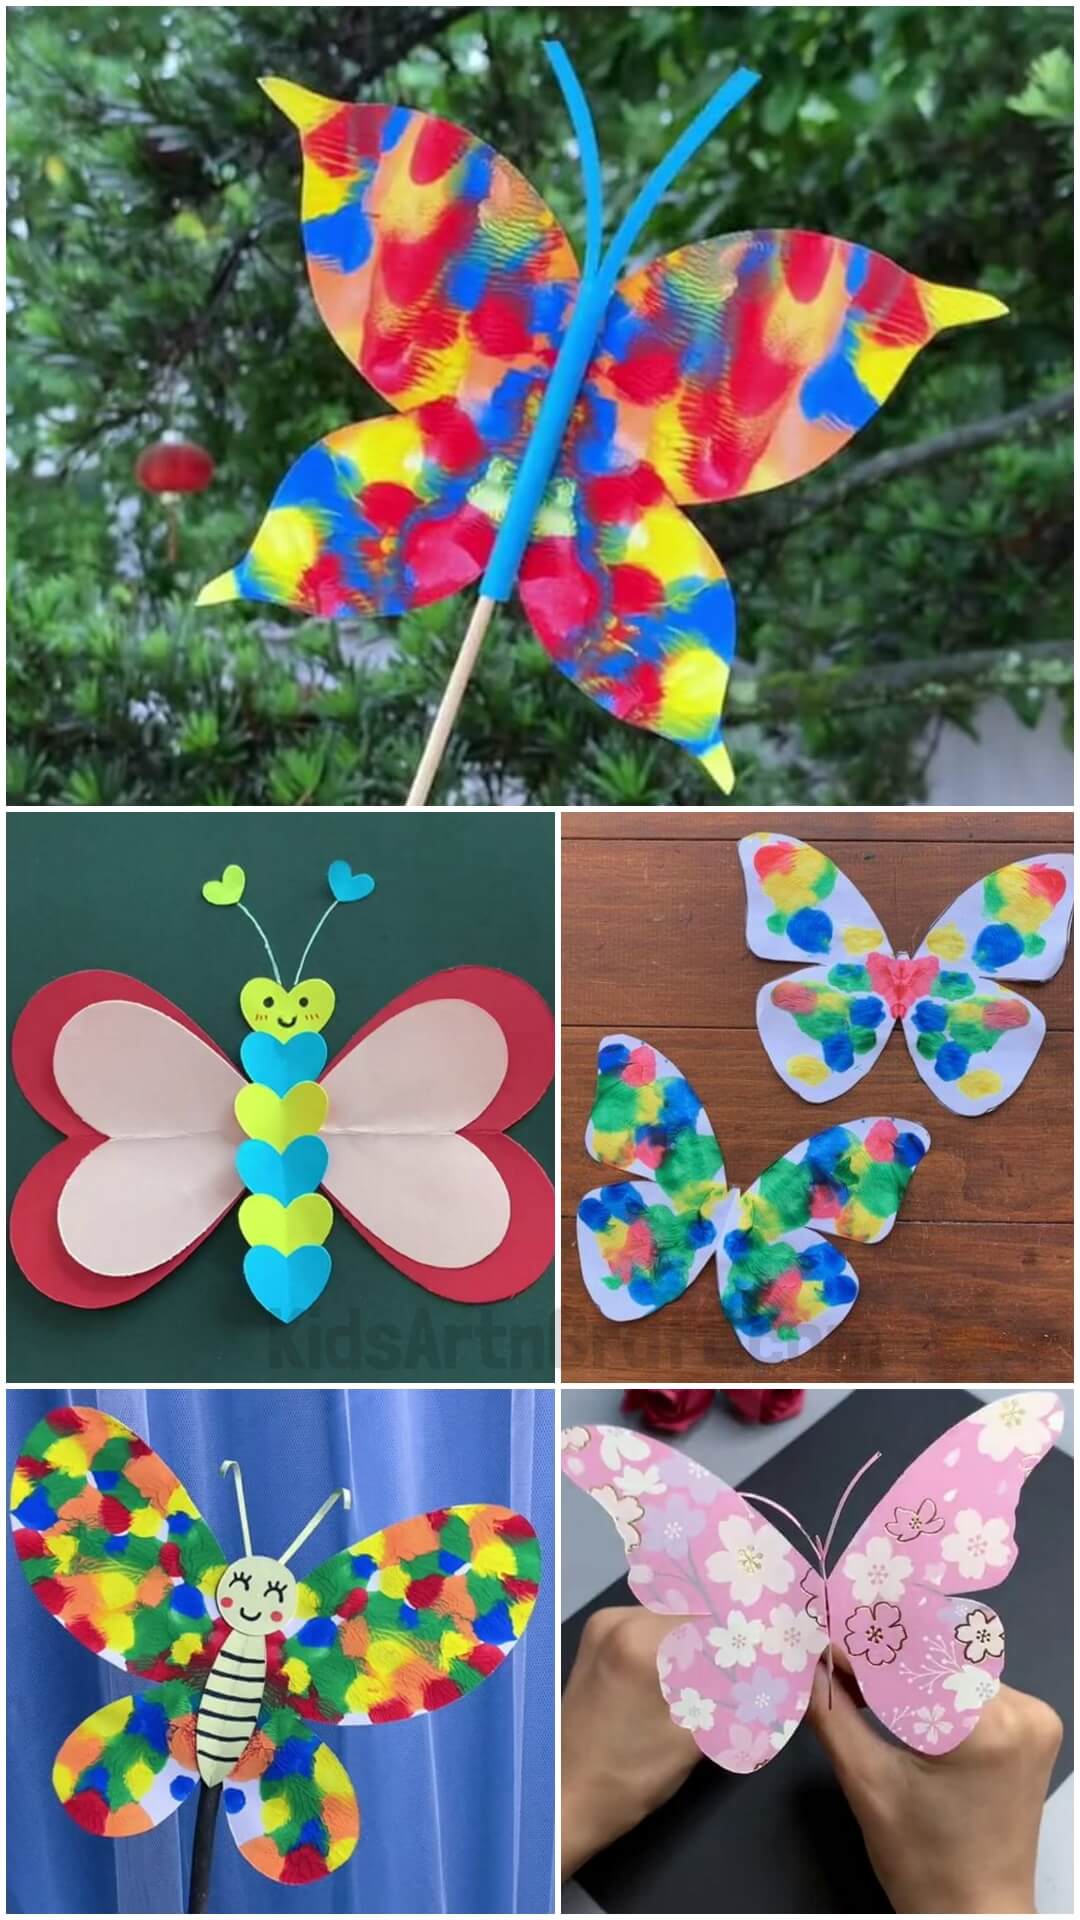
Butterfly Crafts for Kids
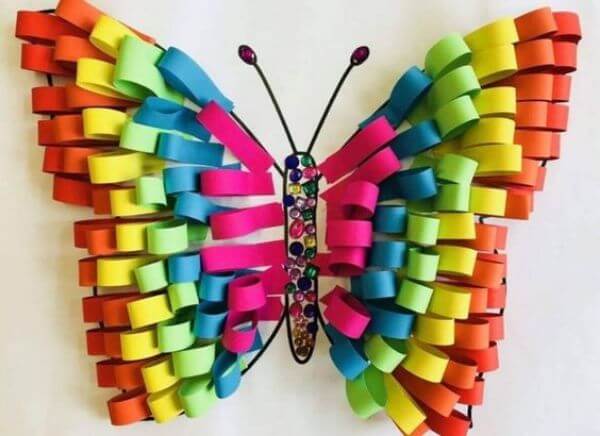
DIY Project Paper Butterfly Craft for kids
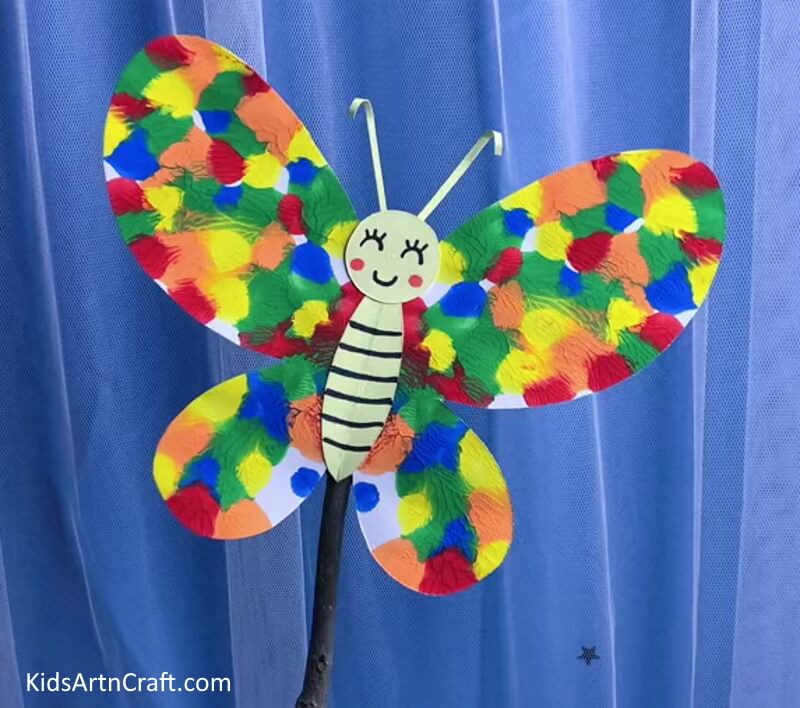
Image Source/Tutorial: Kids Art& Craft
This DIY project is a great way for kids to have fun and get creative. It’s an easy and fun Paper Butterfly Craft that kids can make. All they need is a few supplies and they can have a beautiful butterfly to show off. This is a great project for young children.
Creating Paper Butterfly Craft For Children
Image Source/Tutorial: Kids Art & Craft
Creating a paper butterfly craft for children is a fun and simple way to get kids involved in the creative process. This activity not only encourages creativity but also helps to develop fine motor skills. It’s a great way to spend time together and create something beautiful.
Kids Could Create Origami Butterfly Handicrafts
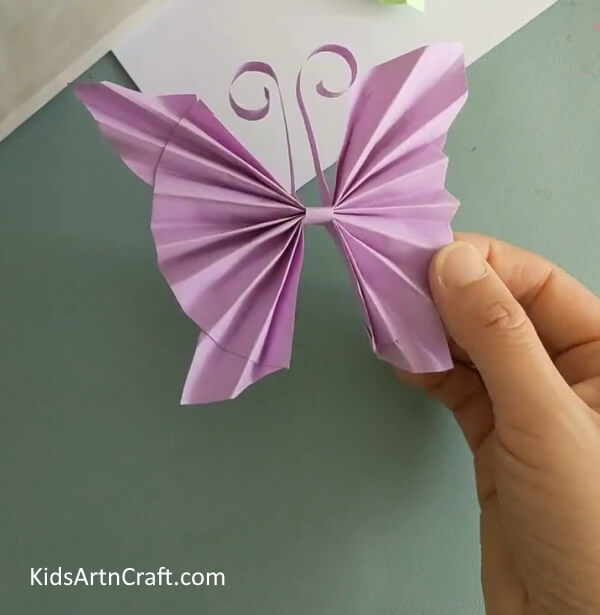
Kids could create origami butterfly handicrafts as a fun and engaging way to learn about the beauty of nature. With just a few simple materials, they can create a stunning piece of art that is sure to be admired.
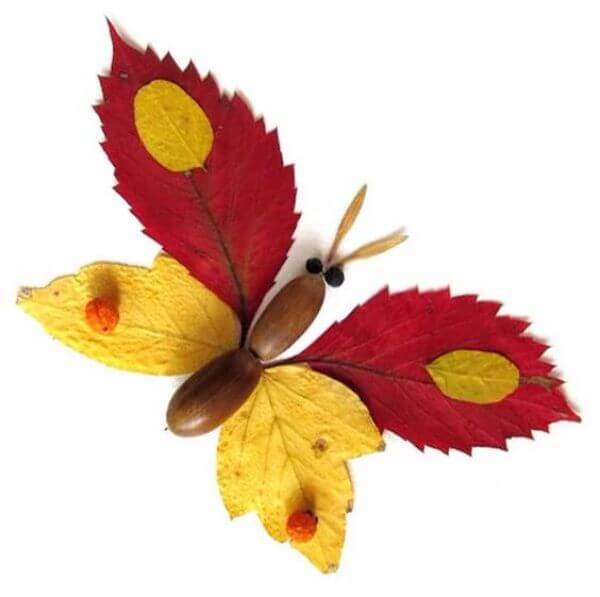
Creative Ideas To Make Leaf Butterfly Crafts For Youngsters
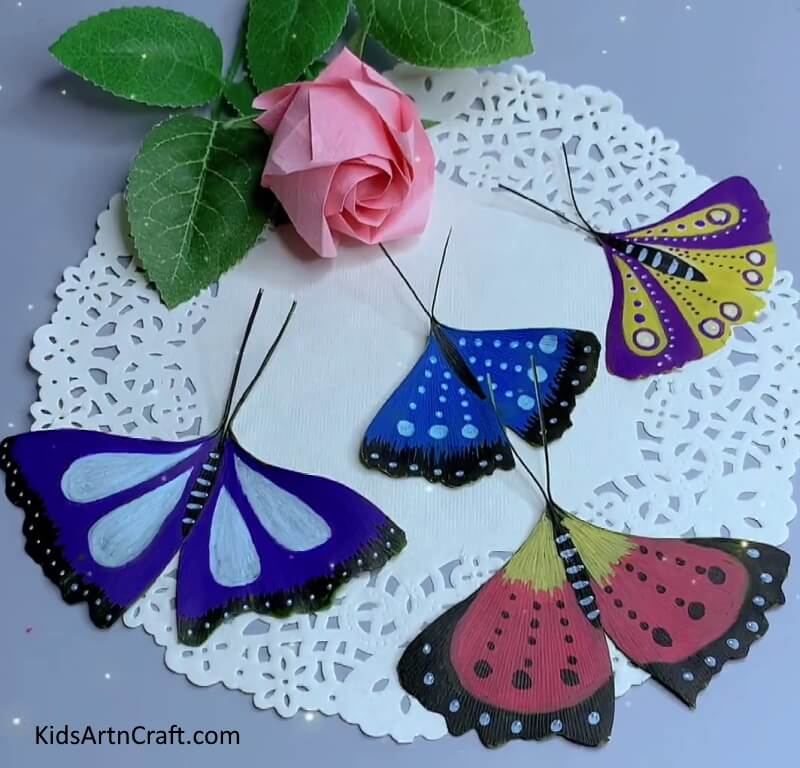
Image Source/Tutorial: Kids Art & Craft
Leaf butterfly crafts can be a great way to get youngsters’ creative juices flowing! They can use leaves from around the garden to create beautiful butterfly art. It can be a fun and educational activity to do with the whole family.
Crafting a Paper Butterfly Easily with Painting Techniques
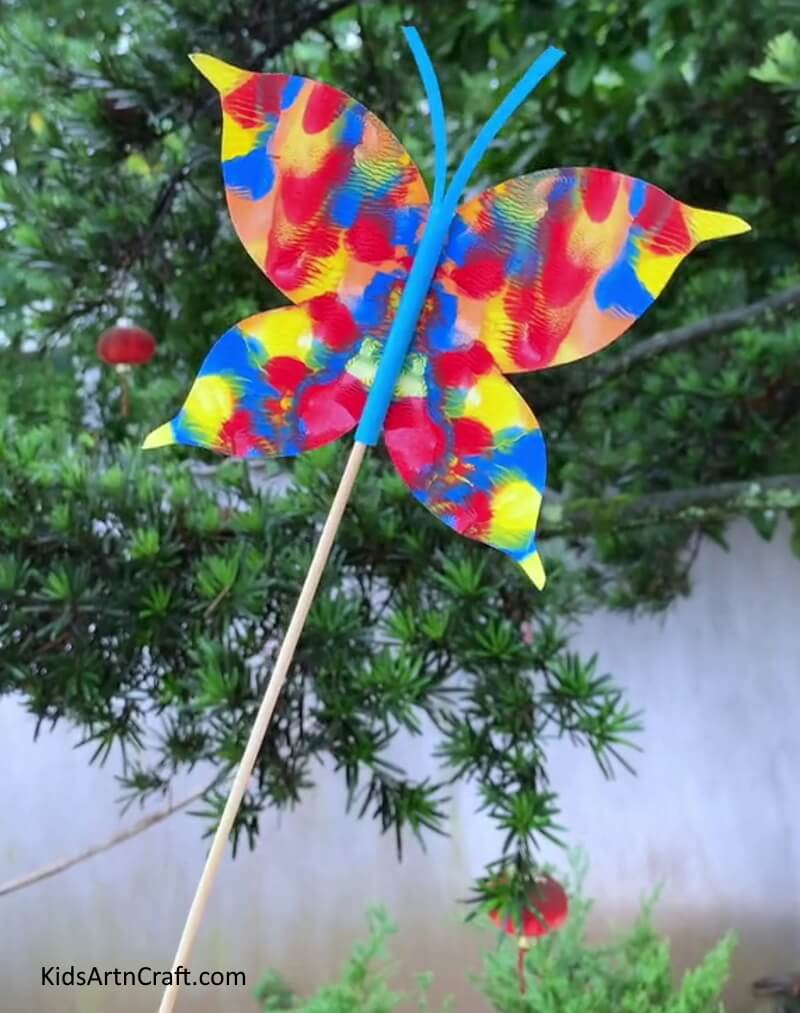
Image Source/Tutorial: Kids Art & Craft
Painting techniques can be used to craft a beautiful paper butterfly easily. With some paper, paints, and a few tools, you can create a stunning butterfly that will be the centerpiece of any room.
Constructing a Paper Butterfly Project for Children
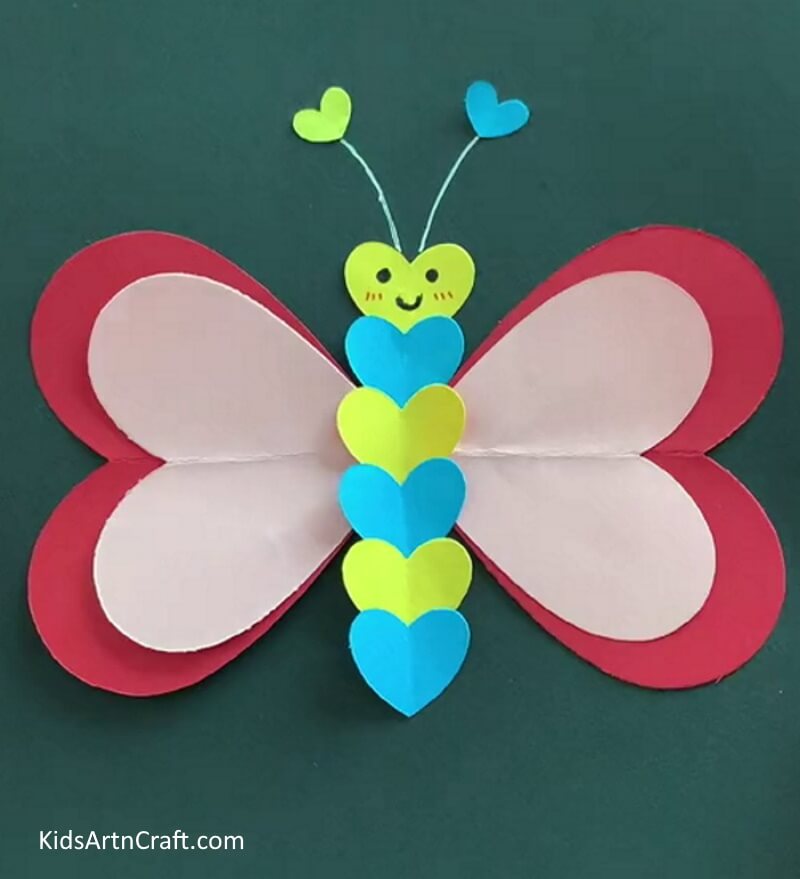
Image Source/Tutorial: Kids Art & Craft
This Paper Butterfly Project is perfect for children! It is a fun and creative way to learn about the lifecycle of a butterfly. With easy-to-follow instructions, the project can be completed in no time. This is a great way to keep the kids engaged and entertained while also teaching them about the beauty of nature.
Paper Roll Butterfly
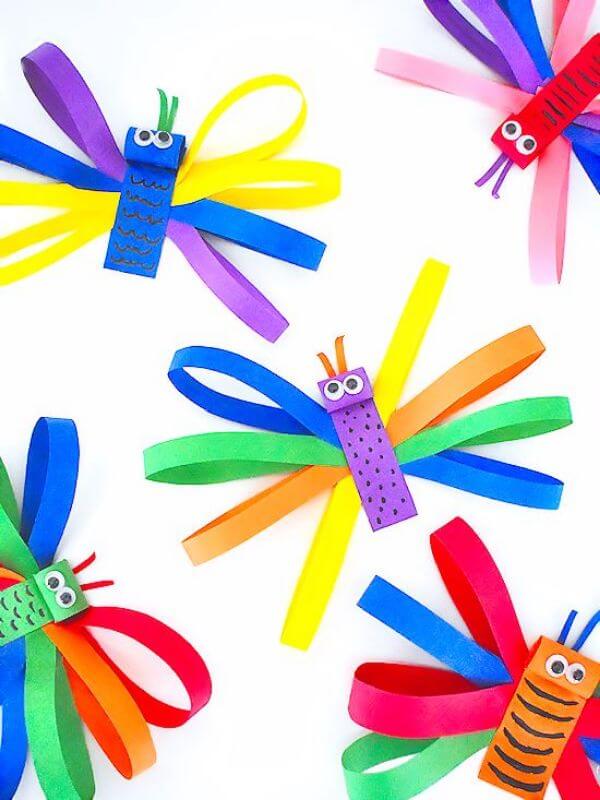
Butterflies can be made using a wide range of materials which makes this an adaptable craft for all ages.
Keep those extra paper strips you generally discard to make these charming little butterflies. Making this little one is excessively simple, and it just finds a way to reuse paper strips into a delightful butterfly DIY that your kids would surely love to make.
You’ll need:
- Markers
- Scissors
- Gluestick
- Colourful papers
- Googley eyes
Begin by cutting long strips of paper about. Bring 4 strips of paper and join them. Bring the ends of the strips towards the centre and glue each, layered on top of the other. Now fold a strip in half. Apply glue to both sides and lay the strips on the top closer to the fold. Bring the other half up and put together.
Paste small googly eyes. Draw details with markers on the body of the butterfly. Wavy lines, dots, whatever you like.
Paper roll giant Butterfly
This paper strip giant butterfly craft is a truly fun one to make! You’ll just need a couple of basic art supplies to make this colorful giant butterfly for spring or summer. This looks so brilliant and merry hanging up around your home or in any room! Give it a try!
You’ll need:
- Ruler
- Pencil
- Glue stick
- Scissors
- CoColouredaper
Cut out equal strips from colored papers. Starting with your body colour apply glue to each end of your first strip, making sure to do it on the same side for both. Next, bend your strip in half to find the centre and lightly pinch it on the body. Turn your ends in towards each other so that the outside bits that you applied glue to meet and stick them together. Repeat the same steps that you this time for the strips that you sized out to make up your wings. Attach your body and wings! You’ll do this by applying glue. Curl the tops of your antenna strips to make them round off the way an actual butterfly’s antennae and that’s all!
Fall leaves butterfly
One of the best things about fall is the falling leaves. There isn’t anything more delightful. This is the easiest way to make something out of those fallen leaves and turn them into something beautiful. This DIY will teach your kid to make something out of those leaves and bring their creative side in use.it requires only a few steps!
Let’s see how to use those fallen leaves to make a beautiful butterfly!
You’ll need:
- Craft paper
- Fallen leaves
- Googley eyes
- Markers
- glue stick
First, we draw your butterfly body and antennae. Then add some glue around the body and stick on the leaves to form the wings. Now add the google eyes. Let the butterfly get dried up in the sunlight and add other details like design or sparkle if your kid feels like. Your butterfly is now all set to fly away!
Handprint Butterfly
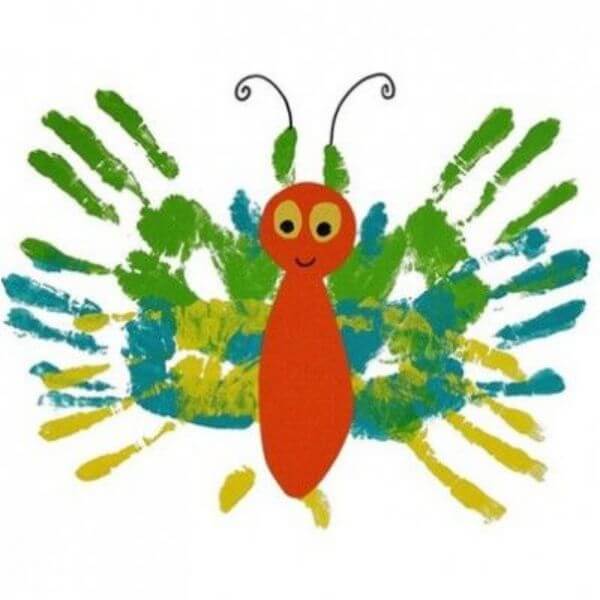
Painting can help your kids in expressing their feelings or sentiments. Using various colours, they can communicate without the utilization of words. Painting helps your kid to create versatility abilities. Their hand muscles are being utilized, which permits them an extension to create both practically and mentally.
You’ll need:
- White sheets
- Watercolours
- Black marker
- Googly eyes
Start by painting your child’s hands, place hand in the middle of a piece of paper. Press the hand evenly and remove carefully. Let dry. Add small google eyes and a smile to the head of the butterfly.
Make small antennas using a black market on top of the butterfly head. You can add colourful gems to the butterfly “wings” for extra fun and colour and your kid would love it too!
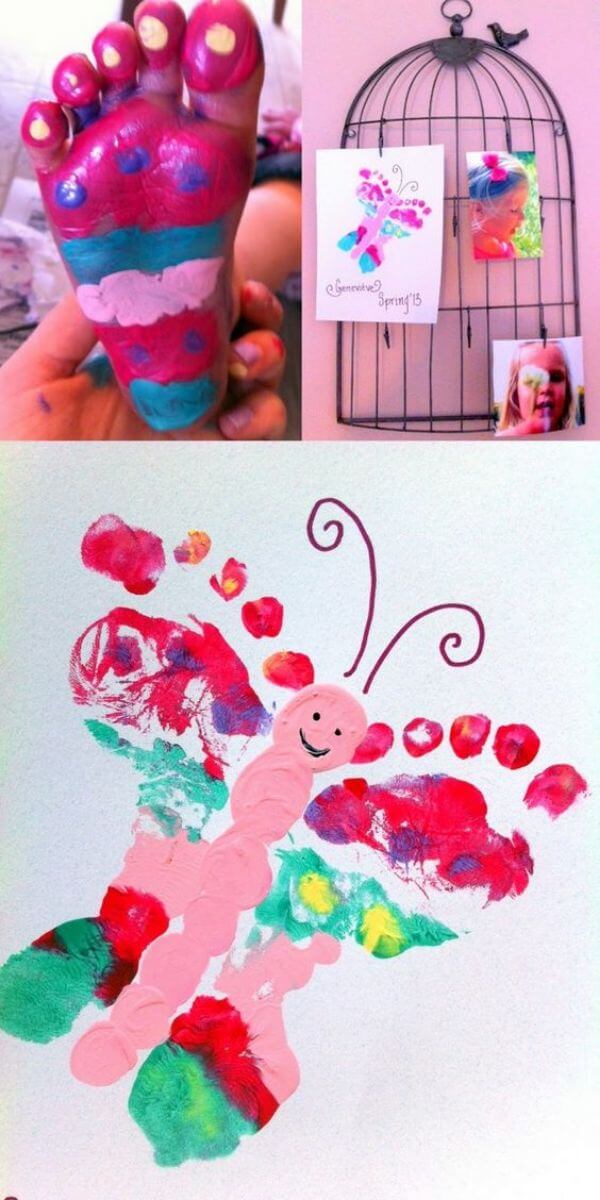
Footprint Butterfly DIY
It’s so natural – right? – to make life muddled and especially when it comes to kids. We persuade ourselves, our children need extravagant toys and activities to keep them
engaged for even the briefest time but that’s not true.
Feet are often forgotten as a wonderful tool for painting as well as exploring the sense of touch. Simple feet paintings combine both and are sure to bring on lots of giggles! Prize? You end up with gorgeous paintings that we can often get them framed.
Furthermore, we stress on the fact that we don’t have there red “things” arranged but all we need is paint!
Let’s begin!
You’ll need:
- Chart paper/White sheets
- Poster colours
- Large bowl
- Hand towels
Take a piece of paper or a chart paper. Take a small number of different paints on a plate. Dip their feet and ask your kids to walk all over the paper. But be careful! It might be slippery. Once it gets dries, the foot paintings make a perfect wall/room decor. Make sure to be prepared because this activity can get a little messy especially if one of the kids fall.
And it’s done! People will surely comment on how much they love it!
DIY pipe cleaner butterfly
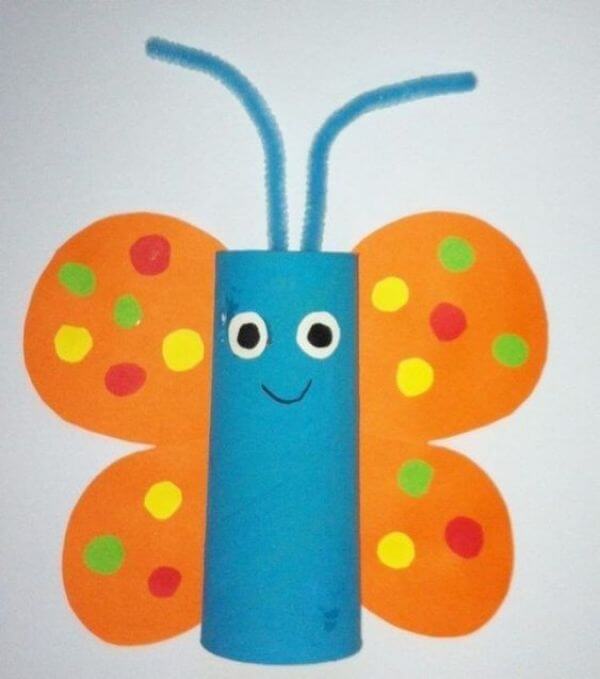
Splendid and beautiful butterfly DIYs are an absolute necessity for springtime when there are colours all around! We made this butterfly and it turned out cute. Your children will love making it!
The best part about this butterfly DIY is the pipe cleaner and the paper roll attached with wings which add some fun to the pretty butterfly.
You’ll need:
- Colourful paper
- Gluestick
- Pipe cleaner
- Googly eyes
Start by making a roll with the coloured paper of your choice. Set it aside. Make a small fold on the insides of the butterfly wings, add glue to the folds and glue them onto the sides of the paper roll. Glue your googly eyes onto your paper roll and draw a mouth on your butterfly if you want to. Cut your pipe cleaner in 2 pieces. Curl both ends to make antennae. Pin them down into the top of the paper roll to make your butterfly antennae.
Paper rolls DIY
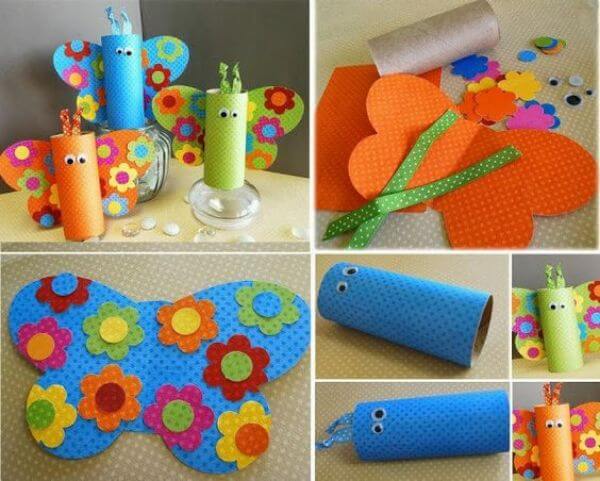
This butterfly DIY for kids can help you with making charming butterflies using paper, rainbow colours, and look delightful. They don’t need a lot of material and the kids can design the butterflies as they wish. This DIY isn’t just simple but fun as well, and ideal for little kids.
You’ll need:
- Coloured papers
- Ribbons
- Paper flowers
- Gluestick
- Paper rolls
- Scissor
Paint the toilet paper roll with a colour of your choice and allow it to dry to make the wings fold a piece of cardstock in half. Trace the outline of a butterfly, or you can draw it yourself. Cut out the wings carefully and sticolouredred buttons with glue. You can decorate it with coloured stones. Bend a pipe cleaner to make the antennae and stick two small pom-poms to the tips with glue. Now, attach the antennae to the inside of the paper roll. Stick the googly eyes and draw a mouth with a black marker pen. the last step is to paste the wings to the roll.
DIY tissue paper roll butterfly
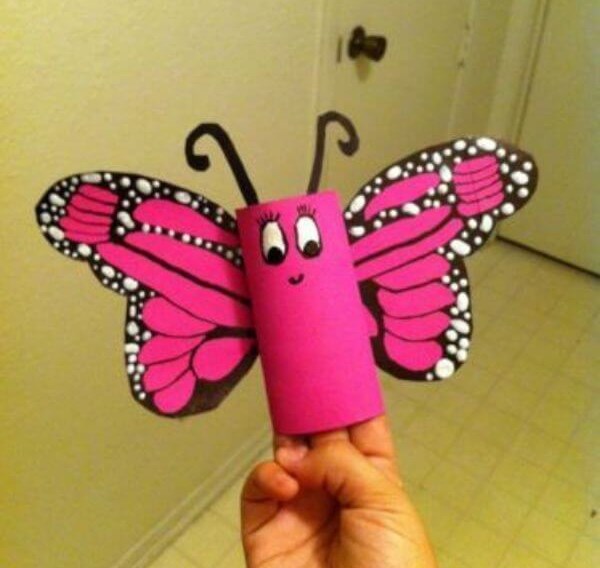
Have everybody in the house prepared to spare those tissue paper rolls for DIY, or take that pile about which you haven’t been staying aware of. Let’s grab the container which is flooding with rolls, so it was the ideal opportunity for some papercraft!
We made this tissue roll butterfly make for kids, however, it could also work for a special occasion.
You’ll need:
- Black maker
- Colourful paper
- Glue
- Empty toilet paper roll
- Pipe Cleaner
- Googly eyes
Cut a bit of paper to fit the tissue roll. Fold a bit of paper over the tissue and secure with tape or glue. You can similarly paint the roll with the colour of your choice. Cut two little hearts for the wings.
Paste the two hearts together at the lower part of each heart. Attach the wings to the rear of the tissue roll. Paste googly eyes to the front of the bathroom tissue cost. Now draw eyes on your butterfly with a marker or cut eyes from the paper. Using the dark marker, draw a mouth onto the tissue roll. Now cut a piece from the pipe cleaner and cut into equal parts. Twist the highest points of the pipe cleaner and paste or tape to the roll. And it’s done!
DIY Lollipop Butterfly
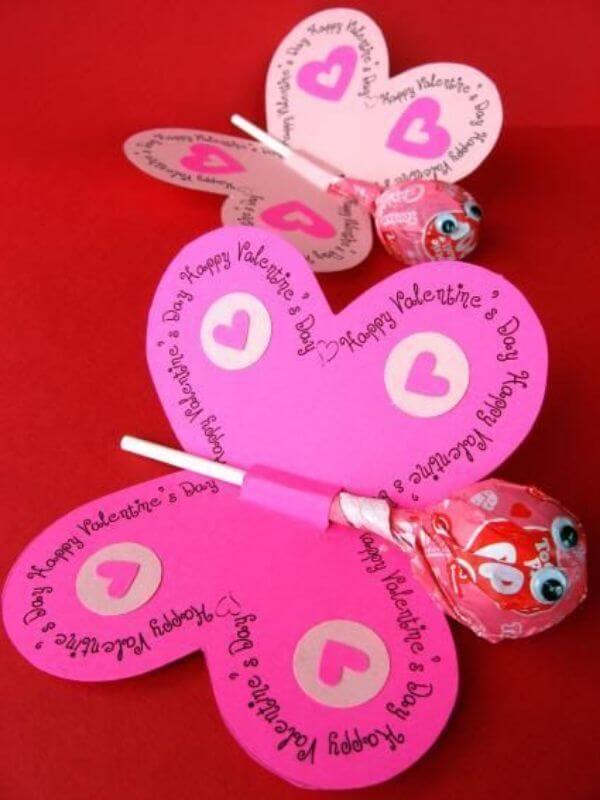
Candies are a pretGooglec right? But you can turn them extraordinary for your kids! Here is a way you can use candies to make sweet DIY that your kids and colleagues will adore!
These charming little candy pots are truly modest and simple to make making them with provisions from your nearby dollar store or art store. You can even let the children help you make them and customize them for their cohorts or instructors.
You’ll need:
- Sketch pens
- Glitter
- Gluestick
- Googley eyes
- Scissors
Fold a paper in the centre. Draw and cut semi-circles starting from the centre; upper one little bigger than the lower one. Make two small cuts in the centre of the fold, 1 inch apart. Place the stick of lollipop inside the cuts. Decorate wings of the butterfly with the things of your choice.
DIY spoon butterfly
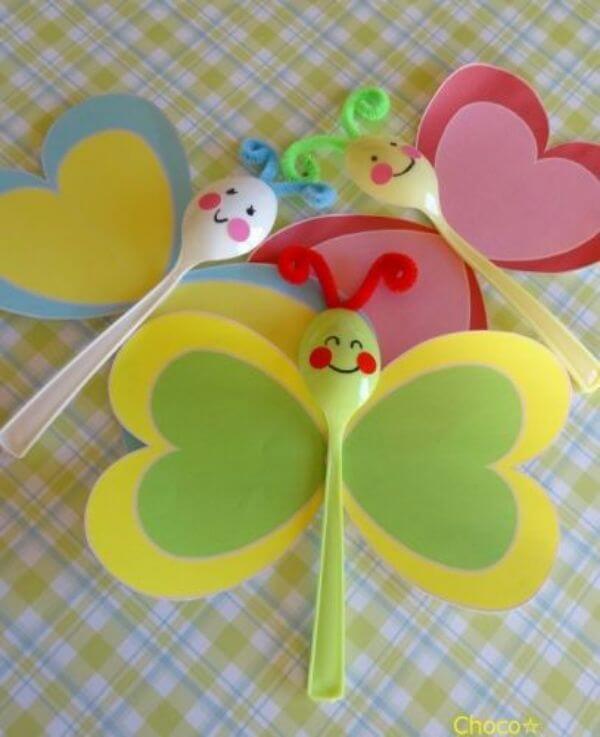
One look at this delightful recycled spoon butterfly and you will need to make lots of them. These butterflies are totally valuable. It’s an ideal speciality to do with the children. We love that the provisions are so natural to discover at any nearby store, and it’s anything but difficult to get imaginative and make them novel. We are sure that the children will adore this undertaking as much as we did. This craft is a good time for adding to spring and summer adornments. There’s simply something fun about observing a little charming butterfly flying out around a plant or sitting on a flower nearby!
You’ll need:
- Plastic spoons
- Markers
- Glue
- Scissor
- Pipe cleaner
On a solid paper of your choice, draw the wings shape. Cut out this shape. On a patterned piece of paper, trace the same shape, only slightly smaller, and then cut it out. Glue the wings to a plastic spoon making sure the bottom of the spoon is facing up. Cut the pipe cleaners into small pieces and curl to add the antennae. Glue the pipe cleaners onto the back top of the spoon. Use a marker to draw eyes. Now you can display your butterfly as wanted!
Water Bottle butterfly DIY
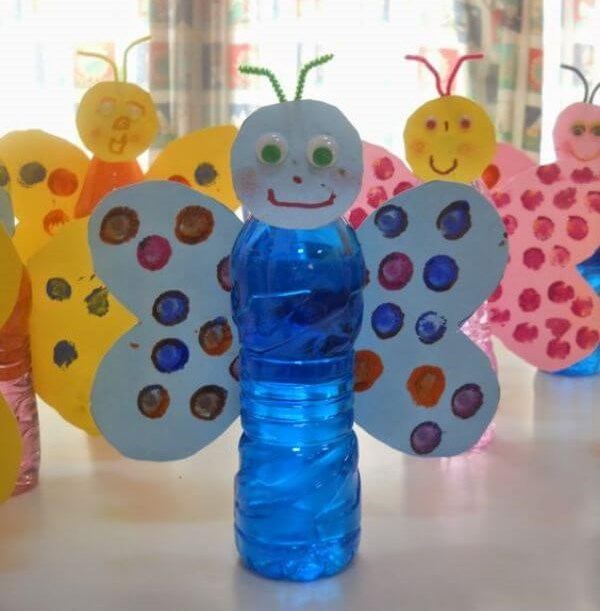
Nature is perhaps the best place to search for crafty ideas. Butterflies are among the most used for craft ideas since they are lovely, fragile, colourful, and beautifully designed, so they are ideal for any inside adornments. Here is a DIY task to make beautiful butterflies with plastic bottles and caps. Plastic bottle idea is a decent method to reuse plastic. These plastic butterflies look so dazzling with their bright and clear wings, and shining beaded body. They are exceptionally easy to make and your children can assist with the drawing and other additional parts. Along these lines, you can show them the idea of reusing a lot of plastic bottles. Let’s start making it!
You’ll need:
- Water bottles
- Pipe cleaners
- Coloured paper
- Scissor
- Gluestick
- Googly eyes
- Markers
Start with the coloured sheets. Cut out equal small circles and wings for the butterfly using the scissor. Now take the bottle and mark the points where you are going to stick these parts. Once done, using the gluestick start pasting the body parts one by one. Now keep the bottle aside. One it gets dried, paste the googly eyes and make the face of the butterfly. Using the markers, you can beautify the wings. Now cut out small pieces of the pipe cleaner and paste it right on top of butterflies head which will make the antennas. That’s it! Your water bottle has been reused!
Thermocol plate butterfly DIY
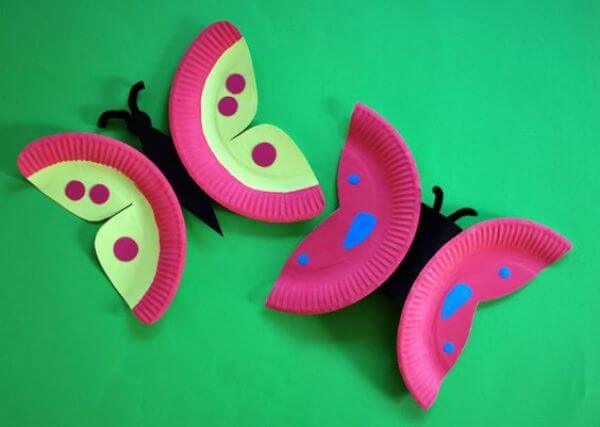
Children love nature and, most importantly, experience its massive magnificence, which is discovered in watching colourful butterflies, among numerous other wonderful animals. Kids are stunned by the butterflies they pursue in the school ground or find in their yard or garden. Children love to find out about butterflies or watch a caterpillar become a butterfly. So let’s engage them in one such activity where they can learn all about butterflies!
You’ll need:
- Thermocol plates
- Poster colours
- Scissors
- Glue gun
- Coloured sheets
Cut your paper plate from the middle, now with each piece cut kind of a bent “V” shape along with every one of the edges.
Paste the wings to one or the other side with a heated glue gun. Paste two short pipe cleaner pieces at the top of the butterfly hear.
Last part is to finish your butterfly touch-ups and designs on the body and wings if needed. That’s it!
Watercolour Butterfly DIY
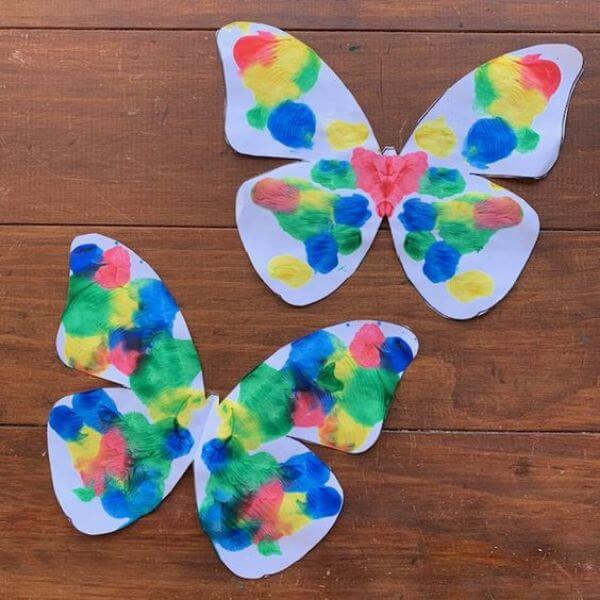
kids love looking for butterflies in the spring and summer. We love examining the lovely colours and patterns of the butterflies they find. Most often what they find are moths, but that does not take away from their excitement. They have found some really pretty, unique and large moths.
As we eagerly await the appearance of butterflies this spring, we pulled out our watercolours to make our unique butterflies.
You’ll need:
- White sheets
- Scissors
- Watercolours
Ask your kid to paint one side of the paper and then folded the paper in half so that the other side had the same designs. cut out a butterfly shape from the dried paintings by just folding the paper in half. After that cut out another butterfly outline ist is slightly bigger. After the butterflies were done the kids loved making them fly around the house and then hanging them up to show off.
Glitter paper butterfly DIY
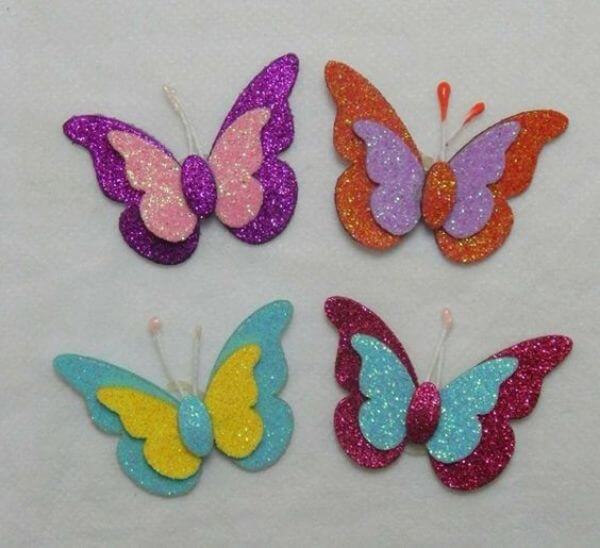
There are loads of sweet embellishments and improvements that you can get for your making tasks, for example, making your cards, scrapbooking and enhancing and decorating your home. Locally acquired plans can be perfect yet, frankly, it is significantly additionally fulfilling to make your butterfly enhancements – and fortunately, it’s not too difficult to do by the same token.
You’ll need:
- Bobby pins
- Glitter paper
- Scissor
- Pencil
- Glue
Cut a butterfly design from glitter paper. Use a pencil to draw first or trace around using a stencil. You need a minimum of 3 pieces to make each.
Use glue and sprinkle over some extra fine glitter powder if still needed to Shake off the stray glitter and allow it to dry. Use two bobby pins to make the antennae. Stick these to one paper butterfly with glue.
Place some glue down just the middle of a butterfly and then stack another layer on top. Repeat this with however many paper pieces you have for your butterfly.
Once the glue is all dry, push up the wings and spread them out. Your butterfly is ready to fly away!
Handprint butterfly DIY
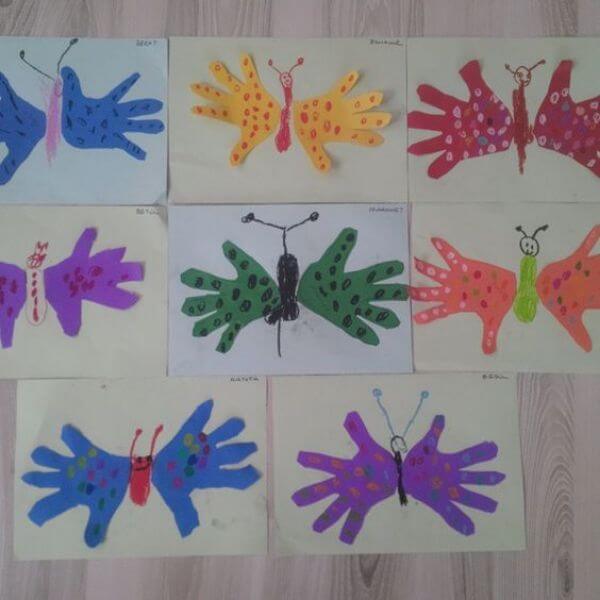
The best part about this DIY is it’s carefully composed with adoration and accompanies a charming purpose of your kid’s impression. These would make ideal cards to make in preschool or when you want to tour child to learn about hand impressions.
This butterfly craft is a way to reuse the craft papers and making it inexpensive to craft to make. With just a few extra art supplies, you will be ready to make a lot of handprint butterflies.
You’ll need:
- Colourful paper
- Markers
- Scissors
- Gluestick
- Pencil
Start with folding over your paper in half. Now trace your kid’s hand as and keep the wrist on the fold side. Next, add an antenna and cut out your butterfly. With a new coloured paper, cut out a body and head and glue to the outer part of the butterfly. You can make the head from a pom-pom as well. The last step is to draw the eyes and the remaining parts. Decorate the handprint wings with glitter or markers and that’s it!
Colourful butterfly DIY
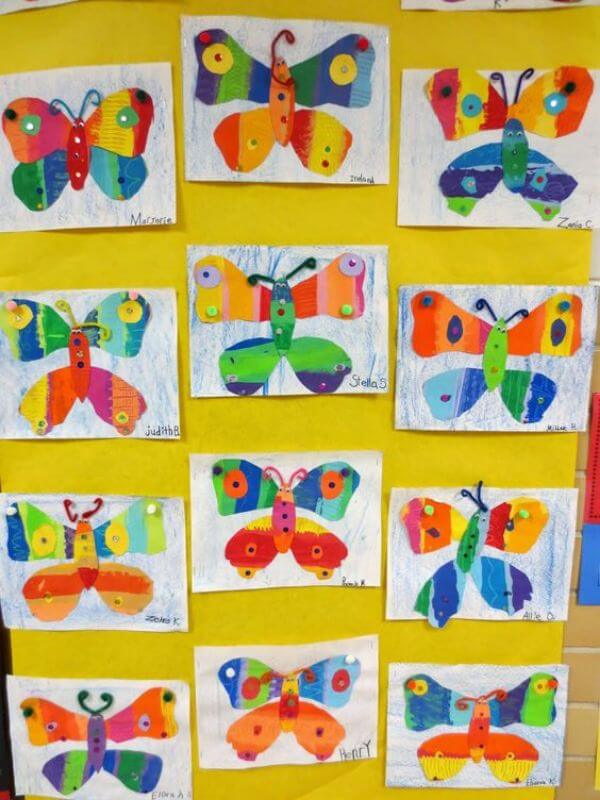
Little children have heightened levels of the creative mind. Changing a boring piece of paper into a 3-dimensional shape or an animal does some incredible things for their imaginative senses. For parents, viewing their kid’s eyes light up after finishing an activity is extremely valuable so here’s one such activity to turn a boring piece of paper into something beautiful!
You’ll need:
- Pipe cleaners
- Watercolours
- Scissor
- Gluestick
- Sponge/brush
First, draw the wings using a pencil. Fold the paper in half, cut the wings and paint them with the sponge or brush and allow to dry. You just need to paint one side of the wing. The other side will have a design automatically. Now come to the body and use watercolours to paint butterfly and allow to dry. There is no right way to paint the wings. Each one will be different. Glue the butterfly body to the wings of the butterfly.
Cut 2 pieces of the pipe cleaner in and curl both ends to make antennae after pasting them on top of its head. Your butterfly is ready!
Simple butterfly printables
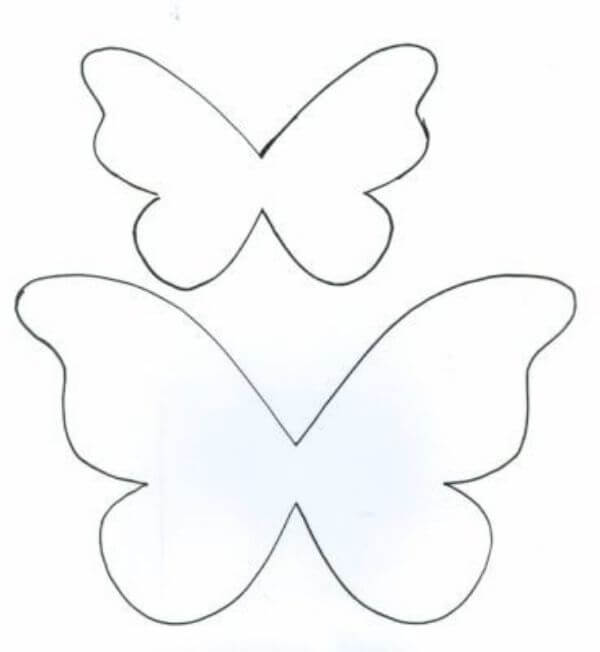
A wide range of butterfly printables is accessible online for grown-ups and kids to be used as a layout for crafting. They are valuable in butterfly DIYs for kids when we need to make a few of a similar kind and save our time.
They are valuable for kids who can utilize them for colouring and improve their fin arts skill and mastery.
You’ll need:
- Printables
- Printer
One can download these printables online and get it printed either on a plain or a coloured piece of paper.
They can be imprinted on coloured sheets for craft purposes.
Cupcake liner butterfly DIY
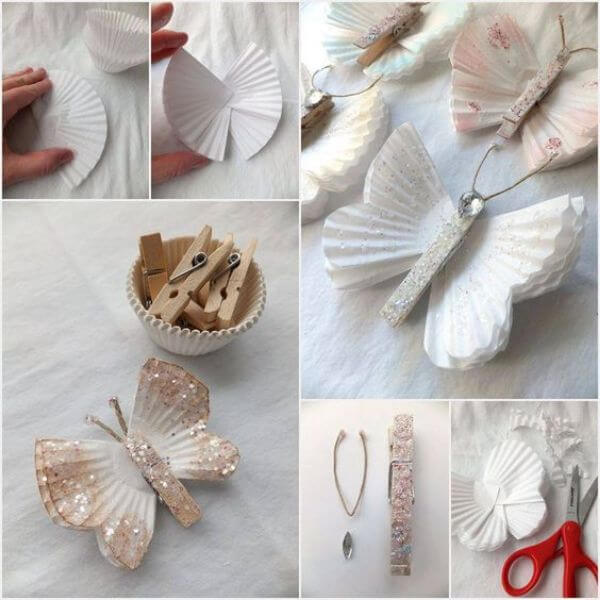
With a couple of folds, trims and squeezes, this butterfly becomes animated! We love this basic speciality for watercolour We utilized watercolour on the wings, use utilizes markers or other colouring materials. You could even adorn your butterflies with stickers! Paste a magnet to the back, at that point use it to hang photographs and craftsmanship on the cooler.
You’ll need:
- Cupcake liners
- Markers
- Clips
- Scissor
- Gluestick
Fold four baking cups in half, then in half again. Dampen a foam paintbrush before dipping into watercolour pigments. Paint the edges of each wing using watercolour paint. Overlap two wings so the scallops are staggered and don’t line up exactly. Glue the wings together and repeat with the remaining pair of wings. Hold the wings together at the inner folds using a clothespin.
Paper fold butterfly
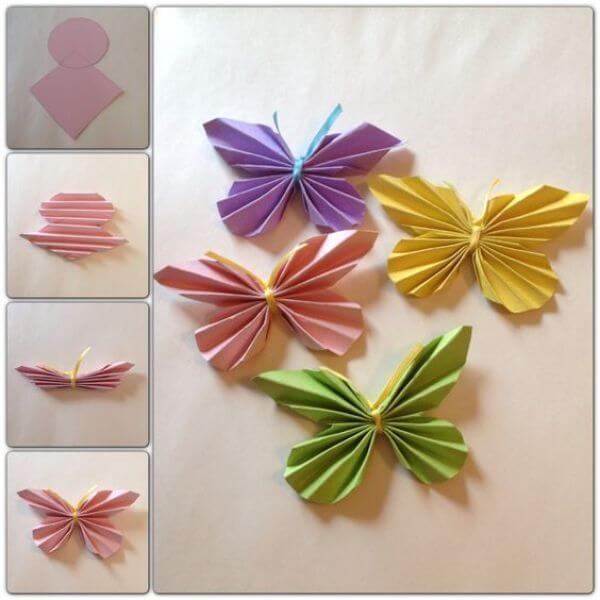
These paper butterflies can be used from numerous points of view – transform them into a butterfly hanging or beautify your corner. Make little ones and add them to a band or an ornament. Improve a corner wall or paste on top of an Origami Box as a pretty DIY box. Let’s see how to make these beautiful DIY butterflies!
You’ll need:
- Colourful sheets
- Markers
- Yarn/ thread
Cut the squares of equal size. Take one piece and overlay it equal folded and corners. So you have a square shape with sharp ends. When done, fold it from the mid part as to tie the knot. Now bind it with a yarn piece or a string and it’s all wrapped up!
Origami butterfly DIY
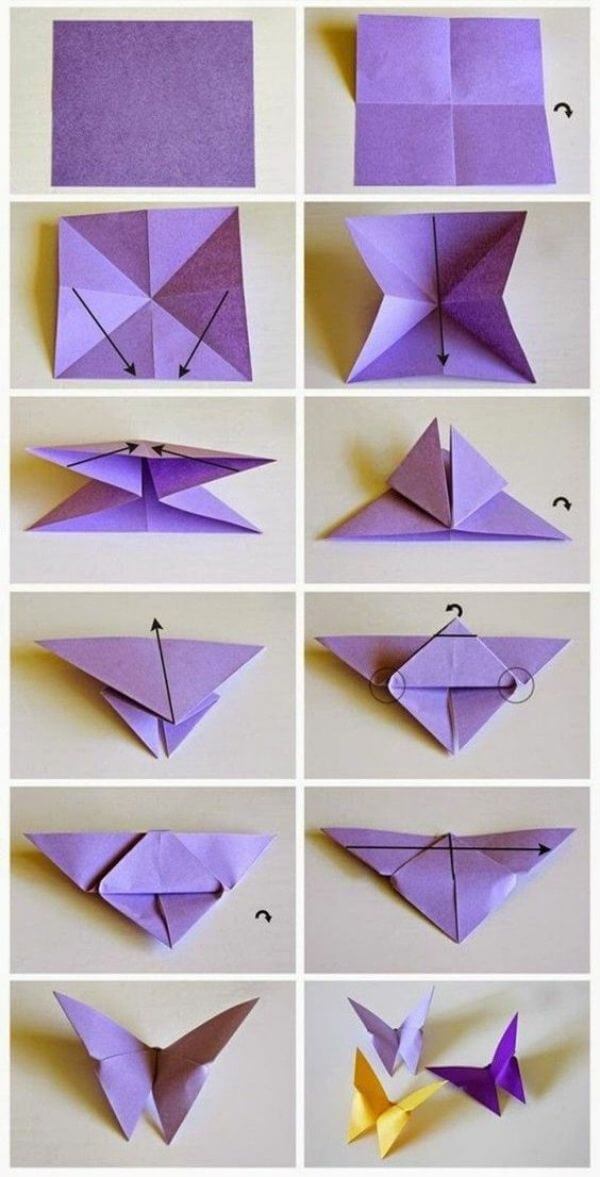
Origami enables different abilities of learning. It has been appeared to improve perception abilities using paper folding. Such aptitudes allow kids to fathom, describe, and develop their perspective and way in day to day life. So, let’s get started!
You’ll need:
- Kite papers
- Markers (optional)
First, cut out a square from a coloured paper sheet. Now fold the square along the diagonals. Crease the square into equal parts on a level plane at that point unfurl. Holding two inverse sides, push the points together until they form a square. Take the base corners of the top layer triangle and overlap them to meet at the top corner.
Turn the card over and overlap the top of the triangle in reverse over the base edge, so the tip stands out. Ensure you don’t flatten the edge. Fold the edge that sticks out over the side and turns the card over. Crease down the middle
And you’ve finished it!
There you have it! These paper butterflies might not be the most complicated project you’ve ever done, but you must have found them to be a nice and simpler idea than the other, more complicated crafts.
These can be made anywhere, anytime by using the least or whatever you have at home.
Comment down below and tell us if you found these ideas helpful. We would love to hear.
Have fun with your kid and keep your inner child younger than ever!
For more such creative, easy yet simple Ideas you can visit our website and check our posts where you can find the best Ideas to bring a smile on your kid’s face.
Check Amazing collection of Craft Ideas for Kids at K4 Craft.
You’ll Also Like
- Easy Kids Fun Butterfly Craft
- Fun Activities and Crafts For Toddlers
- Fun Activities: Old CD Animal Crafts for Kids
- Gingerbread man activities for preschool
- How to Make Easy Paper Animal Crafts For Kids


