Kids Activities
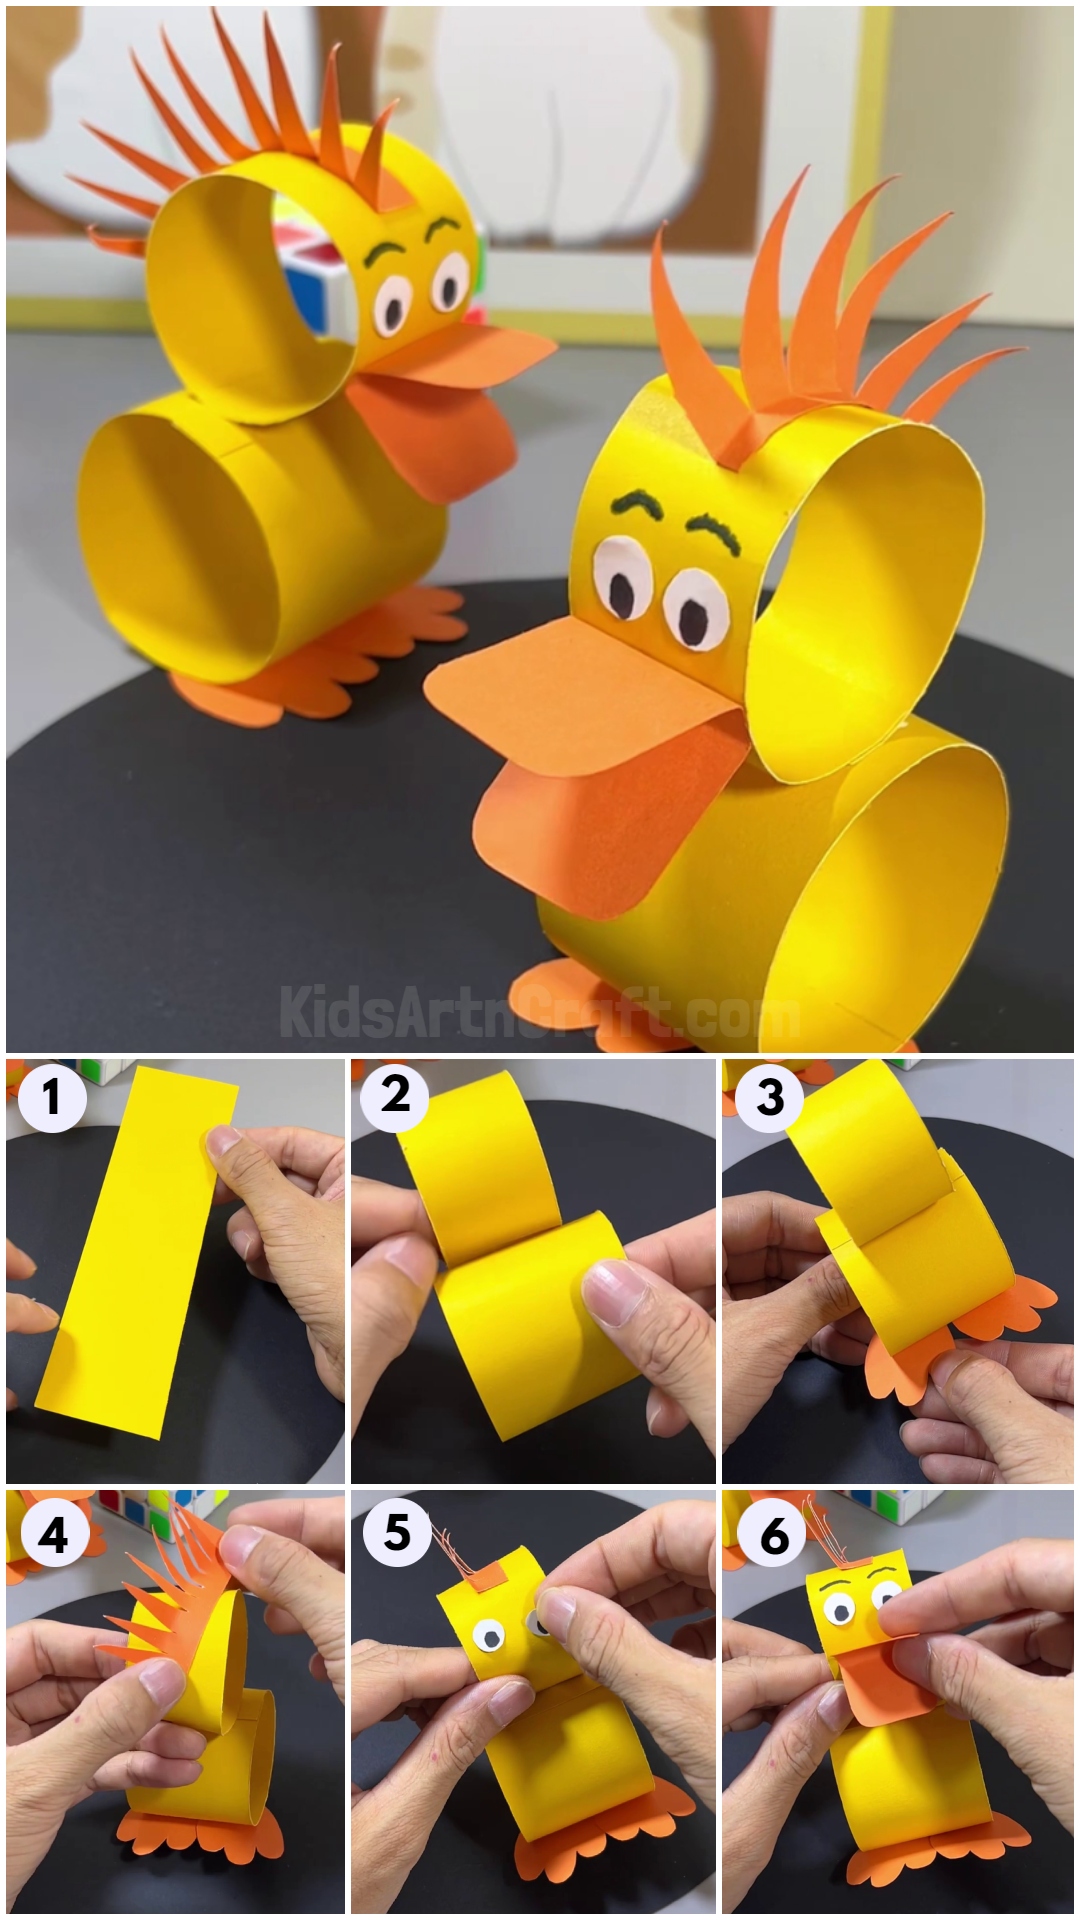
How to Make a Paper Duck Toy Craft

Make a cute paper duck toy craft with the help of this simple and easy guide. Learn how to make a paper duck toy in a few simple steps and have fun playing with it.
Welcome to a fun and creative papercraft tutorial on how to make a paper duck toy. This project is a great way to use up any leftover scrap paper you have lying around. With a few basic supplies, you can make a cute and colorful duck for your kids to play with! All you need is some paper, glue, scissors, and a few other materials. This craft is perfect for kids of all ages and is sure to be a hit! It is a simple and creative project that can be done with materials found around the house. The end result is a cute little duck that can be used as a toy, decoration, or even a gift! Here are the steps to make your own paper duck toy craft.
Fun to Make Paper Duck Toy Craft Activity For Kids

Read More: How to Make Paper Sheep With Step-By-Step Tutorial
Materials Required
- Construction Paper (Yellow and Orange)
- Black Marker
- Scissors
- Glue
Procedure
Step 1: Getting Ready With Yellow Rectangle Paper
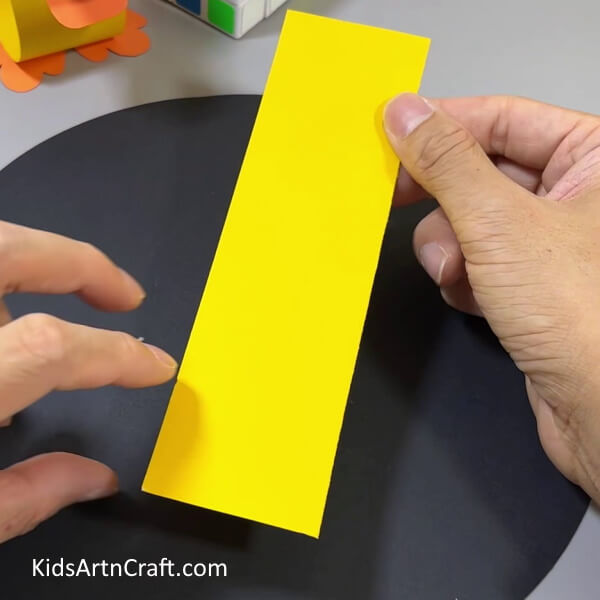

To make this craft you need a long rectangle of yellow paper.
Step 2: Rolling To Form A Ring
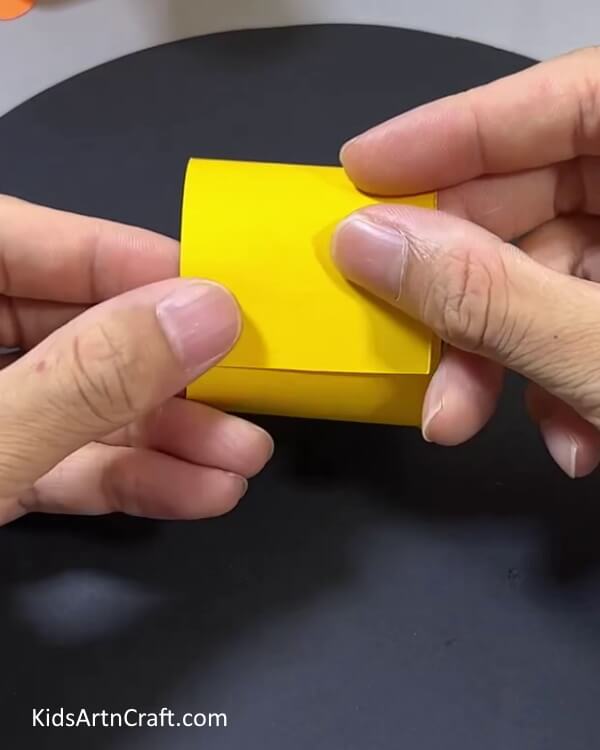

Roll the yellow rectangle paper to make a ring shape and glue the edges.
Step 3: Pasting Two Yellow Rings
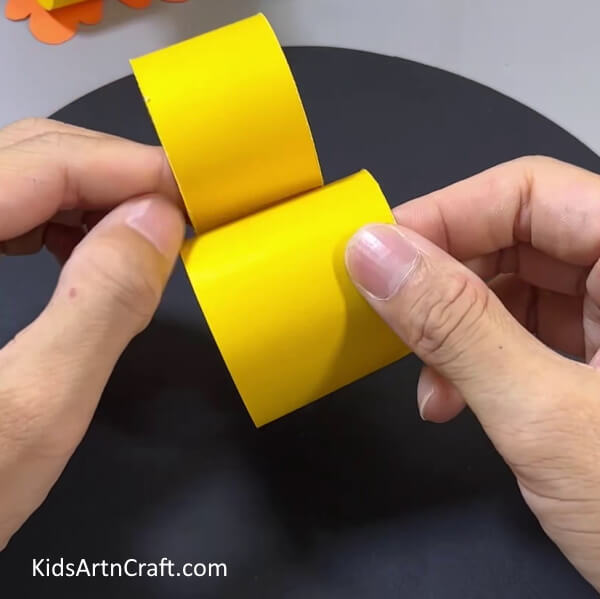

Take a smaller rectangle and make another circle ring to make the head of the duck. Paste the smaller circle ring on top of the bigger one using glue.
Step 4: Making Legs Of Duck
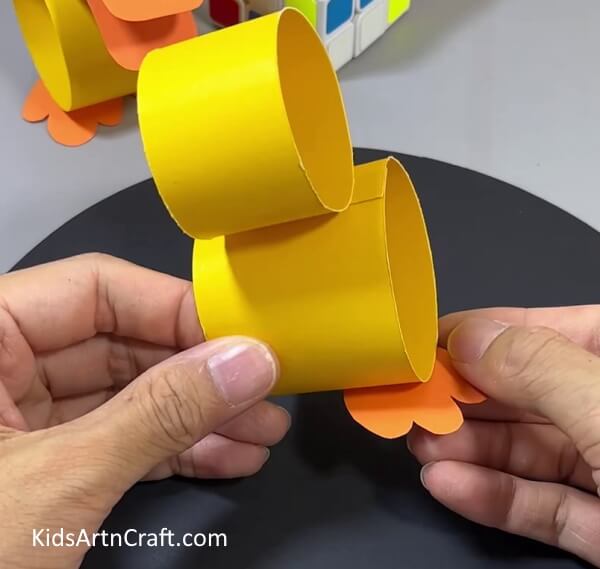

Once the body and face are ready, take an orange paper and cut two paw shapes out of it to make the legs of the duck. Paste one of them at the bottom of the body using glue.
Step 5: Pasting Another Leg Of Duck
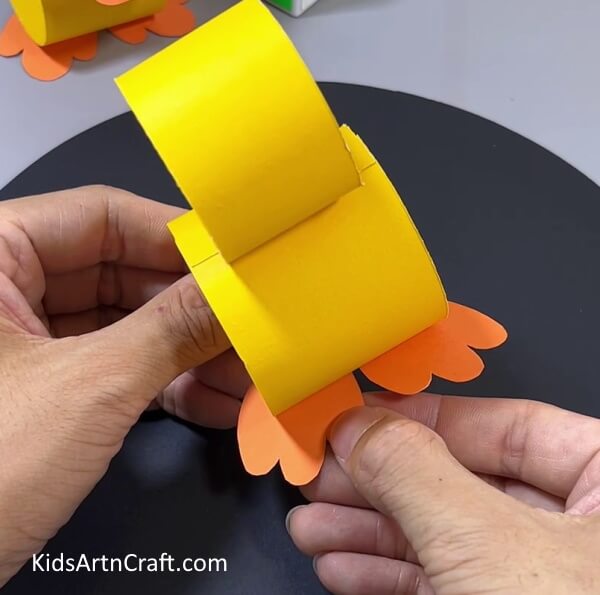

Paste another leg of the duck.
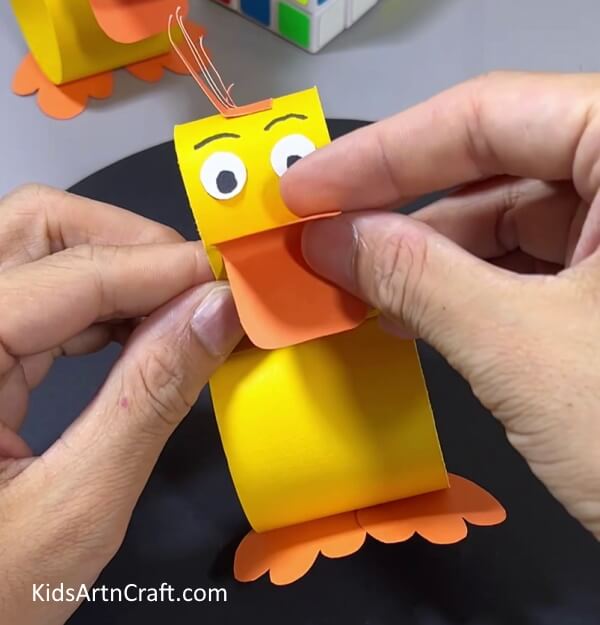
Step 6: Making Crown Of The Duck
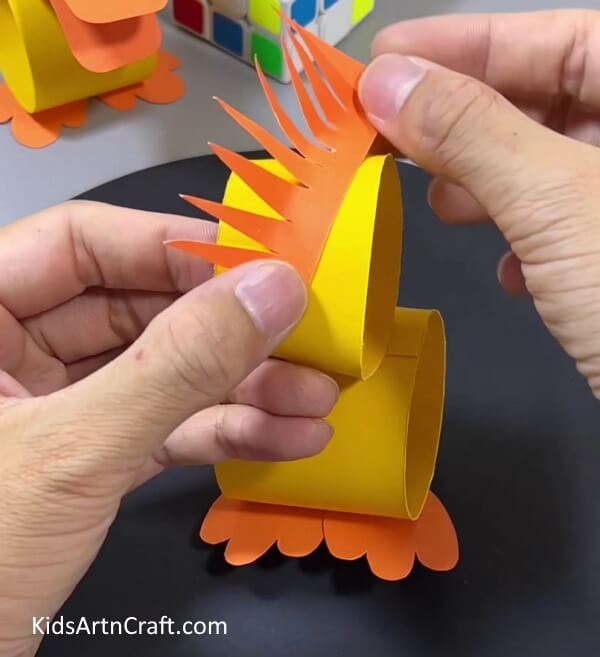

Now, take an orange rectangle of paper and cut sharp triangles on the top of it as shown in the above image. Paste the crown on the top of the top yellow paper circle ring.
Step 7: Pasting Eyes
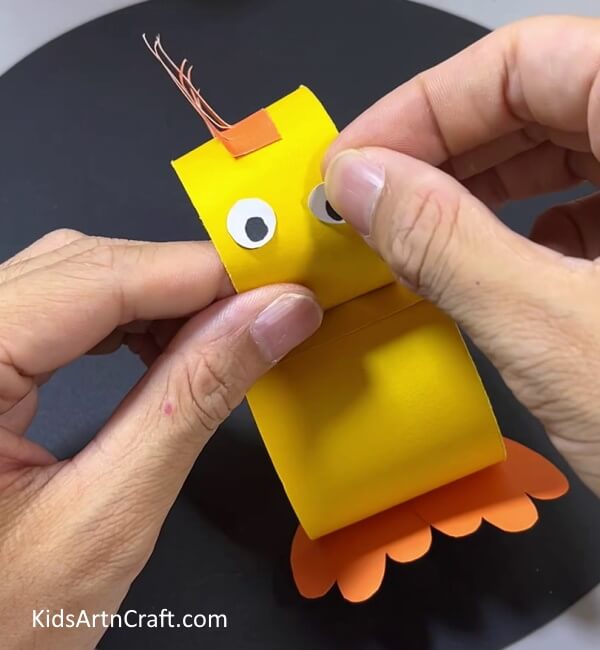

Cut two small white paper circles and make dots on them using a black pen. Paste the eyes on the face of the duck. using a black marker pen, draw the eyebrows of the duck.
Step 8: Taking An Orange Rectangle and Folding In Half
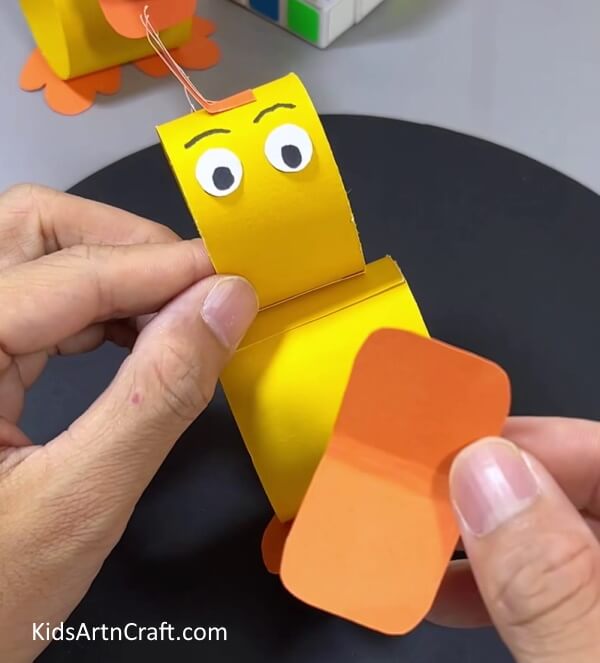

Now, to make the beak of the duck, take an orange rectangle with curve corners. Fold it in half.
Step 9: Making Duck’s Beak

Finally, paste the beak from the middle crease under the eyes of the duck to complete the craft.
Cute Paper Duck Toy Is Ready To Play!
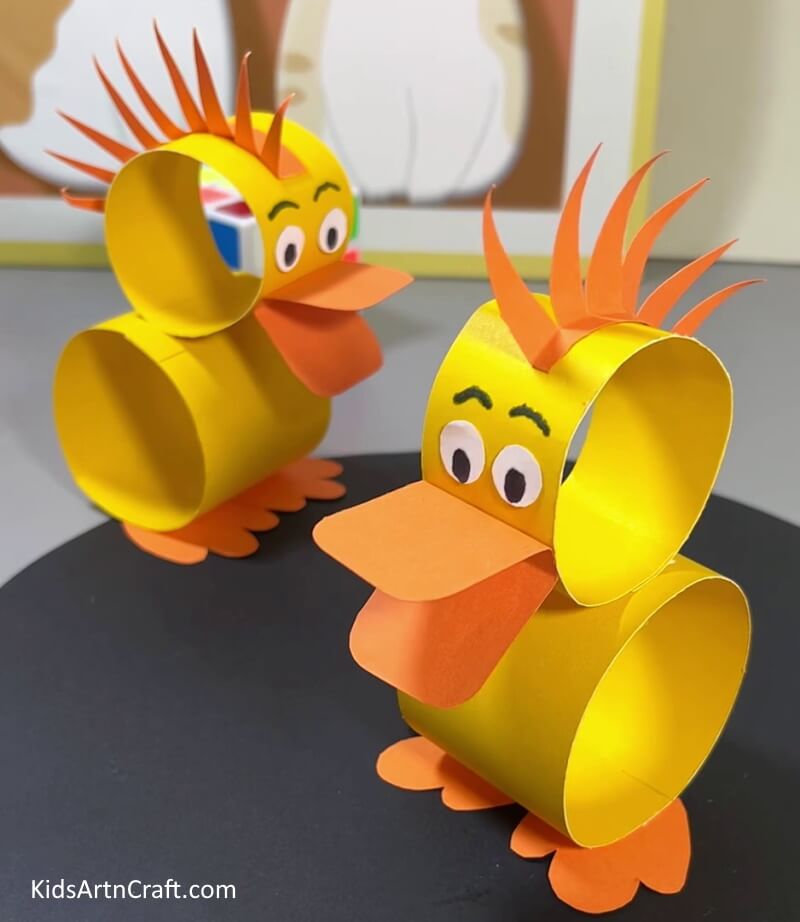

Now, you can get your hands on one of these cute paper creations and bring a bit of joy to your home. With its bright colors and fun design, this paper duck toy is sure to bring a smile to everyone’s face. It’s easy to assemble, and it’s ready to play with right away! So what are you waiting for? Get your own paper duck toy and have some fun!
Some More Duck Craft Tutorial
Crafting a Paper Duck Design

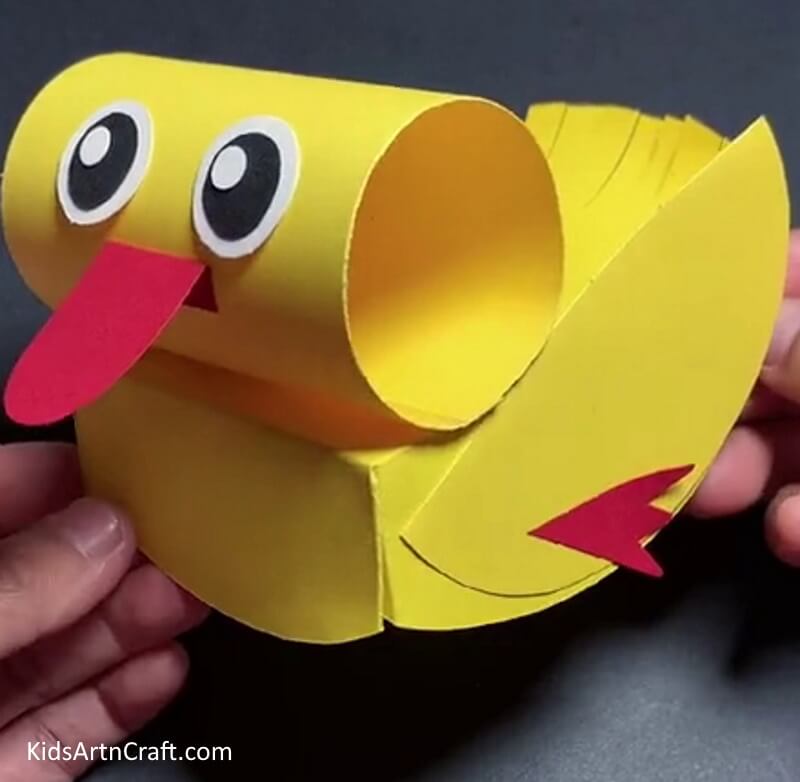
Image Source/Tutorial: Kids Art & Craft
Creating a paper duck design can be a fun and creative activity. With some simple supplies such as paper, scissors, and glue, you can make a unique and beautiful artwork. It is a great way to spend some quality time with family and friends while making something special.
Easy To Make Duck Craft Using watercolor For Kids

Image Source/Tutorial: Kids Art & Craft
This fun and easy duck craft for kids uses watercolor to create a colorful and unique masterpiece. Kids will love this craft and the results they get from it. It’s a great way to get creative and make something beautiful.
Creative Paper Duck Craft For Children

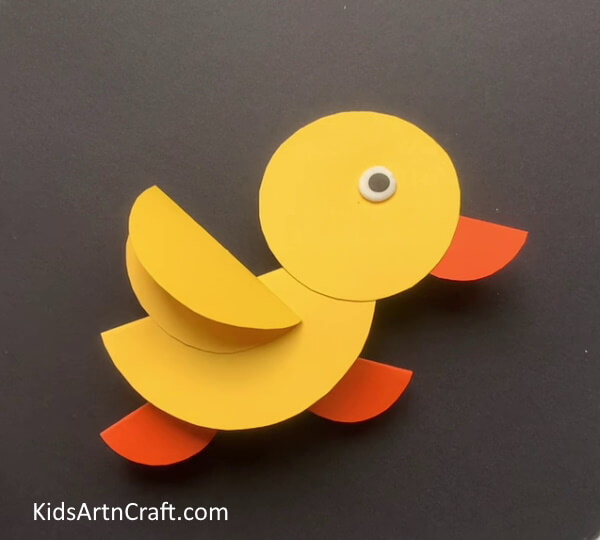
Image Source/Tutorial: Kids Art & Craft
This creative paper duck craft is a great way to keep children entertained while teaching them some basic crafting skills. It is easy to make and requires few materials, making it perfect for any age group. The finished product looks great and is sure to bring a smile to any child’s face.
FAQs Related To How to Make a Paper Duck Toy Craft
1. What materials do I need to make a paper duck toy craft?
You will need yellow and orange paper, a pair of scissors, a pencil, a black marker, and some glue.
2. What size should I cut the paper?
Cut the paper into a long rectangular shape.
3. How do I cut out the duck shape?
Carefully use the scissors to cut out the duck shape.
4. How do I make the beak?
Draw a rectangle shape on the paper, cut it out, and fold it in half. Glue it to the head of the duck.
5. How do I make the eyes?
Draw two small circles on the paper and cut them out. Glue them to the head of the duck.
6. How do I make the feet?
Draw two paw shapes on the paper and cut them out. Glue them to the bottom of the duck.
7. How do I finish the craft?
Your duck toy craft is now finished! You can use it as a decoration or a toy.
Making a paper duck toy craft is a great way to get creative and have fun. With a little bit of imagination and some simple materials, you can make a unique and adorable paper duck to delight your friends and family.
Follow us on Youtube for art and craft tutorials and much more.
More Articles from Kids Art & Craft
- Paper Craft Idea to Make Video Tutorial for All
- Cool Paper Craft Video Tutorial for Kids
- Simple Paper Animal Craft Ideas Video Tutorial for All
- DIY Paper Animal Crafts Video Tutorial for Kids With Parents
- Easy to Make Paper Crafts Video Tutorial for Kids