


Paper Crafts
Learn to Make Paper Hair Clips Step-by-Step Tutorial

Easy To Make Hair Clips Step-by-Step Tutorial hair
Materials Required
-
Green rectangular sheet
-
Scissors
-
Blue marker
-
Glue stick
-
Toothpick
-
Single pearl bead
-
Object picker
Step 1: Creating the Clip Shape

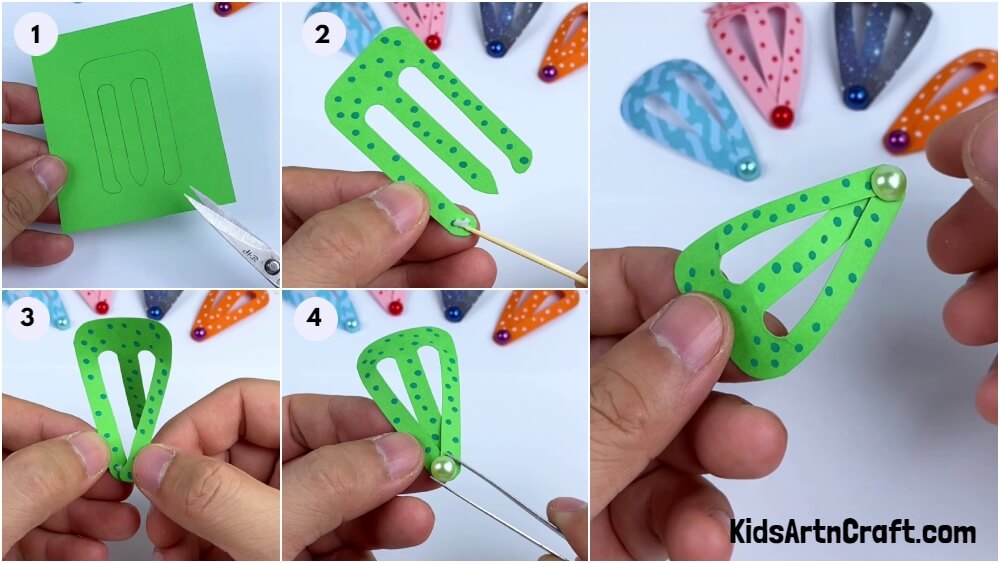
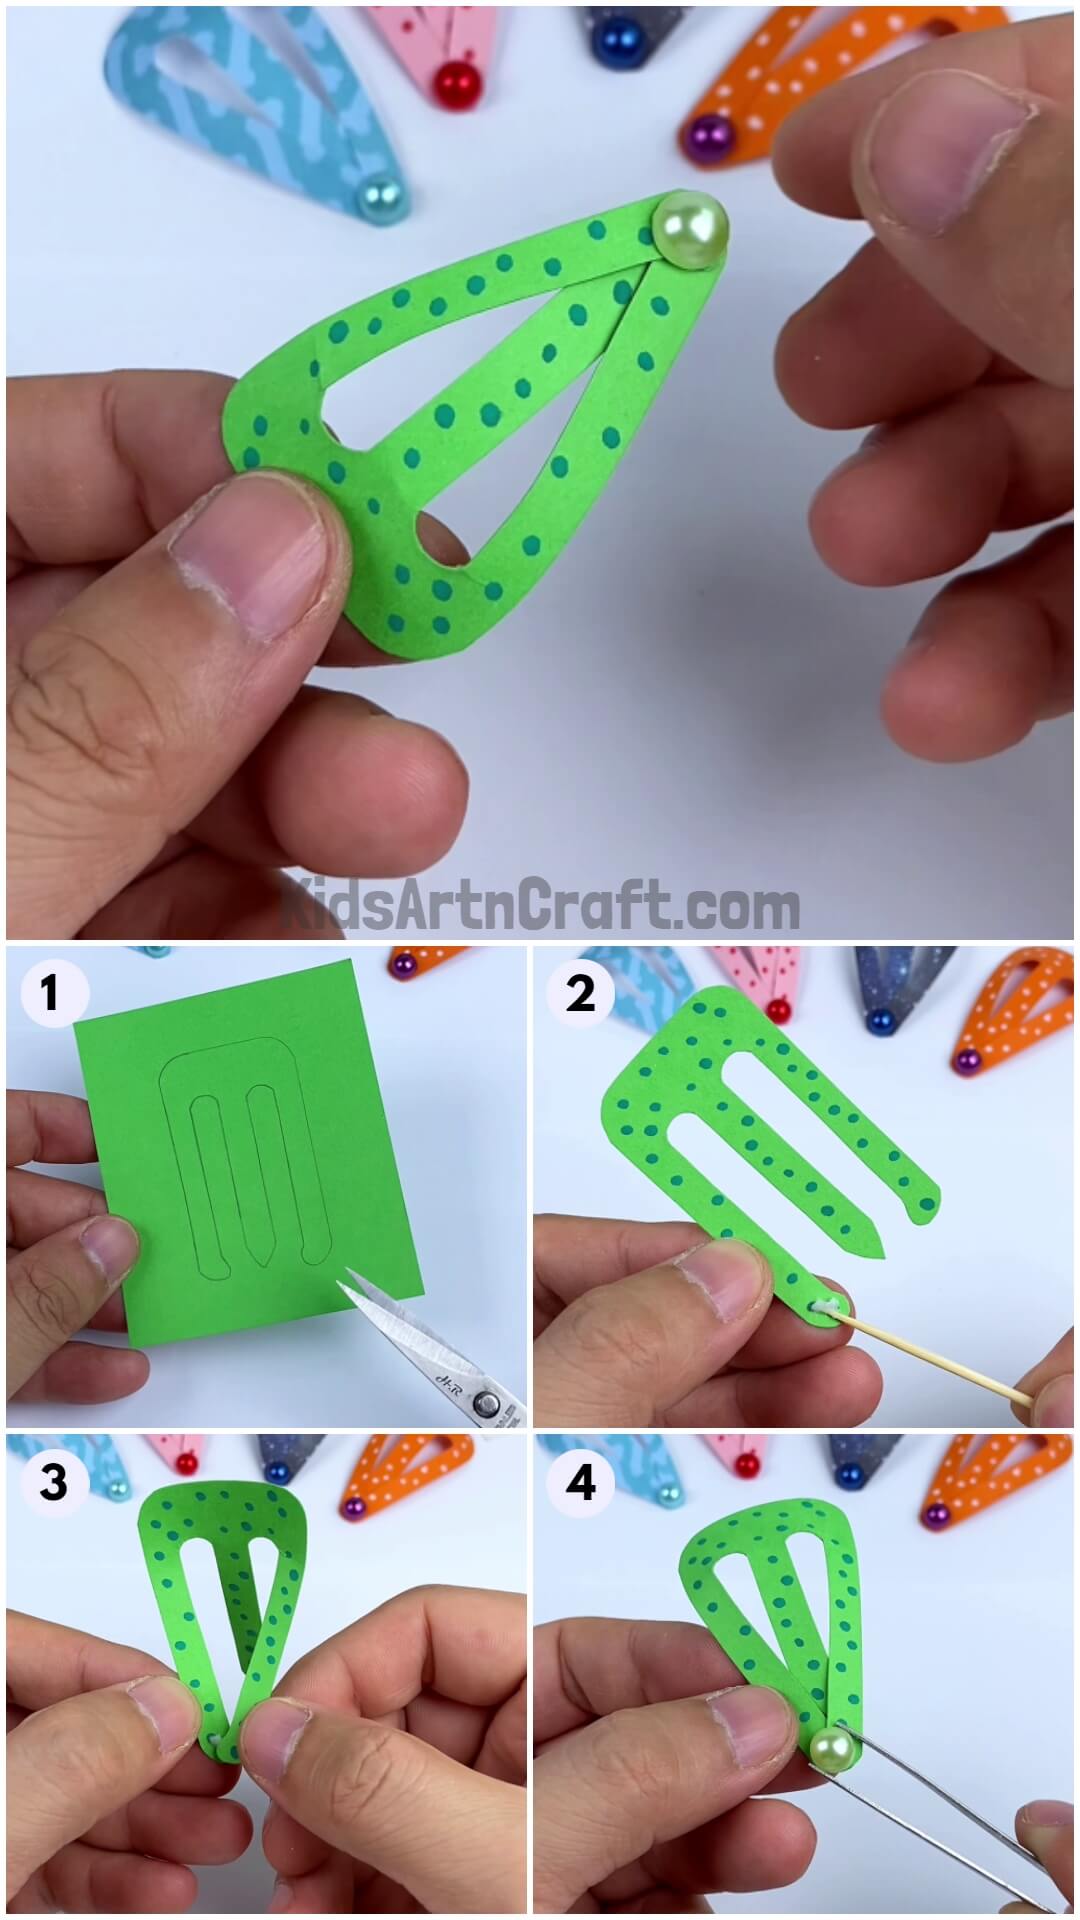
Take the green rectangular sheet and fold it in half lengthwise. You should now have a long strip. On one end of the strip, draw a clip shape using a pencil. The clip shape resembles the letter “M” with shorter arms. Make sure to leave some space between the arms for cutting. Refer to the first image as a guide. Once the shape is drawn, carefully cut along the outline using a pair of scissors. Remember to be cautious while handling sharp objects and seek adult supervision if needed.
Step 2: Adding Dots to the Clip
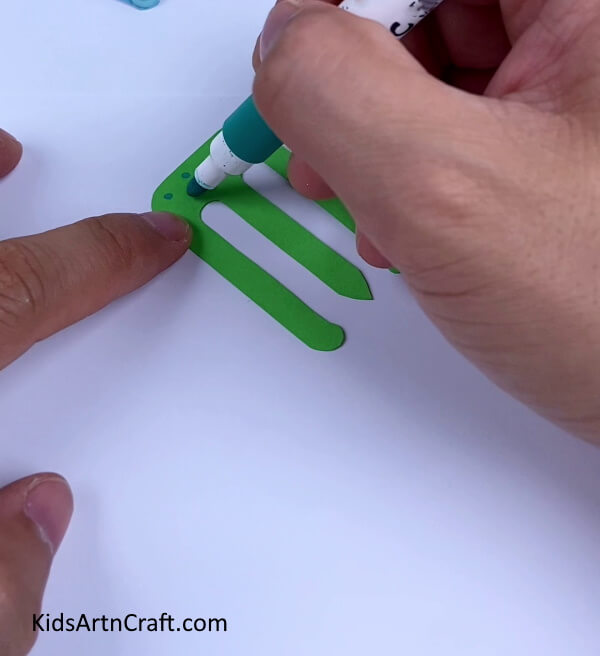
Using the blue marker, create a pattern of dots on the cut green clip. These dots should cover the entire front side of the clip. You can make the dots randomly or create a specific design according to your preference. Let your creativity shine as you add these colorful dots! Observe the second image as a reference.
Step 3: Applying Glue
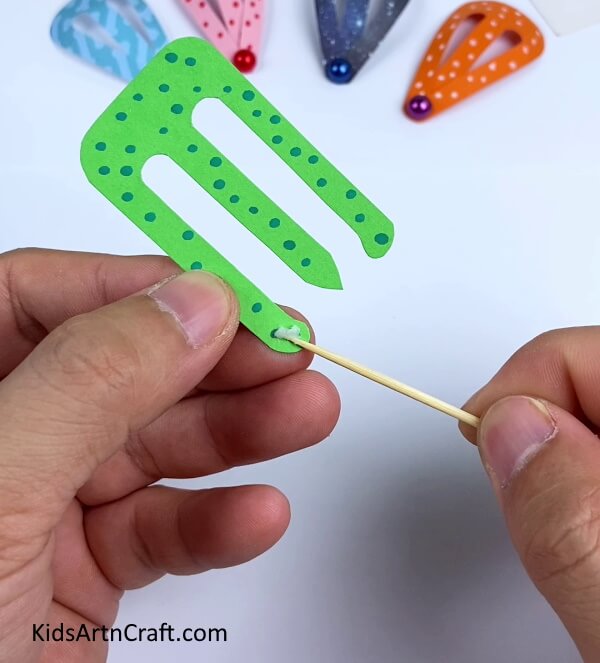
Now, take the glue stick and apply a thin layer of glue on both ends of the “M” shaped clip. To make this process easier, use a toothpick to spread the glue evenly. Applying glue on both ends will ensure that the clip remains secure and long-lasting. Exercise caution while handling the glue and be sure not to use excessive amounts.
Step 4: Attaching the Ends

With the glue applied, carefully attach the last two ends of the “M” shaped clip to the middle clip arm. The ends should fit snugly and form a stable structure. This step helps create the functional part of the hair clip, making it easy to use and secure in your hair. Take a look at the fourth image to visualize the attachment.
Step 5: Adding the Pearl Bead
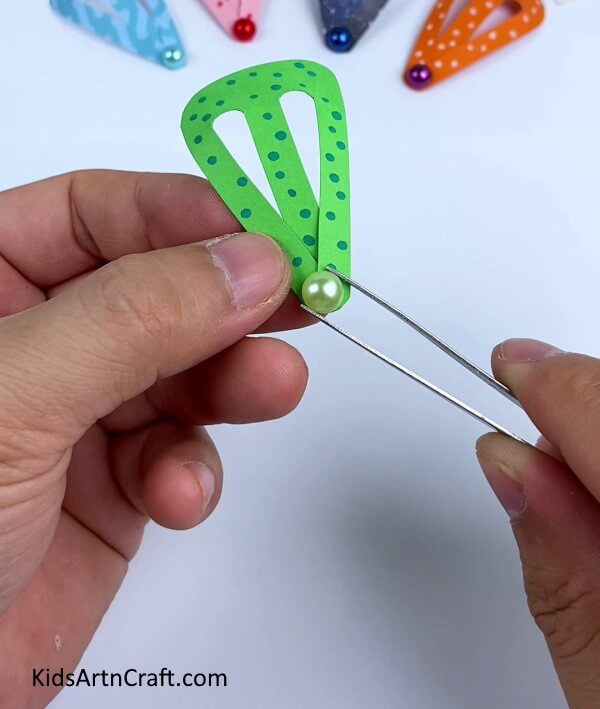
Using an object picker, carefully pick up a single pearl bead. This small, elegant bead will serve as a decorative element for your hair clip. Attach the bead to the lower end of the clip, opposite to the middle clip arm. Ensure it is firmly secured in place. The bead adds a touch of sophistication and uniqueness to your creation. Refer to the fifth image for clarity.
Craft Completion

Congratulations! You have successfully created your own paper hair clip. Admire your craftwork and enjoy wearing it with pride. This hair clip is a perfect accessory to complement your outfits or gift to a friend. We hope you had a great time crafting with us. For more exciting craft tutorials and inspiration, visit our website and explore a wide range of creative projects.
In this tutorial, we learned how to make charming paper hair clips step-by-step. We started by cutting out the clip shape from a green rectangular sheet and then added colorful dots using a marker. Next, we applied glue to secure the ends of the clip, attaching them to the middle clip arm. Lastly, we adorned the clip with a single pearl bead to add an elegant touch. Crafting is a wonderful way to express your creativity and make unique accessories. Enjoy your beautiful hair clips and continue exploring your artistic side! For more crafty articles and tutorials, please visit our website.
Follow us on Youtube for art and craft tutorials and much more.
More Articles from Kids Art & Craft
- DIY Bird Nest Paper Craft For Kids
- Paper Mug With Straw Craft Easy Tutorial
- Recycled Plastic Bottle Dragon Craft Tutorial for Kids
- How To Make Cardboard Tube Swan Craft Tutorial For Kids
- Handprint Craft Paper Frog Easy Craft for Kids


