Paper Crafts
How to Make Paper Origami Backpack Craft For Kids

You have to check this article for real! This step-by-step tutorial will guide you on making a cute tiny origami and paper-cutting backpack!
We welcome you here on this step-by-step tutorial article on making the cutest backpack! This backpack is made partially from origami and paper-cutting as well! We will guide you on each and every step of this craft making! The results will definitely be the apple of your eye! By following us you will get a stunning tiny backpack which everybody will admire! Even a beginner or kid can also make this craft with our guidance! So, let’s roll on to making this backpack with us!
DIY Paper Origami Backpack For Kids

Read More: DIY Paper Butterfly Easy Craft For Kids
Materials Required
- Paper Sheets (Pink And Pink-White Check Patterned)
- Scissors
- Glue
- Stickers
Procedure
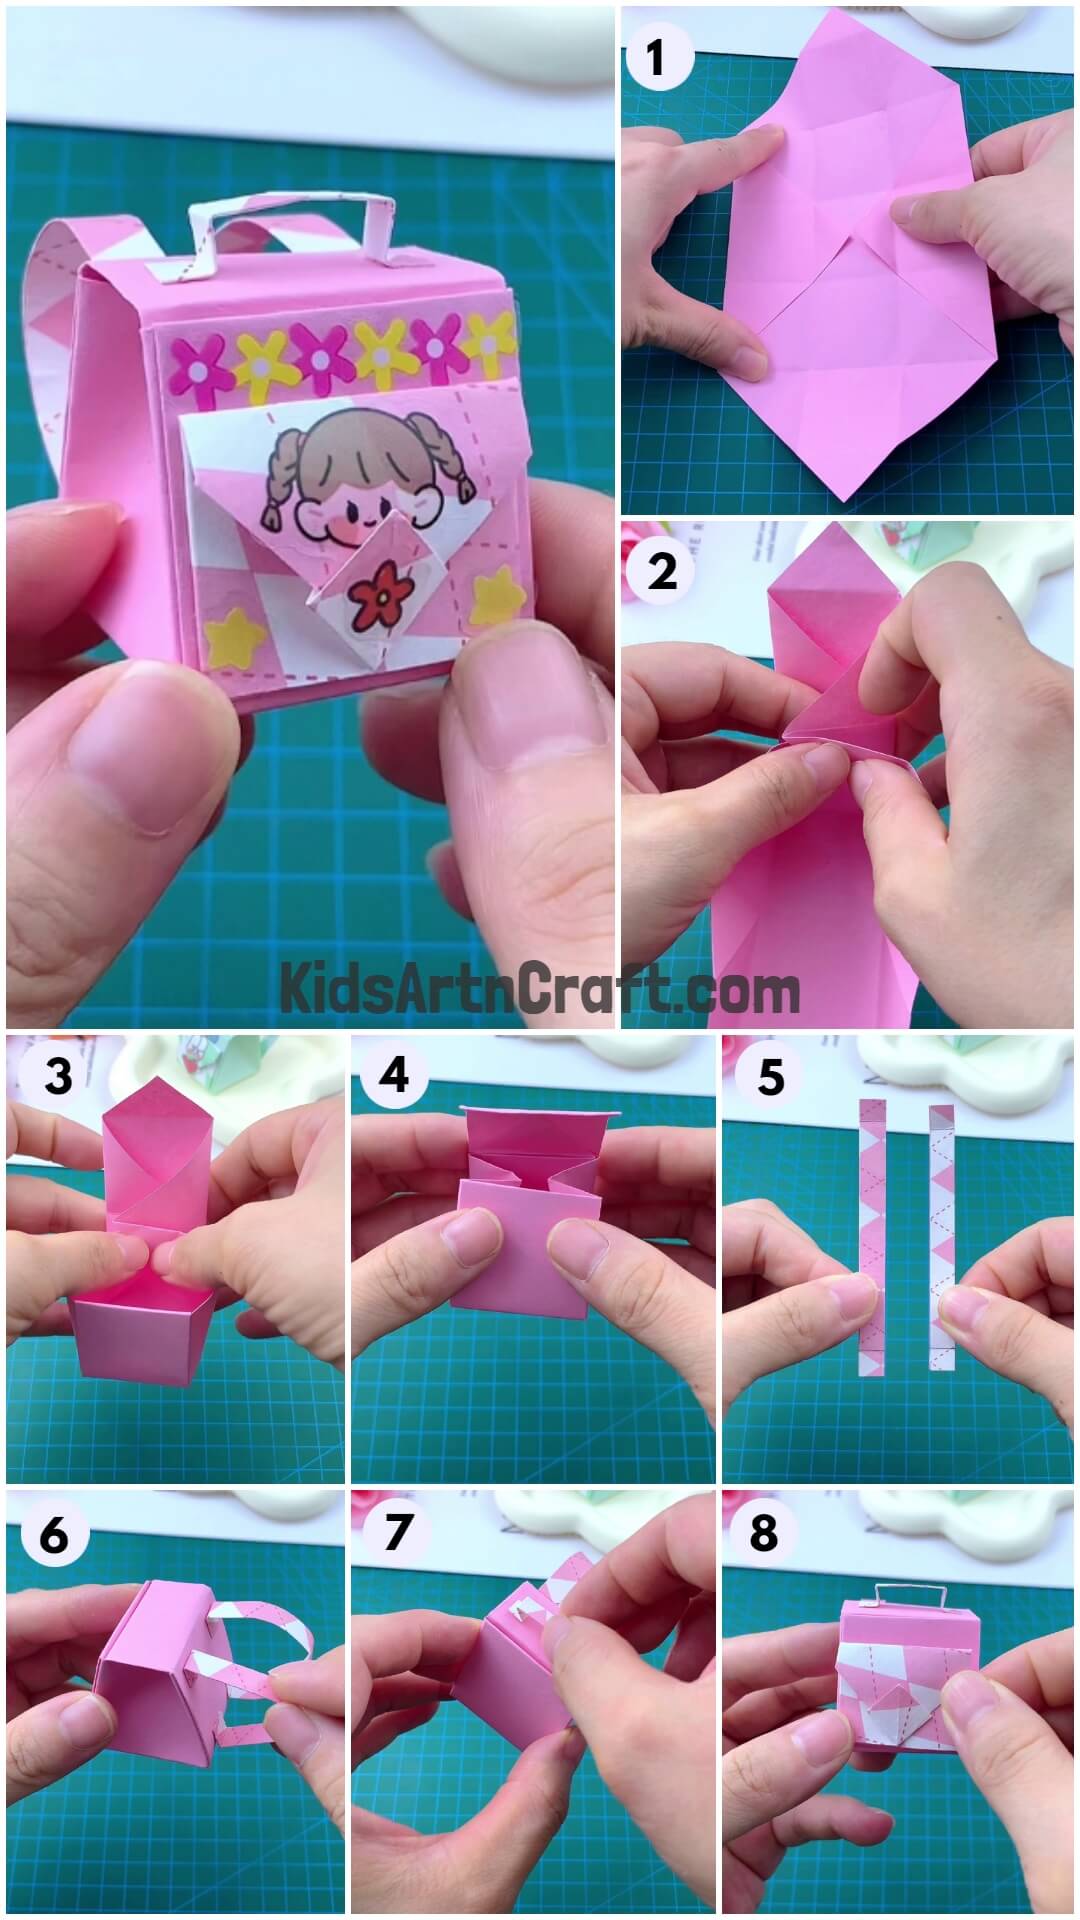
Step 1: Making ‘+’, Diagonal, And Diamond Creases
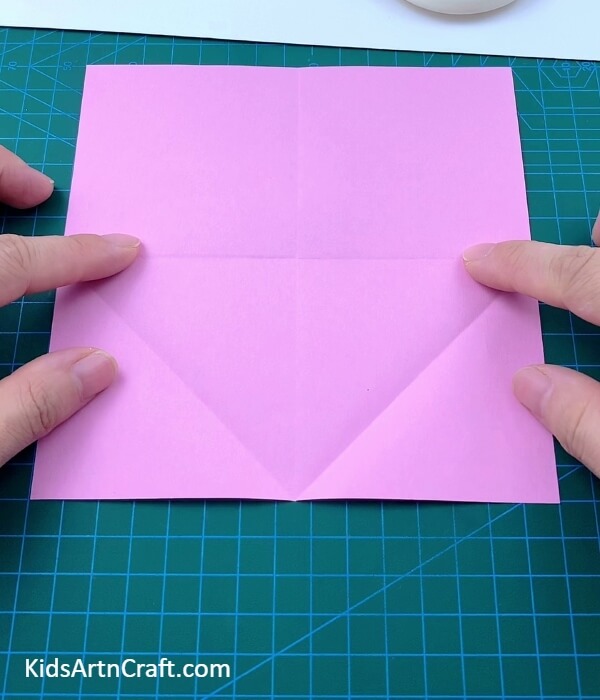

Begin this craft by taking a pink origami sheet. Fold the sides of the sheet to their opposite ones to form ‘+’ creases over the sheet and unfold them. Now, fold the sheet corners to the intersection of the ‘+’ creases to see a diamond shape and make creases to form diamond creases and unfold them. Fold the corners of the paper to their opposite ones to make diagonal creases and unfold them.
Step 2: Making Checks Creases
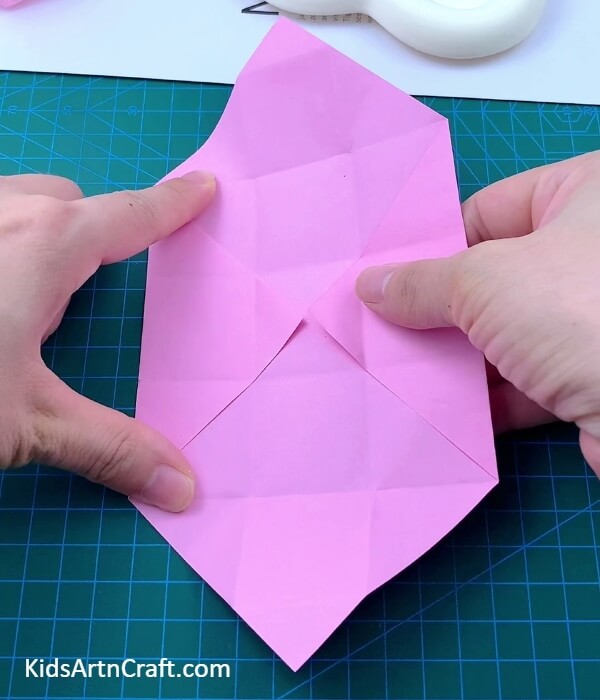
Fold the paper along the diamond creases to form the diamond again. Fold the side of the diamond 1/3rd over it and again 1/3rd to form a strip and unfold back to the diamond. Fold the adjacent side of the diamond, in the same way, to form the strip and unfold it back to the diamond. You will see checks creases over the whole paper. Unfold the top and bottom diamond folds.
Step 3: Making An Open-End Box
Raise the paper straight above from the middle 2 creases you can see on the paper and along the diagonal crease of the upper half push in the paper and overlap one over the other to form a box-like structure with an opened end.
Step 4: Flipping In The Paper Corner
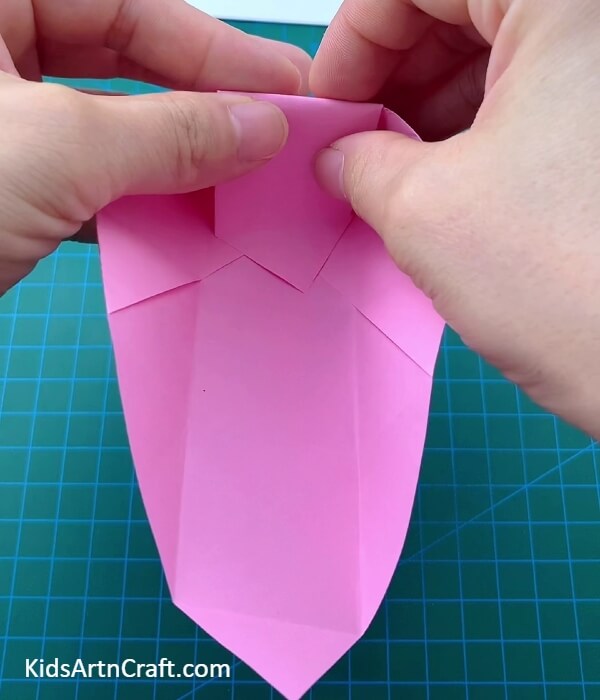
The top corner of the paper which is coming out from the box, fold it in the box along the folded side.
Step 5: Folding Along The Diagonal Creases Of The Other Side
From the opened end of the box or the other side, following the same, fold it along the diagonal creases by pushing in and overlapping the folds one over the other. This will complete the box.
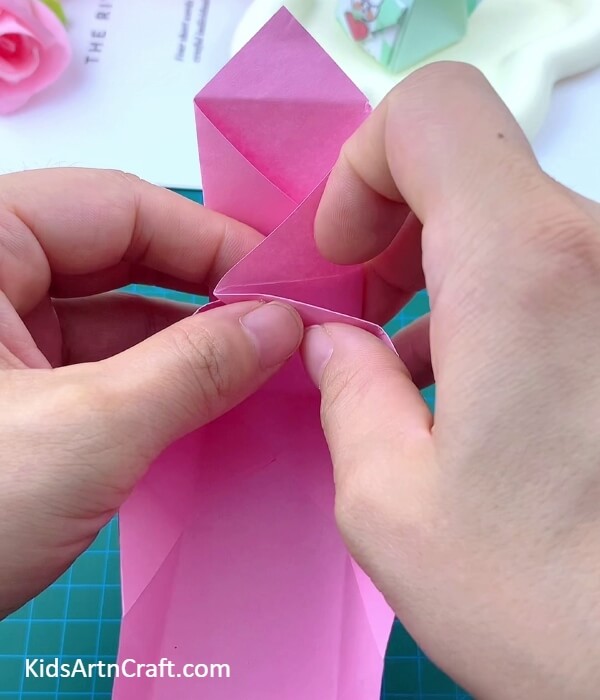
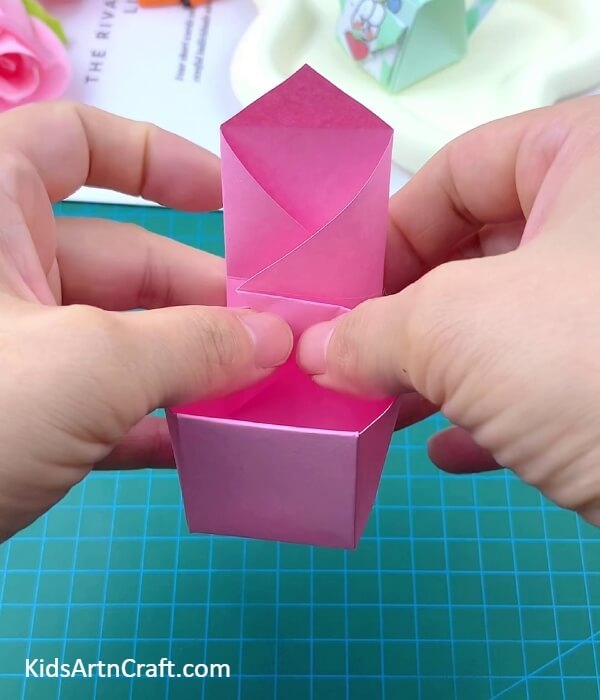
Step 6: Making The Flap Of The Bag

Apply glue on the outer loose folds of the box and also at the corner tip. Now, paste the loose folds to the box and fold to paste the corner tip along the very first check crease over it and then fold again along the previous fold to the boundary of the box to make a crease. This will be the flap of your bag.
Step 7: Giving The Shape Of A Bag
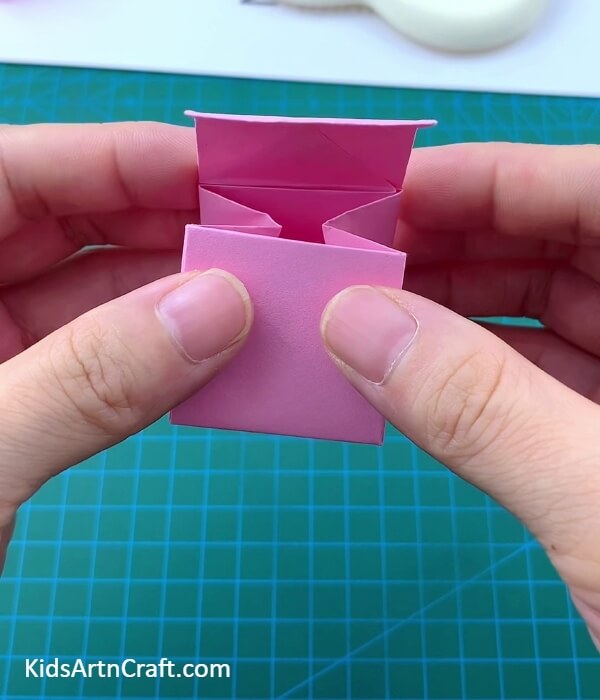
Push in from the middle crease, the adjacent sides of the box from the flap to give it a shape of a bag.
Step 8: Closing The Bag With A Flap
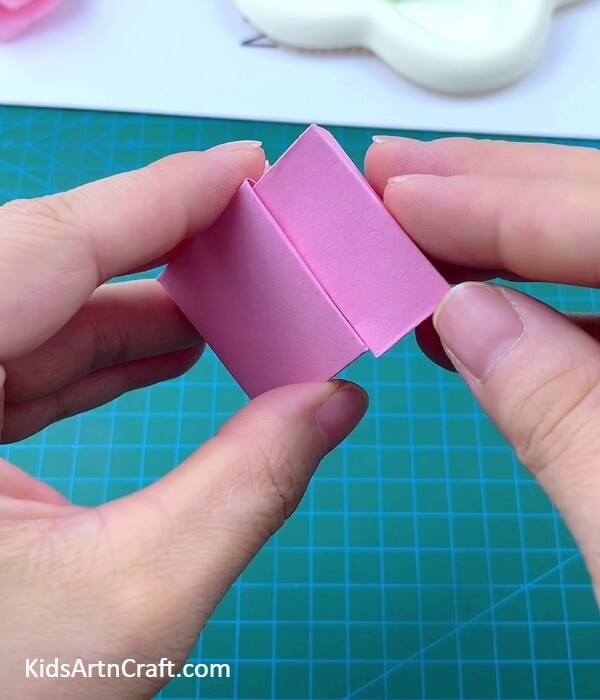
Close the bag by putting the flap inside it.
Step 9: Making ‘+’ Creases
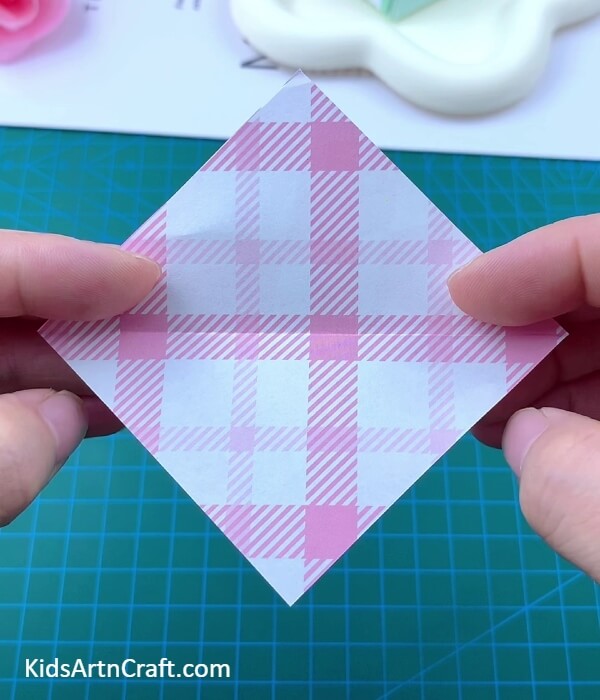
Take a pink-white checks diamond-shape paper sheet, smaller than the previous one, and fold the corner of it over the opposite ones to make ‘+’ creases and unfold again.
Step 10: Folding A Corner To The Intersection
Fold the bottom corner of the paper to the intersection of the ‘+’ creases.
Step 11: Folding Along The Horizontal ‘+’ Crease
Fold the previous fold along the horizontal ‘+’ crease to make a triangle.
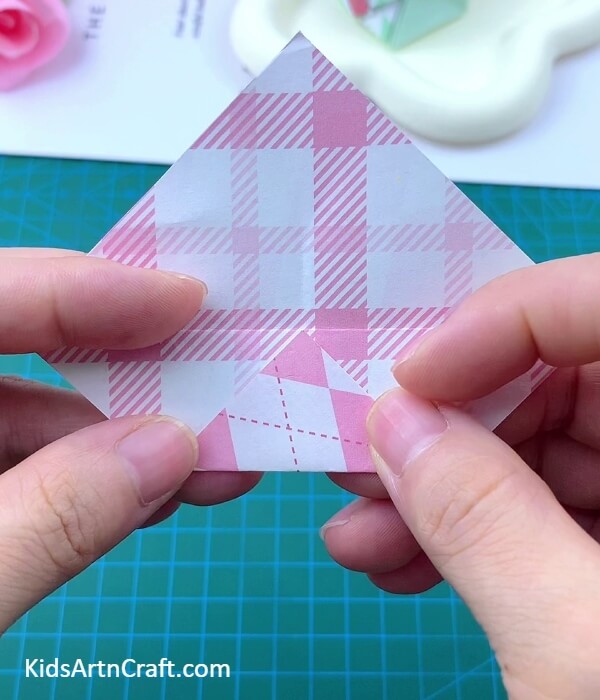
Step 12: Folding The Triangle Corners
Fold the side triangle corners 1/3rd over it to convert it into an envelope figure.
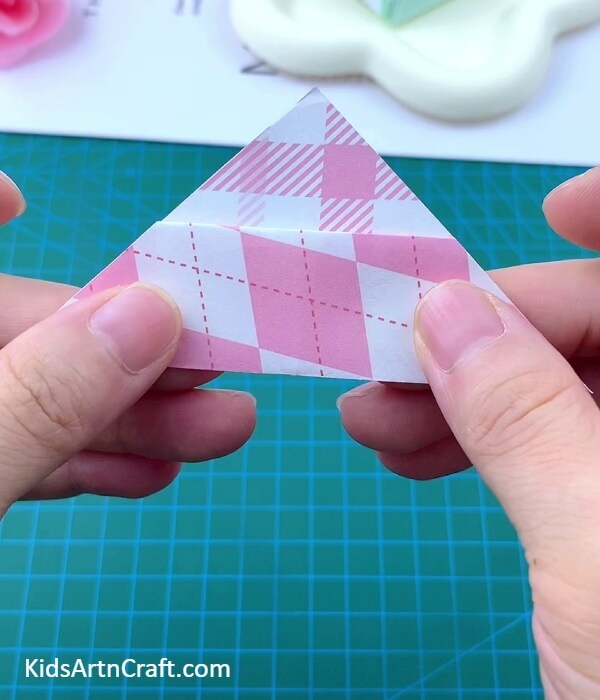
Step 13: Making A Small Diamond Over The Envelope
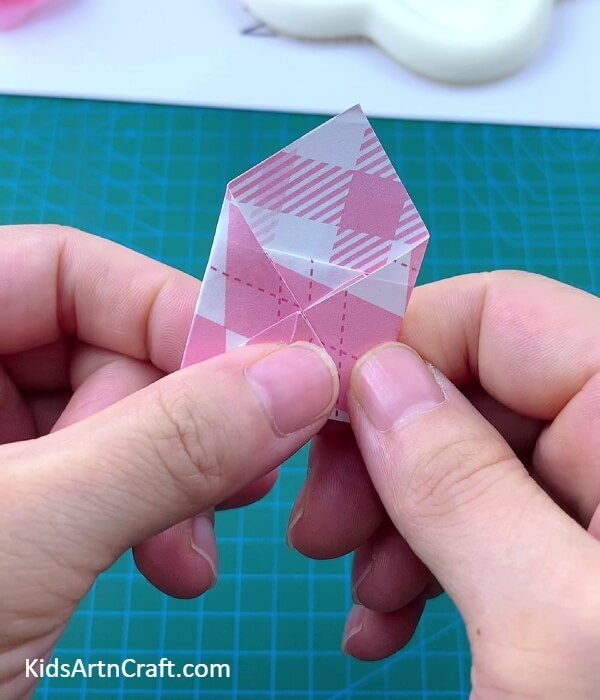
Fold the above-folded triangle corner a little to the opposite side to form a crease and unfold again. Now, open the corner from the middle and push in along the crease to form a small diamond over the envelope. Using glue, paste this envelope fold to secure the envelope and also the diamond over the envelope.
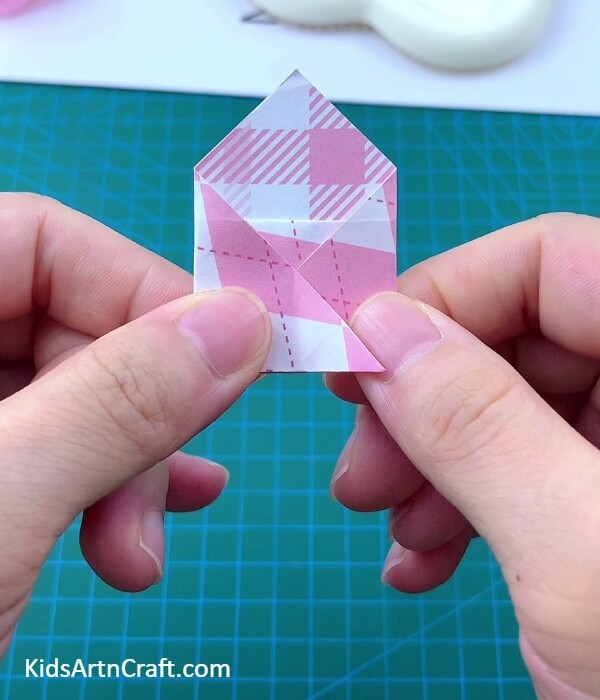
Step 14: Closing The Envelope
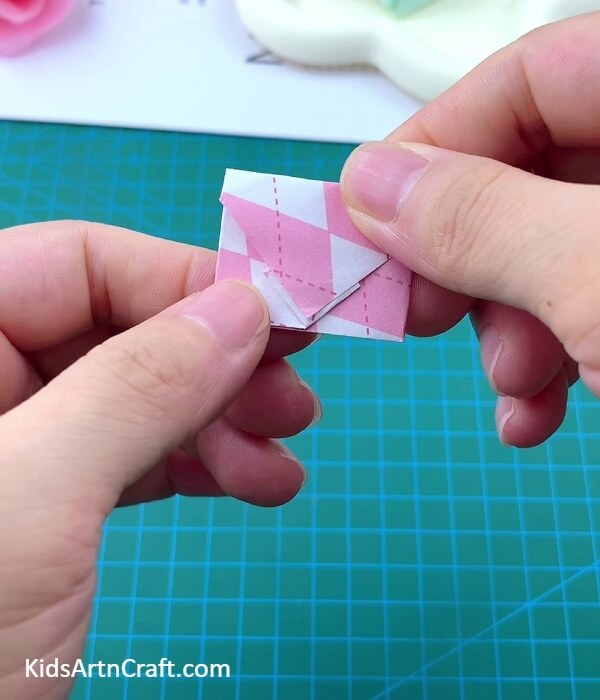
Fold the flap along the crease to close the envelope.
Step 15: Securing The Envelope Inside The Diamond
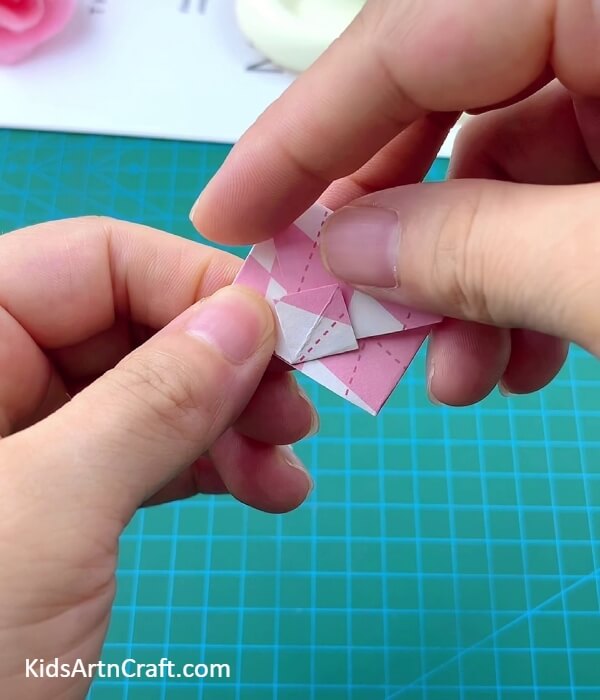
Put the flap tip of the envelope inside the diamond to secure it. This will be the bag pouch.
Step 16: Cutting Out 2 Strips
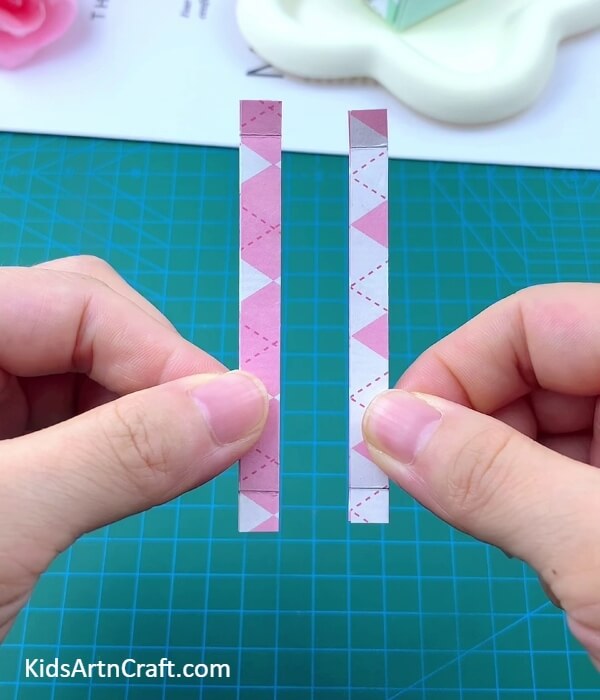
Using scissors, cut out 2 thin and equal strips from the pink-white checks paper.
Step 17: Folding The Strips And Making Creases
Fold the strips in half to make a crease and fold the end of the strips inside to make creases. These will be the straps of your bag.
Step 18: Attracting The Bag Straps
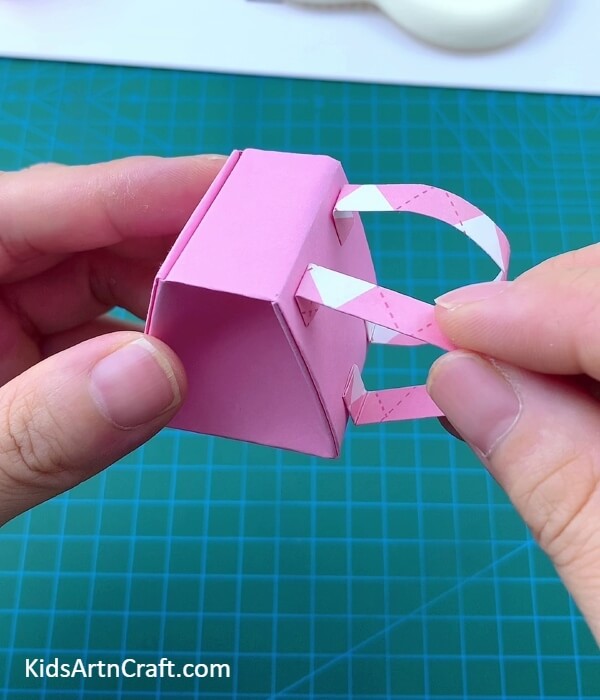
Using glue, paste the straps over the back side of the bag from the folded ends of the straps as shown in the image.
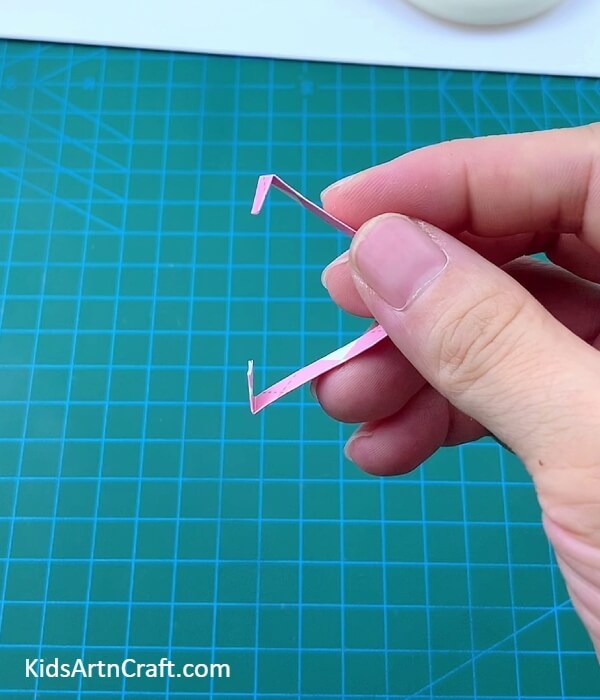
Step 19: Making A Handle Of The Bag

Cut out a further smaller and thinner strip from the pink-white checks paper using scissors. Fold the ends of this strip to the middle and further outward a little to make the handle of the bag. Paste the handle over the flap top using glue.
Step 20: Pasting The Bag Pouch To The Bag
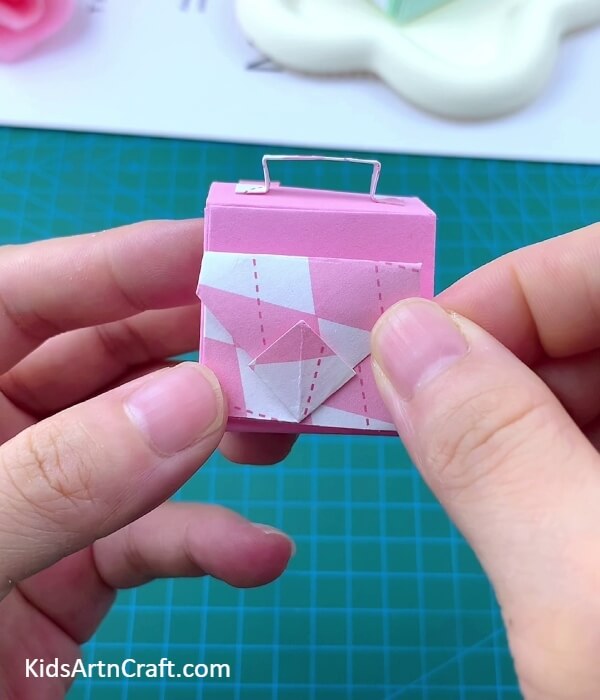
Paste the bag pouch on the front side of the bag using glue.
This Is The Final Look Of Your Backpack!
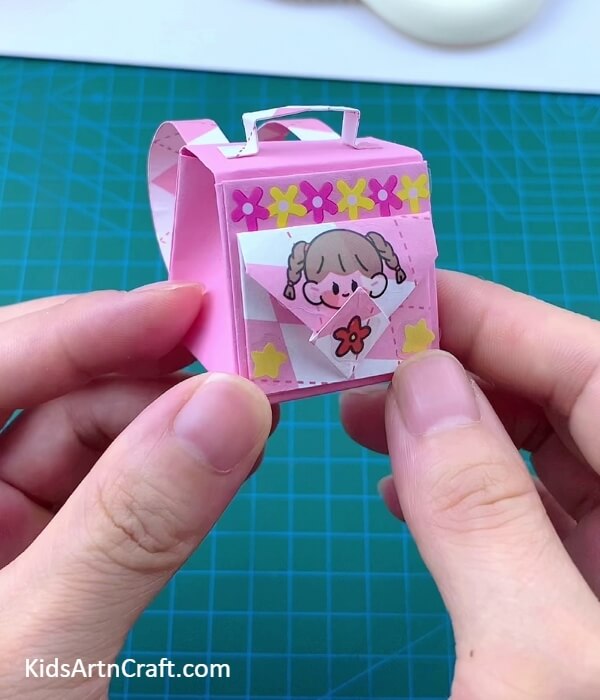
For the last step, paste some sticks over your backpack to decorate it as shown in the image.
Woah! You must be stunned too! Now you have your own tiny backpack!
You can use it to play pretend or it can be a great accessory for your dolls and toys! Creating paper toys can be fun with the learning process, as kiddos drive their motor skills by creating and the fun part is the process and obviously the results! This backpack can be a great addition to your origami collection! You can even customize your backpack in any way you like, add different sticks, or make a different-colored backpack! All we suggest is to get creative!
Hope you liked the article and the description. Share with your friends to all together create a backpack! Also, tell us about your crafting journey in the comments section!
Follow us on Youtube for art and craft tutorials and much more.
More Articles from Kids Art & Craft
- Paper Lollipop Craft – Learn to Make Origami Paper Candy with Step By Step Tutorial
- Origami Heart Craft To Make At Home – Simple Tutorial
- Easy Origami Cat Folding Craft for Preschool Kids – Step By Step Tutorial
- Rainy Day Umbrella Craft Tutorial For Kids
- Easy Ladybug Craft For Kids Using Leaves and Paper