Paper Crafts
How to Make Paper Slippers Step-by-Step Tutorial for kids

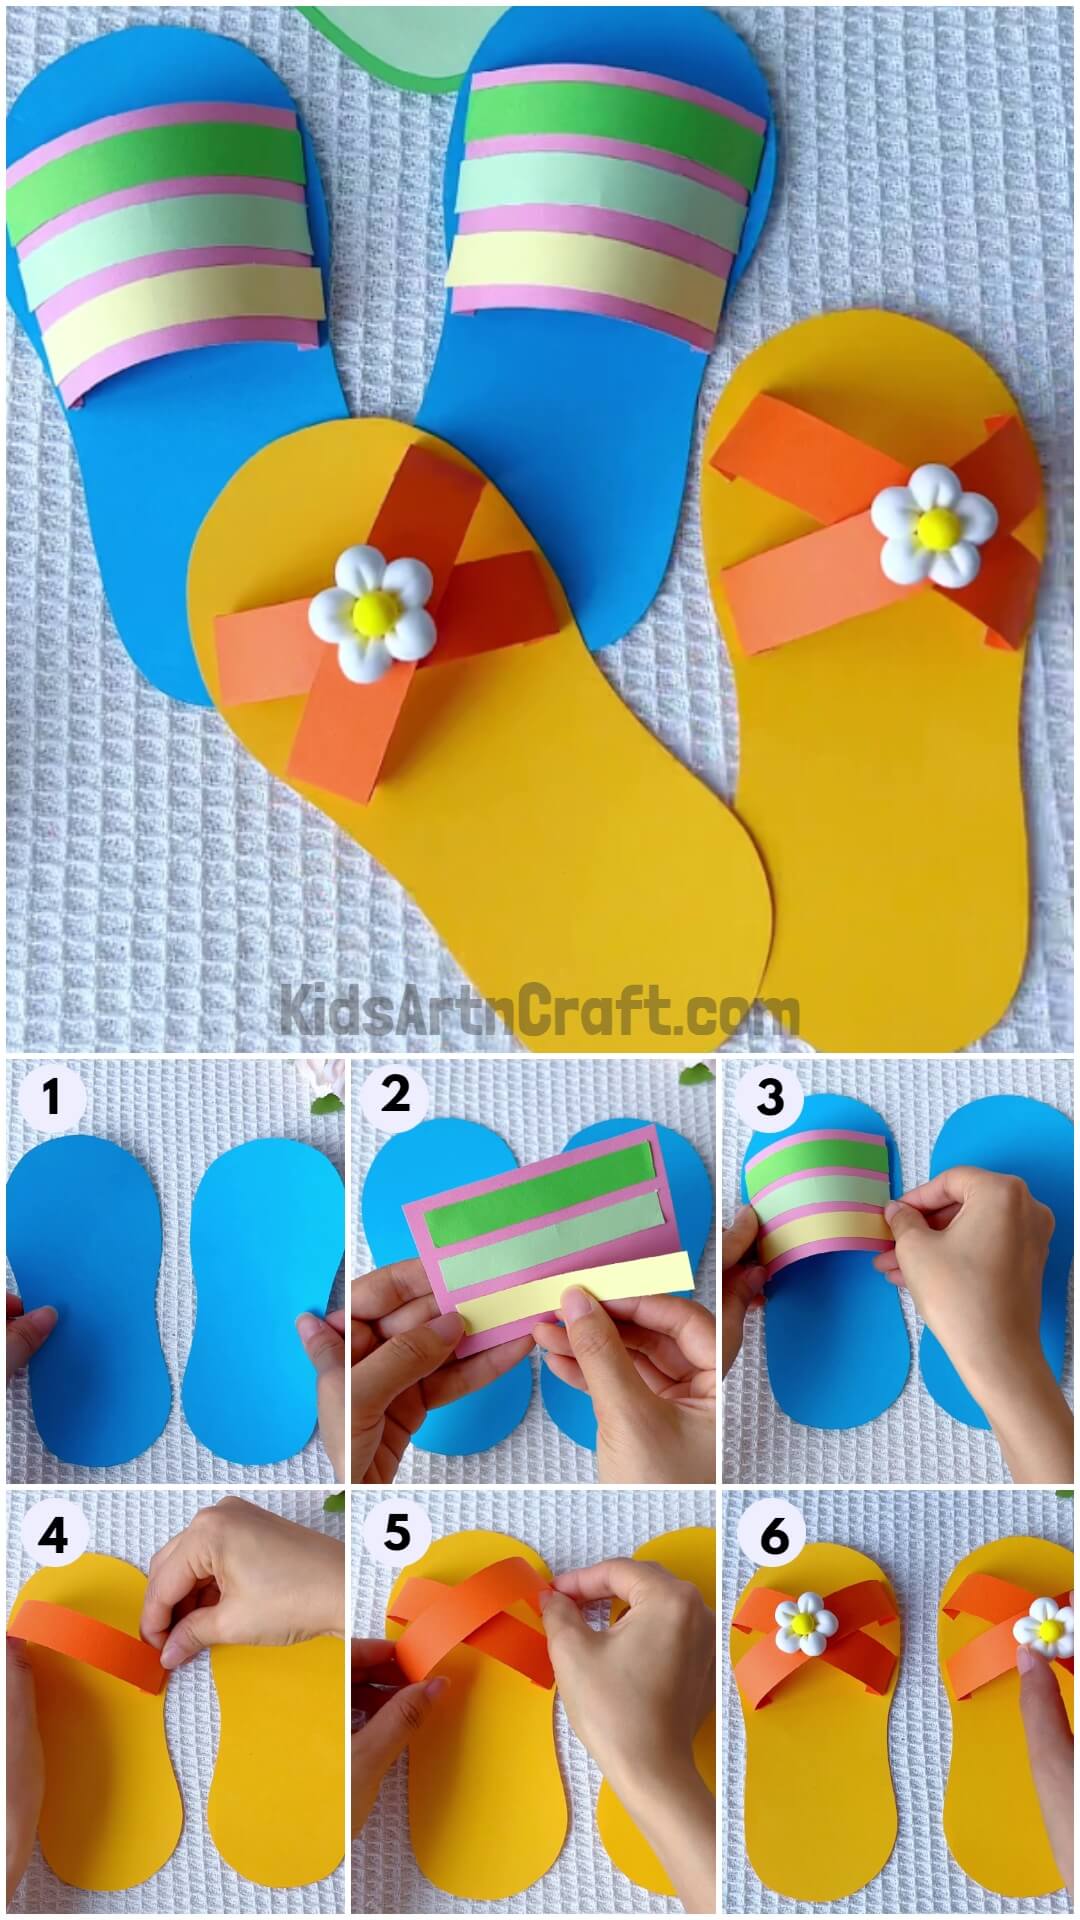
Easy To Make Paper Slippers For Kids

Read More: Clay watermelon ice cream easy craft tutorial
Materials Required
- Blue, Dark green, Light green, Pink, Light yellow, Dark yellow and Orange Craft paper
- Scissors
- Glue
- Flower charms
- Pencil
Procedure
Step 1: Starting the first slipper with Blue Craft Paper
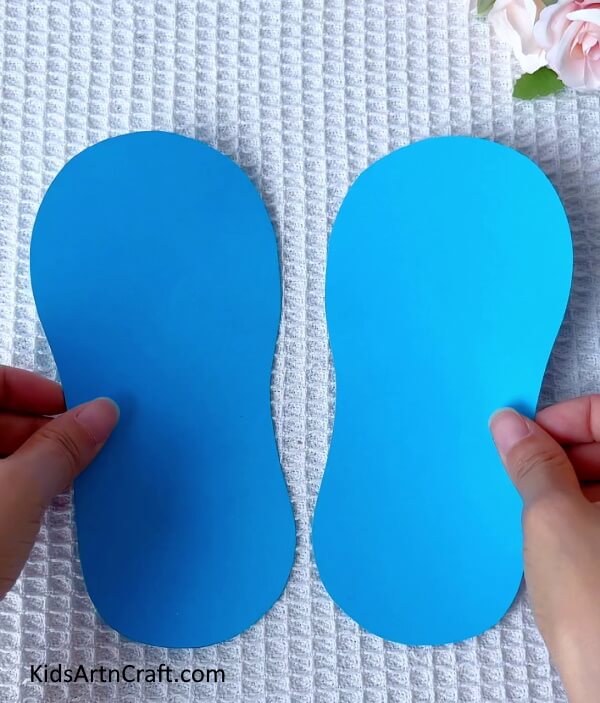

On blue craft paper, draw out two big slipper shaped outlines. Using scissors, cut out the slipper outlines. This will be the base for your first pair of slippers.
Step 2: Making the slipper strap on pink craft paper
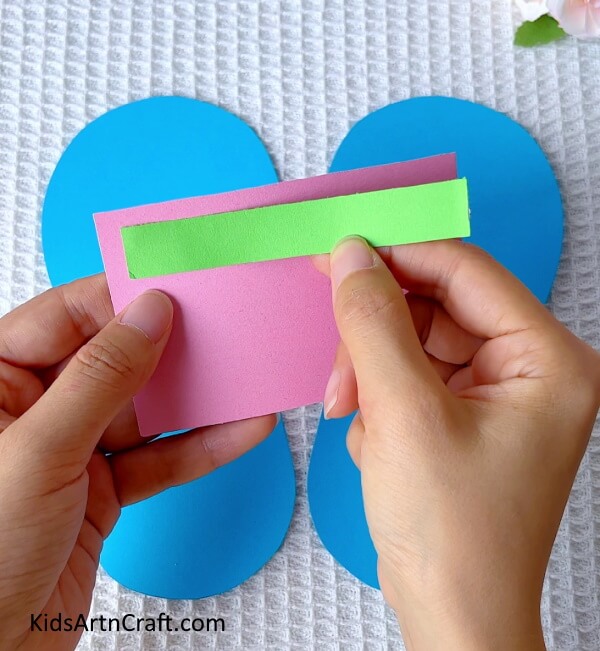

Next, from pink craft paper, cut out a thick rectangle strip for the strap of your slipper. Make sure the strip is long enough to be attached onto the slipper just fine. Once you have the strip cut out, cut a thin rectangle strip from dark green chart paper and use this as a decoration on the main slipper strap. Stick this onto the pink rectangle using glue.
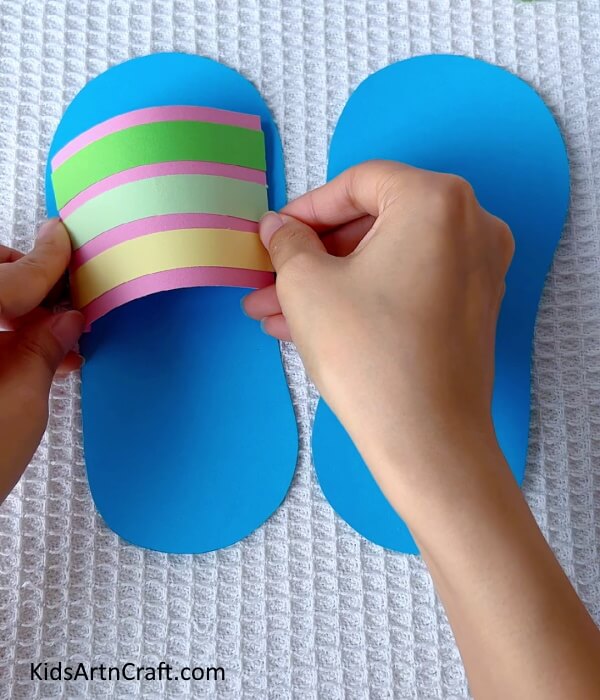
Step 3: Making the other strips for the strap decoration
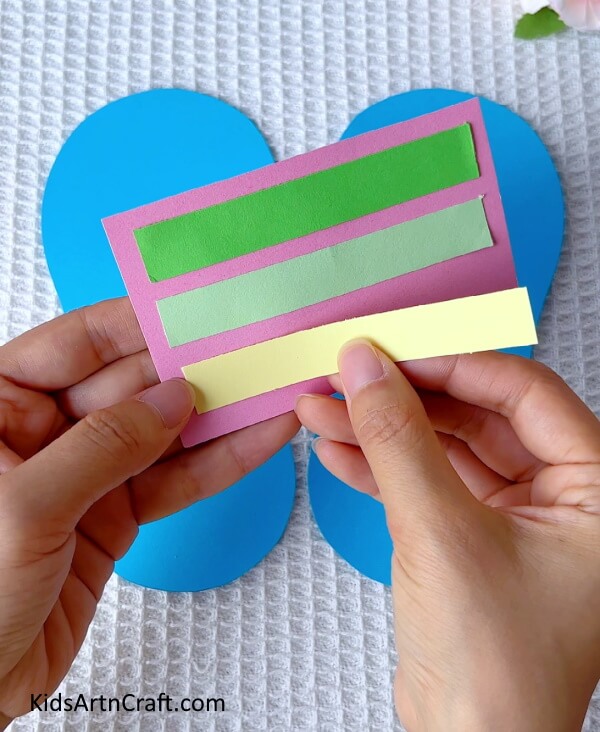

You will add two more strips of different colours to the pink strap. Cut two more strips of the same size as the dark green one, from light green and light yellow craft paper. Stick these below the first strip with proper space. Make sure all the strips are spaced out properly on the pink strap.
Step 4: Folding the edges of the pink strap
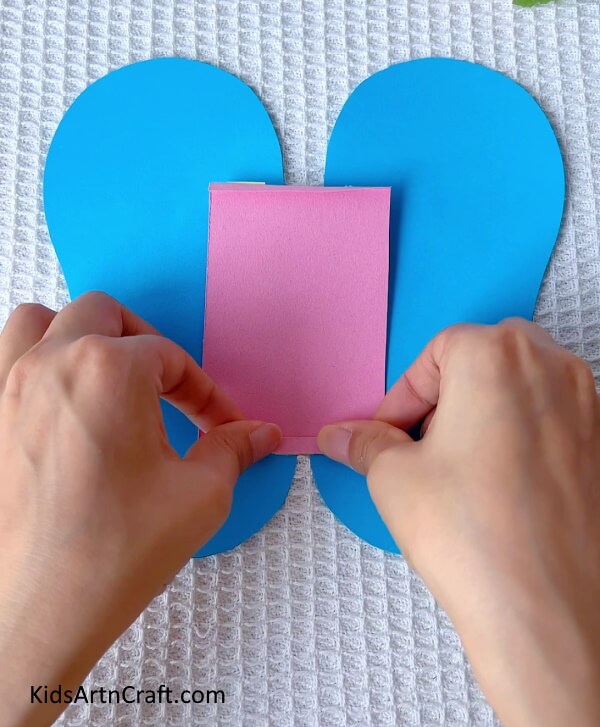

Once your strap is ready, flip the strap over such that the bottom plain side is facing you. Give slight inward folds to the two shorter edges of the rectangle. This will help you stick them easily onto the slipper.
Step 5: Sticking the first strap onto the slipper

Stick the strap onto the slipper using glue. First, stick one edge of the strap onto one edge of the slipper. Curve the strap a little to give it a realistic effect and stick the other edge. Ta-da! Your first slipper is ready!
Step 6: Sticking the strap of the second slipper


Follow the above steps and make the strap for the other slipper. Secure it with glue in the same way as you did for the first slipper. Your first pair of paper slippers is ready!!
Step 7: The first pair of paper slippers
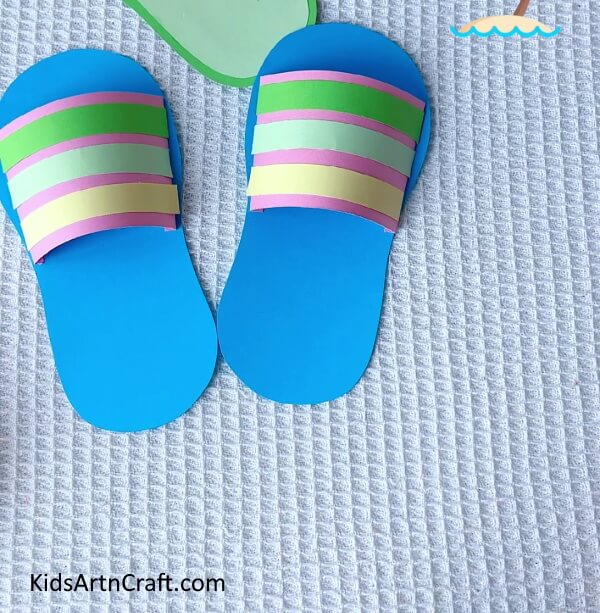

Your first pair of slippers are ready and one. You will now put these aside and prepare to make another pair of slippers with a different design.
Step 8: Starting with the second pair of slippers
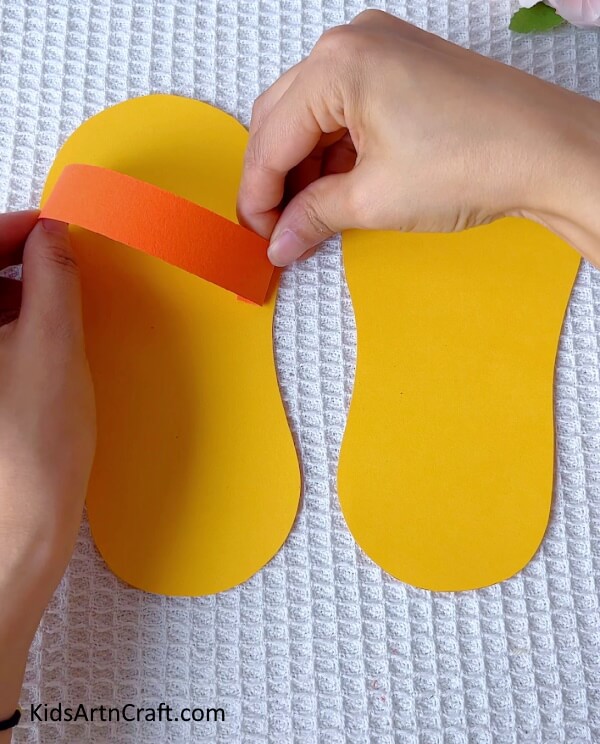

As you did for the first slipper base, do the same for this pair. Cut out two slipper bases from dark yellow or light orange craft paper. From dark orange craft paper, Cut out four slightly thick, and long enough, rectangle strips. These strips will be used to make the straps of this slipper. You will be making a crisscross design for this slipper. Stick the first strip onto the slipper in a diagonal position. Make sure to fold the edges inwards to stick more easily and curve the strap.
Step 9: Sticking the second strip to complete the crisscross design
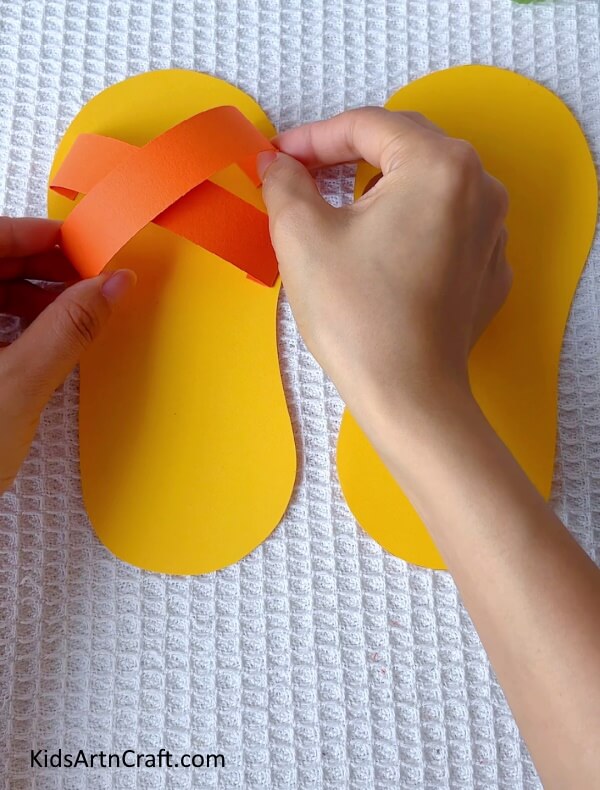

Now, stick the second the second strip over the first one in the opposite diagonal position. Your first crisscross strap design is complete. Repeat the steps and attach the straps to the second slipper as well.
Step 10: Adding on the flower charms
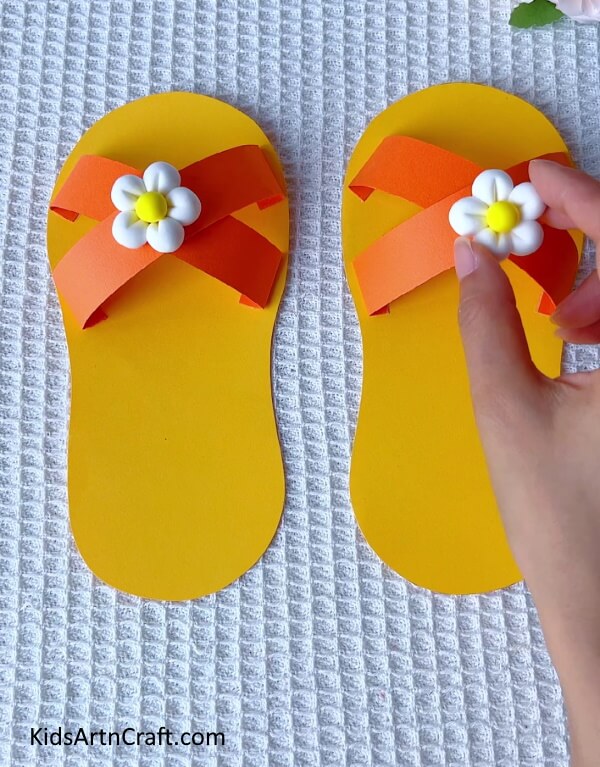

Your last and final step would be to add on the flower charms to the sippers. Take two flower charms and attach one on the center of the crisscross straps on each slipper, using glue.
Your Craft Is Ready!!
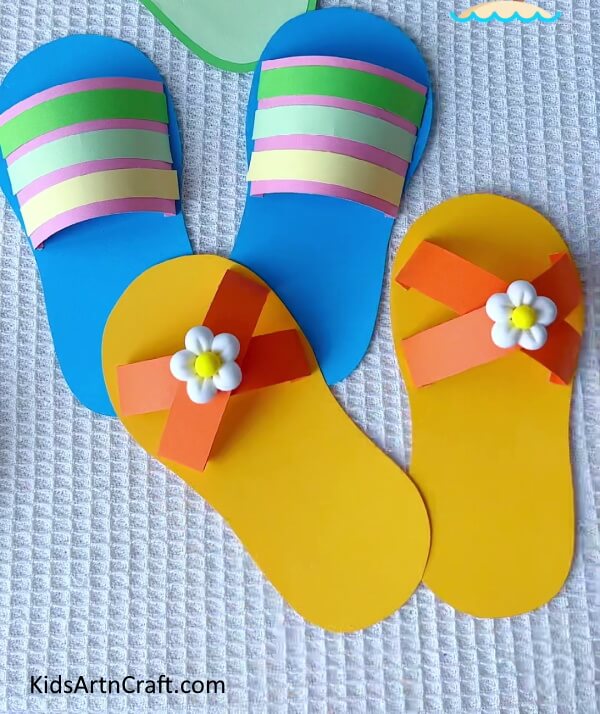

Woohoo! Your funky and pretty Slippers made form paper are all ready and done!! You can now showcase your masterpiece to everyone!!!
Following this step-by-step tutorial, kids can easily learn to make this fun and creative art. They will learn a completely new craft and use their creativity to make their own creation. This craft is perfect for craft projects and decorations. It is super easy and engaging and will keep the kids interested and attentive throughout the process. They get to learn new skills and sharpen their art and craft skills. It is quick to make and kids can easily catch on to the steps with this tutorial and showcase their creativity. So give it a try and engage your kids and yourself in a fun craft-learning activity!
Hope you like this creative and fun Paper Slippers Craft step-by-step tutorial for kids, and that it helped you and your children learn something new. We would love to hear your thoughts in the comment section below.
Be sure to visit our other articles for more craft and DIY ideas!
Thank You for visiting our website!
Follow us on Youtube for art and craft tutorials and much more.
More Articles from Kids Art & Craft
- Amazing Jute Basket Craft Making Step By Step Tutorial For Kids
- Paper Woven Crafts & Designs for Kids
- DIY Bird Nest Paper Craft For Kids
- Easy Paper & Popsicle Cloud Rainbow Craft For Kids
- How to Make a Paper Bunny Easy Tutorial for Kids