Kids Activities
How to make a Pen Pencil Holder Craft Using Paper Strips

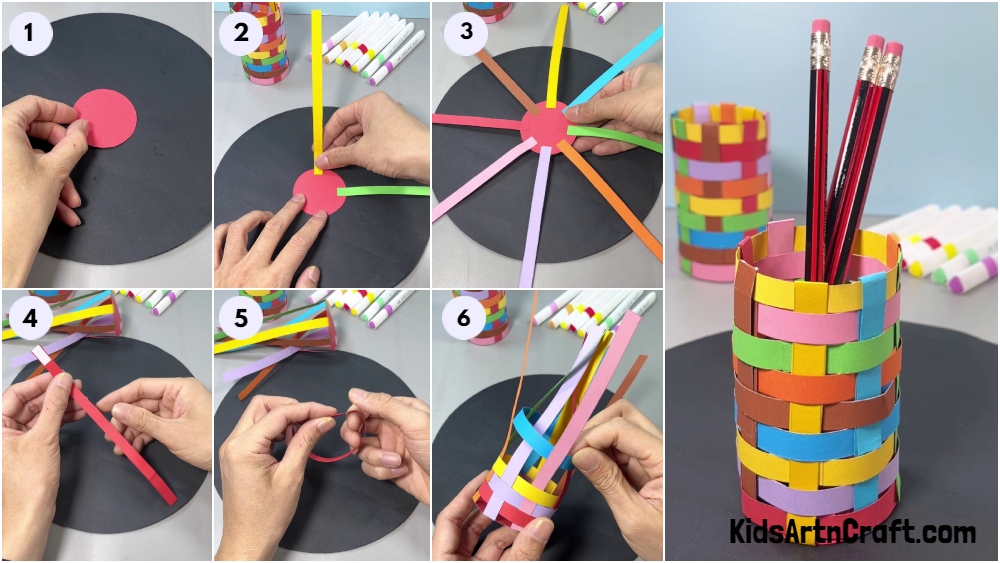
This article will show you how to make a fun and easy pen-pencil holder craft using paper strips. Learn step-by-step instructions for creating a colorful paper holder perfect for organizing your desk or workspace.
Are you looking for a fun and creative way to store your pens and pencils? A pen-pencil holder craft using paper strips is the perfect solution! n this article, we will discuss how to make a pen-pencil holder craft using paper strips. This craft is easy to make, requires minimal supplies, and can be done in a short amount of time. Plus, it’s a great way to show off your creativity and make a unique piece of art. So, let’s get started!
Creative Pen & Pencil Holder Craft Made With Paper Strips
Read More: Creative Fun Ways To Shape Dough
Materials Required
- Colorful Paper Sticks
- Glue
- Double Side Tape
Procedure
Step 1: Cutting Out A Paper Circle
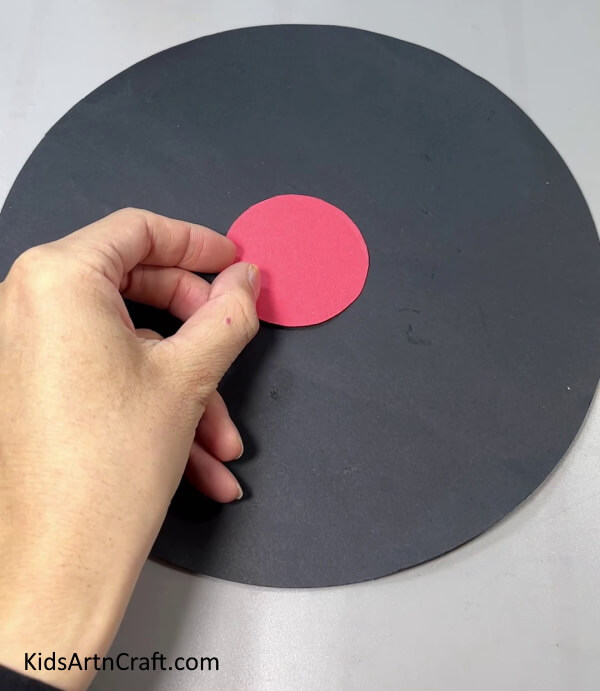
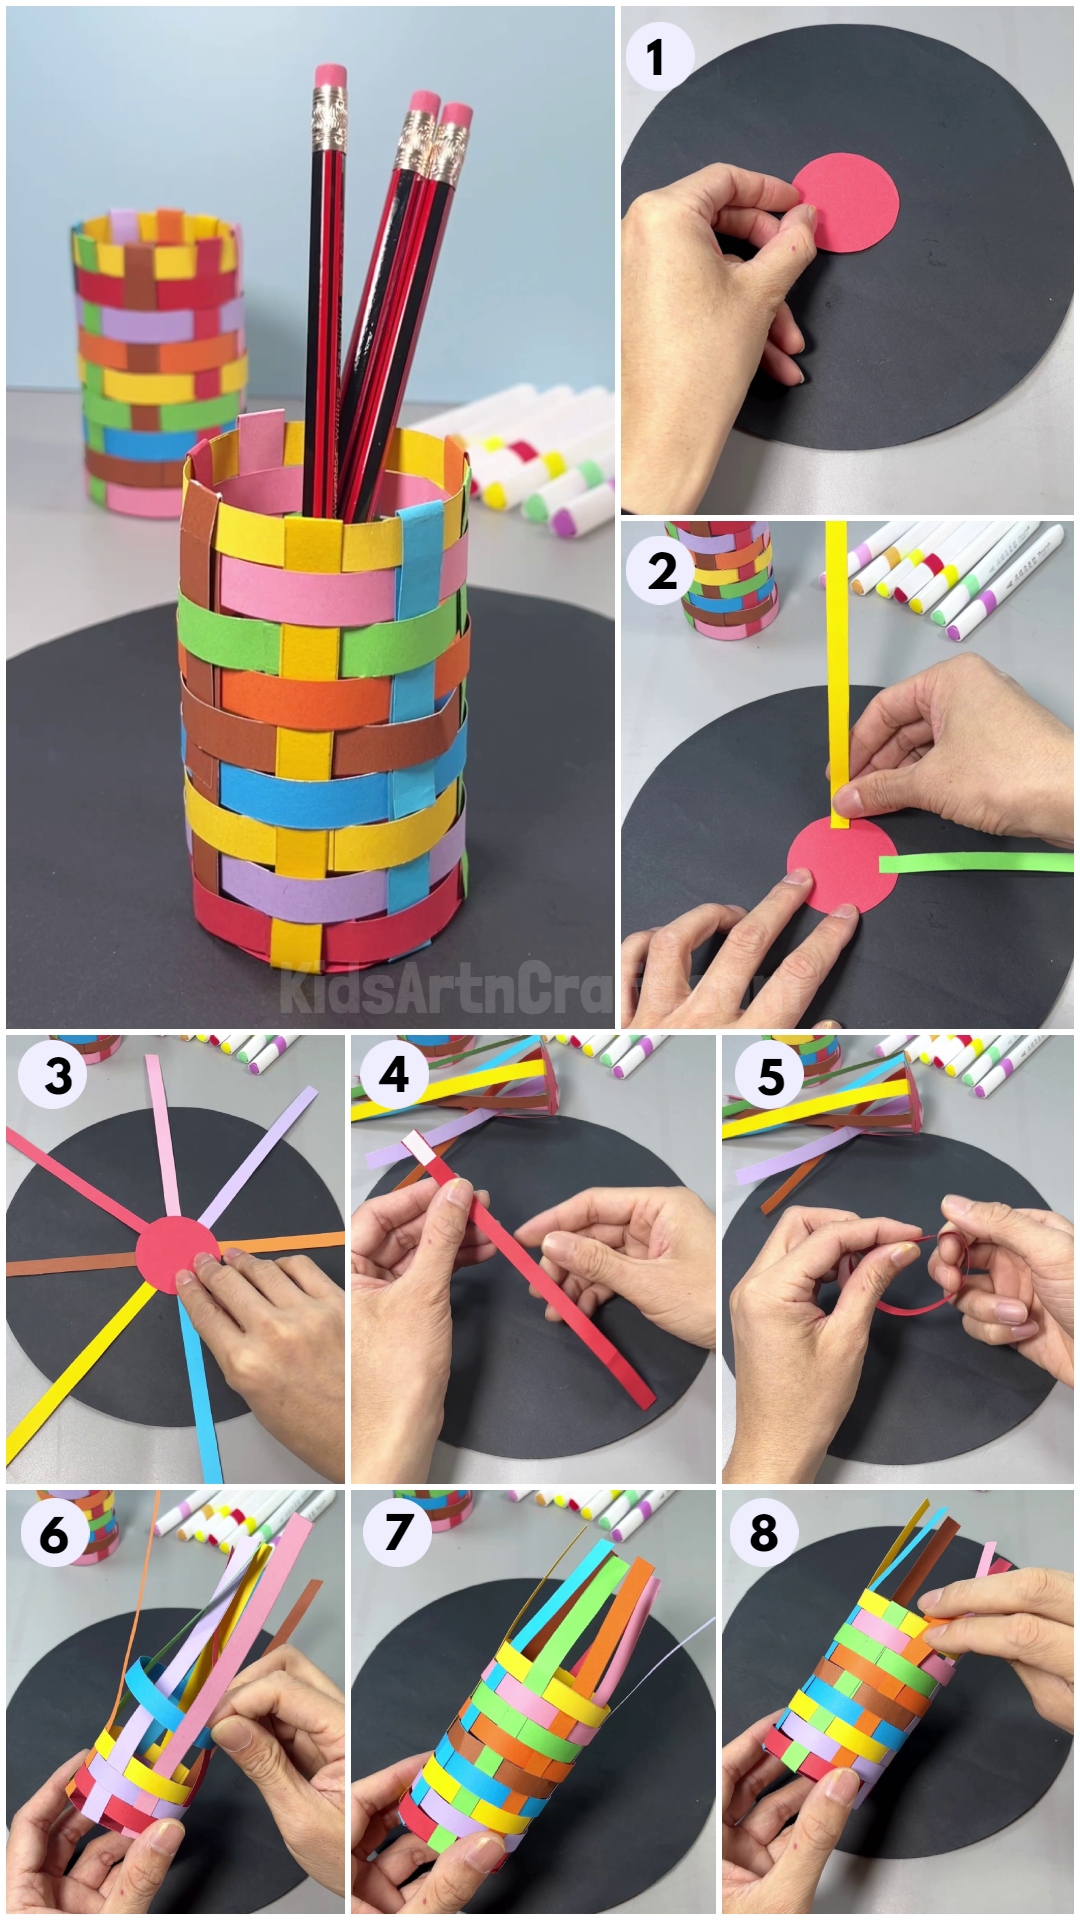
Let’s begin making paper strips pen holder stands by cutting a circle out of red paper using scissors.
Step 2: Pasting A Paper Stick On the Edge Of the Circle
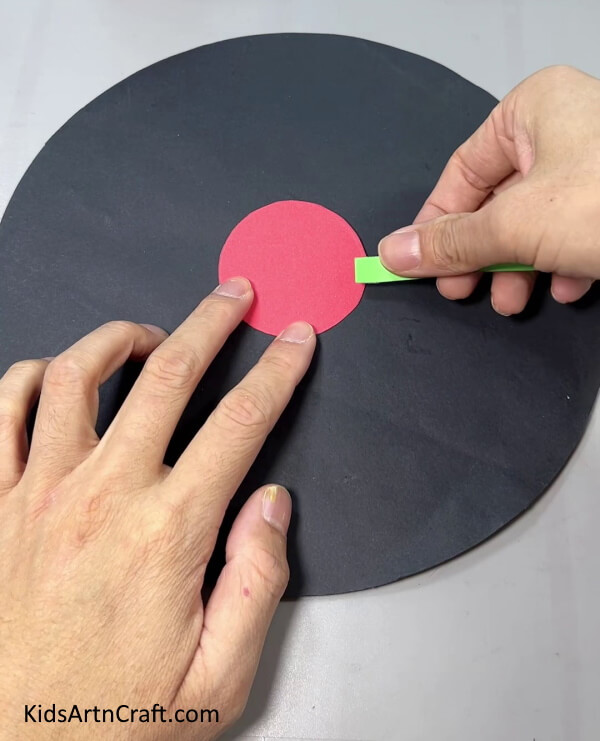
Take a paper strip and paste it on the edge of the circle.
Step 3: Pasting Another Paper Strip
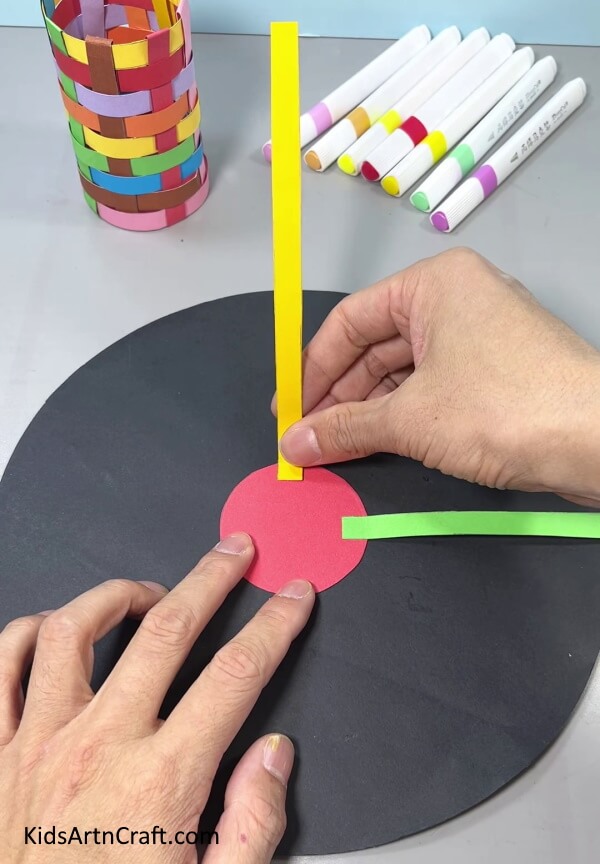
Paste another paper strip on the circle’s edge.
Step 4: Pasting Paper Strips On Circle
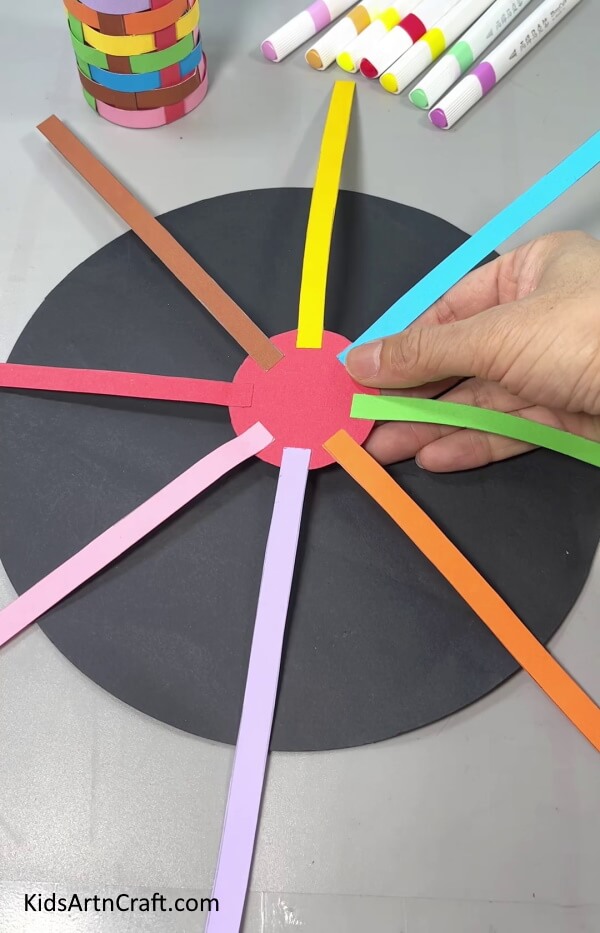
Cover the circumference of the circle by pasting paper strips at some gaps.
Step 5: Turning Around The Circle
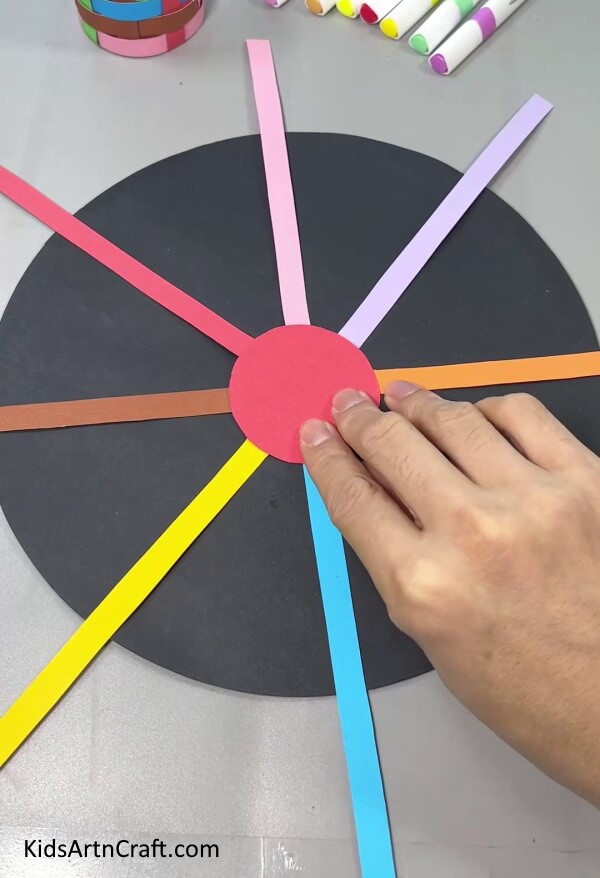
Flip the red paper circle.
Step 6: Bringing Paper Strips Upwards
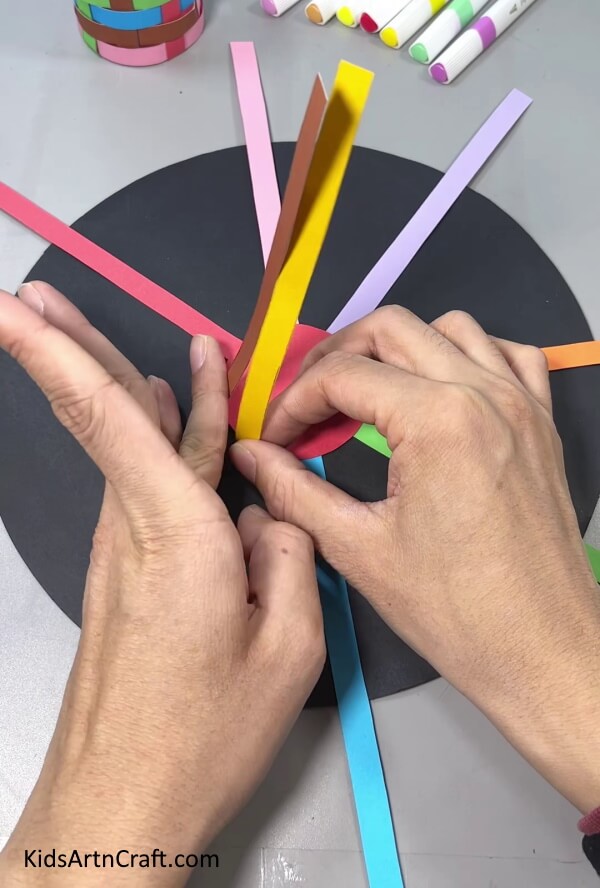
Next, bring the paper strips upwards with the help of your fingers.
Step 7: Applying Double Side Tape On a Paper Strip
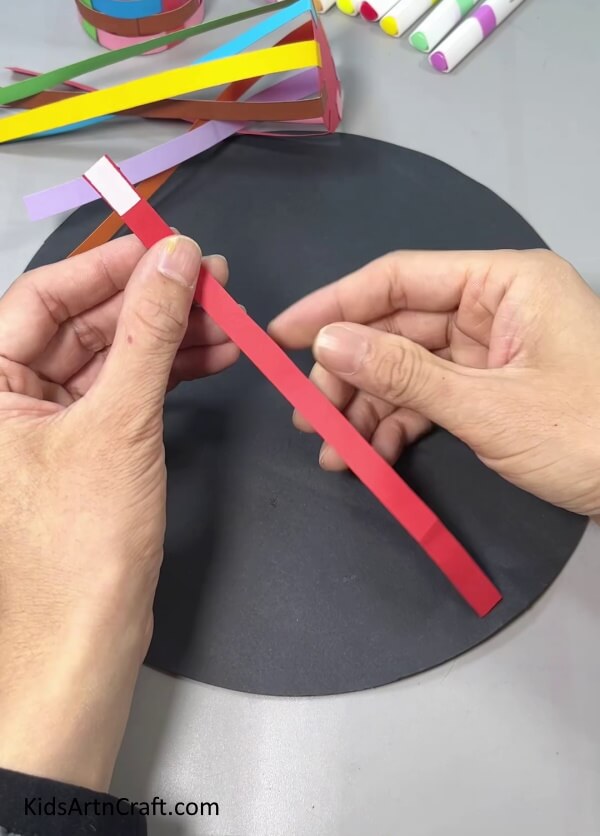
Now, take another paper strip and apply double side tape on one side.
Step 8: Folding Paper Strip End To Form A Circle
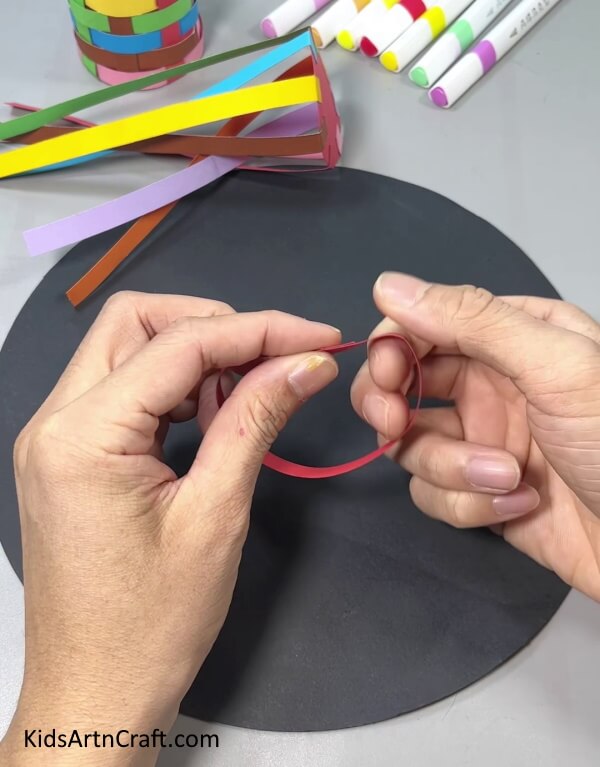
Joint both ends of the paper strip to form a circle.
Step 9: Inserting Circle Of Paper Strips Alternately
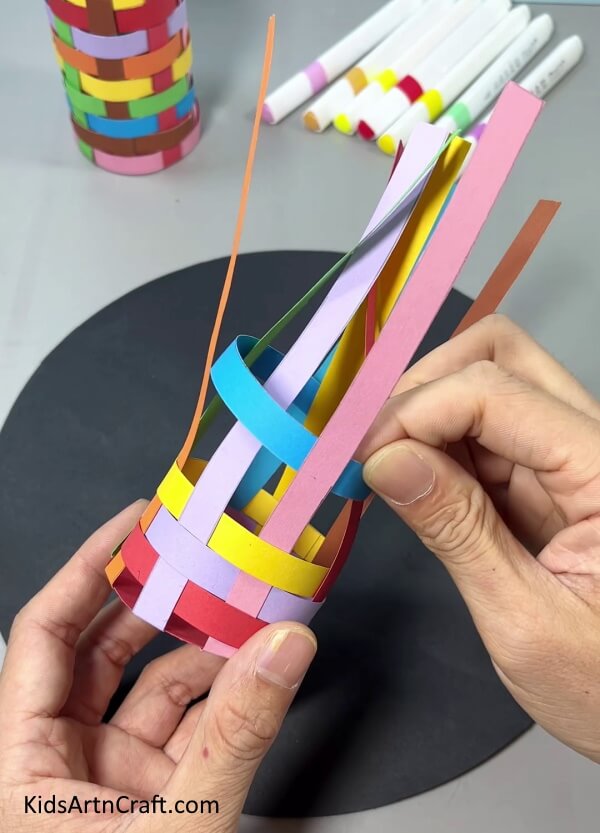
Now, insert the paper strip circle in the pen-pencil holder alternately that means insert the circle by leaving one strip adjacent to the inserted strip as shown in the above image.
Step 10: Inserting More Paper Strips Circles
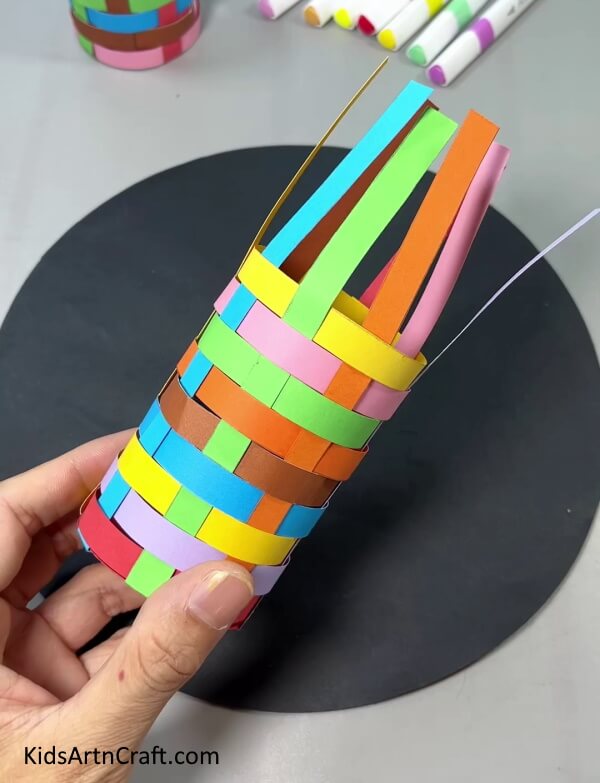
Using the same method, insert many paper rings to form a pen-pencil holder.
Step 11: Folding Ends of Paper Strips
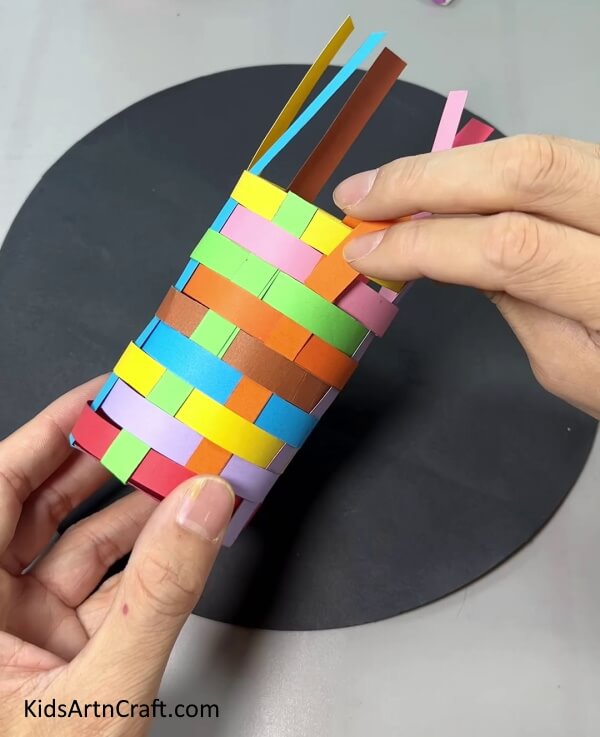
Lastly, fold the top ends inside or you can cut them.
Handmade Paper Strip Pen & Pencil Stand Is Ready To Use!
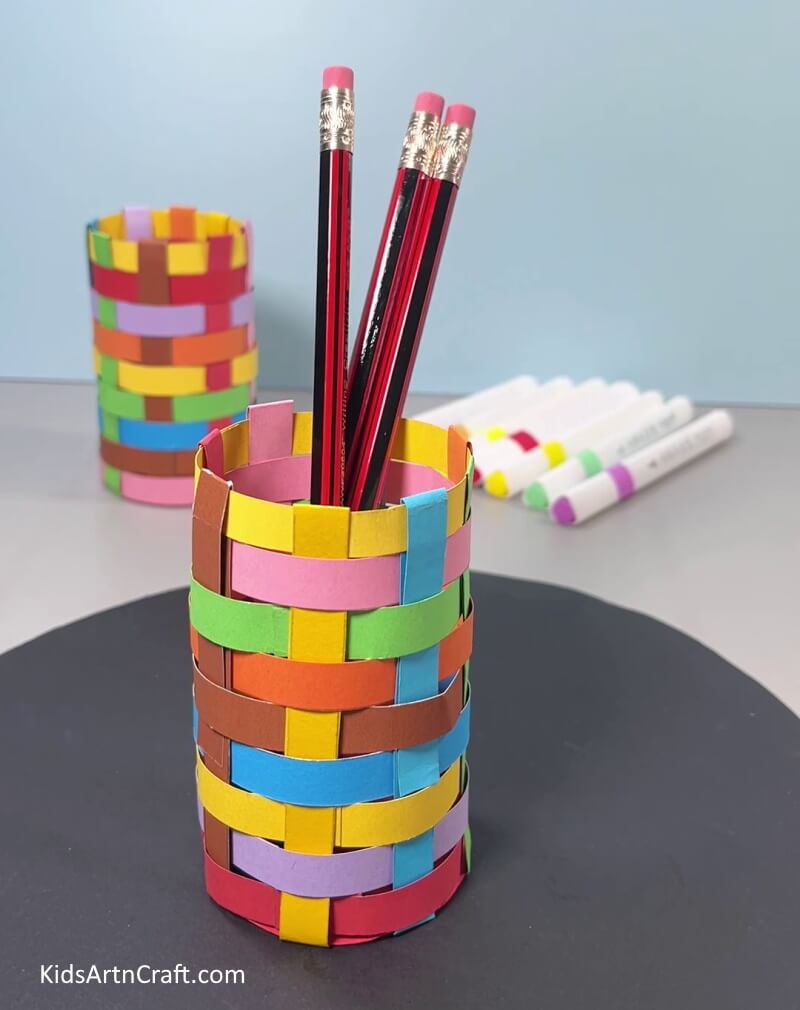
And there you have it – your very own pen-pencil holder craft! It’s always so satisfying to see a project come together, and this handmade paper strip pen & pencil stand looks like a great addition to any desk. It is a useful tool and a nice decorative touch! What are you waiting for? Get, Set, and Craft!
FAQs Related To How to Make a Pen & Pencil Holder Craft Using Paper Strips
1. How do I make a pen-pencil holder craft using paper strips?
To make a pen-pencil holder craft using paper strips, you’ll need strips of paper, a glue stick, a ruler, and scissors. First, measure and cut the paper strips into equal lengths. Then, fold the strips in half and glue them to make a cylinder shape. Finally, make a base and attach it to the cylinder to finish your pen-pencil holder craft.
2. What kind of paper can I use to make a pen-pencil holder craft?
You can use any type of paper to make a pen-pencil holder craft. However, lighter-weight paper such as construction paper, cardstock, or even wrapping paper works best.
3. How many paper strips do I need to make a pen-pencil holder craft?
The number of paper strips you need to make a pen-pencil holder craft will depend on the size of the holder you want to make. Generally, you will need at least 10 paper strips to make a small holder and up to 25 paper strips for a larger holder.
4. How long should I make the paper strips?
The length of the paper strips will depend on the size of the holder you want to make. Generally, the strips should be between 8 and 10 inches long.
5. How should I tape the paper strips together?
It is best to use clear tape to tape the paper strips together. This will ensure that the tape does not interfere with the final look of the holder.
6. How do I measure the circumference of the loop?
To measure the circumference of the loop, you will need a ruler. Place the ruler along the outside edge of the loop and mark the length with a pen.
7. How do I cut the paper strips into four equal parts?
To cut the paper strips into four equal parts, you will need to measure the circumference of the loop. Once you have the circumference, divide it by four and mark the marks with a pen.
8. How do I fold the paper strips into a box shape?
Fold each of the four paper strips in half and glue them together. This will form a box shape that serves as your pen-pencil holder craft.
Making a pen-pencil holder craft using paper strips is a fun and creative way to store your writing utensils. With a few simple materials, you can create a unique and eye-catching craft to keep your pens and pencils organized.
Making a pen-pencil holder craft using paper strips is a great way to add a personal touch to your workspace. Not only is it a fun craft activity, it is also a great way to use up paper scraps. With just a few simple materials and some creativity, you can make a unique and useful desk accessory.
Follow us on Youtube for art and craft tutorials and much more.
More Articles from Kids Art & Craft
- DIY Flying House Using Leaves–Up Movie Inspo
- DIY Fun To Make Paper Craft Ideas for Kids
- DIY Easy Paper Cup Octopus Craft For Kids
- How to Make Toilet Paper Roll Penguin Craft For Kids
- DIY Party Popper Step-by-Step Tutorial For Kids


