DIY and Crafts
Pencil Shaving Crafts for Kids

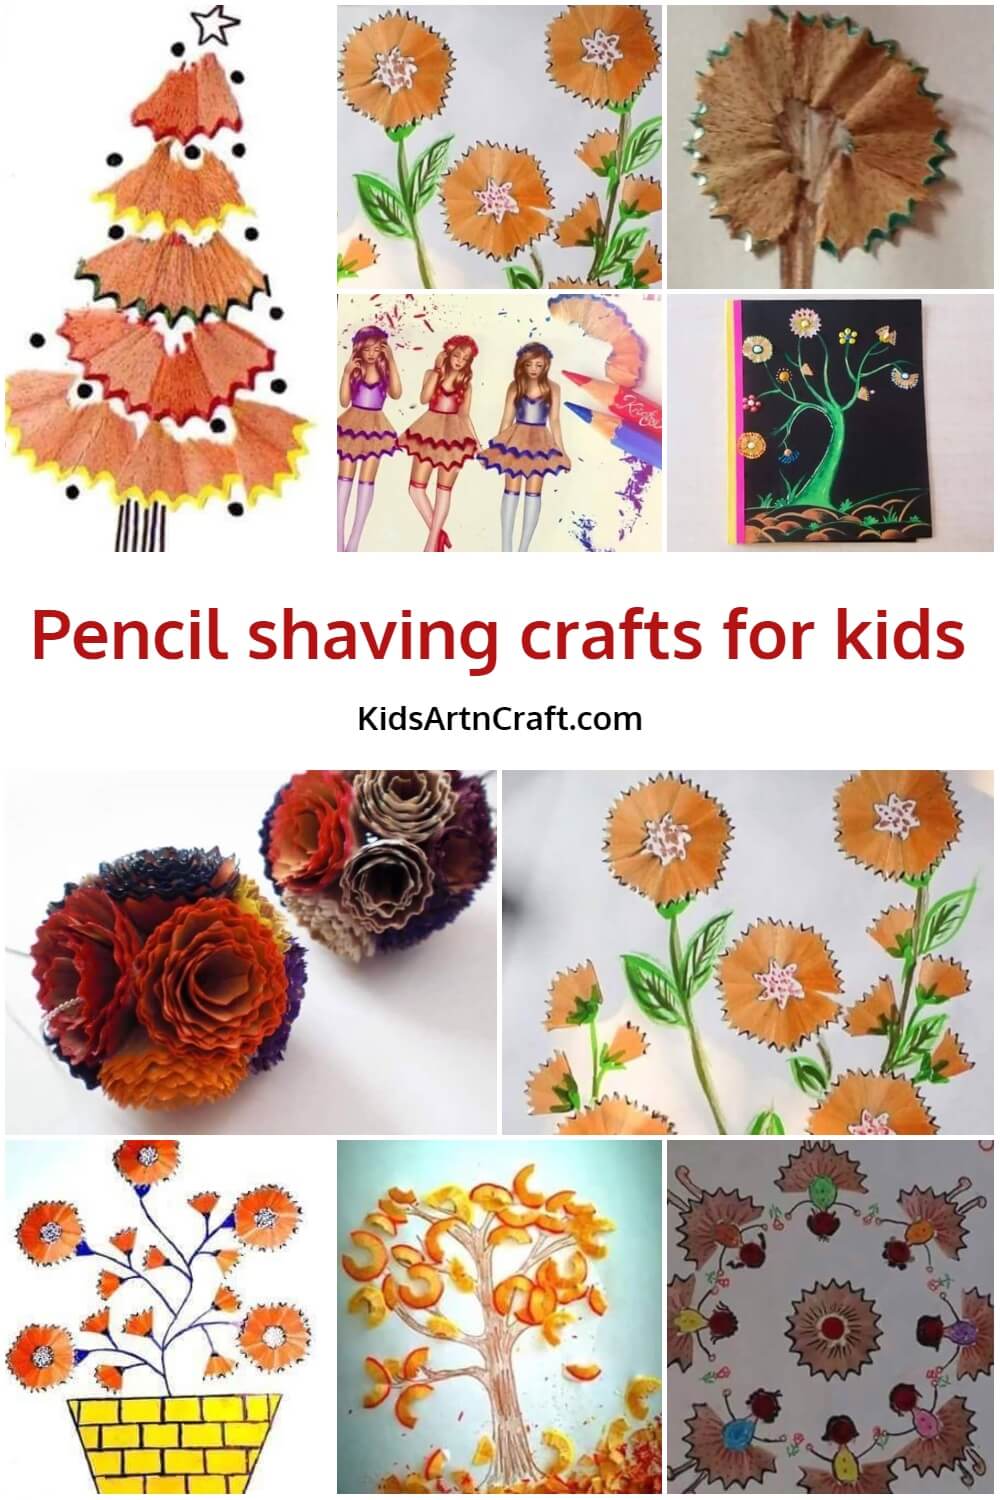
Do you like to be extra creative by pushing your boundaries? Creating new ideas and crafts from the things that are waste for others? Such as the pencil shavings!
If yes, these craft ideas are for you. We bring you some of these kinds of easy pencil shaving crafts. Instead of throwing those pencil shavings, why not create some attractive crafts from them if you can? So let’s go ahead with it and create these beautiful crafts.
Pencil Shaving Craft for Kids

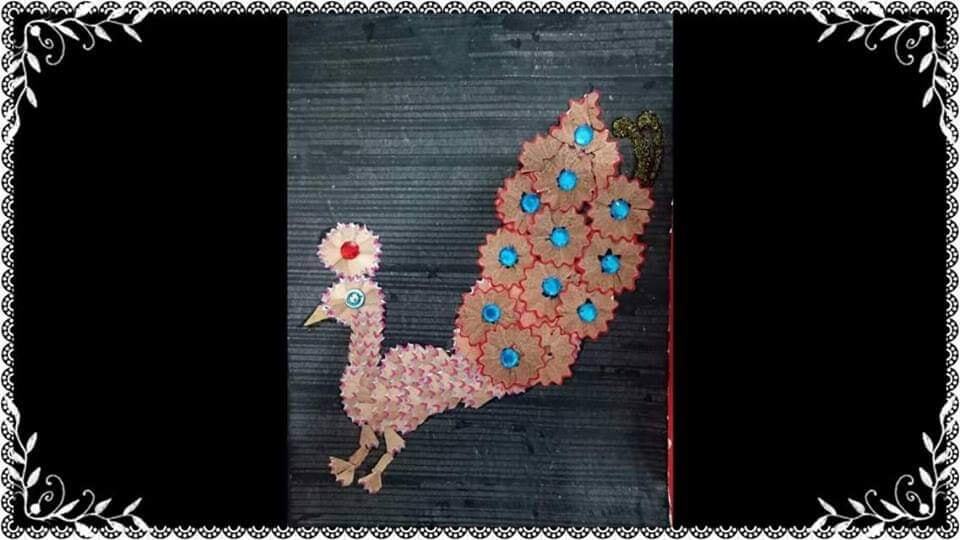
1. Pencil Shaving Peacock
This beautiful peacock is very easy to make in just a few steps, and it is also really attractive.
Level: Easy
Materials required: Black craft paper, glitter glue, colour pens, red colour pencils, glue
Procedure:
Shave the pencils to make the waste. For the body, you can divide the larger ones into small parts. Draw the body structure of the peacock with a pencil on the craft paper. Arrange the shavings on the body accordingly and paste with glue. Make the eyes and small circles on the wings with coloured pens. Finish it with a design near the wings with glitter glue.

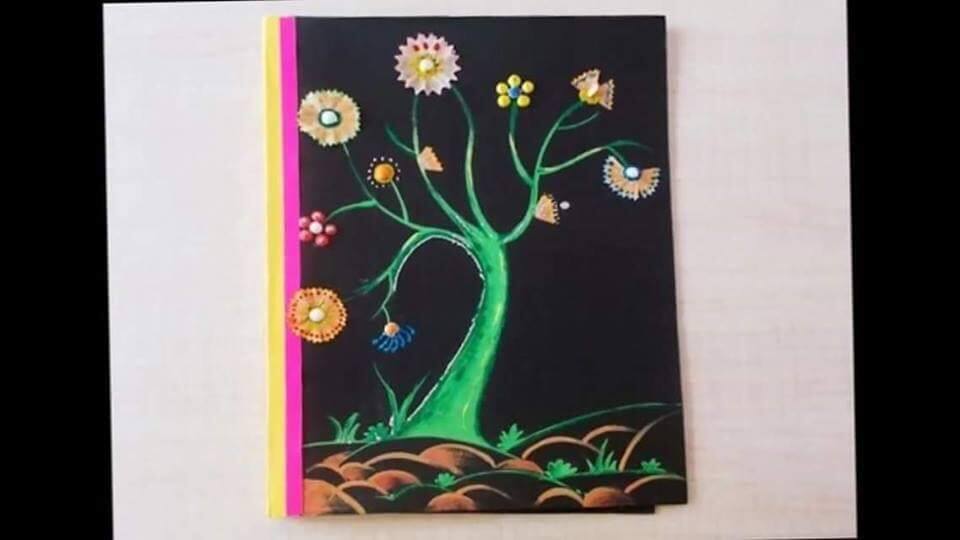
2. Beautiful Tree
Create this beautiful tree and decorate it with pencil shavings to give it an extra creative effect.
Level: Easy
Materials required: Black craft paper, oil pastels, pencil shavings, glue
Procedure:
Draw the tree on the black craft paper and create beautiful shades with oil pastels. Arrange the shavings as leaves and flowers on the branches of the tree. You can add some colours and glitter to the shavings if desired.

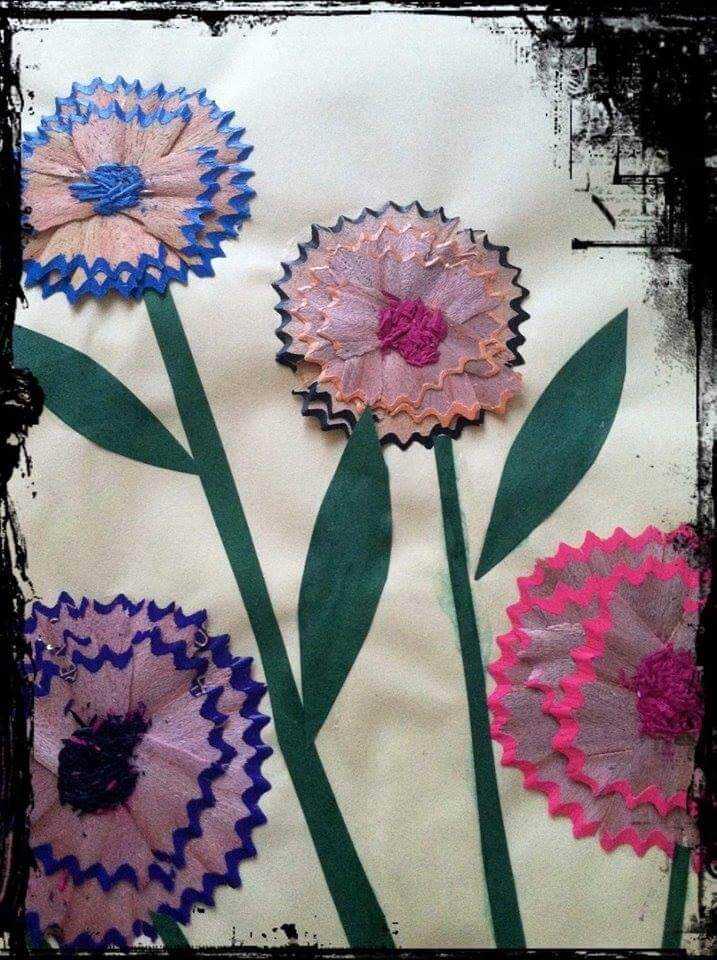
3. Shaving Flowers
Sounds attractive, right? SHAVING FLOWERS. They are also attractive in making, just like their name.
Level: Easy
Materials required: Craft paper, pencil shavings of different colours, green colour paper, glue, scissors
Procedure:
Arrange the shavings of different colours in a flower shape, on any colour of craft paper. Cut the stem and leaves from the green paper and paste them under the flower.

4. Cute Flower Pot
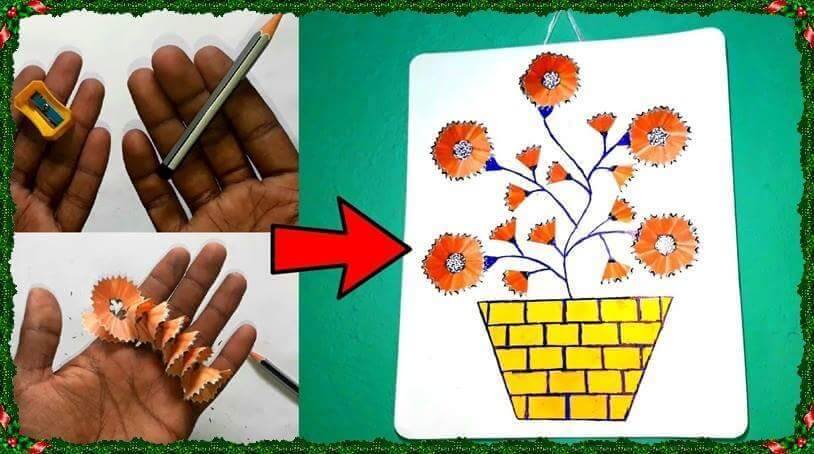
You can make a beautiful flower pot with pencil shavings and a few coloured pens. Just follow these steps.
Level: Easy
Materials required: White craft paper, pencil shavings, colour pens, glue
Procedure:
Draw the flower pot with coloured pens on the white craft paper and colour it. Draw the branches of the plant. Arrange the shavings on the branches and paste.

5. Beautiful Girls
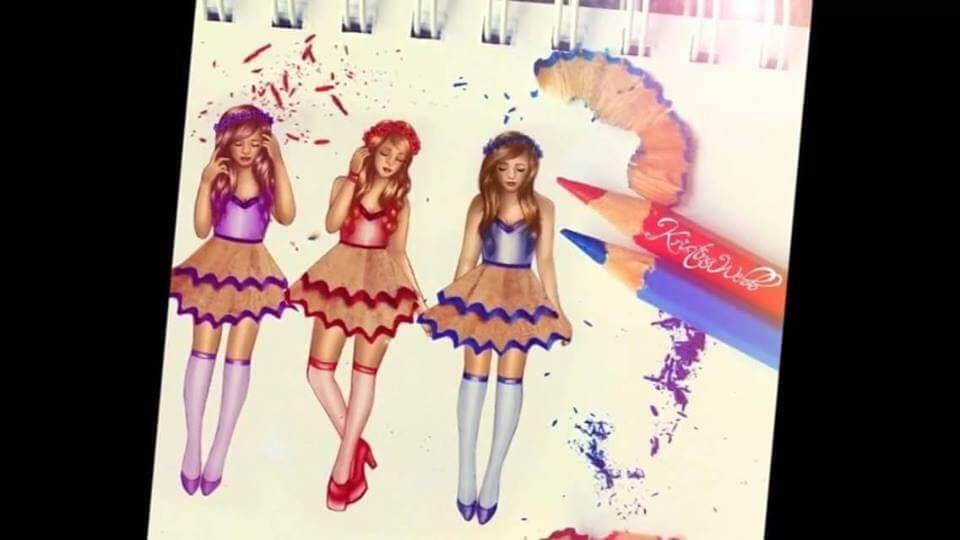
Create these cute and pretty girls with pencil shavings. They look really cute and easy.
Level: Easy
Materials required: White craft paper, colour pens, red, pink, and blue shavings, glue
Procedure:
Draw the structure of these girls, and colour them. You only have to make the skirts with shavings. Colour the drawing. Lastly, arrange the shavings as skirts and paste.

6. Playing Children’s
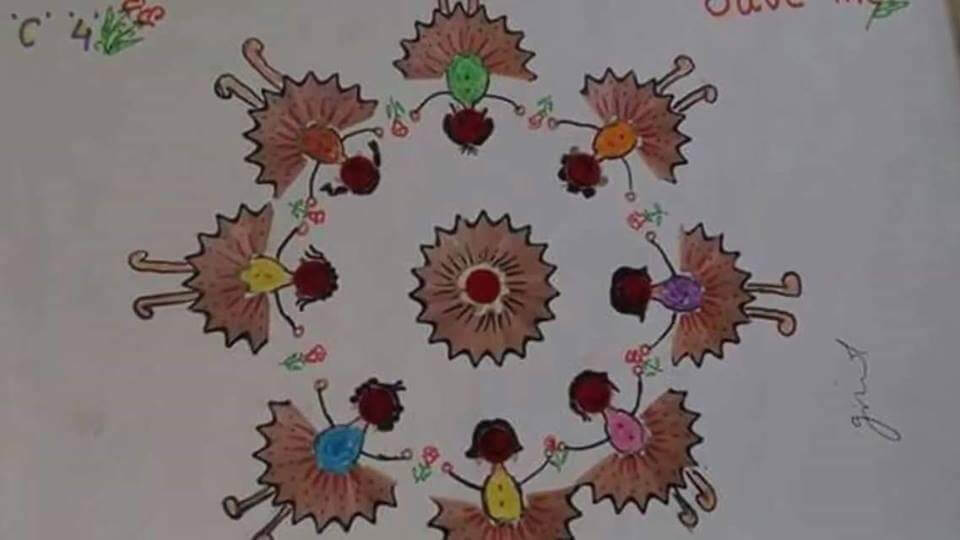
Making these children play is easy. This craft looks beautiful and happy in itself.
Level: Easy
Materials required: Craft paper, colour pens, pencil shavings, glue
Procedure:
Draw the body and hair of the children with coloured pens in a circular form as shown. Paste a shaving in the centre of the circle. Now arrange another shaving on the bottom part of the children’s body and paste.

7. Smiling Flowers
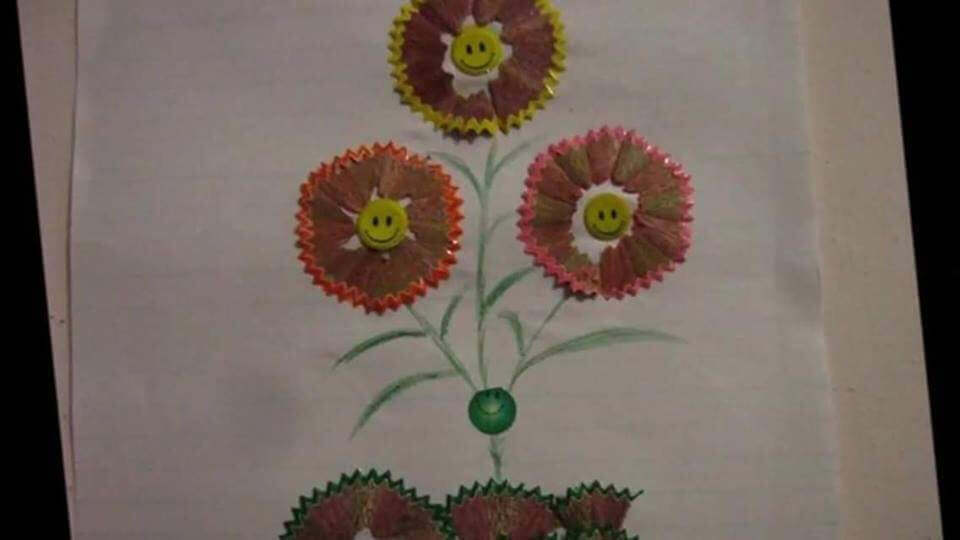
Sounds cute, right? It is really cute, though. Create these smiling flowers and bring a smile to your face and others’ faces.
Level: Easy
Materials required: Craft paper, colour pens, pencil shavings, smiley stickers, glue
Procedure:
Paste the shavings on the top as flowers and at the bottom as soil. Put the smiley stickers in the centre of the flowers. Draw the stem and leaves with coloured pens. Put a smiley sticker above the soil.

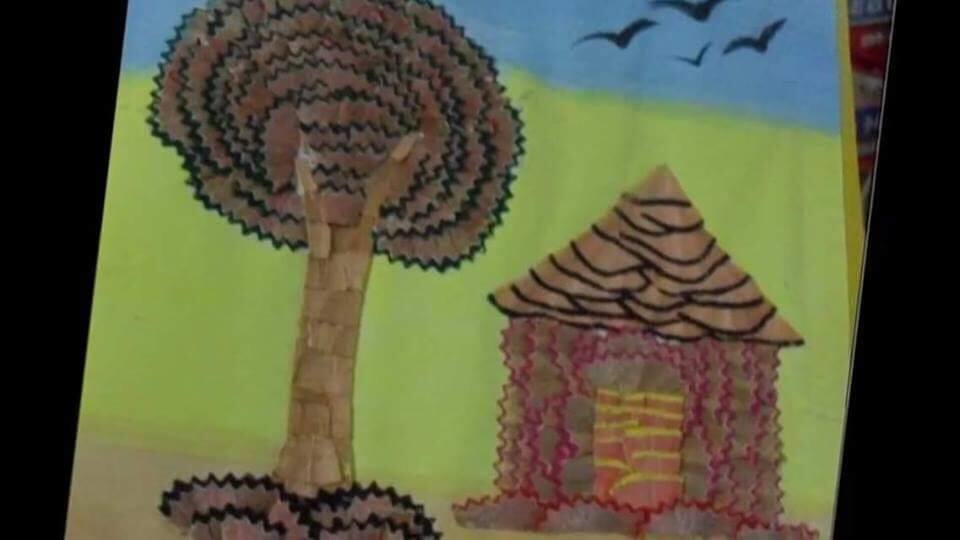
8. The Shaving House
Create this beautiful scenery only with shavings in a few minutes.
Level: Easy
Materials required: Craft paper, watercolours, pencil shavings, black marker, glue
Procedure:
Paint the background on the craft paper with watercolours. Let it dry. Arrange the shavings as a tree and a house. You can divide the bigger shaving to get the smaller ones. Paste them. Draw some birds with the black marker.

9. Beautiful Flowers
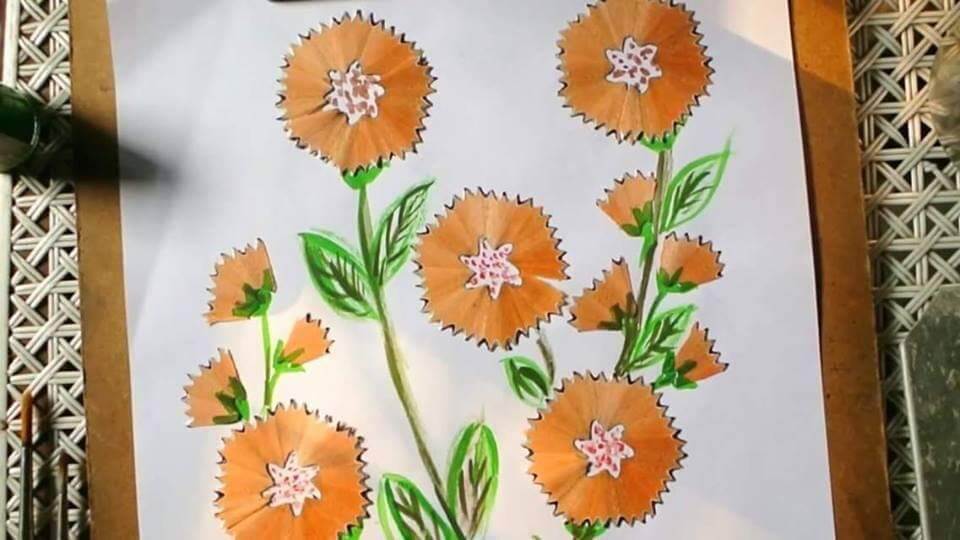
Make these beautiful flowers, which are very easy to make. And at the same time, it is beautiful.
Level: Easy
Materials required: Craft paper, colour pens, pencil shavings, glue
Procedure:
Arrange the shaving as flowers and buds on the craft paper. Draw the stems and leaves with green colour.

10. Unique Art
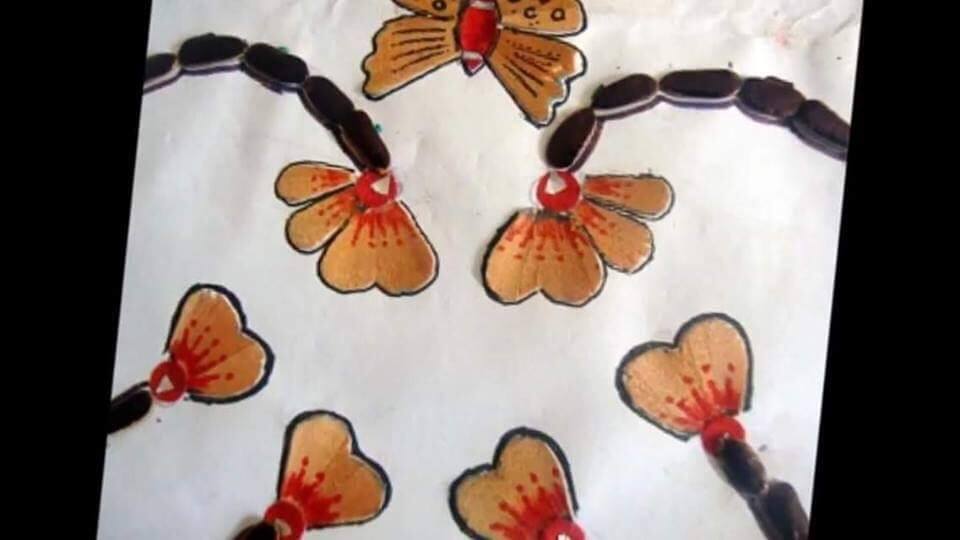
Create this unique and pretty artwork in a few steps. You can make it very easily.
Level: Easy
Materials required: Craft paper, cardboard, black paint, pencil shavings, black and red marker, glue
Procedure:
Paint the cardboard black and let it dry. Till then, arrange the shavings in the shape of a butterfly and flowers. Cut the cardboard into small cylindrical shapes. Paste them as the branches of the flowers and buds. Create some shades with red markers in the butterfly and flowers. Highlight the art with a black marker.

11. Shaving Trees
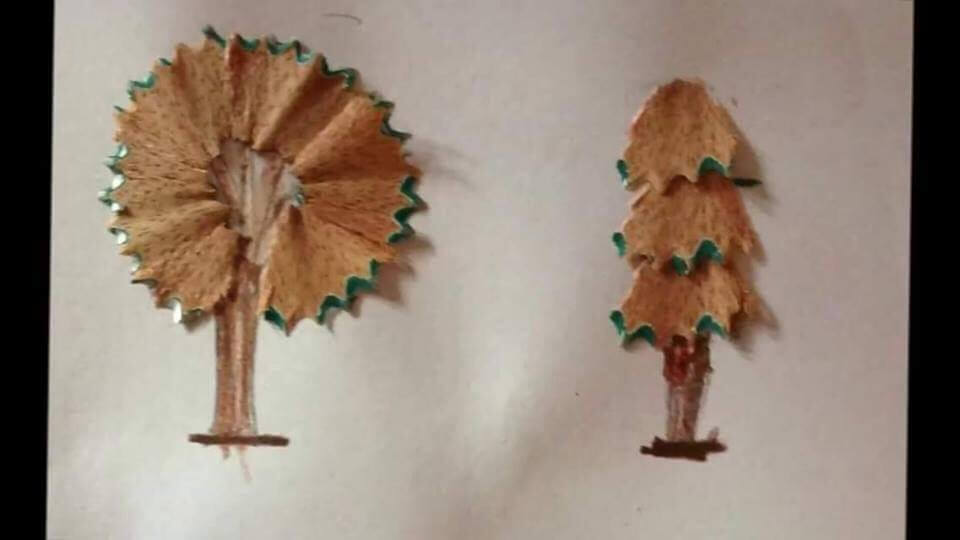
Make these different shapes of trees to get beautiful art. It is very easy to make.
Level: Easy
Materials required: Craft paper, pencil shavings, brown colour pen, glue
Procedure:
Arrange the shavings in different tree shapes, such as circles or triangles, and paste. Draw the stem with a brown sketch pen.

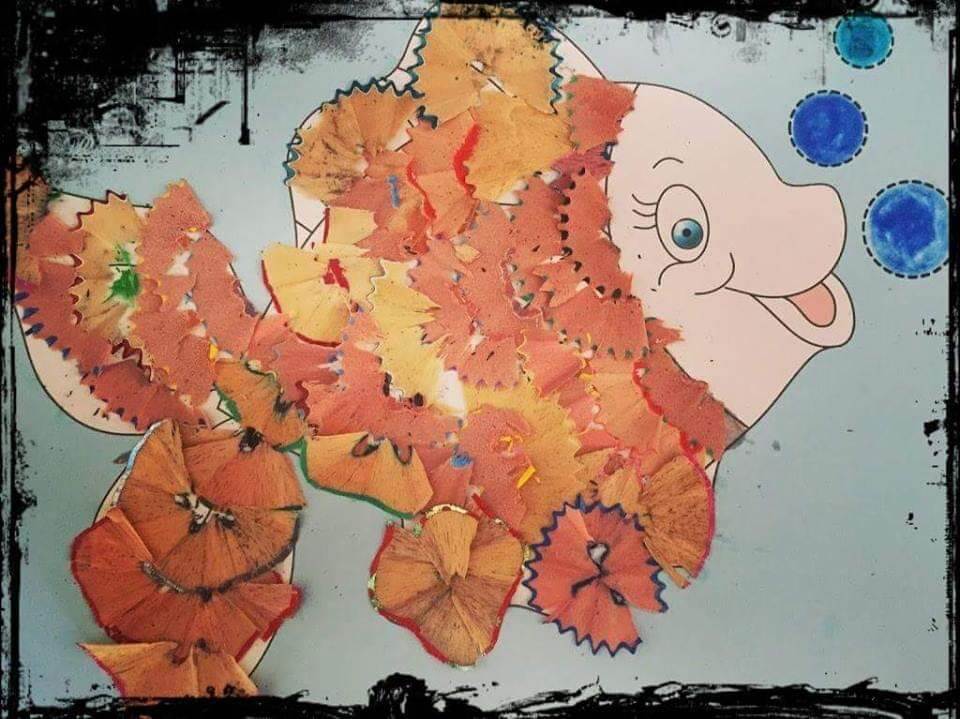
12. Cute Fish
Make this super cute and smiling fish. The smile of the fish will itself bring a smile to your face.
Level: Easy
Materials required: Craft paper, different coloured pencil shavings, black marker, glue
Procedure:
Draw a beautiful fish on the craft paper with a pencil. Arrange the shavings on the body and paste. Outline the whole with a black marker. Draw some water bubbles.

13. Beautiful Painting
Make this beautiful painting in a few steps. It is very easy to make.
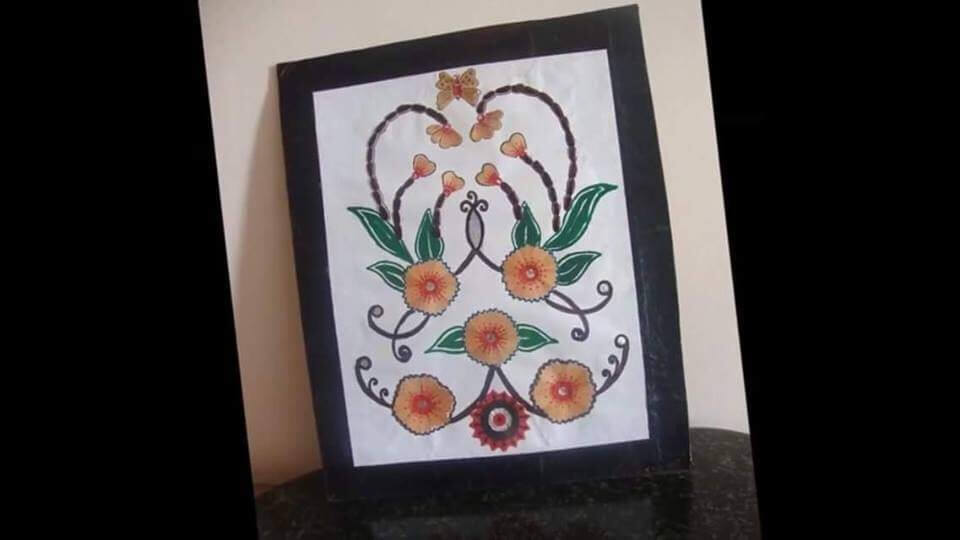
Level: Easy
Materials required: Black and white craft paper, cardboard, black paint, colour pens, pencil shavings, glue, scissors, black marker
Procedure:
Paint the cardboard with black paint and let it dry. Arrange all the shavings in the shapes of butterflies, flowers, and buds as shown. Cut small cylindrical shapes from the cardboard. Draw the leaves with the green pen. Arrange the cylindrical shapes as the branches. Make designs with a black colour pen as shown near the flowers. Create some beautiful shades from the red colour pen on the flowers. Outline the whole art with a black marker. Paste the white paper on the black craft paper.

14. Unique Flowers
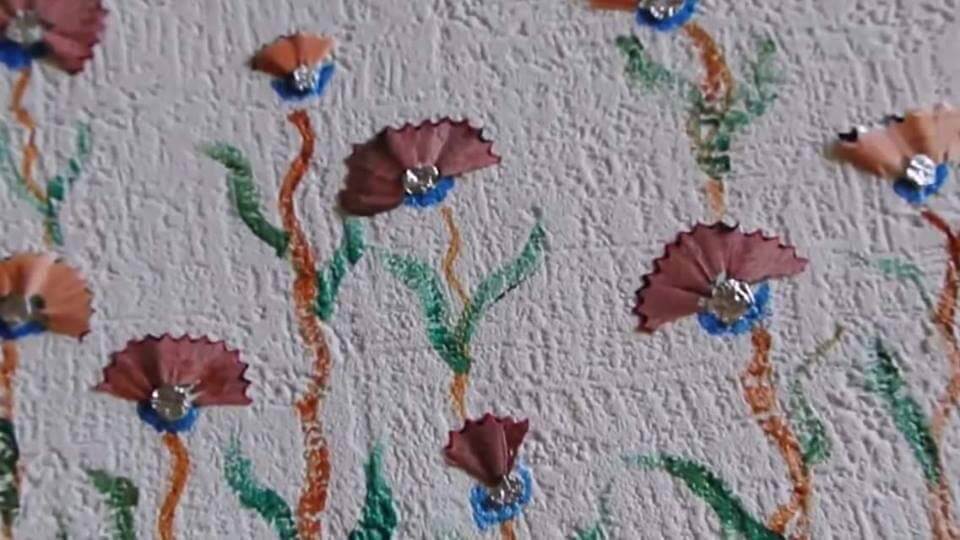
Create these beautiful and unique flower designs that look pretty after making.
Level: Easy
Materials required: White craft paper, coloured pens, aluminium foil, pencil shavings, glue
Procedure:
Paste the shavings on the craft paper as shown. Make small aluminium balls and paste them below the flowers. Create zig-zag branches with coloured pens.

15. Falling Leaves
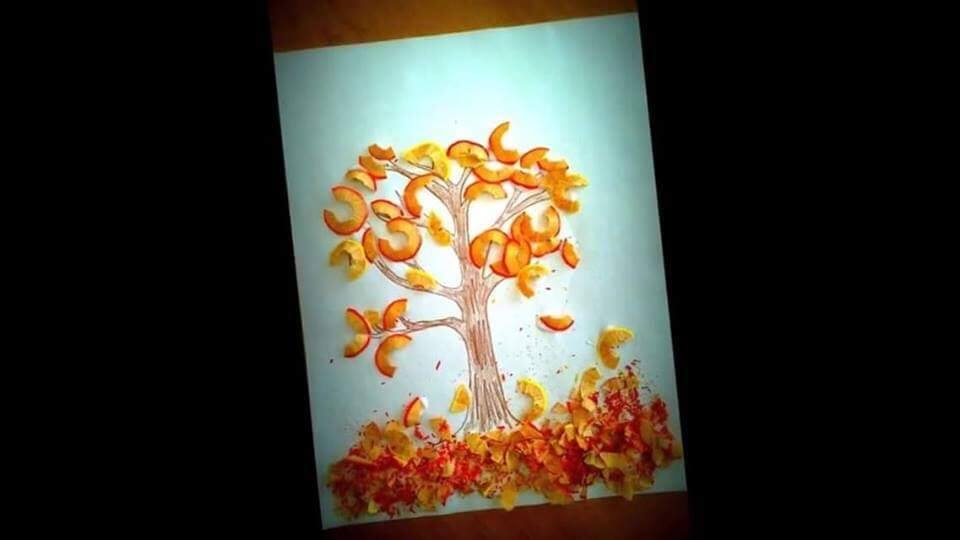
Falling trees look beautiful, right? Make this beautiful craft to get those amazing falling trees.
Level: Easy
Materials required: Cardstock paper, brown sketch pen, pencil shavings, glue
Procedure:
Draw the stem and branches of the tree with a brown sketch pen. Arrange some shavings on the tree as leaves. Paste some more shavings as fallen leaves. Paste some shavings in the middle also to show the leaves falling.

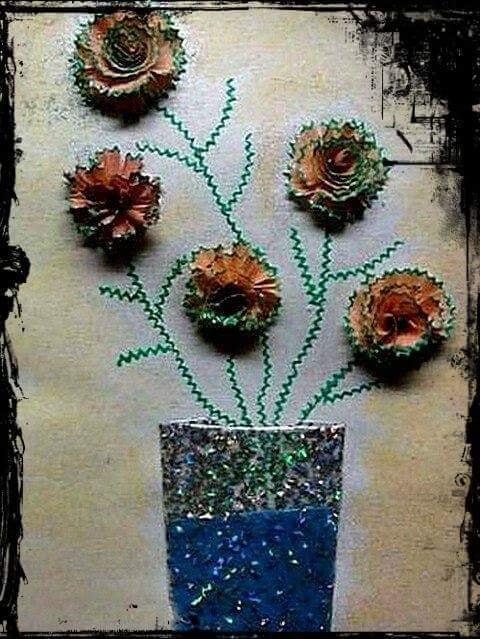
16. Shimmery Flower Pot
Make this beautiful, glittering flower paint. It looks super attractive.
Level: Easy
Materials required: Cardstock paper, pencil shavings, glitter, colour pens, glue
Procedure:
Draw the flower pot with a pencil. Arrange the shavings together to create one flower as shown. Like this, create many flowers. Paste them and create zig-zag lines as branches. Squeeze some glue on the flower pot and sprinkle the glitter on it.

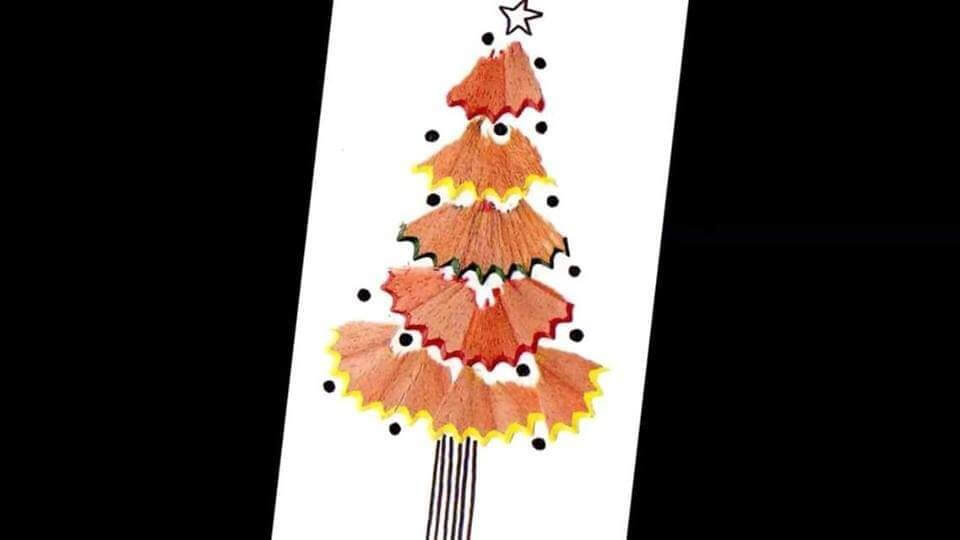
17. Christmas Tree
Make this beautiful Christmas tree with shavings. It is amazing and easy.
Level: Easy
Materials required: White craft paper, pencil shavings, black marker, glue
Procedure:
Arrange the shavings in the shape of a Christmas tree. Draw the stem with a black marker. Make a small star on the top and small circles with a black marker.

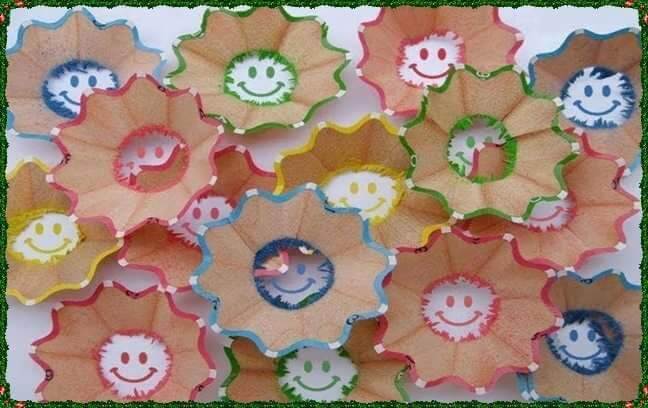
18. Smiling Faces
Make these cute smiling faces with the shavings. It is very cute and easy.
Level: Easy
Materials required: Craft paper, pencil shavings, colour pens, glue
Procedure:
Make smileys on the paper with different coloured pens. Paste the shavings on every smiley to create a face.

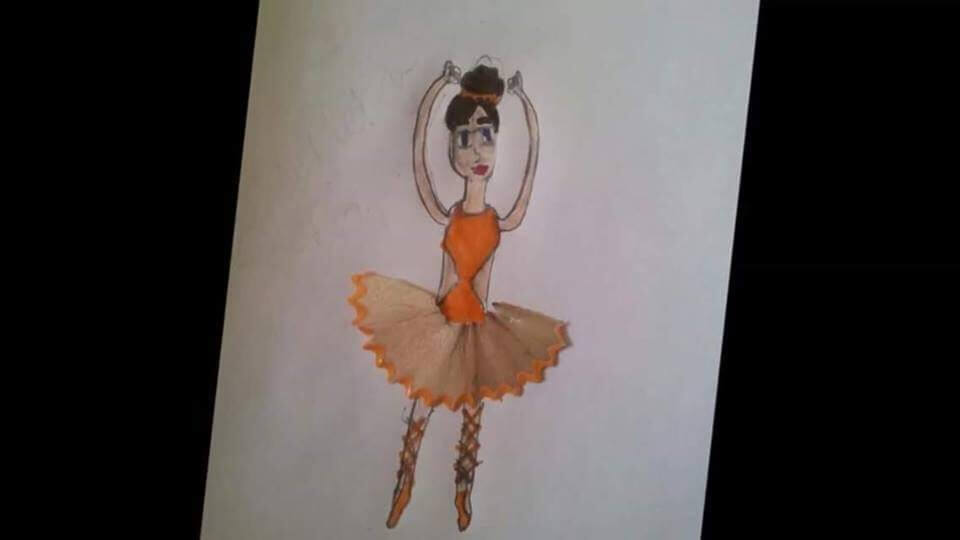
19. Dancing Girl
Create this charming girl and dance with her. She is very easy to make.
Level: Easy
Materials required: Craft paper, pencil shavings, colour pens, glue
Procedure:
Draw the dancing girl with the coloured pens. Colour her accordingly. Now, all you have to do is paste the shavings on her skirt.

20. 3D Flower
Make this beautiful 3D pencil shaving flower. You’ll instantly fall in love with it.
Level: Easy
Materials required: Pencil shavings of different colours, glue
Procedure:
Take the shaving and stick them together to create a flower-like structure. Take one shaving and paste another above it. Follow this pattern, and you’ll soon get a flower.
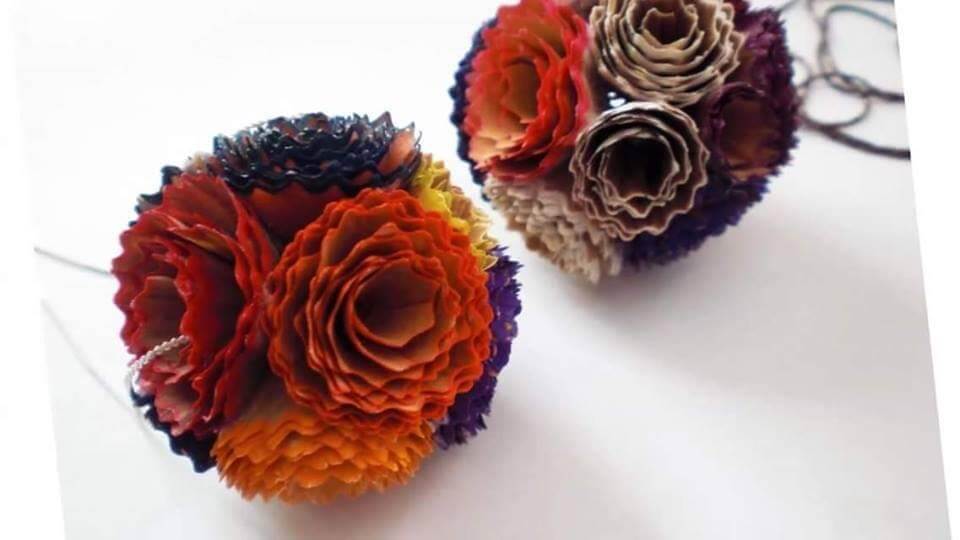

So these are some of the easy and amazing pencil shaving crafts that anyone can make without much effort. All of these activities are simple yet amazing and will help in enhancing your creative skills.
Easy Step-by-Step Pencil Shaving Crafts Tutorial

Learn how to create beautiful pencil shaving crafts for kids with this easy step-by-step tutorial. Turn simple pencil shavings into colourful flowers, animals, and creative art. A fun best-out-of-waste craft activity that boosts creativity, fine motor skills, and imagination using simple school supplies.
Read More:
- 20+ DIY Pencil Toppers for Kids – Back to school Crafts
- DIY Creative Pencil Holder Ideas – Stationery Organisers
- Pencil Drawings for Kids – A Walk Through The World Of Dazzling Arts
- Simple Pencil Drawings for Kids – Easy Ideas with Pictures
- Rainbow Crafts for Kids