Clay Crafts
DIY Seed Germination Using Clay Easy Artwork For kids

Encourage your kids to get creative with this fun and easy DIY seed germination project using clay with our step-by-step instructions tutorial!
DIY Seed Germination Using Clay Easy Artwork For Kids is a fun and creative way to get your little ones involved in gardening. This project provides an easy and rewarding way to learn about the science behind germination and the art of creating unique clay planters. With just a few supplies and a little time, your kids can create and watch their own little garden grow! It’s an exciting way for kids to explore nature and express their creativity. Let’s dive into the steps and make our beautiful artwork!
Easy To Make Germination Clay Artwork

Read More: How to Make Clay Flower Easy Tutorial for Kids
Materials Required
- Circular Cardboard
- Colored clay (Brown, Green, Blue, And Peach)
- Ruler
- Brown Paper Sheet
Procedure
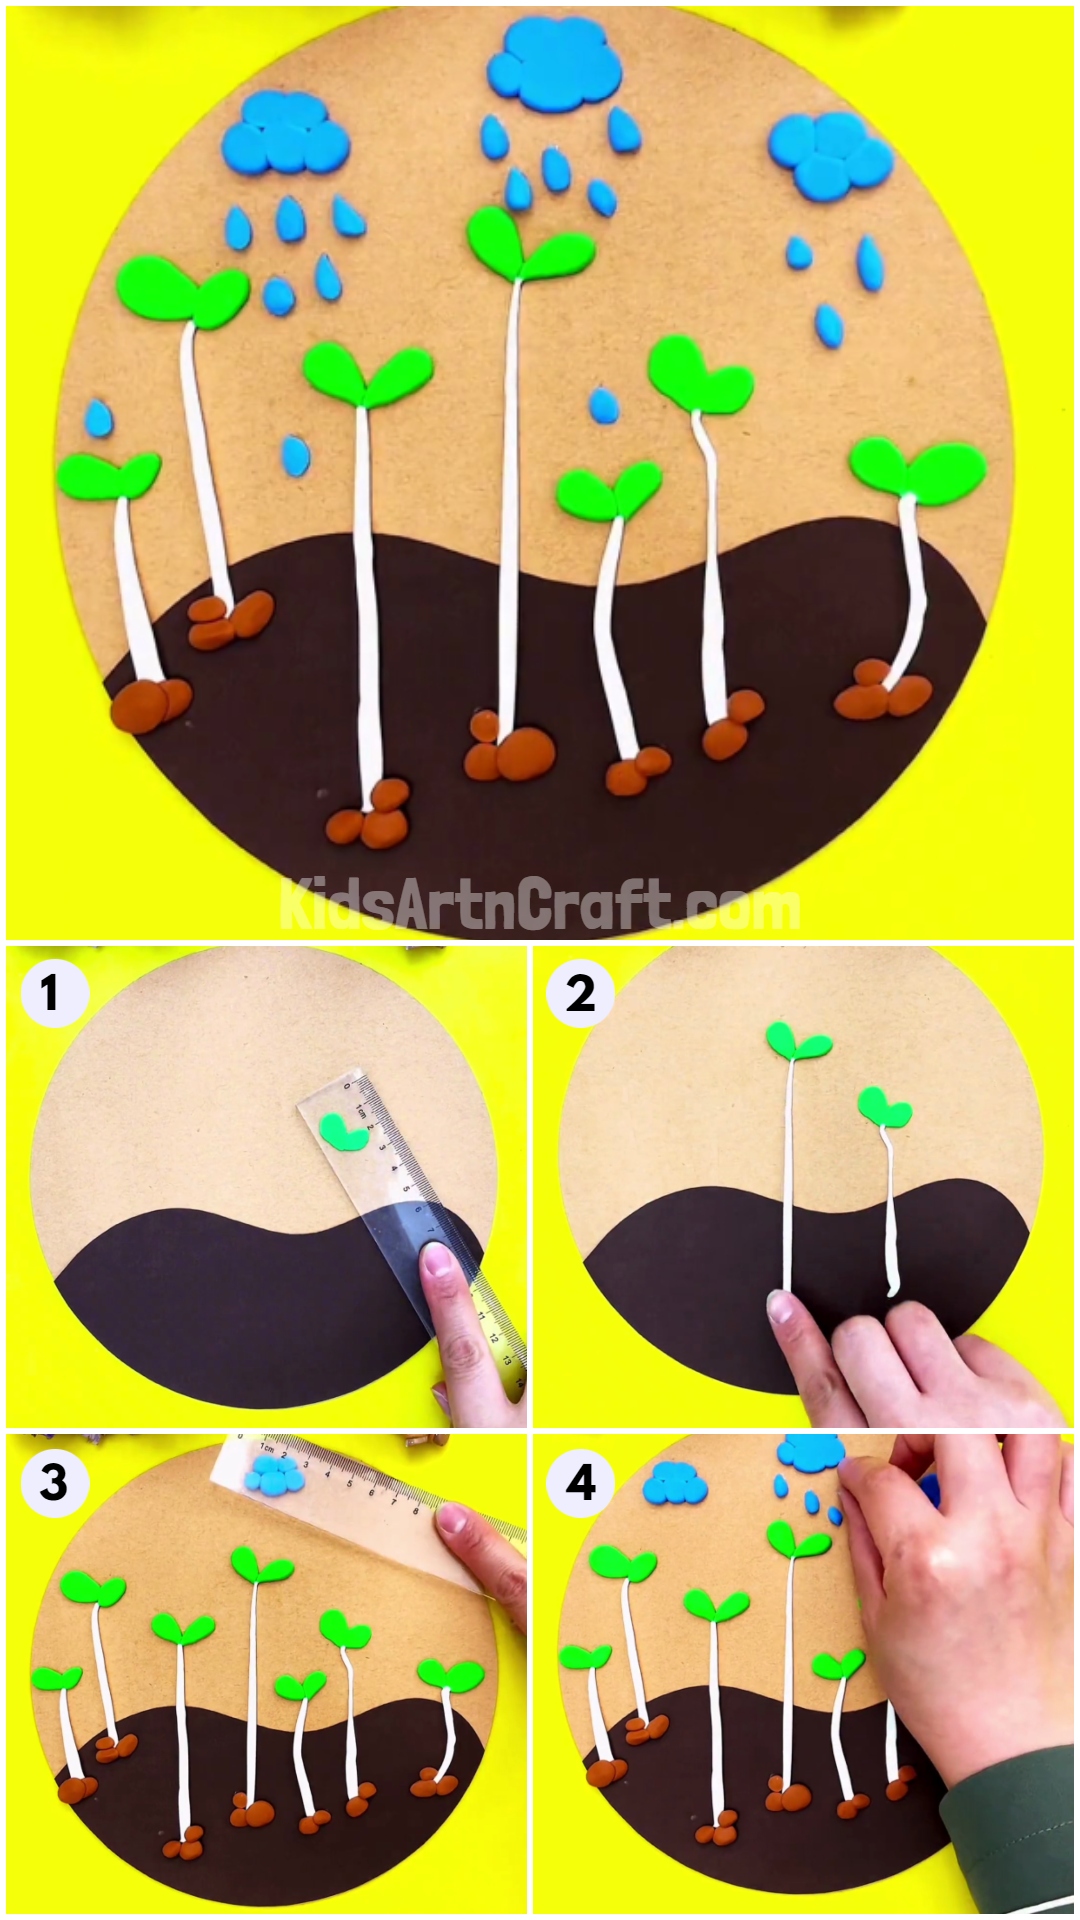
Step 1: Cutting And Pasting The Ground

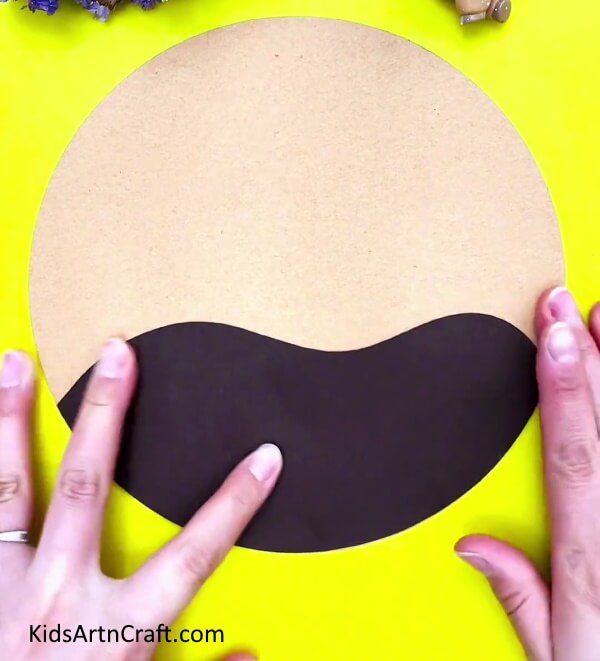
To begin this craft, take a circular cardboard and a brown paper sheet. Using scissors, cut a half-wavy semicircle shape from the brown sheet and paste it onto the bottom of the cardboard.
Step 2: Taking Out A Piece Of Green Clay

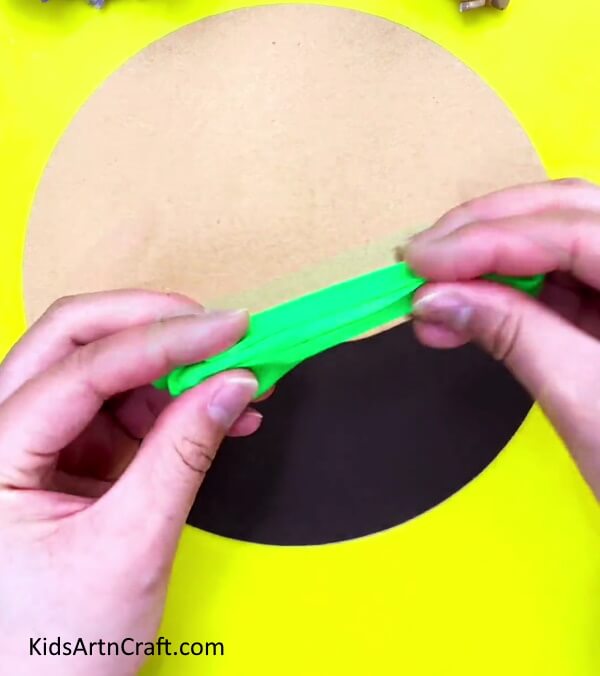
Take out a portion of green clay by stretching it out.
Step 3: Arranging Tiny Green Clay Pieces

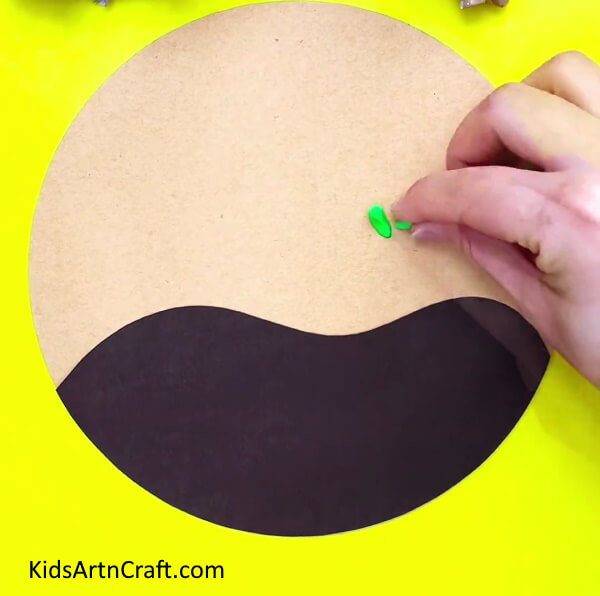
To create the leaf parts of the germinated seeds, use tiny pieces of green clay. Arrange them in the order shown in the image.
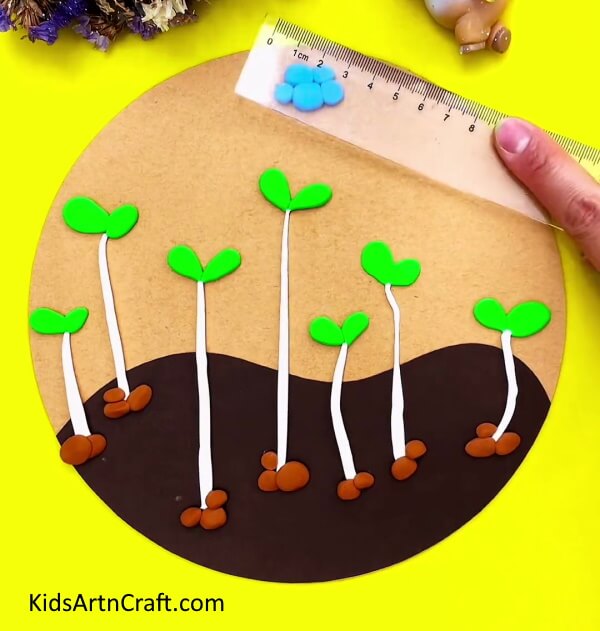
Step 4: Pressing With A Ruler To Shape The Leaves

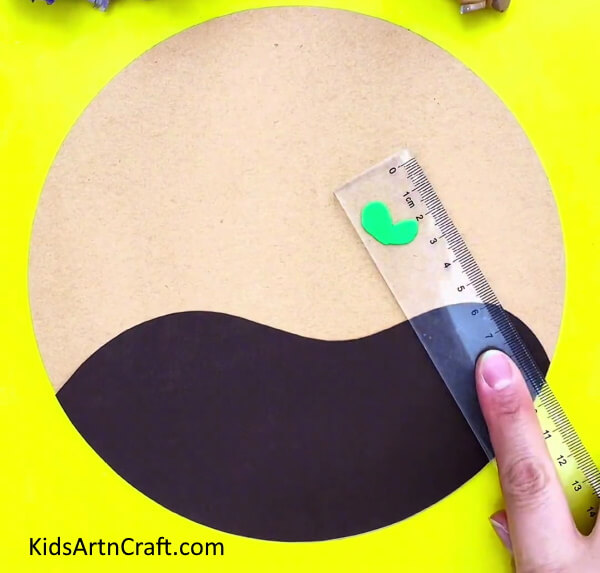
Take a ruler and press it gently on each green clay piece. Apply even pressure and carefully shape the clay to resemble leaves. The ruler helps in spreading and flattening the clay, giving it a leaf-like appearance.
Step 5: Making Another Leaf And Stems


Using a small amount of peach-colored clay, roll it between your hands to form a thin straight roll. Align this roll beneath the germinated seed leaf vertically to halfway to the ground. Also, make another leaf beside the one already made and again flatten it using the ruler.
Step 6: Attaching Stem To The Other Leaf

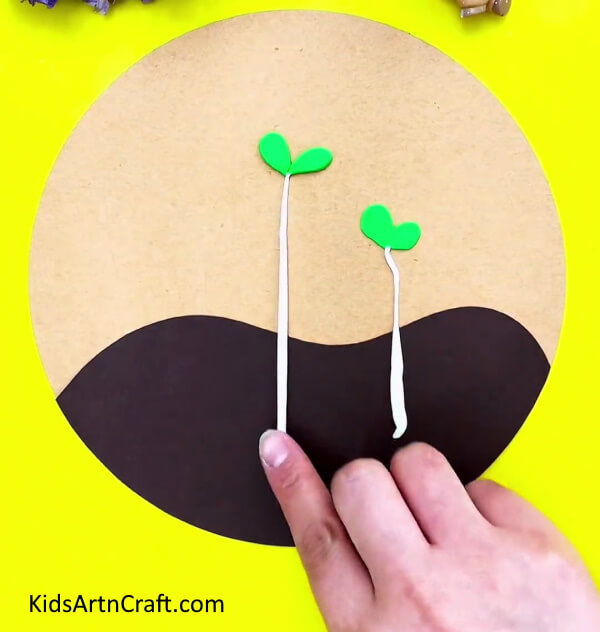
With your hands, gently press and attach the peach-colored clay stems onto the brown semicircle. Compress tit evenly and make sure it is firmly stuck to the background. To give a more natural look, curve the ends of each stem slightly outward, resembling the spread-out roots of germinated seeds.
Step 7: Making More Leaves And Stems

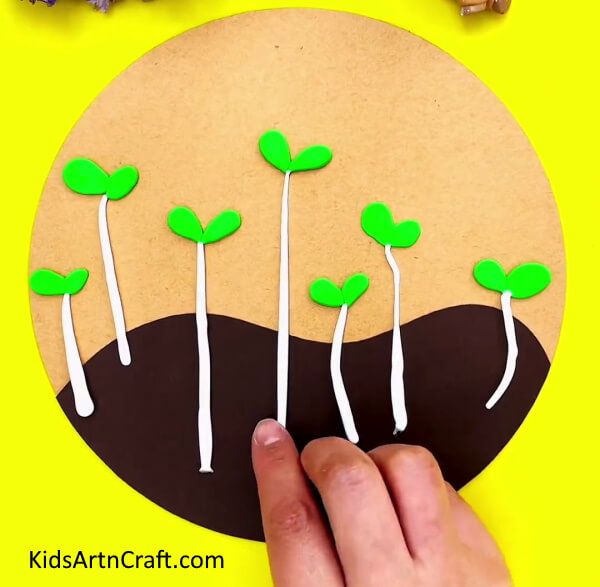
Follow the same previously mentioned steps to make 8 of the stems and leaves over the base.
Step 8: Making Sand Circles Beside The Germinating Seeds

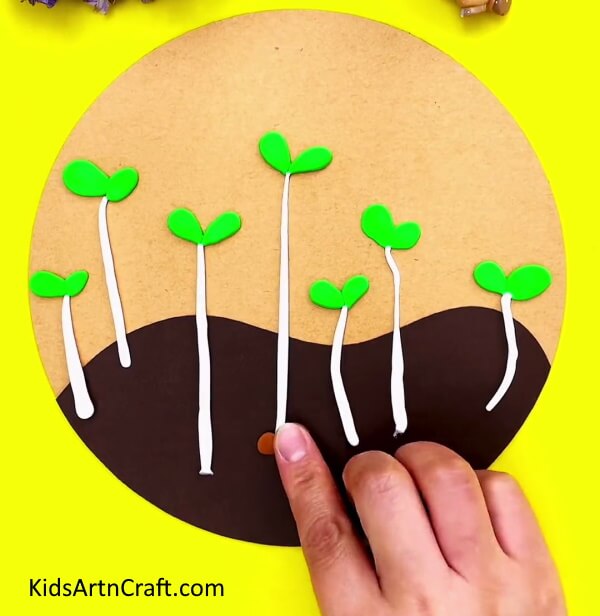
To make the drifted-apart sand after seed germination, take small pieces of brown clay and shape them into circles. Attach these circles to the end of each stem. Press them gently onto the stems to ensure they are firmly attached.
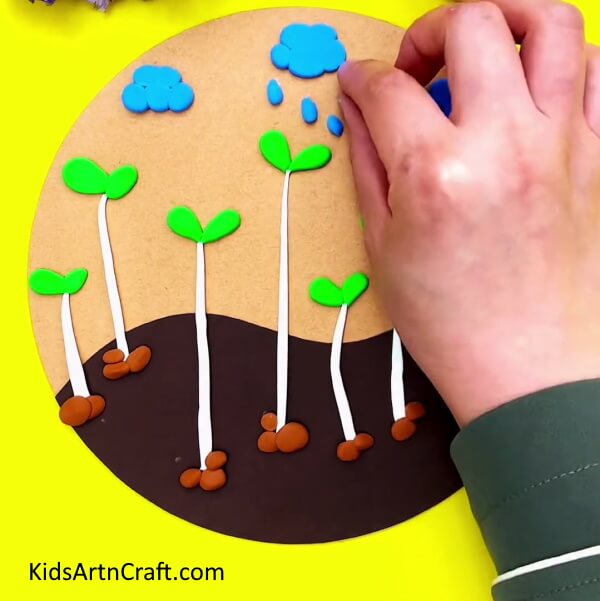
Step 9: Adding Clouds

Using blue clay, take small pieces and shape them into cloud-like forms. Place these clay pieces on the top portion of your artwork. Use a ruler to gently press the clay, giving it a flattened cloud-like appearance.
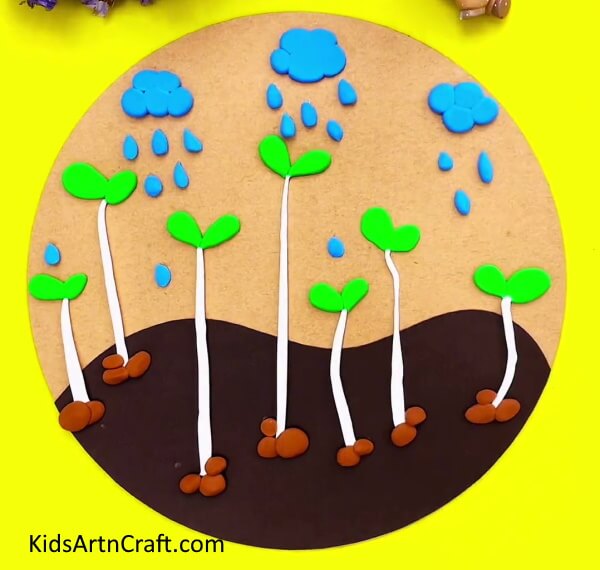
Step 10: Adding Raindrops

For raindrops, use small blue clay pieces, shape them into drops and position them in various areas of the artwork below the clouds.
Finally, Your Beautiful Seed Germination Artwork Is Ready!

Congratulations! You have completed your seed germination artwork using clay.
Admire your creation—it’s a beautiful representation of the germination process. You can display it as a decorative piece or use it for educational purposes. Stay tuned for more exciting projects on our website! Remember, art is a wonderful way to express your creativity and learn about nature. Enjoy the process and have fun exploring the world of clay art!
Follow us on Youtube for art and craft tutorials and much more.
More Articles from Kids Art & Craft
- How to Make Worms Using Clay For Kids
- Simple & Tasty Ice-Cream Craft Using Clay – Step-by-Step Tutorial
- Clay watermelon ice cream easy craft tutorial
- DIY Bees Clay Art Tutorial for Kids
- How To Make Caterpillar Eating Apple Using Clay