Home Decor
Pretty Straw Flower Bouquet Craft Tutorial For Kids

Plastic straw flowers! They will be your best DIY creation to date! Follow this step-by-step tutorial to make these flowers like a pro!
A warm welcome to you on this tutorial on making a beautiful colorful flower bouquet using plastic straws! In this tutorial, you will be guided through each and every step of making a flower, then its stem, then leaves. This tutorial is beginner friendly, which means that anyone who is new it crafting can make it too! This will definitely be a fun learning journey for anyone making these flowers! The minute details in these flowers make them look even more beautiful and professional and look like they are readymade! Grab the required materials and let’s begin with our craft!
DIY Straw Flower Bouquet Craft

Materials Required
- Blue And Green coloured Plastic Straws
- Scissors
- Double-sided Tape
- Green Craft Stick
Procedure
Step 1: Taking A Blue Straw
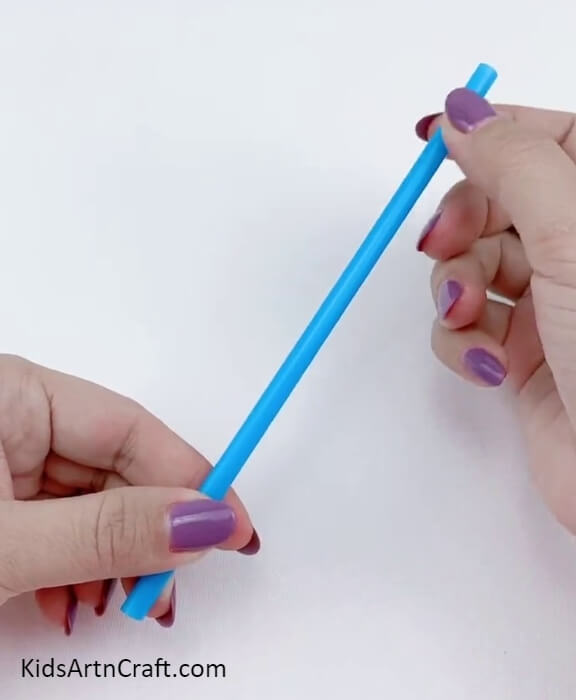

Let’s begin this craft by taking a blue-colored plastic straw.
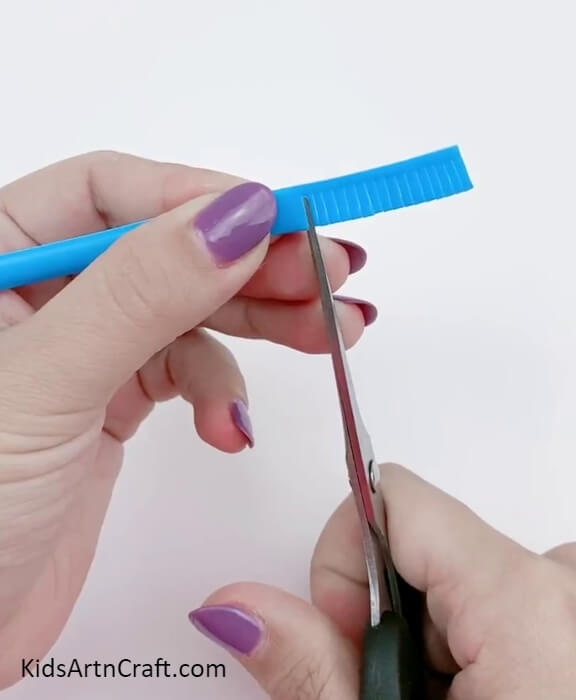
Step 2: Cutting A Tiny Strip

From the end of the straw, using scissors, make a tiny cutover from the longer side of the straw. Make sure to not cut to the very end and keep some relevant space.
Step 3: Cutting More Tiny Strips
Cut identical tiny strips as the first one, completely over the longer side of the straw
Step 4: Applying Double-Sided Tape
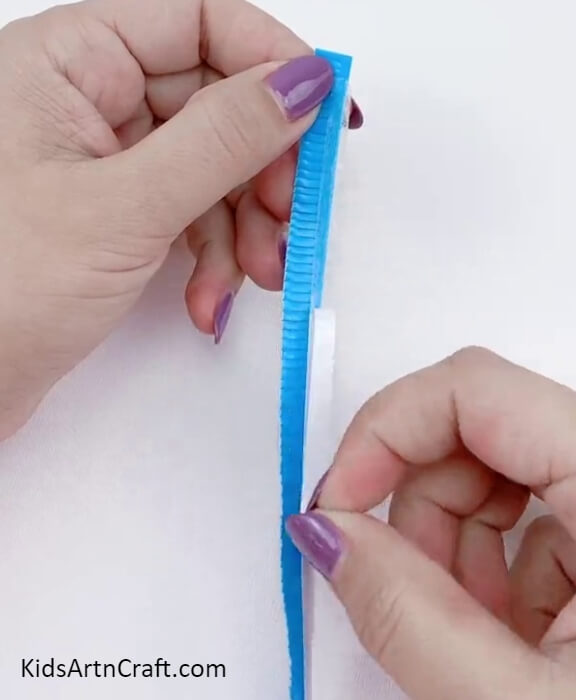
Apply double-sided tape on the non-cut strip corner of the whole straw. Make sure to not apply the tape of the cutted strips and cut out the extra tape coming out of the straw using scissors.
Step 5: Rolling Over The Straw
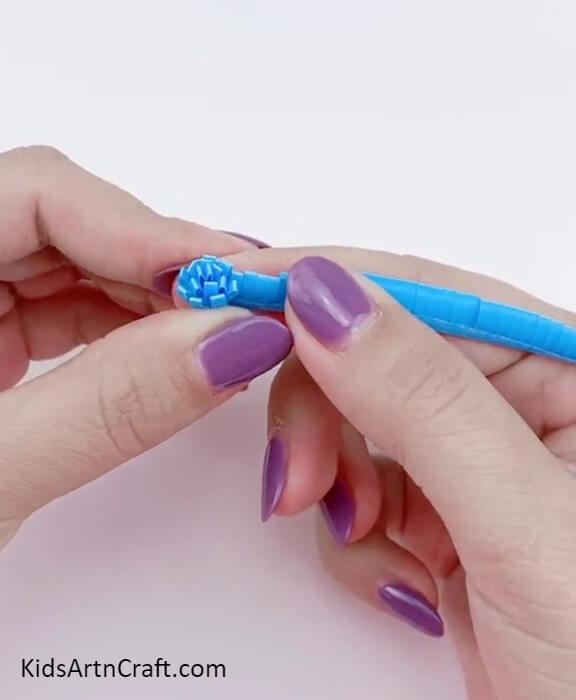
Now, roll over the straw tightly to make the double-sided tape stick to the roll.
Step 6: Forming A Flower
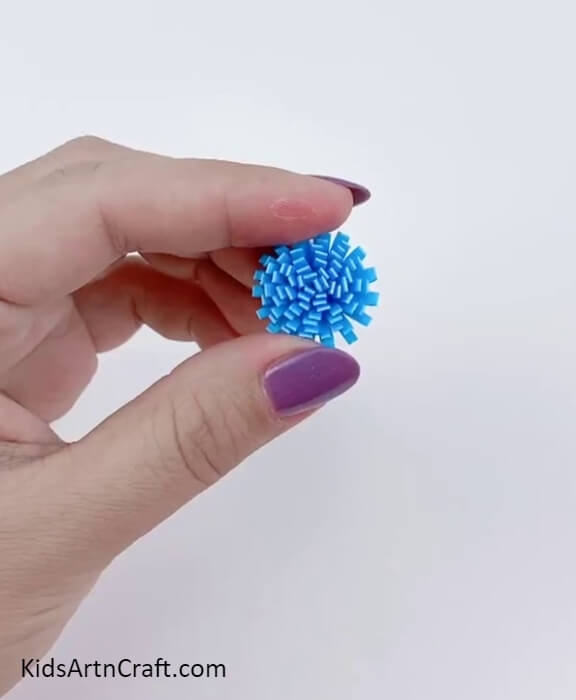
Completely roll over the whole straw and you will see a flower made.
Step 7: Pasting The Flower To Stem
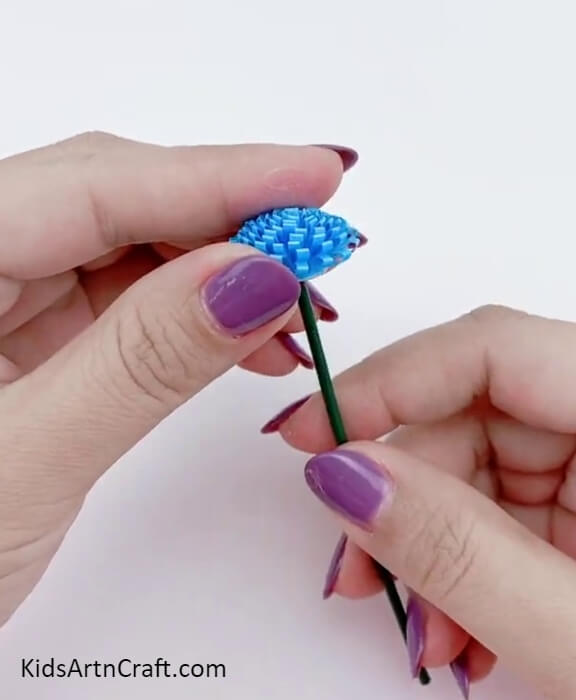
Take a green craft stick and using the double-sided tape, paste the flower from below to the top of the stick.
Step 8: Cutting A Green Straw
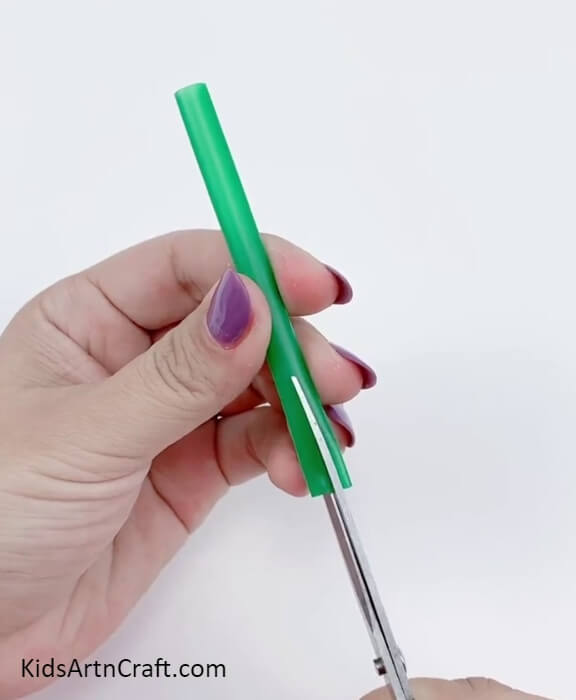
Take a green plastic straw and using scissors, cut it into half to make it shorter. Now, using the scissors, cut the scissor from the hole of it to make 4 sections till more than half of the straw piece. These will become the 4 leaves.
Step 9: Shaping The Leaves
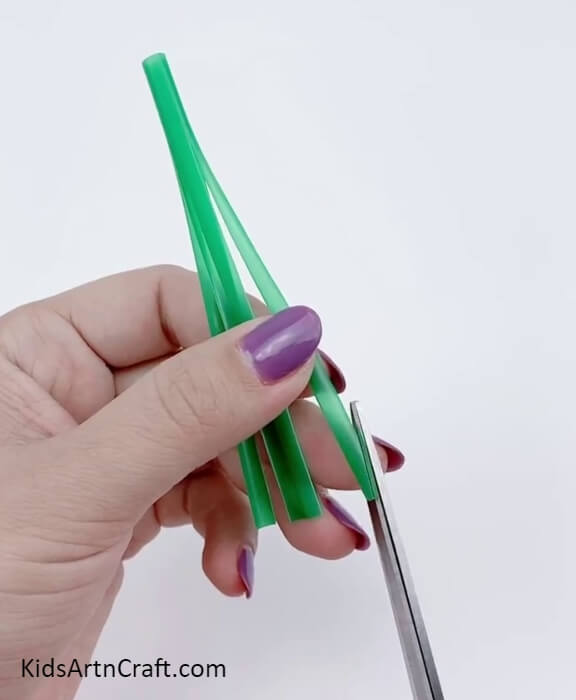
Make slating cuts over the top of each leaf to shape them.
Step 10: Pasting The Leaves To The Flower Stem
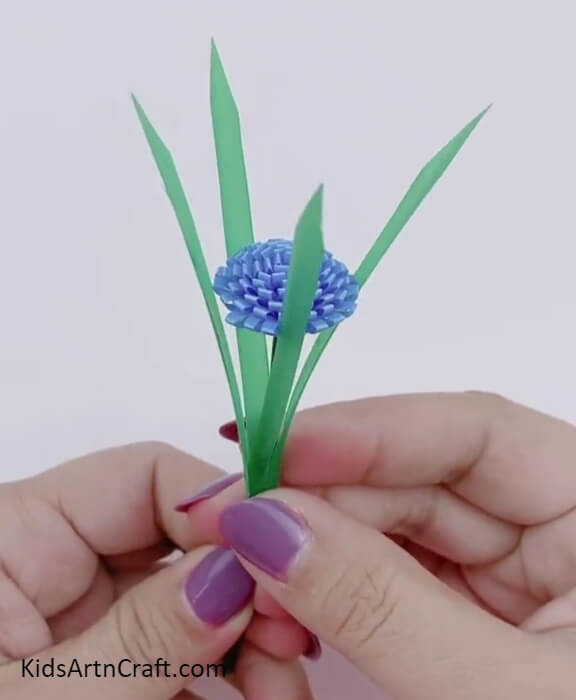
Apply double-sided tape over the stem and then insert the stem from the hole, pinch it to make it stick to the stem.
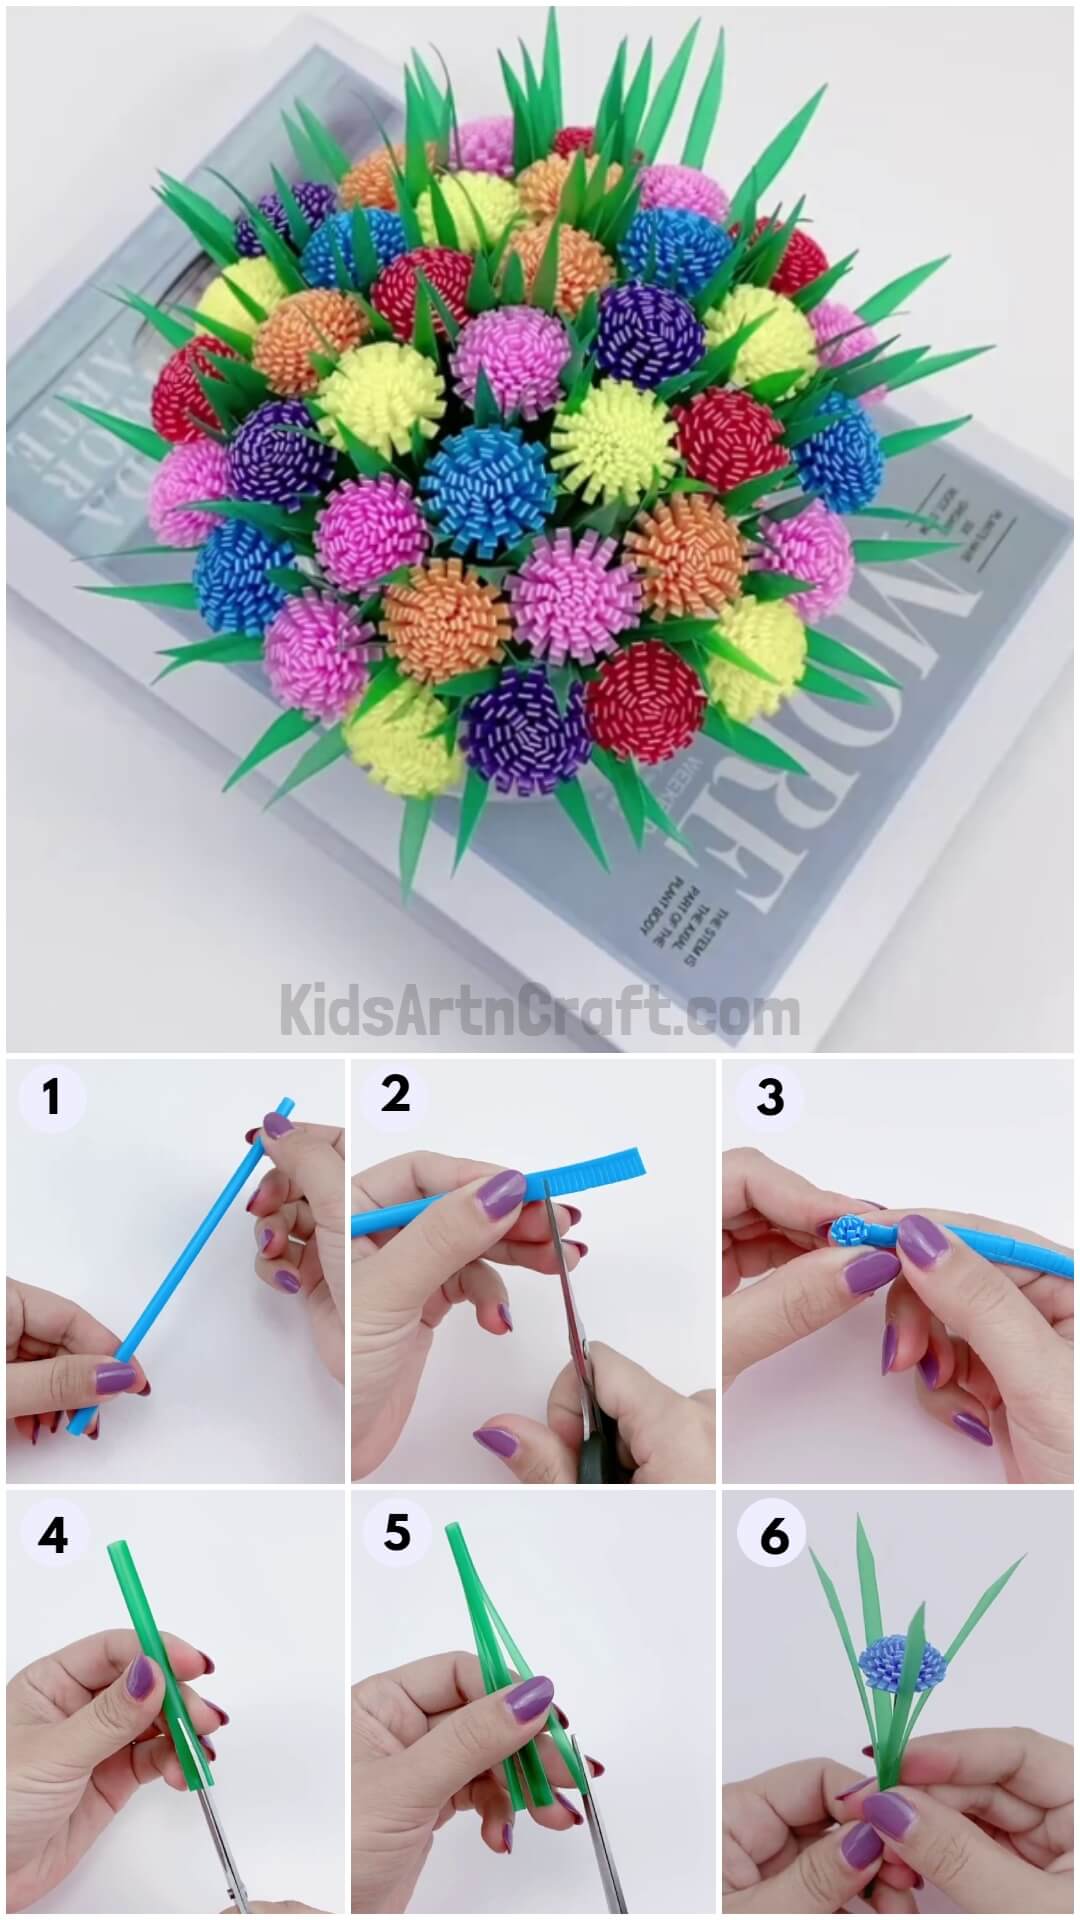
Finally ! Your Pretty Flowers In A Bouquet!
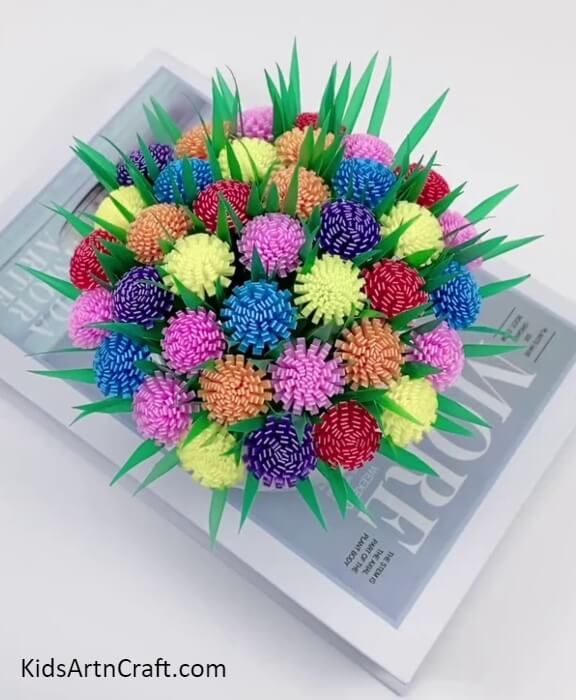
Create a whole bunch of these flowers using more colorful straws to make colorful flowers, and arrange them all together to form a pretty bouquet!
Voila! Look at the final results of these flowers! They surely look stunning!
You can now create a bouquet of them and decorate them as a centerpiece on the table or can even decorate them in any room’s corner to brighten it up! The beautifully vibrant colors of these flowers will add color to any corner! The plastic flowers shine and don’t even die! You can easily clean them up if they are dusty after some time to make them new again! These flowers can also be used as a gift for your loved ones!
Follow us on Youtube for art and craft tutorials and much more.
More Articles from Kids Art & Craft
- DIY Flower Basket Step by Step Tutorials for Kids
- How to make Sunflower From Paper Cup Craft
- Button Crafts For Senior Students
- How to Make Paper Cup Wrist Watch Tutorial for Kids
- DIY Foam Net Home Craft For Kids