Paper Crafts
Cute Tiger Cub Paper Craft Step-by-Step Tutorial For Kids

This article is a guide for kids to make a tiger cub out of paper, scissors, and glue. It has clear instructions and pictures to show them how to make a fun and special tiger craft.
Not only house cats and wild cats also a cute create. Wild cats are not only cute, but they are also very powerful too. Tiger is one of those wild cats, which is also more powerful like lions. Tiger is the national animal of India. Do you want to create cute tiger by yourself? In this tutorial, we going to learn how to create a cute tiger craft with color paper. This small and cute orange tiger cub craft is really easy to make. Are you ready to create your own cute tiger cub? Let’s start.
DIY Cute Tiger Cub Paper Craft For Kids

Read More: Fresh Leaf Hedgehog Craft Tutorial For Kids
Materials Required
- Color craft papers (Orange & Yellow)
- Glue
- Sketch pens (Black& Red)
- Small amount of white clay
Procedure
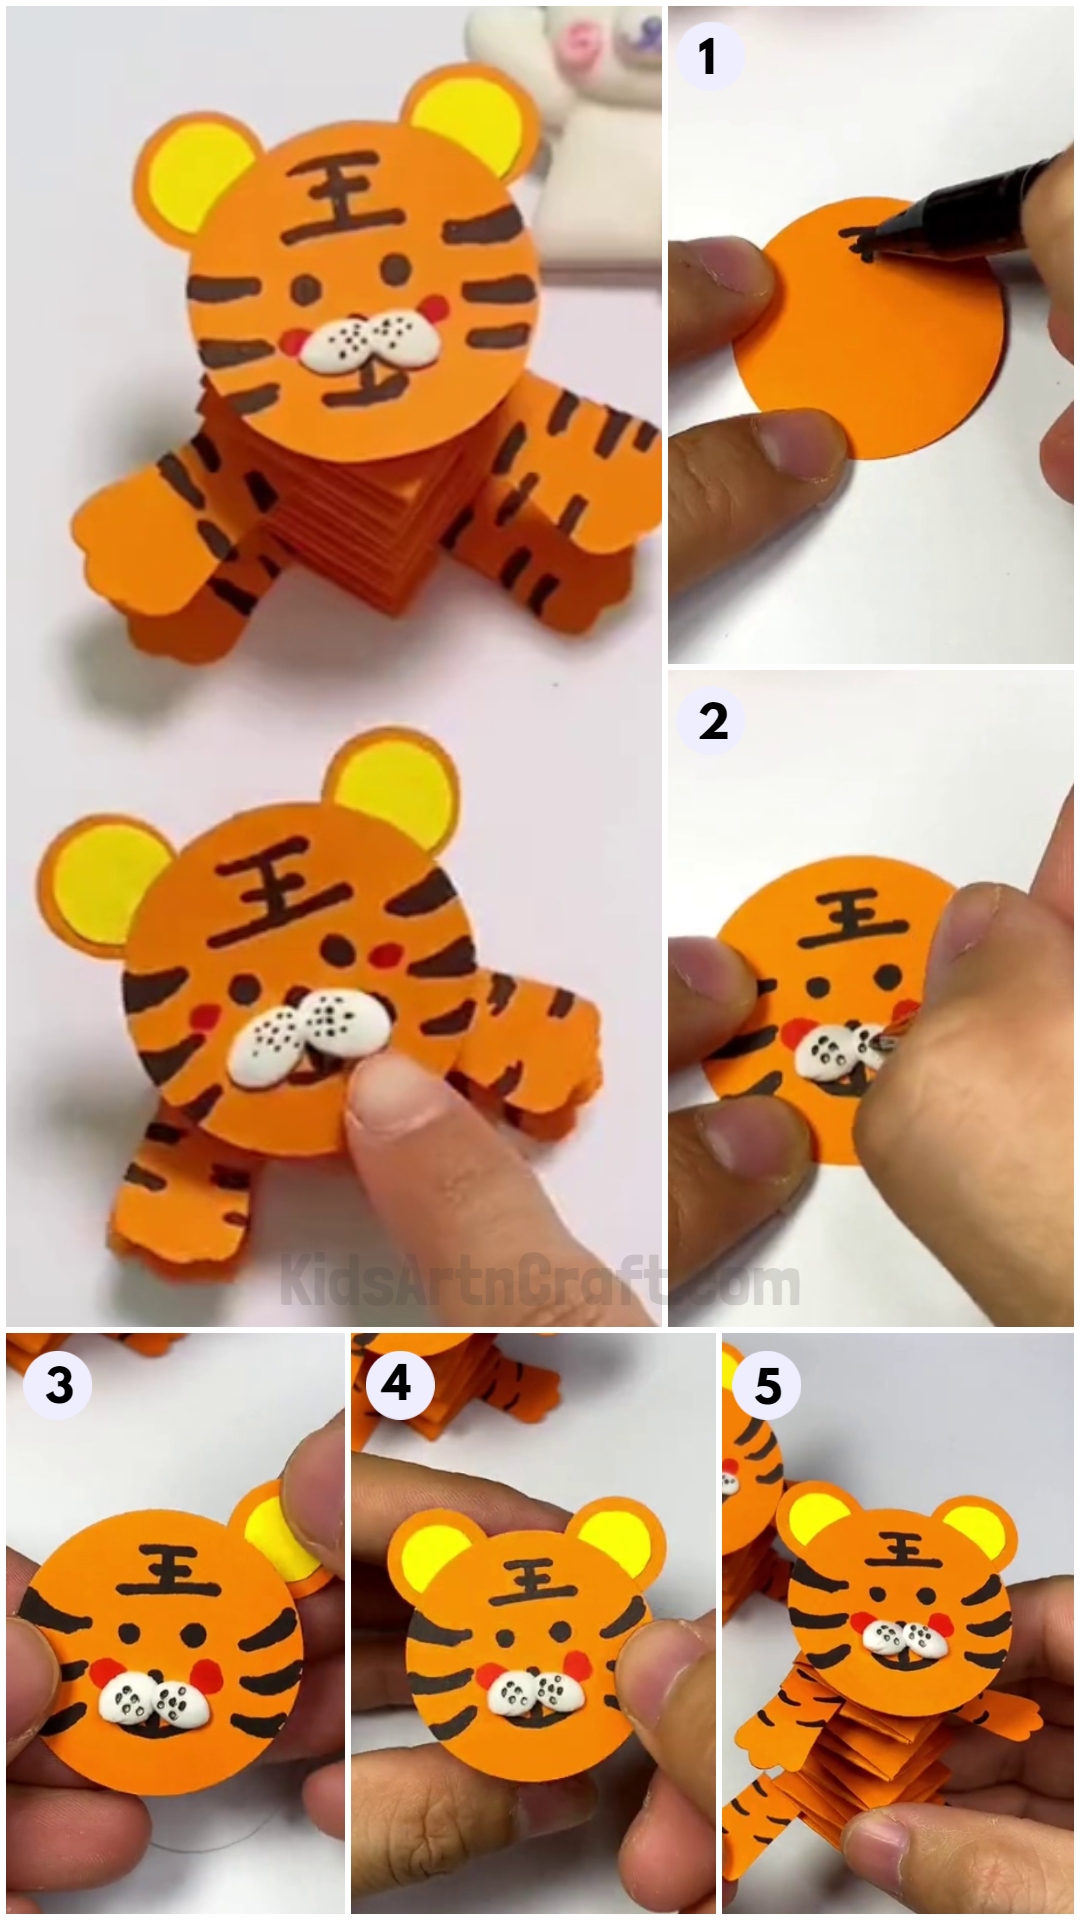
Step 1: Cutting Two Strips From Orange Color Paper
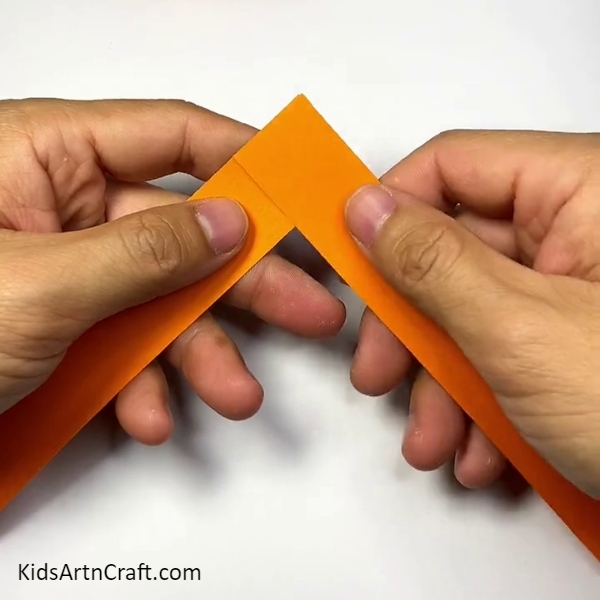

Let’s begin with cut two thick strips from orange color craft paper and paste one end of each strips together with the use of glue.
Step 2: Folding Strips to Create Tiger’s Cub Body
Fold both papers together in zigzag manner as shown in the image.
Step 3: Cutting a Circle From Orange Paper For Tiger Cub Face
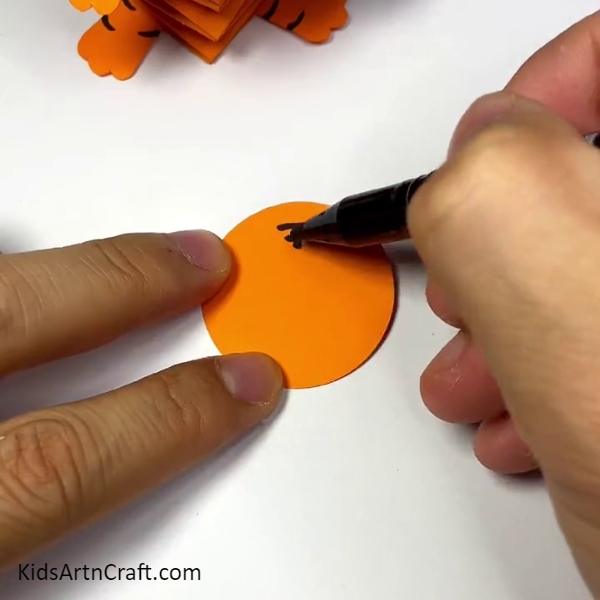
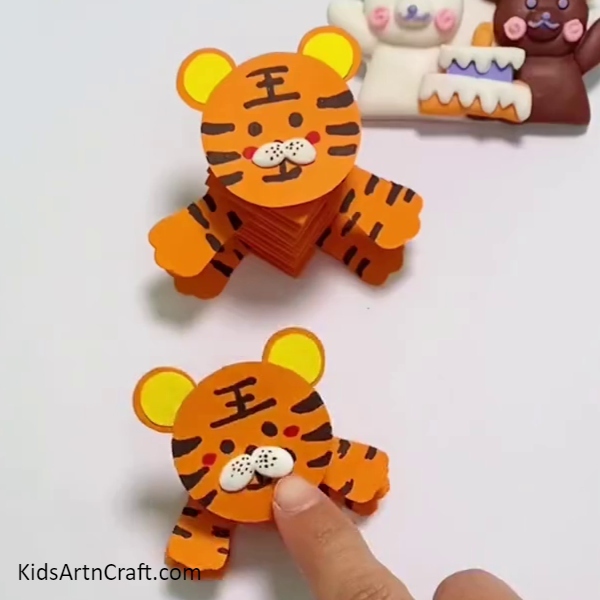
Cut a 3 cm circle from orange color craft paper with scissors to create tiger cub face and with the use of black sketch pen horizontally draw two medium lines on top of that circle and draw one vertical line on those two lines, then under those two lines draw one little long horizontal line.
Step 4: Drawing Eyes, Mouth and Mustache on Orange Circle
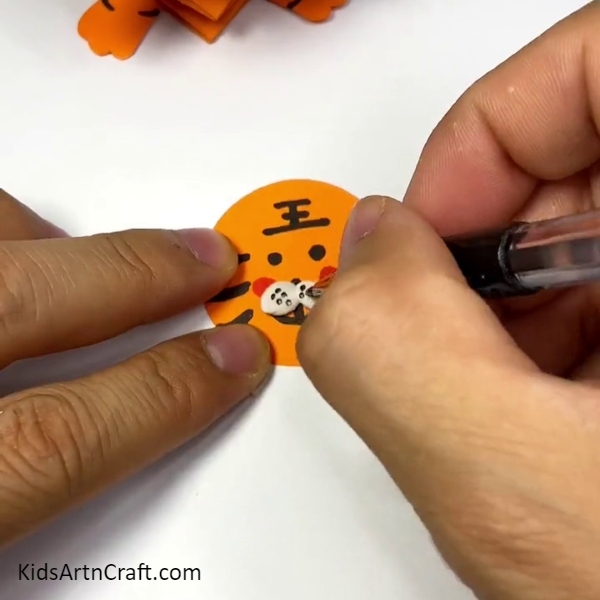
Draw three dark lines on left and right side of orange circle and put two dots for eyes. Under tiger cub eyes draw two medium circles compared to eyes, using red pen. In-between those red circles draw one small vertical line and under that vertical line, draw one upward facing curvy line. Paste two small pieces of white clay on that vertical line and put dots on it.
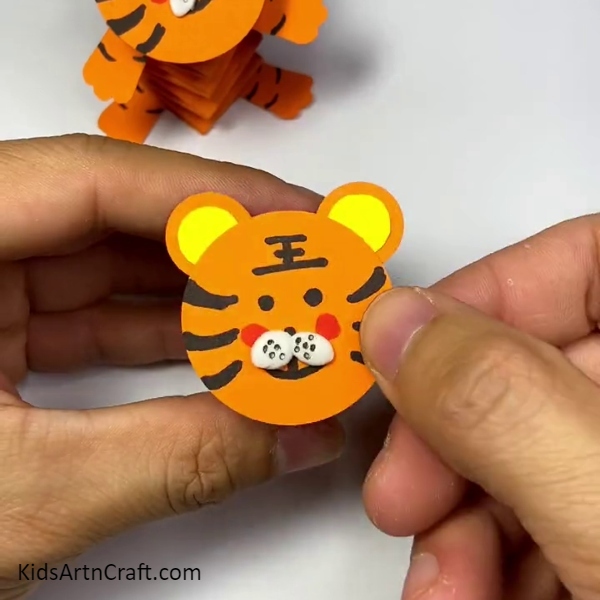
Step 5: Creating and Pasting Tiger Cub Ears
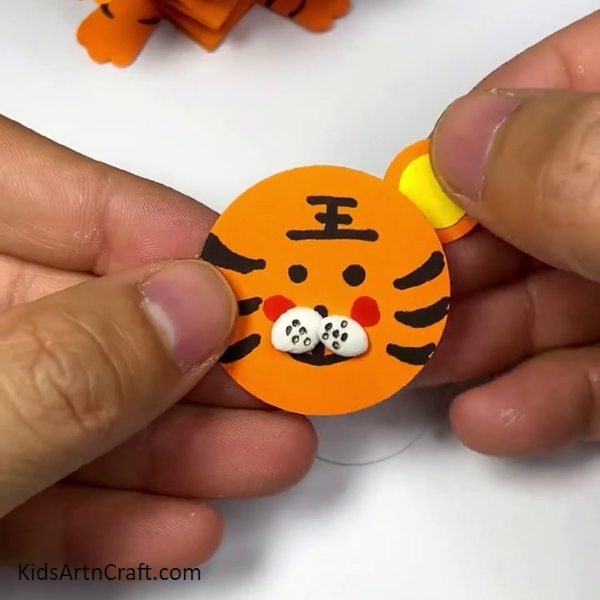
Cut two 1 cm circles from orange paper and two 0.5 cm circles from yellow color paper. Then paste two yellow circles on both orange circles to create ears. Paste those ears behind tiger’s cub head.
Step 6: Pasting Tiger Cub Face with Body
Now paste tiger’s cub head with that zigzag folded paper using glue.
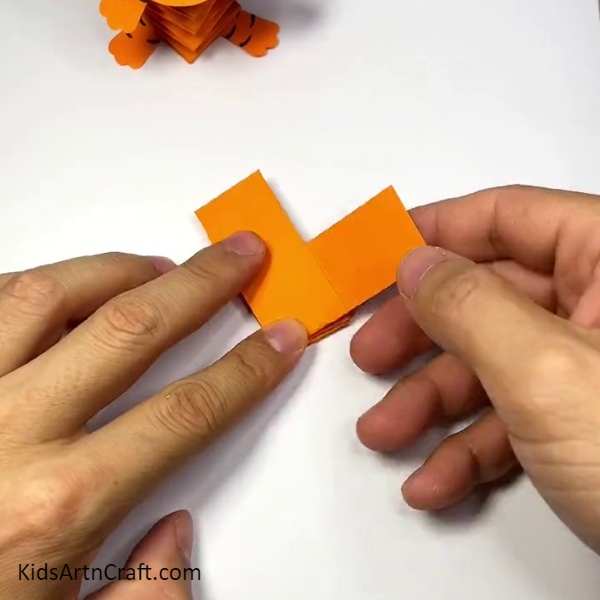
Step 7: Creating Legs and Pasting It
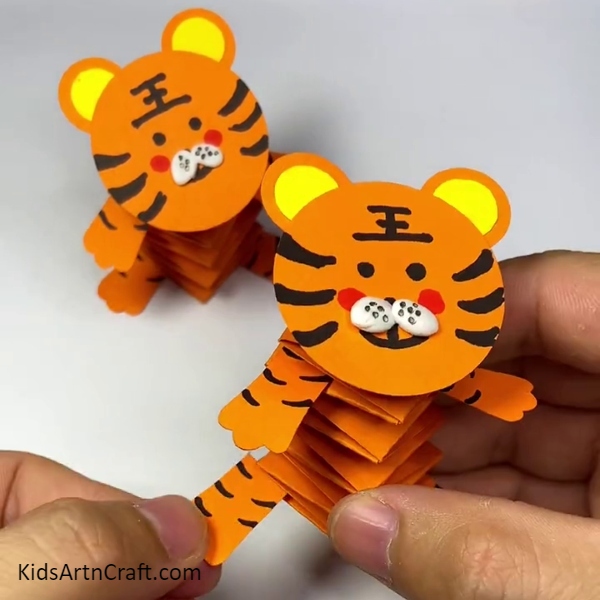
Then, cut 4 pieces from orange paper for legs as shown in the image and draw small lines on each pieces with the use of black pen. Then, paste two pieces of legs under head and another two on bottom of zigzag folded paper as shown.
Hurray !! Your Cute Paper Tiger Cub is Ready !!
That’s all everyone, our cute orange tiger cub is ready. Not so terrific but cute right who doesn’t love this cute tiger? In this tutorial, we give you clear step-by-step instructions to create this cute tiger cub craft.
Hope you all like this cute craft. This craft is adorable and super easy to create, this craft is perfect for kids. If you are looking for more simple and cute crafts like this, visit our website. Leave some comments in the comment box.
Some More Tiger Craft Tutorial
Simple Tiger Craft with a Paper Cup For Children

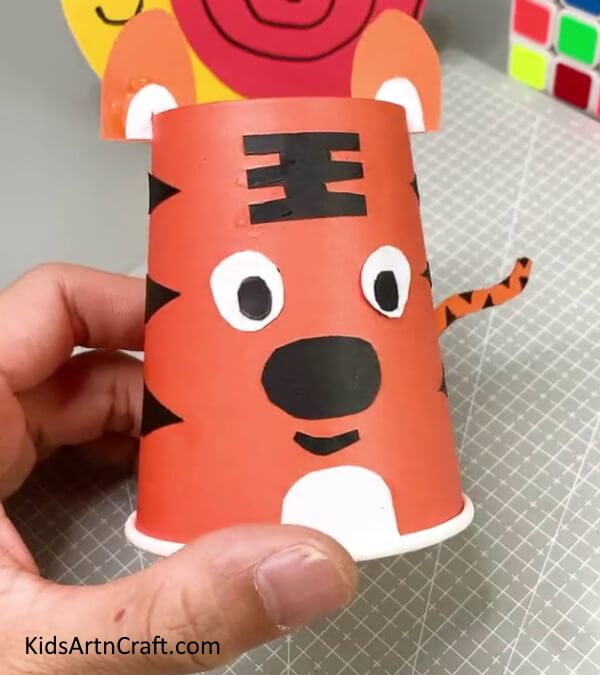
Image Source/Tutorial: Kids Art & Craft
This simple tiger craft is an easy and fun way to keep your children entertained and creative. All you need is a paper cup, paint, and a few other materials, and they can make their own tiger! It’s a great way to spend time with your children and get them to create something fun!
Thank you for visiting us!
Follow us on Youtube for art and craft tutorials and much more.
More Articles from Kids Art & Craft
- DIY Bird Nest Paper Craft For Kids
- Easy Paper & Popsicle Cloud Rainbow Craft For Kids
- Easy Frog Paper Craft For Kids Easy Tutorial
- How to Make Easy Paper Snowflakes Tutorial
- How to Make a Paper Fall Leaf for Kids