Paper Crafts
Cute Tissue Box Craft Tutorial For Kids

Bring your child’s creativity to life with this craft tutorial! This simple and fun guide will help your kids make a unique tissue box cover out of cardboard, paint, and other craft supplies. Let your kids have some creative fun and brighten up their bedroom or any room in the house!
Tissue box is something that you are in need of all the time, whether in the kitchen while cooking, for drying your hands after washing them or to wipe your nose and tears when you have flu or when you are sad. Today’s tutorial brings to you a craft replicating these tissue boxes. With some sheets of paper, you can make this box. So, get ready with all the material required and some small tissue papers to fill the box with, and let’s get started.
Cute Tissue Box Craft Tutorial For Kids

Read More: Summer Paper Fan Step by Step Tutorial for Kids
Material Required
- Sheets of small wrapping papers sharing same prints on both sides.
- Paper cutter
- A black and a pink sketch pen
- Small tissue papers
Procedure
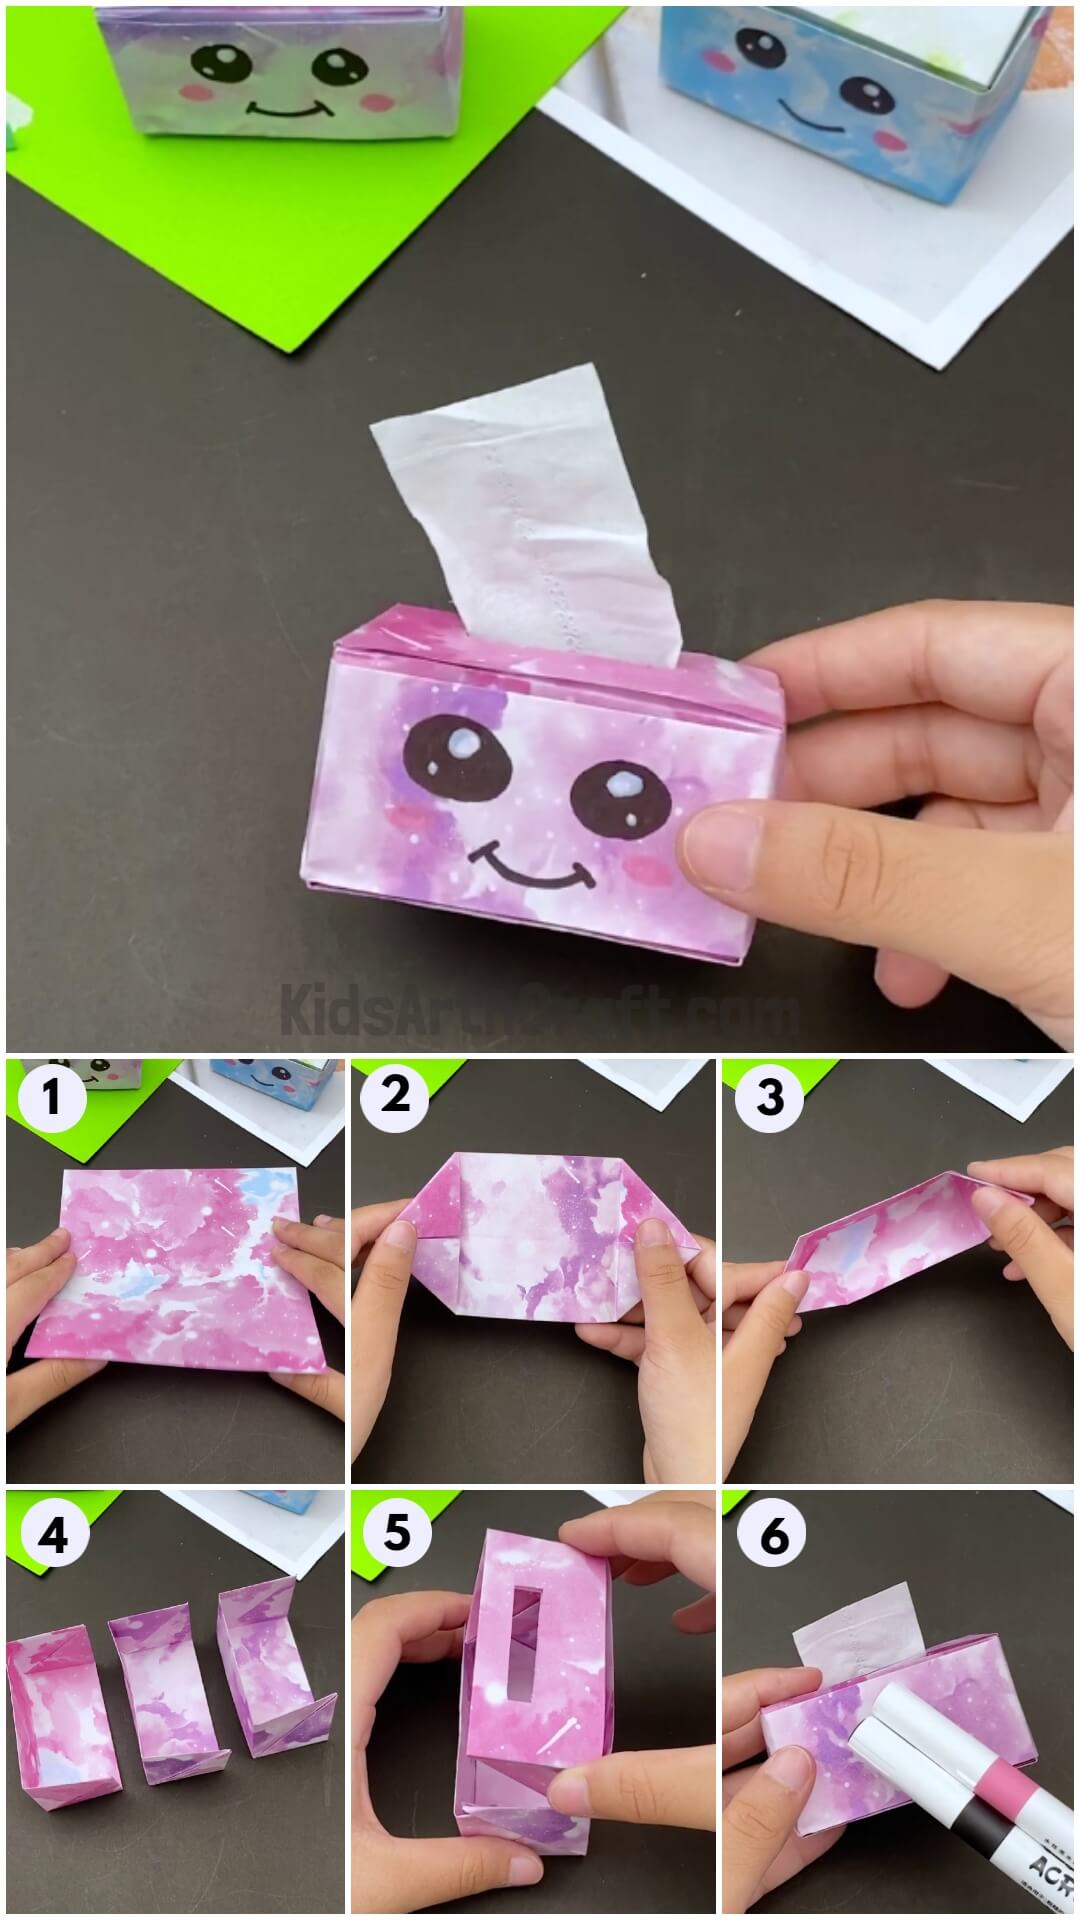
Step 1: Starting With A Single Sheet Of Paper
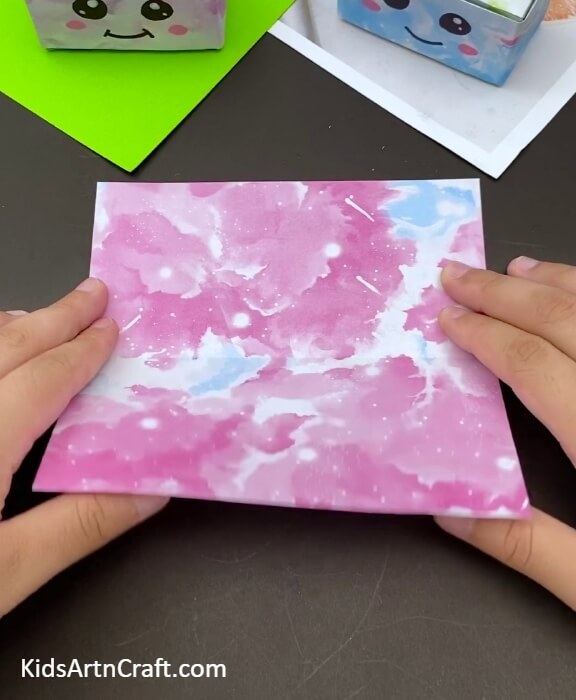

Take a sheet of paper and fold it in the middle making it half in size.
Step 2: Pressing Down On The Fold

Press down on the fold with your finger nail to seal the shape. See the picture below for reference.
Step 3: Making A Fold On One Of The Corner
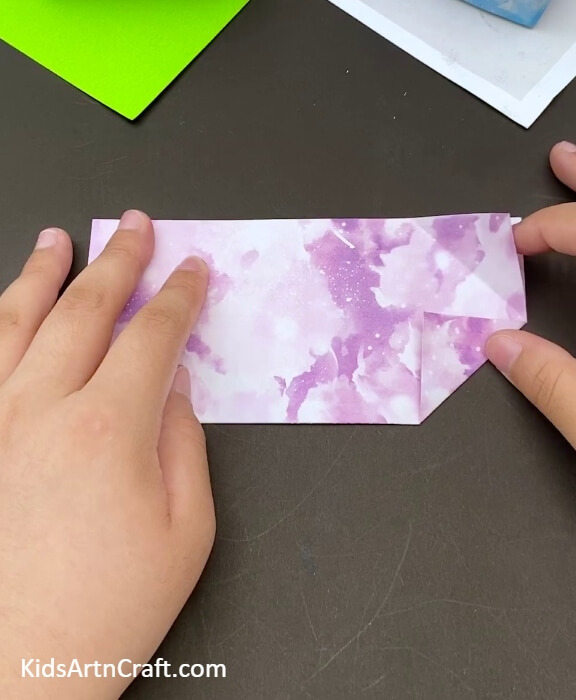
Make a fold on the bottom right corner of the sheet falling on the folded side. See the picture below for reference.
Step 4: Making Another Fold On The Top Corner
Make a fold on the top right corner of the sheet. This time, since, the corner falls on the open ended side, fold the top sheet only leaving the sheet beneath as it is. After making the folds, the ends should fall next to each other as shown in the picture below.
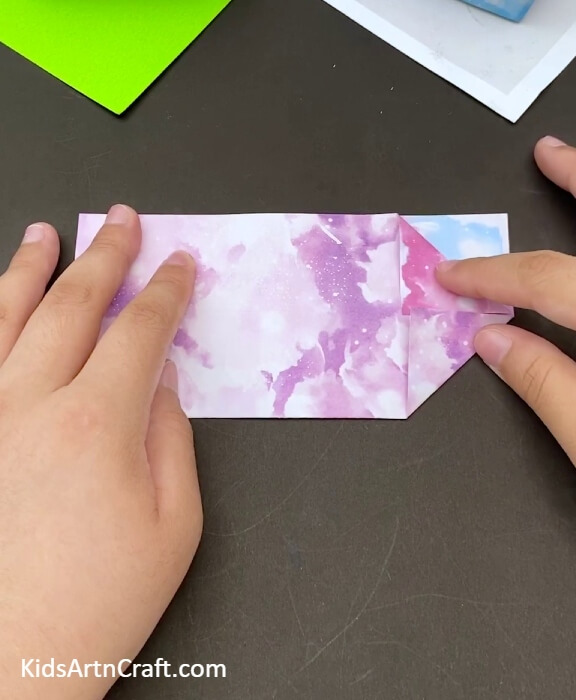
Step 5: Make Folds On The Other Side Of The Sheet
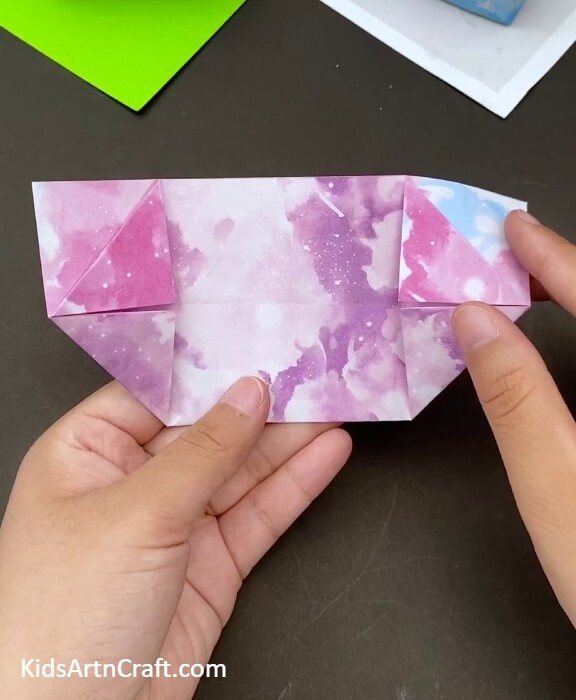
Repeat the previous two steps on the side opposite to the one you just made folds on. See the picture below for reference. You now have four folds on the corners of the sheet.
Step 6: Making Folds On The Sheet Beneath
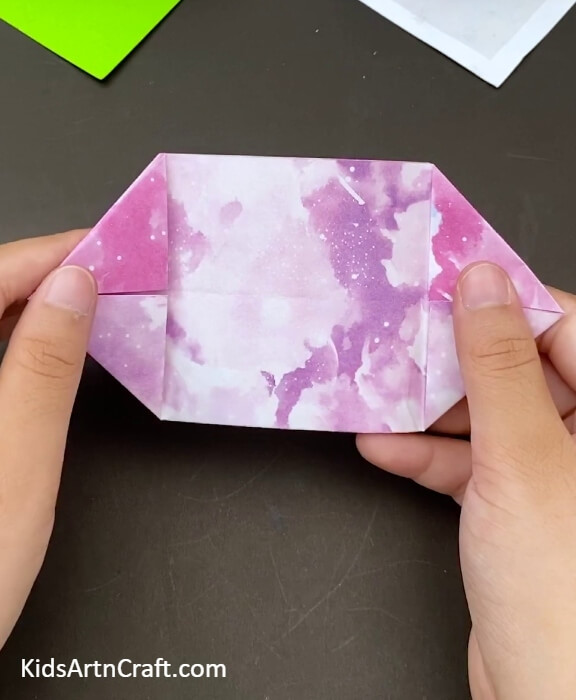
Make folds on the open ended two corners if the sheet beneath. These folds should be made in the outward direction as shown in the picture below. Finally, fold the triangle shapes on the two sides of the sheets up to the middle of the sheet. Press it down to make the marks prominent and undo the folds.
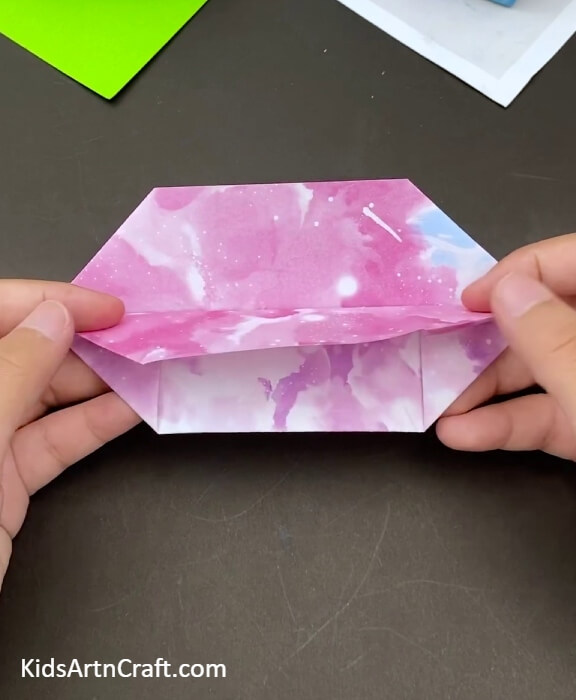
Step 7: Folding The Sheet In The Top Area In Opposite Direction
Take the area of the sheet lying above the mark in the middle and fold it backwards to align it with the sheet below the mark in the middle. See the picture below for reference. Now, fold the sheet which was lying beneath the sheet you just folded. The fold needs to be done in backward motion aligning it with the bottom portion of the sheet at the back.
Step 8: Opening The Shape A Little
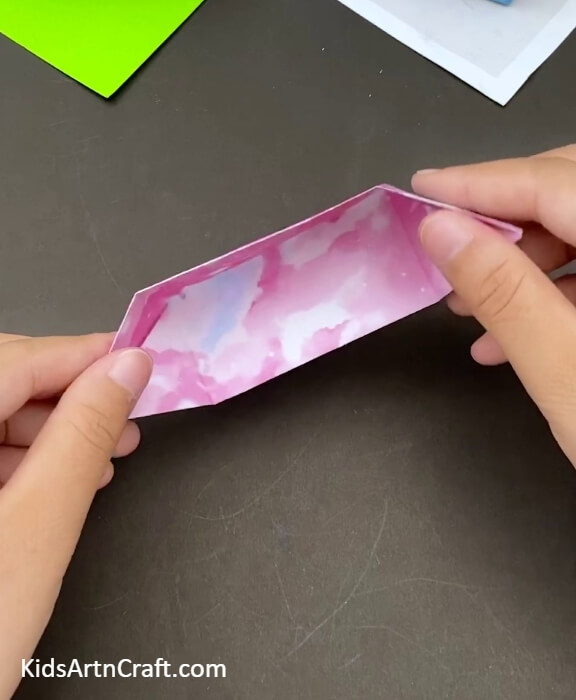
After making all the folds, the sheet must look flat. Turn the sheet on the sides of the sealed ends and inserting your fingers in the pocket formed these sealed sides, open it to make the sides stand using the help of the folding marks you made earlier. See the picture below for reference.
Step 9: Making Two More Such Shapes
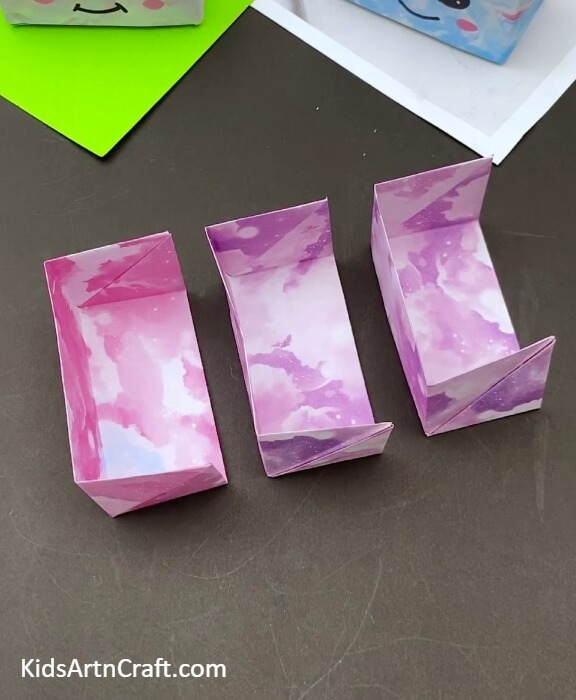
Shape the sides of this shape to make them geometric and looking like a shelf. Follow the entire procedure mentioned above in the form of steps and make two more such shelf shapes. You need to make three such shapes in total. See the picture below for reference.
Step 10: Fitting Two Of The Shapes Together
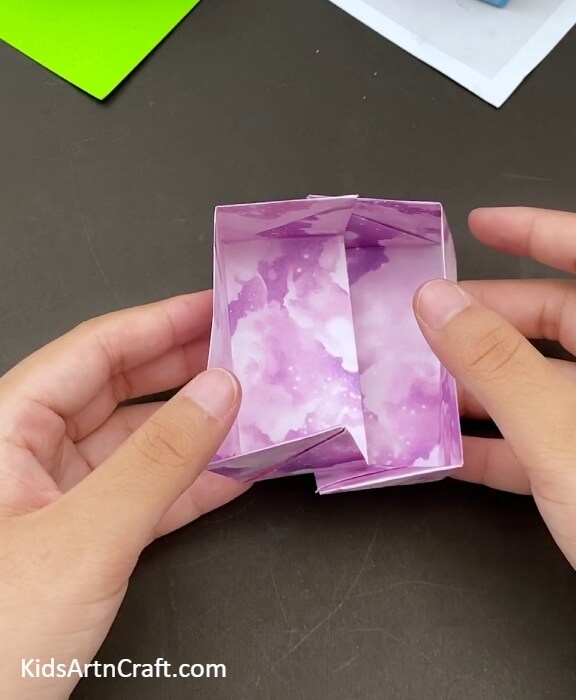
Fit one of the shape inside the open cavity of the other as shown in the picture below.
Step 11: Locking The Sides In
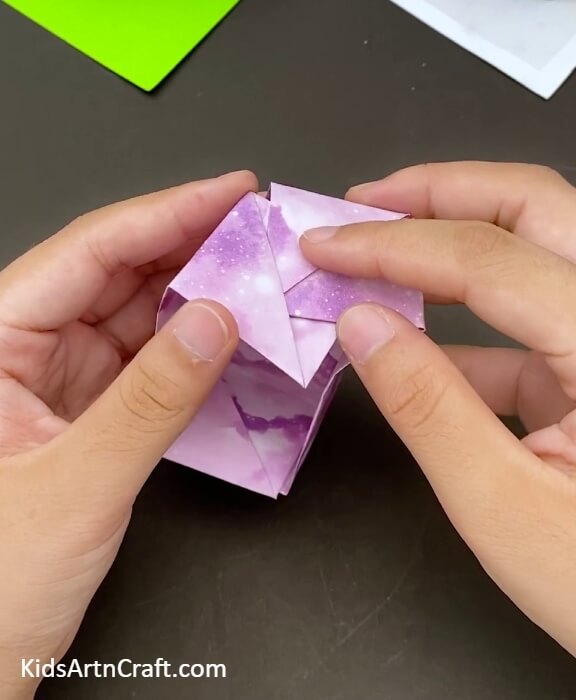
Take the sides of the shape which you used to fit the other shape in and insert the corner of its side in the little opening pocket on the side of the other box as shown in the picture below. Repeat the process on the other side as well. We now have a box which shall hold all the tissues in it.
Step 12: Working On The Third Shape You Made Earlier
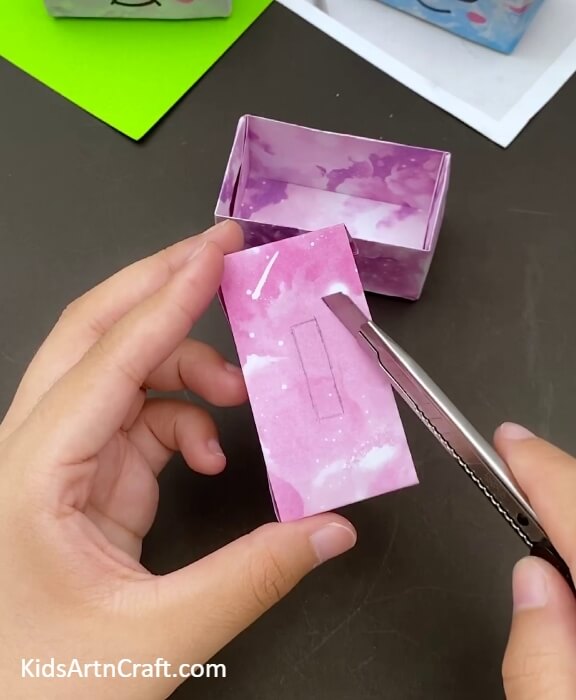
Take the third and the final shape you made earlier and make a small rectangle in the middle of its top surface as shown in the picture below. Now, take a paper cutter and cut on the lines of this rectangle.
Step 13: Fitting The Shape In The Box
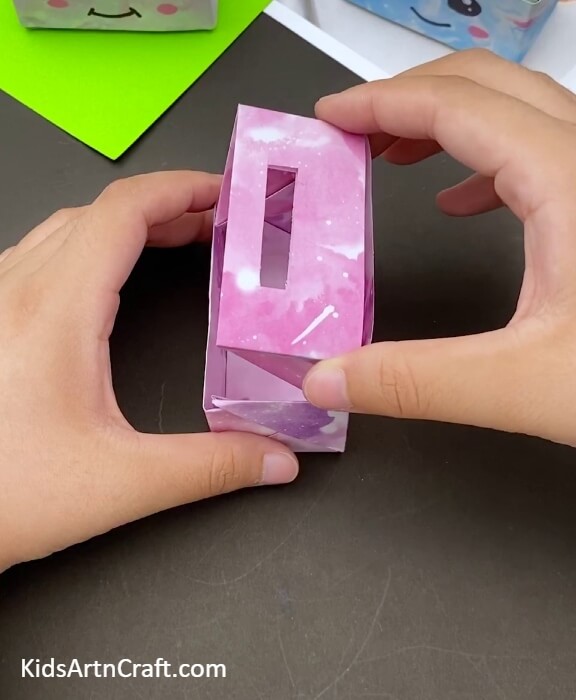
The shape now has a rectangular hole in the middle which will be used to pull the tissues out of the box. Now, fit this shape in the box from the top, fitting the sides of the shape inside the box. See the picture below for reference. This completes the process of making the tissue box structure.
Step 14: Placing The Tissues In The Box
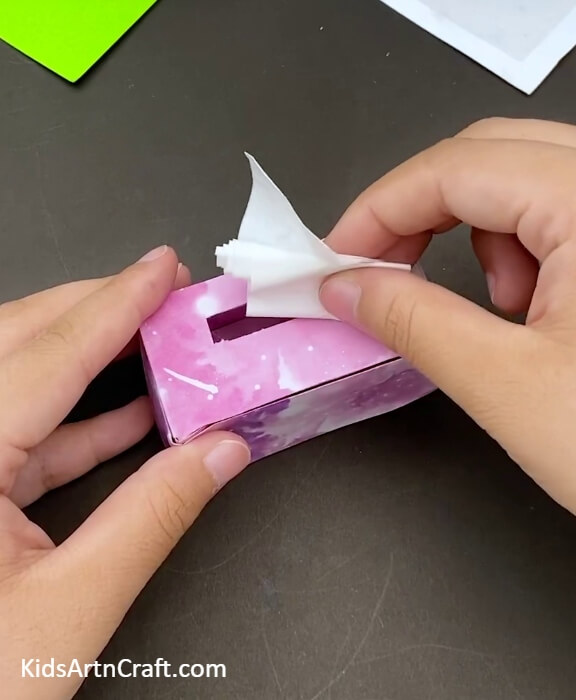
Put some tissues in the box through the hole on top of the box. See the picture below for reference.
Step 15: Working With The Sketch Pens
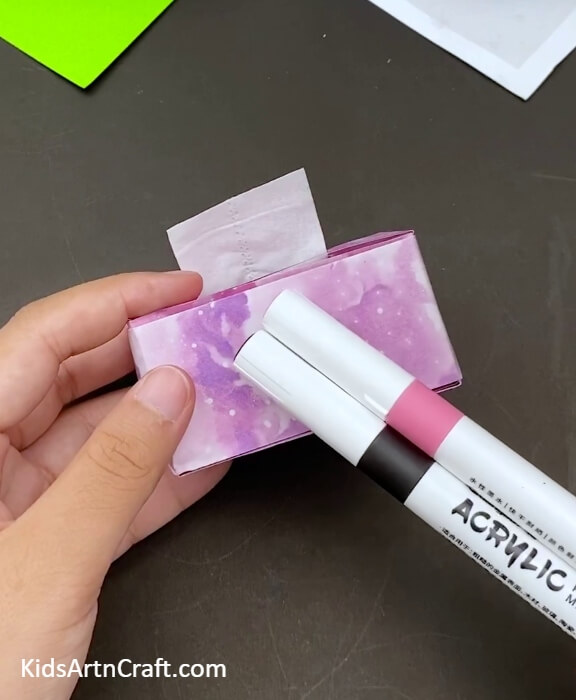
Take two sketch pens, one in colour black and the other in pink as shown in the picture below.
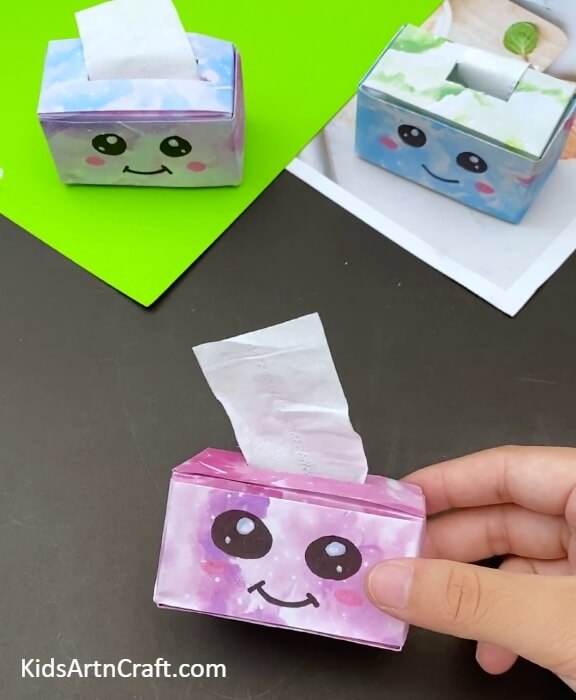
Your Craft Is Ready
Using the black sketch pen, make two big circles on the rectangular side of the box. Make these circles on the to top of the side, next to each other with a small circle left uncoloured at the top of these black circles as shown in the picture below. These circles shall serve as the eyes of the face made on the box. Also make a smily at the bottom of the same side using the same pen. Now, take the pink sketch pen and make an oval dot below each eye. See the picture below for reference.
This completes the process of making our tissue box craft. We now have a colourful tissue box with a smiling face. You can use it in your daily life or gift it to someone. Place it on your study table or somewhere in your kitchen. Today, you learned to make a box which you can put to use in actuality. You also learned some intricate folding skills. Keep practising the techniques you learn in these tutorials and keep experimenting with your imagination. Good luck.
Follow us on Youtube for art and craft tutorials and much more.
More Articles from Kids Art & Craft
- DIY Easy Paper Chick Craft For Kids
- Handprint Paper Rocket Craft for Kids
- How to Make Easy Paper Snowflakes Tutorial
- Easy Paper Butterfly Craft For Kids
- DIY Paper Crafts Video Tutorial fo All