DIY and Crafts
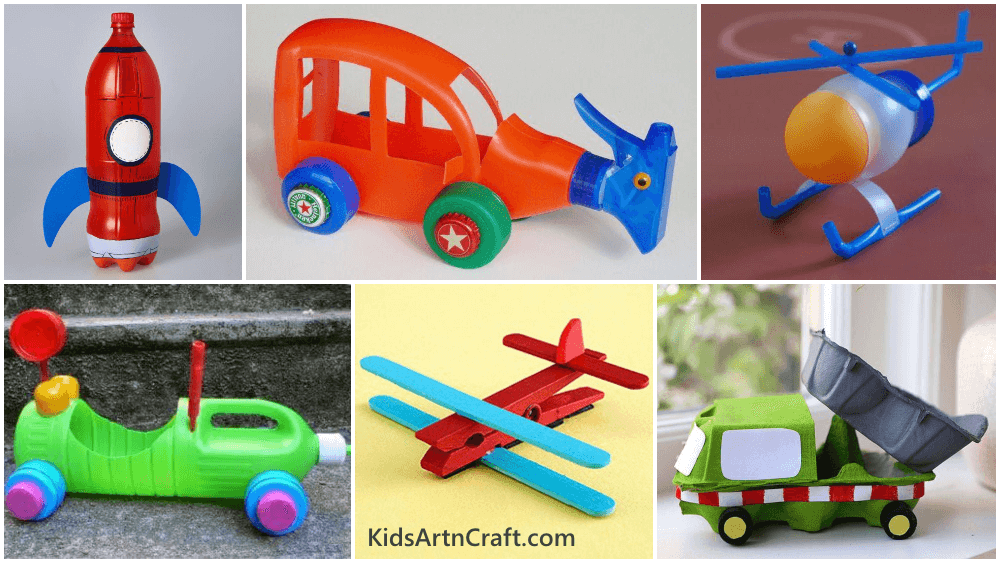
Toy Vehicles Made from Recycled Materials | Projects for Kids


There are so many things that we use and throw away. But we don’t think about the pollution that all the wasted materials create, especially the plastic materials. We know plastic does not decompose; it causes great harm to our environment.
So, regarding this, let’s try our creativity to save our environment. Use all the waste materials to make beautiful crafts using your creativity and imagination. In this post, we are going to make vehicle crafts for kids by using plastic materials that are wasted.
Here, many ideas are given. Follow the procedures and start making! Believe me, you will enjoy a lot making and learning new things.
Recycled Toy Vehicles
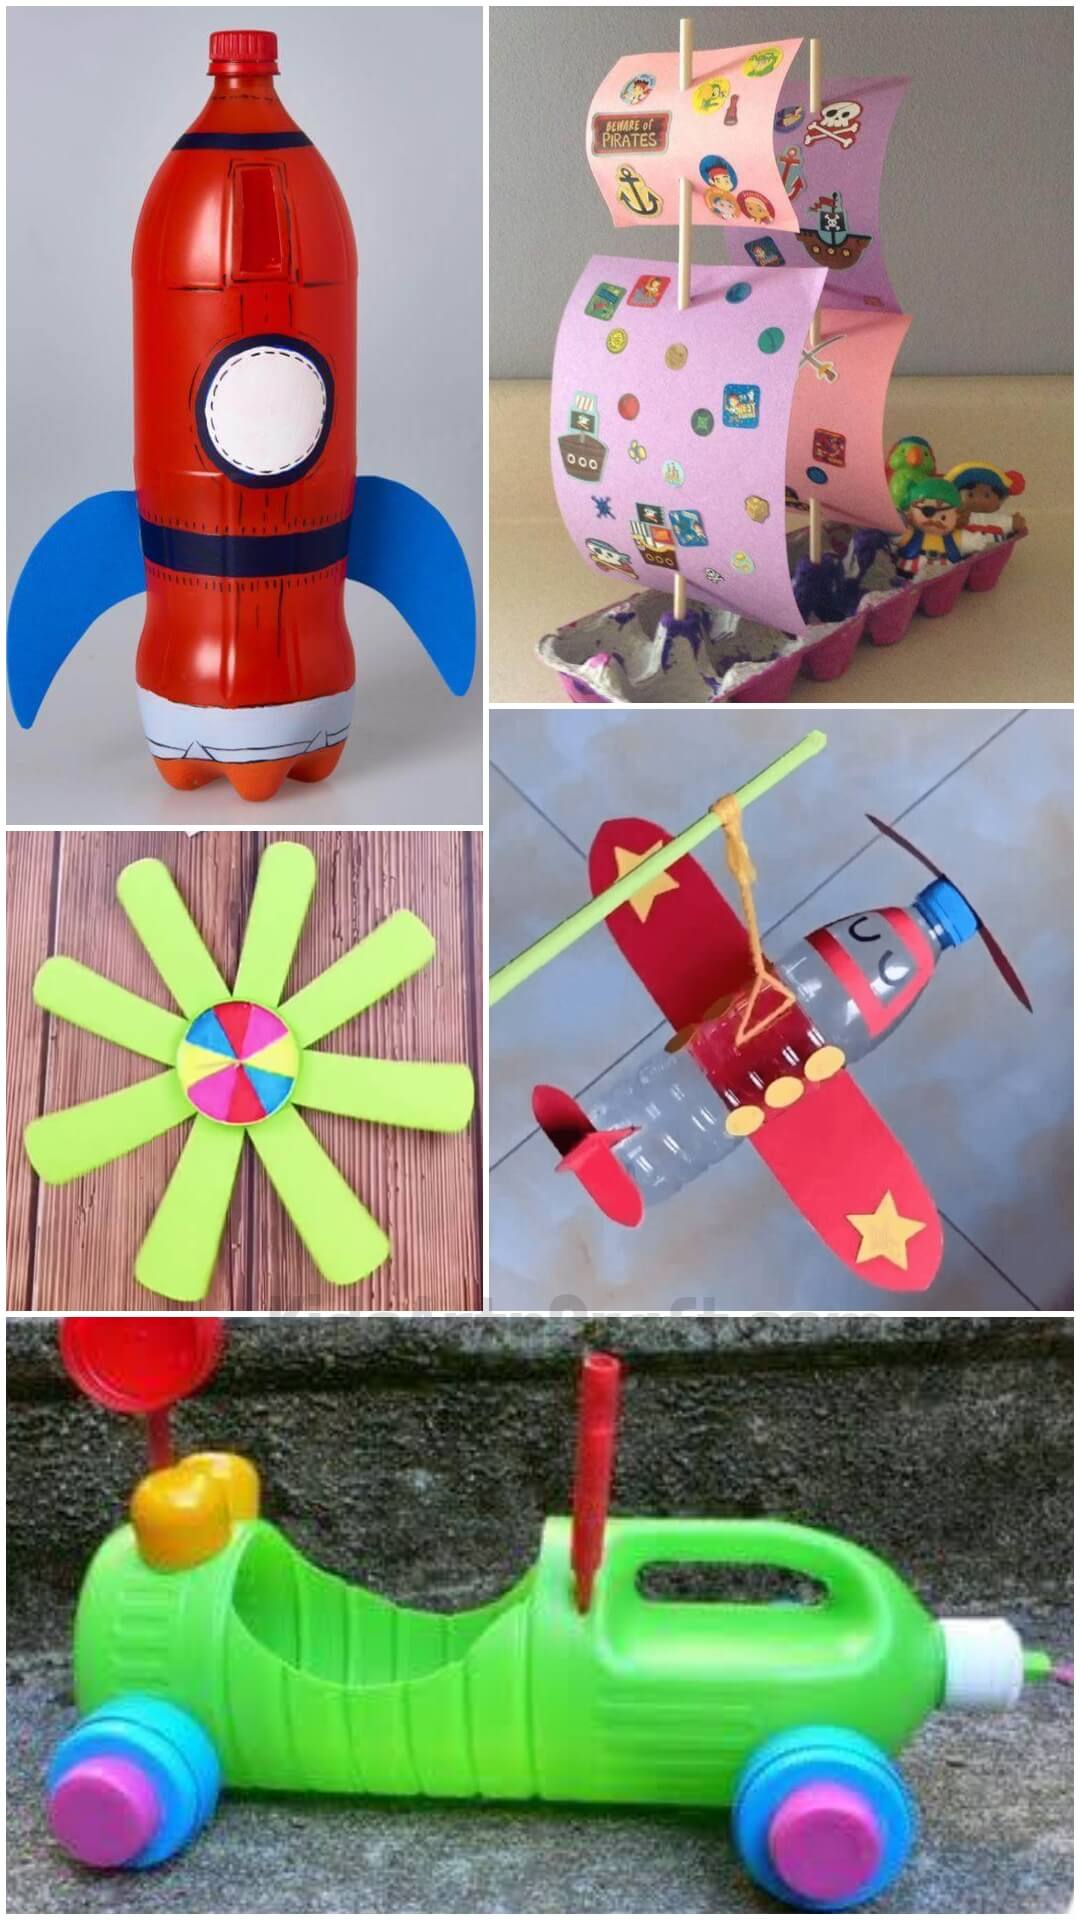
Simple Paper Cup Helicopter Fan Craft For Kids
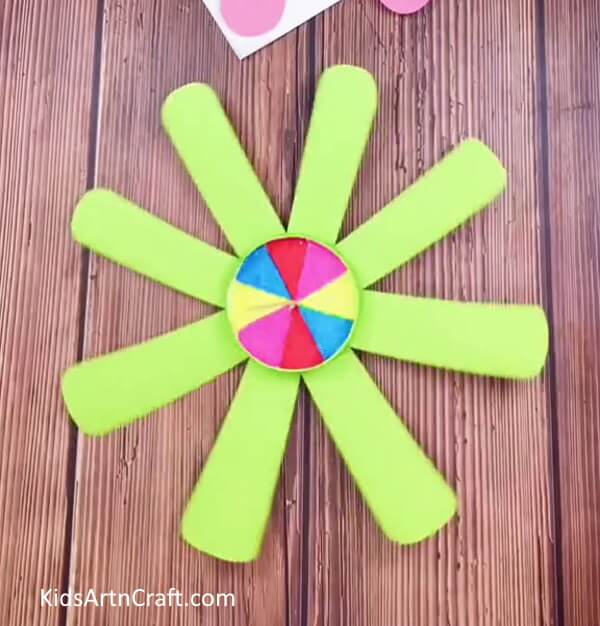
Image Source/Tutorial: Kids Art & Craft
This fun and easy craft is perfect for kids to make! With just a few simple supplies, kids can make their own paper cup helicopter fan. It’s a great way to entertain kids and teach them about science and engineering!
Crafting A Rubber Band Bottle Boat For Children
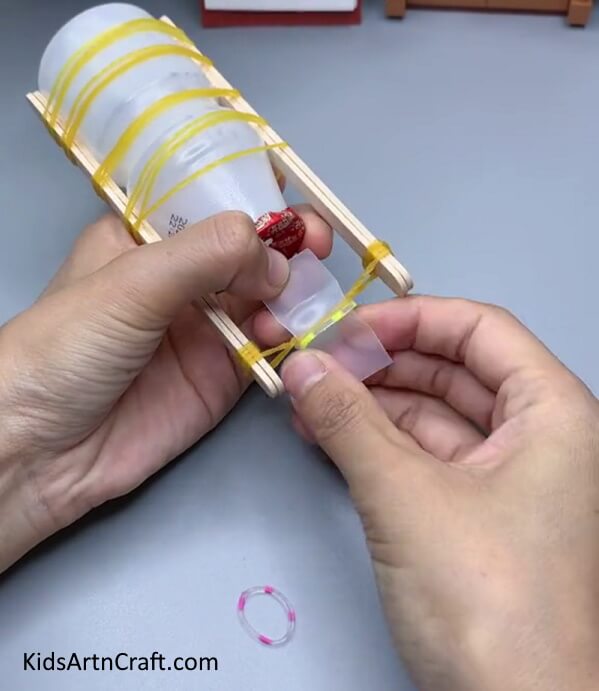
Image Source/Tutorial: Kids Art & Craft
Children can easily craft a rubber band bottle boat with just a few items. This is a fun and creative way to spend time outdoors, using basic items that are found around the house.
Simple Car Craft with Balloons and Straws for Toddlers
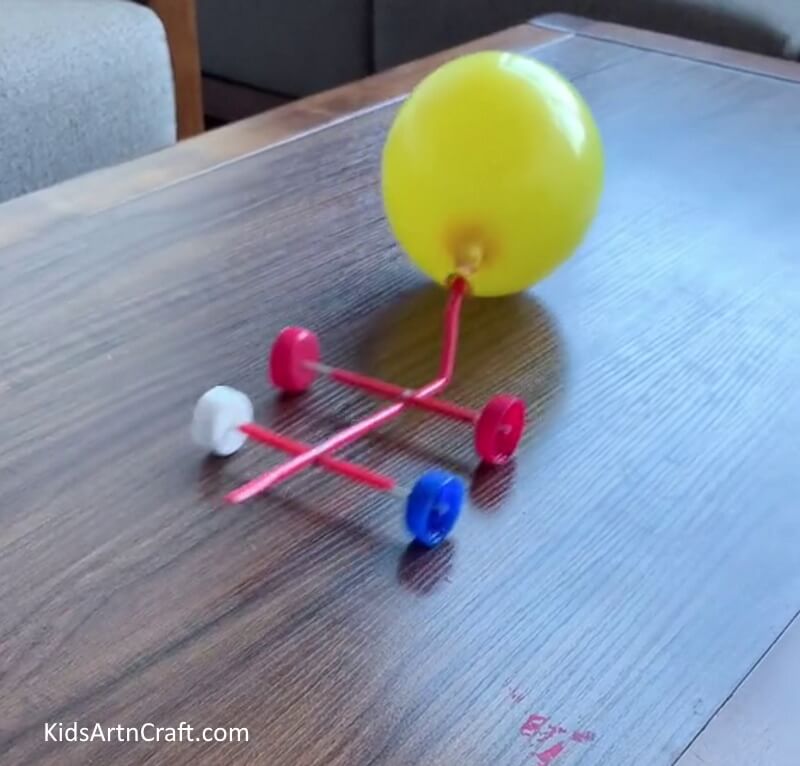
This craft is perfect for toddlers! It is easy to make and requires only balloons, straws, and creativity. The result is a fun car that can provide hours of entertainment for your toddler. Get ready to have fun!
Spray Bottle Tank
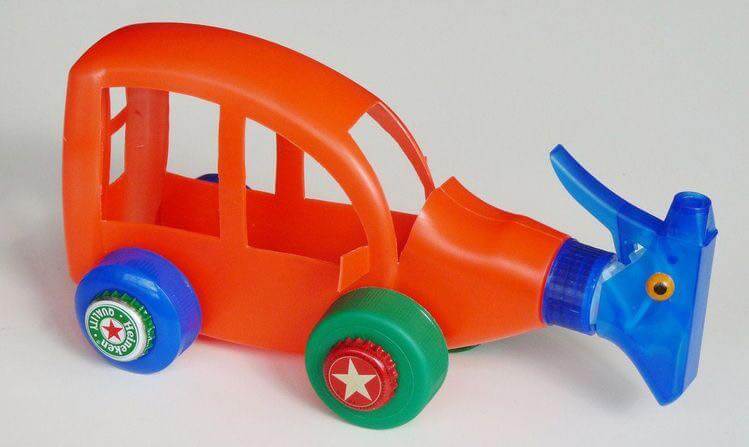
These winter holidays involve your kids in making this beautiful vehicle. For this, provide them with a plastic spray bottle and tell them the given procedures for help. Let them use their creativity too.
Materials Required:
- A used plastic spray bottle
- 4 Caps of other used bottles
- 4 Caps of glass cold drinks(smaller than the plastic bottle caps)
- Glue gun
- Plastic cutter
- A marker
Procedure:
- Take the spray bottle and draw the window and doors in a plastic spray bottle using the marker. Keep the sprayer portion in the front.
- Cut out the windows and doors using a plastic cutter. You can take help from your parents.
- Get the caps of old plastic bottles and glue them to the bottom of the spray bottle to make the wheels.
- On these caps glue the other caps of glass cold drinks.
Your super vehicle made of recycled materials is ready! Play and enjoy!
Popsicle Sticks Helicopter
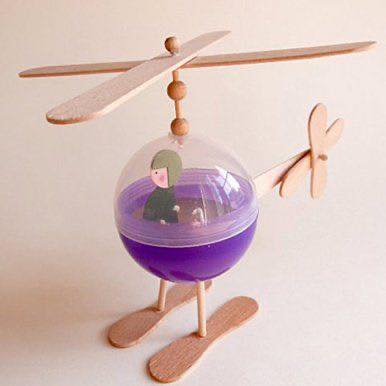
Interested in helicopter crafts? Try this out! It is made by using popsicle sticks. For help, have a look at the procedures. You will enjoy making this project. Spend your time with this interesting craft.
Materials Required:
- Popsicle sticks of different types( small and large, both)
- Glass ball or box of Kinder Joy
- Foam sheets
- Glue gun
- Wooden screw
Procedure:
- Take the long popsicle sticks for fans of the helicopter. Make a cross and screw them in the middle.
- Then take the foam sheet and cut out a helmet and dress for the pilot. Use green foam for it. Use pink foam to make the face. Glue them all.
- Draw the facial expressions.
- Now glue your pilot in the glass ball.
- Take two thin sticks of candy and glue them to the bottom of the glass ball to make the stand of the helicopter.
- Take another two long sticks and glue them horizontally below the previous one to make the base of the stand.
- It’s time for the tail. Take a long popsicle stick and two small ones. Cut out the long one from one-fourth and glue it to the back of the glass ball. Then take the small sticks and screw them in a cross position on the long stick.
Your helicopter is ready to play!
Truck Craft Made From an Egg Carton
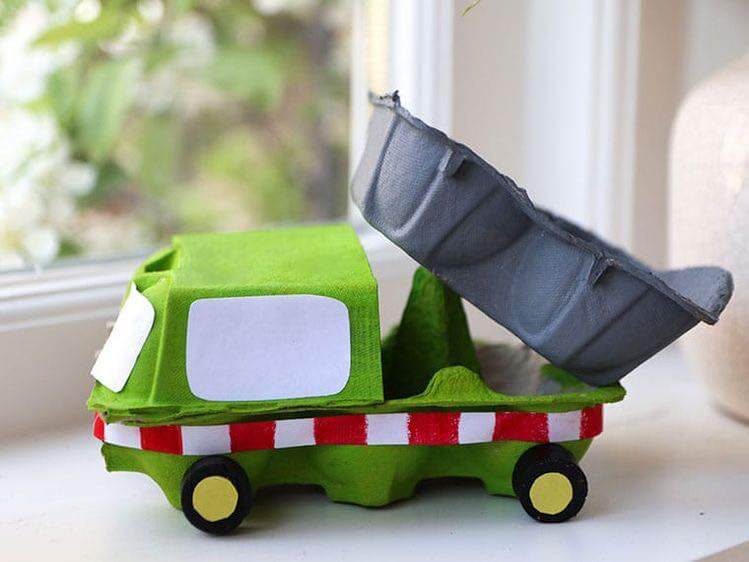
Do you have a recycled egg carton? Use it to make the craft. Make vehicles from recycled materials by following the given ways. For this first, gather all your supplies and start!
Materials Required:
- Egg carton ( three…one small)
- Green fabric
- White sheets
- Paint
- Caps of plastic bottles
- Scissor
- Glue gun
Procedure:
- Take the egg carton and paint it with light green paint.
- Take another egg carton and cut it in half. Paint it green.
- Let them dry.
- Then glue the half carton upward on the first carton. Glue it on the front side. It will be the front portion of your vehicle.
- Then take a third small egg carton and paint it with grey paint. Let it dry. Glue it to the back portion of the vehicle in a lifting manner using a hot glue gun.
- Use your white sheets to make the mirror of the vehicle. Cut out three rectangles ( one is bigger) and glue them on the upward-downward egg carton. Glue them at the front and both sides.
- Now measure the perimeter of the base egg carton and cut out a long strip from white paper for making the border of the vehicle.
- Before this, color the strip red. Make the design of red and white patterns.
- Now take the caps of the bottles and paint them black. Get the yellow paper and cut out four small circles from the caps. Glue them on the caps.
- Now glue the caps on the first egg carton at the bottom for wheels.
Play with your vehicle!
Plastic Bottle Aeroplane
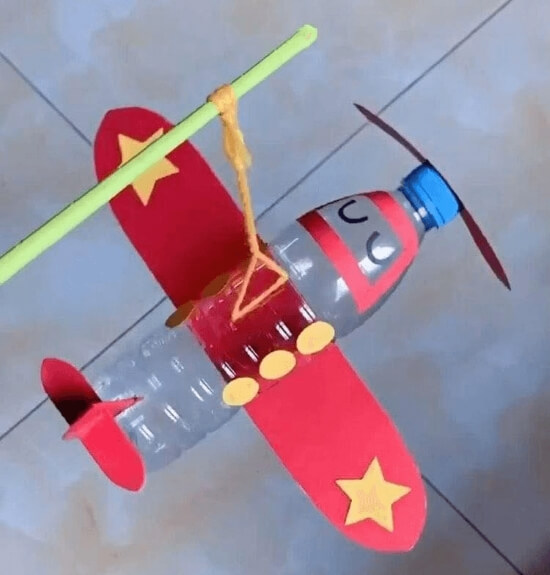
Wanna make an airplane craft, but don’t know the procedures and materials required! You are in the best place. Let’s have some fun by following the given ways and playing some games!
Materials Required:
- Plastic water bottle
- Cardboard
- Colored papers
- Scissor
- Glue gun
- Yarn
- Paint
- Stick
Procedure:
- Take the cardboard and cut out a skate shape from it.
- Then use your colored papers to decorate it. Here I used pink paper to cover the whole cardboard. I glued it to the cardboard. Then I used yellow paper to cut out the two-star shapes. I glue these shapes to both ends of the skate shape. These are the wings of an airplane.
- Then I took another piece of cardboard and cut out a skate shape again to make the wings of the airplane. But these are small in size. I again cover it with the pink sheet.
- Then I made the wings for the back portion.
- Cut out six small circles from the yellow sheets.
- Now it’s time to glue all things. First, glue the wings of an airplane in the middle of a plastic bottle. They glue the end wings and front fans at the end and top of the bottle.
- Also, glue the six circles to the back portion of the plane on two sides.
- At the neck, draw the eyes and a trapezium around them by using black and red paint.
- Take the stick and paint it. Tie the yarn to it. Tie the other end of the yarn at the middle of the plastic bottle( between the circles). You can make holes using a hot nail, or you can glue it.
Your plane is ready to fly!
Rocket Craft
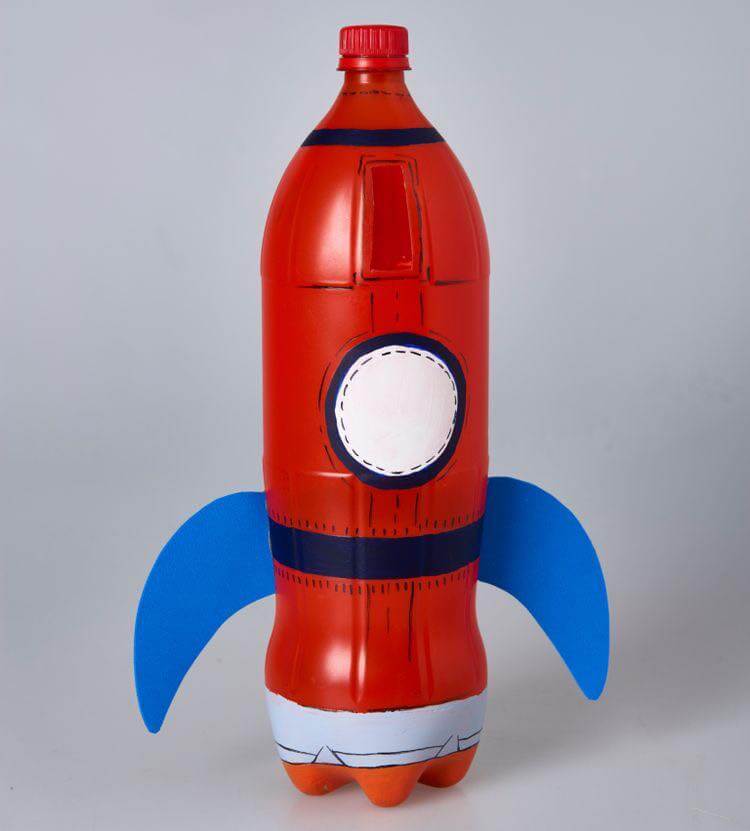
Interested in science and things related to it? Let’s make a rocket to go out in space! For this craft, we need some important materials. So gather them all and start by following the given ways.
Materials Required:
- Cold drink from a large bottle
- Cardboard
- Colored papers
- Glue gun
- Scissor
- Sketch pens
- Paint and paintbrush
Procedure:
- Take the bottle and paint it your favorite color. I am opting out of red. But remember to leave some spaces. Leave a space of about 1 inch at the neck, one inch at the middle, and one inch at the bottom( leaving one inch from the base). Also, leave a space for a circle in the middle of the bottle.
- Paint the base with another color. I used orange.
- Then paint the left spaces. Paint the middle and neck space with dark blue paint and the bottom space with white. Paint the circle with white color too. Outline with blue.
- Let them dry.
- Draw designs of a space rocket on the bottle using the black marker.
- Take the cardboard and cut the two wings in the shape of a shark’s tail. Cover them with blue paper. Glue the paper.
- Glue the wings on the sides of the blue paint in the middle of the rocket.
Your space rocket is ready!
Popsicle Stick And Clothespin Plane Craft
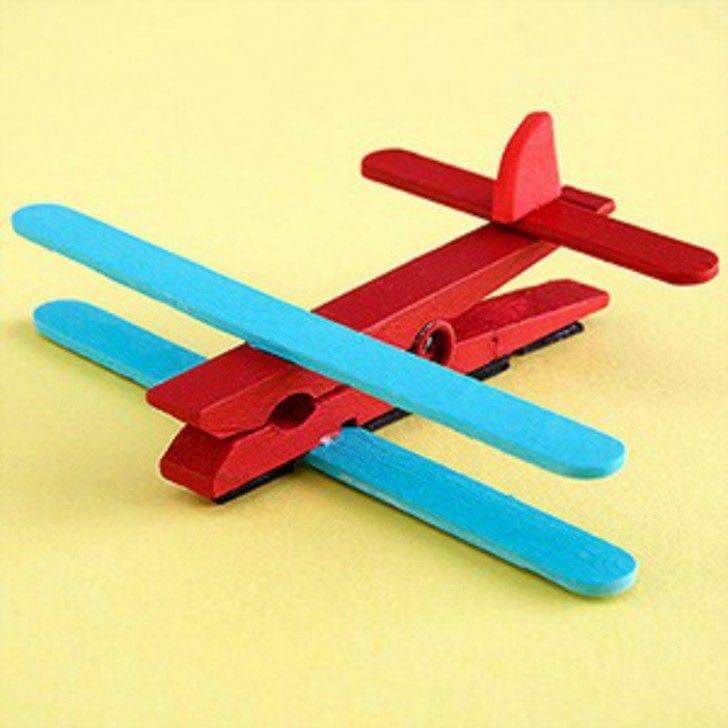
If you were gathering all the ice cream sticks, then use them to make this plane craft. You will enjoy doing so, and you will learn creativity. So let’s start by following the given ways.
Materials Required:
- Clothespin
- Paint
- Popsicle sticks
- Glue gun
Procedure:
- Take three Popsicle sticks and paint them with two different colors. For two larger-sized sticks, I have used blue color, and for the smaller ones, I have used red paint.
- Take the clothespin and paint it with red color too.
- Let all the materials dry.
- Then glue the blue popsicle sticks on the clothespin. One on the top of the clothespin(at the front portion) and the other at the bottom. These are the wings.
- Glue the red stick to the top of the clothespin. This is the tail wing.
- You can use foam to cut out a triangle. Glue it to the tail wing.
Enjoy!
Sail Boat Craft
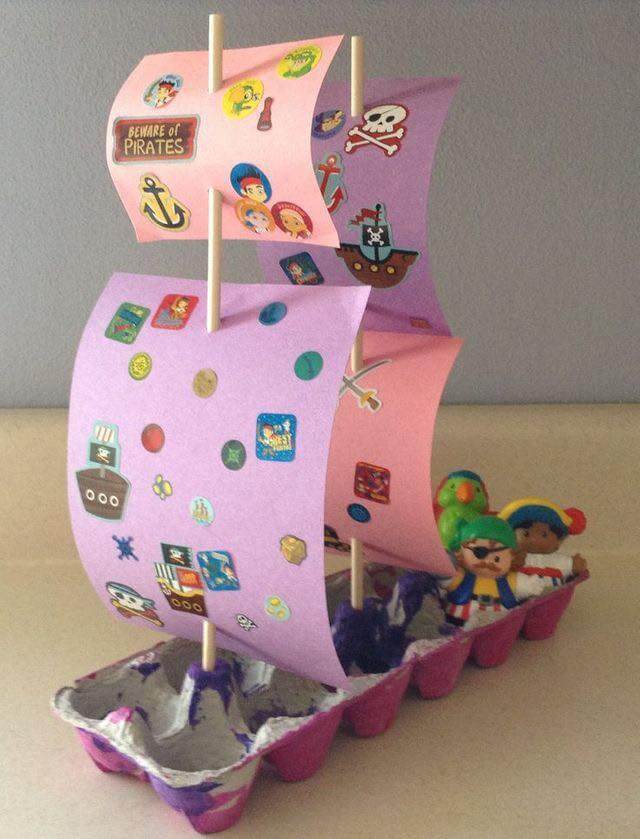
Let’s make a beautiful sailboat craft by collecting some essential materials. See the following procedures to make this craft. You will learn how to glue some recycled materials to make this craft.
Materials Required:
- Colored sheets
- Sailing stickers
- Egg carton
- Sticks
- Glue
- Puppets
- Paint
Procedure:
- Take the egg carton and paint the lower portion.
- Now take the different colored sheets and glue the stickers on them.
- Make two holes in the middle of the sheets and place your sticks in the holes.
- Use two sheets(one is smaller)in a single stick. Use two sticks for the sailing boat.
- Place your sticks in an egg carton.
- Place your pirate puppets in an egg carton.
Straw Helicopter Craft
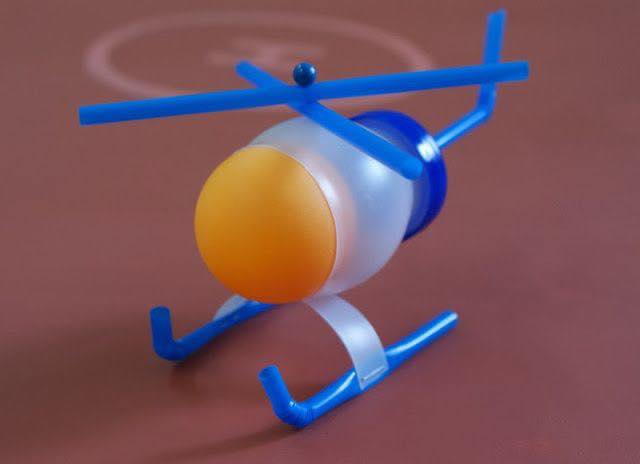
Plastic crafts are easy for kids. So we are giving an idea of making a plastic helicopter craft. Gather your supplies for this craft and enjoy making it with your friends.
Materials Required:
- Two plastic balls of different colors( one is smaller than the other)
- Straws of the same color
- Blue cap on the bottle
- Glue
- Stapler
Procedure:
- Take the bigger ball and cut out its one-third portion.
- Fix your small ball in the bigger one.
- Then take the straws and cut them to make the fans and the stand of the helicopter. For this, cut out the one-fourth portion of straw and glue it on the top middle of the ball. Now, take two straws and glue them together by making a cross. These are the fans of helicopters. Glue them on the one-fourth cut straw. You can use rotative pins for fans.
- Now, from the remaining portion of the bigger ball, cut out a curve to make the base and glue it below the ball.
- Staple two straws at the ends of the curve for stands.
- For the tail glue, cap the bottle at the back of a bigger ball and on it glue a straw horizontally.
Your helicopter is ready!
Plastic Sail Boat Craft
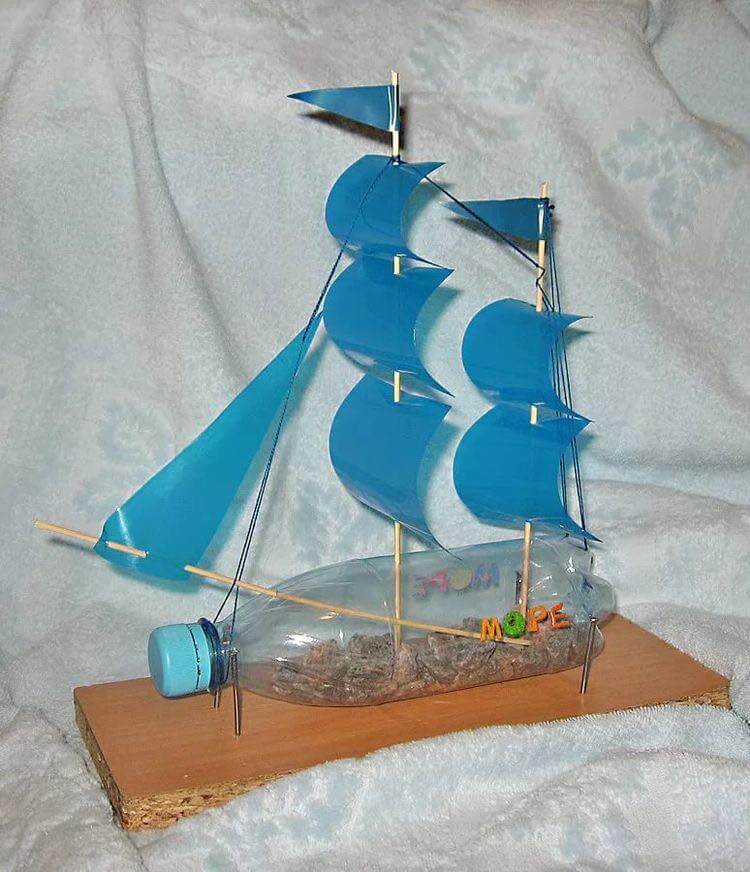
Making sailing crafts is a beautiful process. So let’s try a plastic sailing boat. We are giving the procedures for your help. Gather your materials and let’s start!
Materials Required:
- Plastic bottle
- Thin sticks
- Plastic sheets
- Scissor
- Glue gun
- Pebbles
- Thread
Procedure:
- Take the bottle and fill it with pebbles to make it stable.
- Take plastic sheets and cut out sailing curves and flags.
- Take cut curves and make two holes in each, then place your sticks in these holes. Remember to put one stick smaller than the other.
- Then glue the flags on the top of the sticks.
- Make the front sail in the same way.
- Make three holes in the bottle. One is at the front top, and the other two are at the middle top.
- Place your sticks in the holes in the bottle.
- Use a thread for the tying process.
Beautiful Vehicle Craft
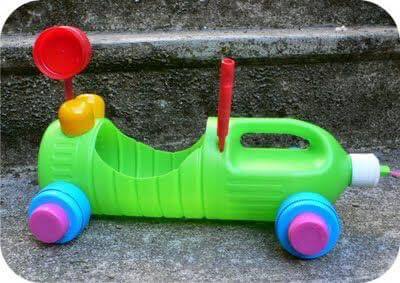
wanna try a beautiful craft of a vehicle using plastic materials. It is one of them. Try this by gathering your supplies and having fun.
Materials Required:
- A plastic fortune bottle
- Paint
- Bottle caps( 4 for wheels, 2 for decoration)
- Four other small caps
- A red big cap
- Glue gun
Procedure:
- Take the bottle and cut out a curve in the middle.
- Paint it in your favorite color. I used green. Let it dry.
- Glue the caps on the backsides and front sides. These are the wheels.
- Glue small caps on the bigger caps.
- Glue two caps to the back top of the bottle.
- Take a straw and cut out one-fourth of it. Glue it to the back top near the caps. Glue the red cap on it.
All done! Play!
Tubes Train Craft

We have made many vehicle crafts. At least let’s try a train craft. For this, you need some essential materials; gather them all. Also, gather your paints, and let’s start by following the given ways.
Materials Required:
- Toilet paper tube rolls
- Paint
- Thin caps
- Plastic strings
- Glue
- Scissor
Procedure:
- Take the tube rolls and paint them in different colors. Let them dry.
- Glue the caps to the lower portion of the tubes for wheels. Glue four on each tube.
- Take plastic strings and, by making holes in tubes, join them horizontally with each other.
- For the engine, take another tube, cut it in half, and glue it vertically on the first tube.
Crafting a Beautiful Fighter Tank Out of Paper Cups
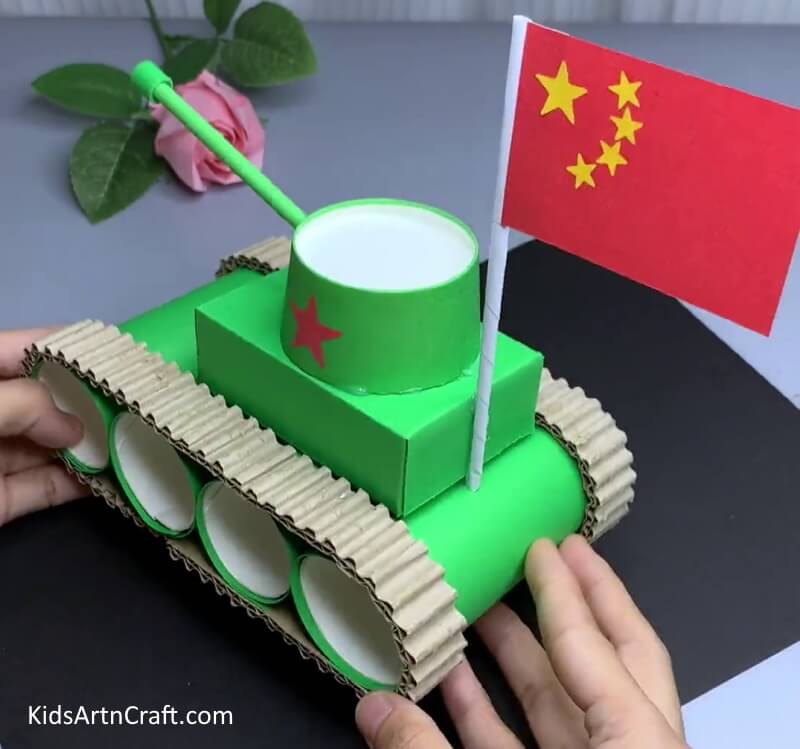
Image Source/Tutorial: Kids Art & Craft
This craft project is an excellent way to reuse old paper cups and turn them into beautiful fighter tanks. It is a fun and creative activity that can be enjoyed by the whole family. It is a great way to explore the world of crafting and make something unique and special.
Your train is ready! Let’s move it to our table or floor and enjoy!
DIY Toy Vehicles from Recycled Materials: Step-by-Step Tutorial
Learn how to make amazing DIY toy vehicles from recycled materials in this easy step-by-step tutorial. Perfect for kids’ craft projects, school activities, and eco-friendly fun. Turn waste items like bottles, cardboard, and caps into creative toy cars, bikes, and trains while encouraging creativity and recycling.
For more vehicle crafts from recycled materials, stay tuned with us. We will provide you with the best ideas for creativity.
Educational Benefits of Recycled Vehicle Crafts
Toy vehicle crafts help children learn through creative play while improving important developmental skills.
Skills Kids Can Develop
- Fine motor coordination
- Creative thinking
- Engineering basics
- Problem-solving skills
- Recycling awareness
- Hand-eye coordination
- Imaginative storytelling
- Early STEM concepts
Building toy vehicles from recycled materials introduces children to basic engineering and design ideas while encouraging environmental responsibility through reuse and upcycling activities.
Best Recycled Materials for Toy Vehicle Crafts
Many fun toy vehicles can be made using simple recycled household supplies.
Common Materials Used
- Cardboard boxes
- Toilet paper rolls
- Plastic bottle caps
- Milk cartons
- Popsicle sticks
- Egg cartons
- Tin cans
- Straws and skewers
- Old containers
- Paper cups
These low-cost materials help parents and teachers create budget-friendly crafts while reducing household waste.
Popular Recycled Vehicle Craft Ideas for Kids
Kids love making different kinds of transportation crafts using recycled materials.
Easy DIY Vehicle Ideas
- Cardboard race cars
- Bottle-cap toy trucks
- Milk carton buses
- Egg carton trains
- Plastic bottle airplanes
- Balloon-powered cars
- Recycled fire trucks
- DIY construction vehicles
- Paper roll rockets
- Cardboard school buses
Interactive moving vehicle crafts make learning more exciting and encourage pretend play activities for children of all ages.
Eco-Friendly Crafting Tips for Parents & Teachers
To make recycled crafting safe and enjoyable:
- Clean recycled materials before use
- Remove sharp edges from cans or plastic
- Use child-safe scissors and glue
- Supervise younger children during cutting activities
- Encourage kids to sort recyclable items creatively
Why Recycled Toy Vehicle Crafts Are Great for Kids
Recycled toy vehicle crafts are a fun and educational way to teach children creativity, sustainability, and hands-on learning. Making toy cars, trucks, buses, airplanes, and trains from recycled materials encourages kids to reuse everyday household items while developing imagination and problem-solving skills. Upcycling projects transform waste materials into creative new objects and art activities.
DIY recycled vehicle crafts are ideal for:
- School craft projects
- STEM learning activities
- Earth Day celebrations
- Preschool transportation themes
- Rainy day indoor play
- Eco-friendly family activities
Children enjoy turning cardboard boxes, bottle caps, paper rolls, and plastic bottles into exciting moving vehicles and pretend-play toys.
Frequently Asked Questions (FAQs)
Q1. What are recycled toy vehicle crafts?
Answer: These are DIY toy vehicles made using reusable or waste materials like cardboard, bottles, paper rolls, and bottle caps.
Q2. Are recycled crafts educational for kids?
Answer: Yes, recycled crafts help children improve creativity, motor skills, engineering thinking, and environmental awareness through hands-on activities.
Q3. Which recycled materials are best for toy cars?
Answer: Cardboard, bottle caps, toilet paper rolls, milk cartons, and plastic bottles are commonly used for making toy cars and vehicles.
Q4. Are recycled vehicle crafts suitable for school projects?
Answer: Absolutely! These crafts are perfect for school exhibitions, STEM learning, transportation themes, and Earth Day activities.
Recycled toy vehicle crafts for kids are a wonderful combination of creativity, learning, and eco-friendly fun. Whether children are building cardboard cars, toy buses, airplanes, or construction trucks, these DIY activities encourage imagination while teaching the importance of recycling and sustainability. These easy craft ideas are perfect for classrooms, homeschool activities, and family craft time.
Creative activities and fun crafts that make learning exciting for every child! Join our Telegram, YouTube & Facebook community now.
Reviewed By Jatin
Read More:
- Toy Organization & Storage Hacks
- Garden Toy Storage Ideas
- Toy Storage Ideas for Living Room
- Popsicle Stick Craft Ideas For Kindergartners
- Easy Popsicle Stick Rainbow Crafts For Kids