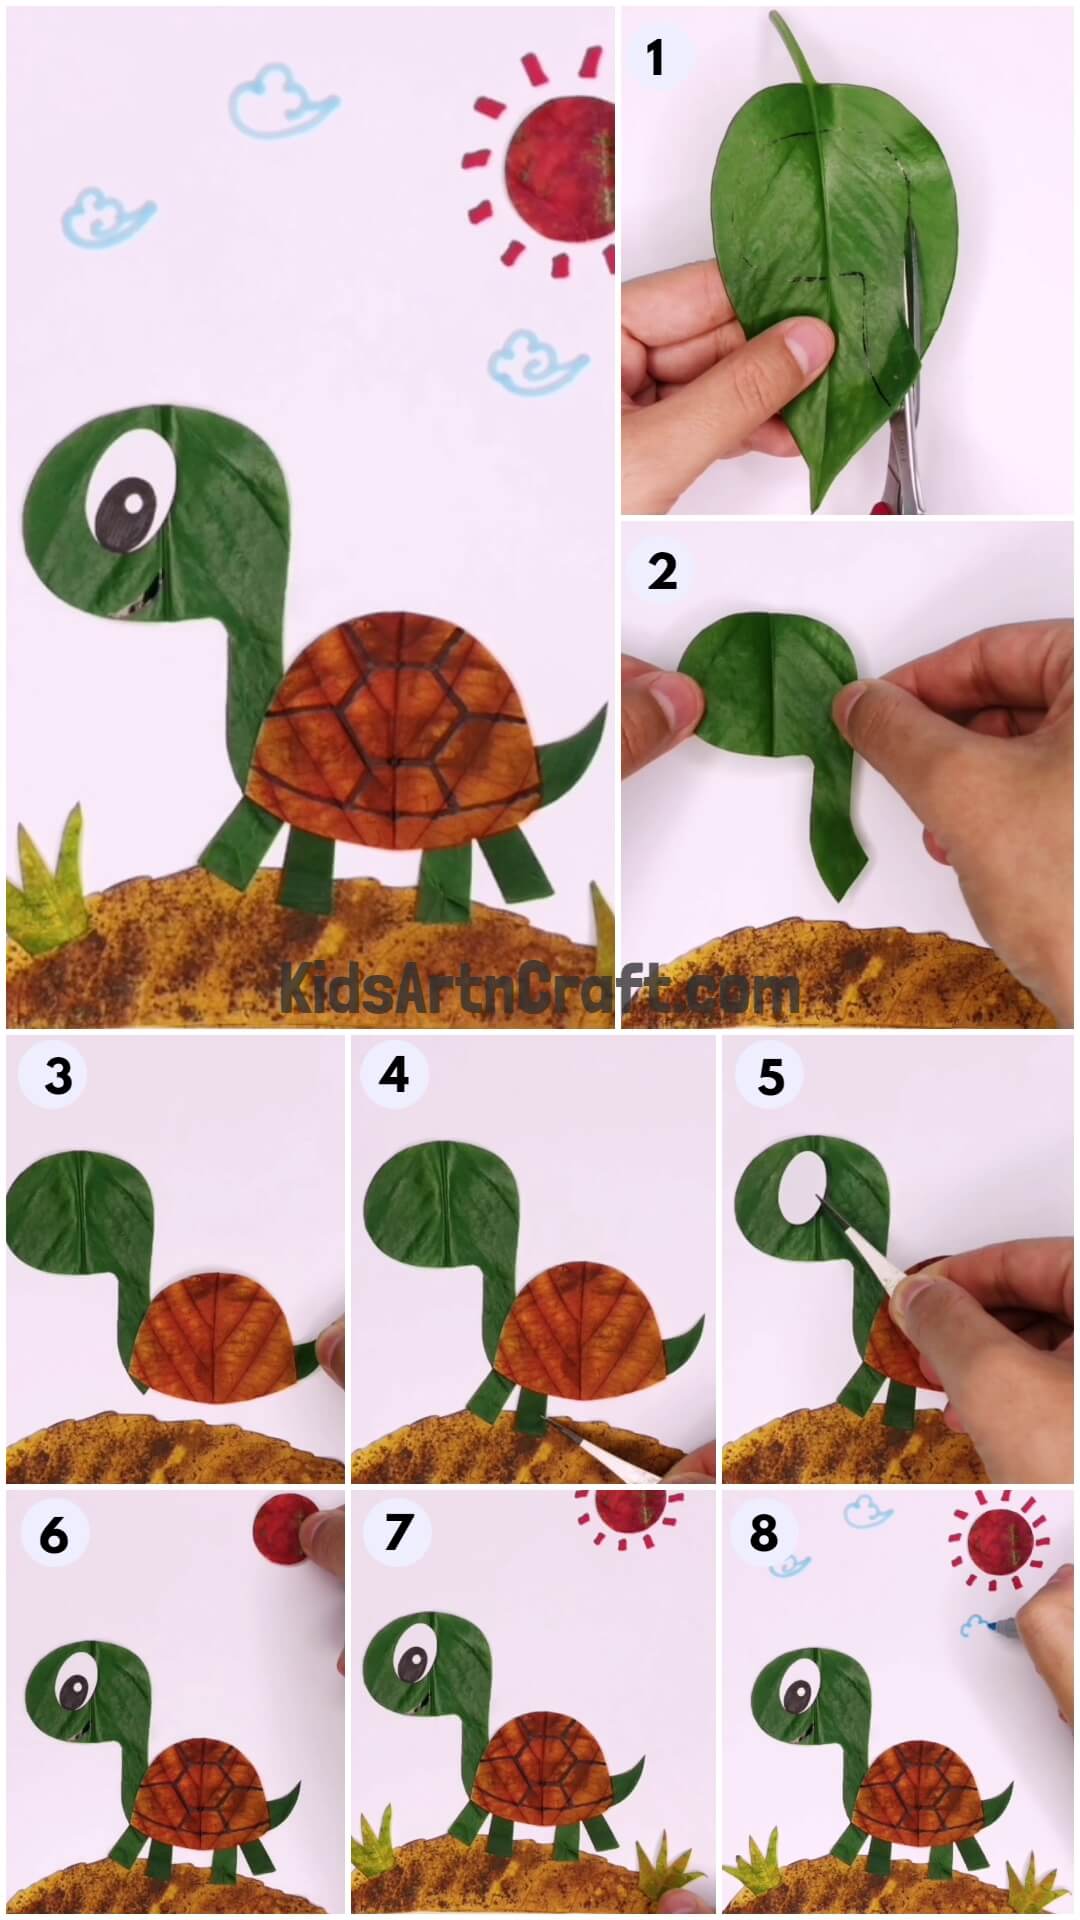
Step By Step
Recycled Turtle Craft With Sun Using Leaves

Create a fun and eco-friendly craft with your family using recycled materials and natural elements. Learn how to make a unique turtle using leaves, sun, and other recycled materials. Perfect for any season, this craft is a great way to stay creative!
Welcome to this fun and creative recycled turtle craft! This project is perfect for kids and adults alike and is sure to delight with its colorful and beautiful results. Using recycled materials, leaves, and a few simple tools, you’ll be able to craft a beautiful turtle with a sun above its head. This craft is sure to be a hit with everyone, and is a great way to teach kids about the importance of recycling and repurposing materials. So gather your materials, and let’s get started!
DIY Turtle Craft With Sun Using Recycled Leaves

Read More: DIY How to Make Paper Umbrella Craft for Kids – Step-by-Step Tutorial
Materials Required:
- Scissors
- Leaves (green, brown, and red)
- A4 Size Sheets
- Marker Pens (Black, blue & red)
- Glue
- Forcep
- Red Craft paper
Instructions:
Creating a Turtle & Sun Craft with Leaves from the Garden – Step 1
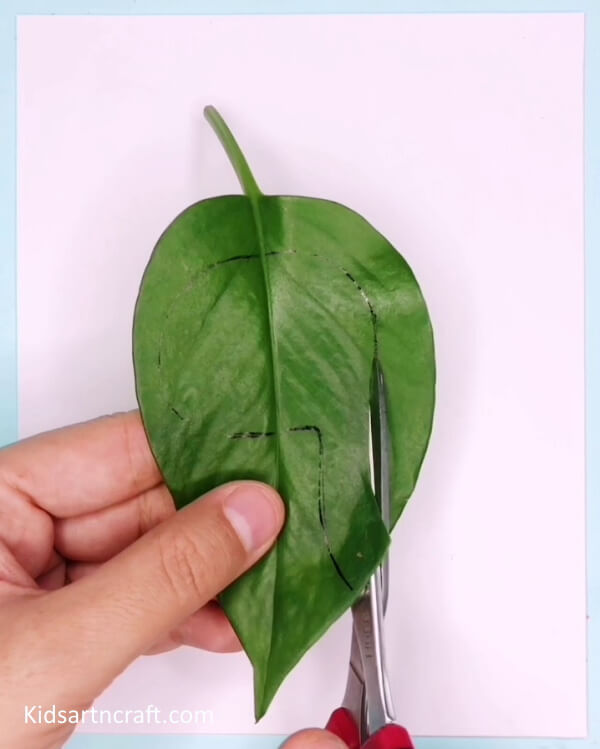

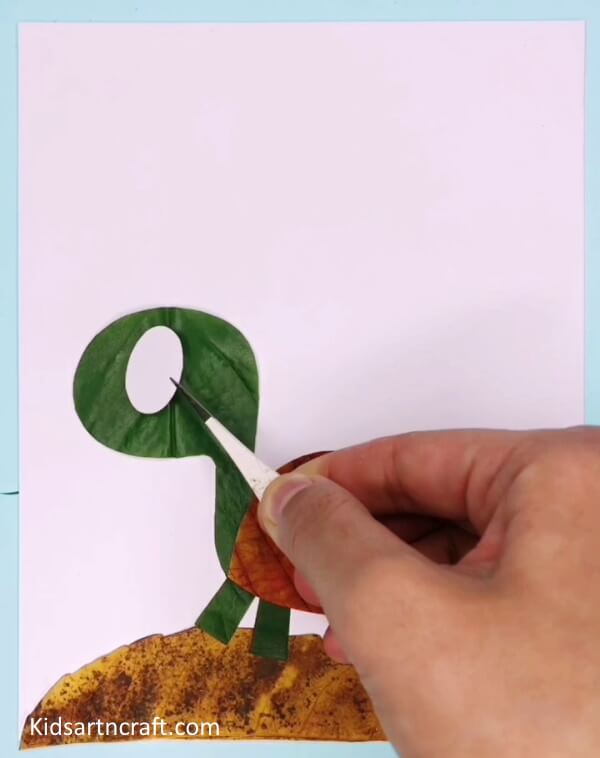
Let’s start this unique & fun to make craft of a turtle & sun using some leaves from your garden. First of all, take a medium-sized green leaf and draw a P-shape with a marker pen for the neck of the turtle.
Next, carefully cut out the shape with the help of scissors.
Creating a Decorative Leaf Art with an A4 Sheet – Step 2
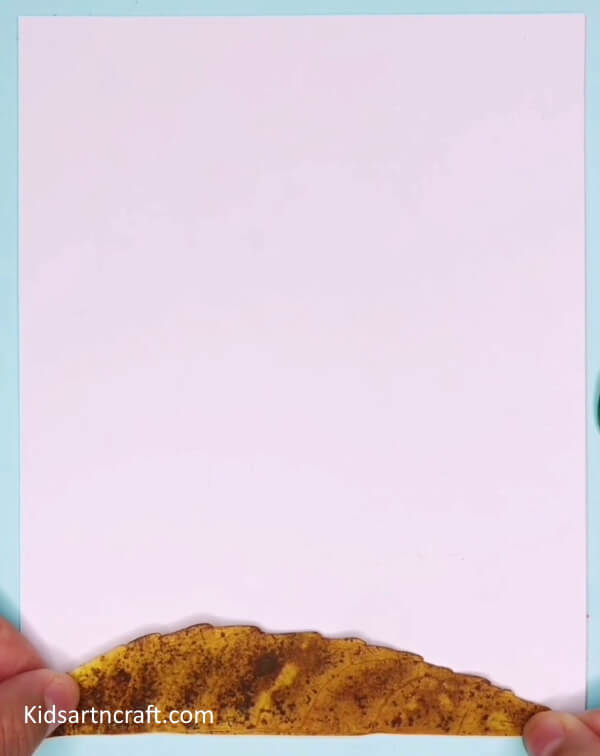

Now, take a dried brown leaf for the ground part and tear it in half as shown in the above image. Then stick that leaf at the bottom of the A4 sheet using glue.
Attaching a Leaf to the Ground – Step 3
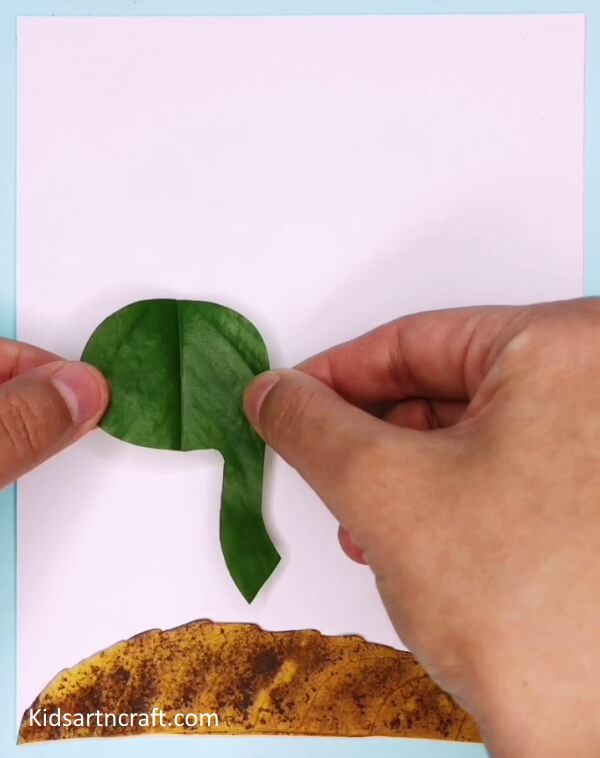

Now, Take the neck part of the leaf and stick it using glue, just above the ground with a little gap.
Creating a Turtle Shell Using a Dried Leaf – Step 4
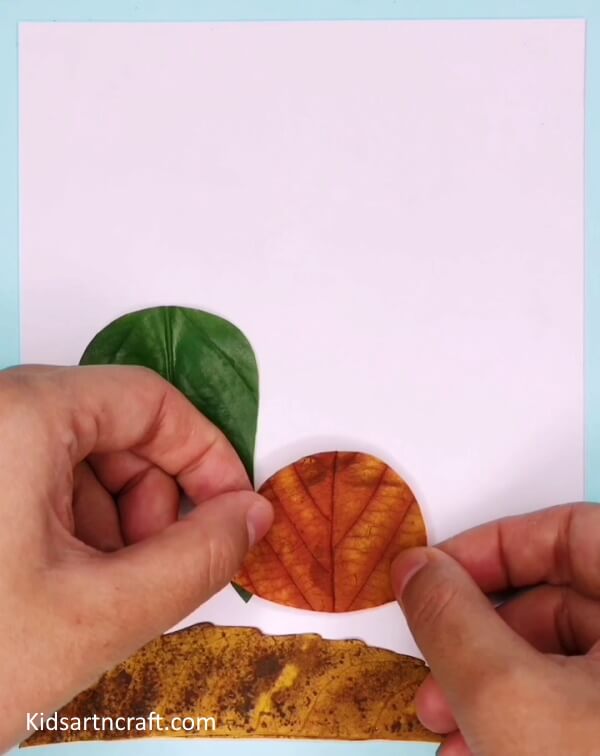
After sticking the neck to the sheet, cut out a turtle shell-shaped piece from a dried brown leaf and stick it alongside the neck as shown in the picture above.
Creating a Turtle Craft – Easy Steps to Follow! – Step 5
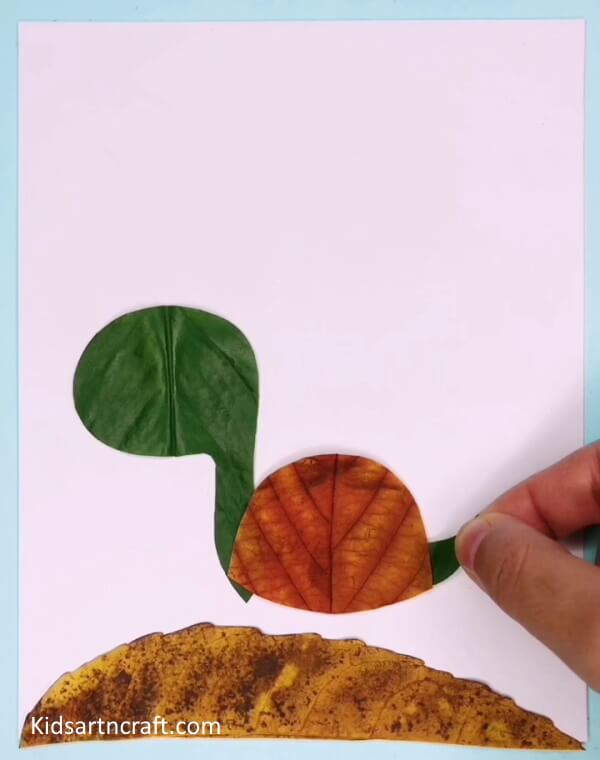

Now comes the tail part, cut out a small leaf piece for the turtle’s tail, and stick it behind the shell.
Easy so far, isn’t it? Few more steps and your craft will be ready.
Making Turtle Legs with Leaves – Step 6
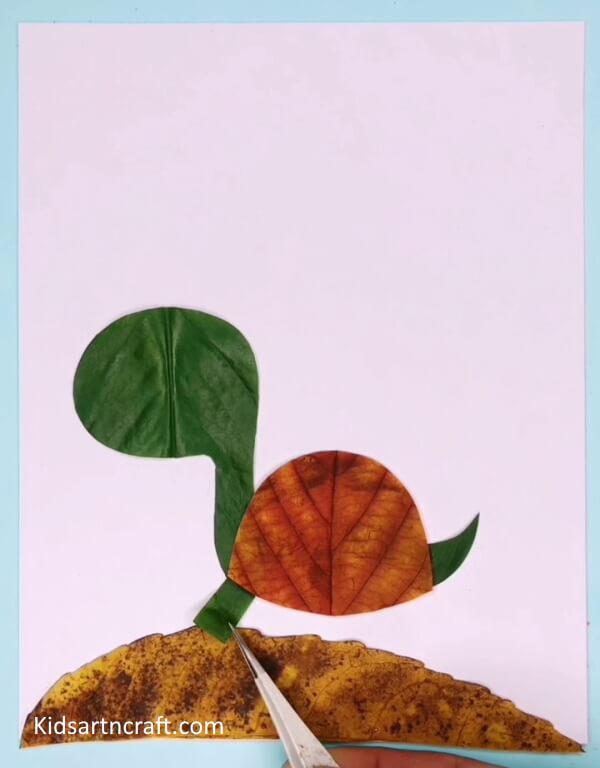

In this step, you need to cut small rectangular pieces from the leaf for the legs of the turtle.
Cut 4 such pieces. Stick it just below the neck and front part of the shell.
Attaching Back Legs to the Shell with Forceps – Step 7
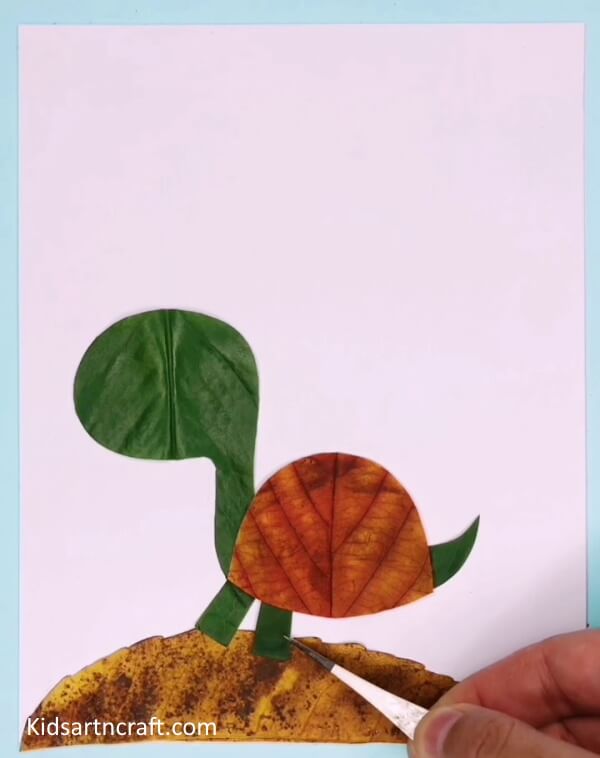
Place another leg as well using forceps and paste the remaining two rectangle pieces at the back side of the shell for the back legs.
Creating an Eye on a Leaf with Glue and Paper – Step 8
Now, for the eye, cut a small oval-shaped piece from a white A4 sheet. Next, place that eye at the right place on the leaf and paste it there using glue.
Drawing the Eye with a Black Marker – Step 9
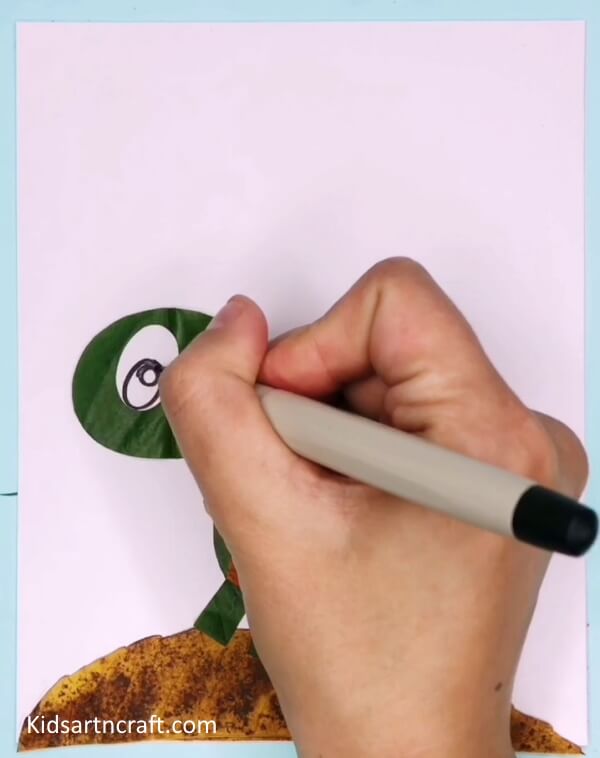
In this step, you need to draw the eye part using a black marker. Just draw a circle inside an oval and fill it with black color as shown in the image above.
Creating a Turtle Scene with a Sun – Step 10
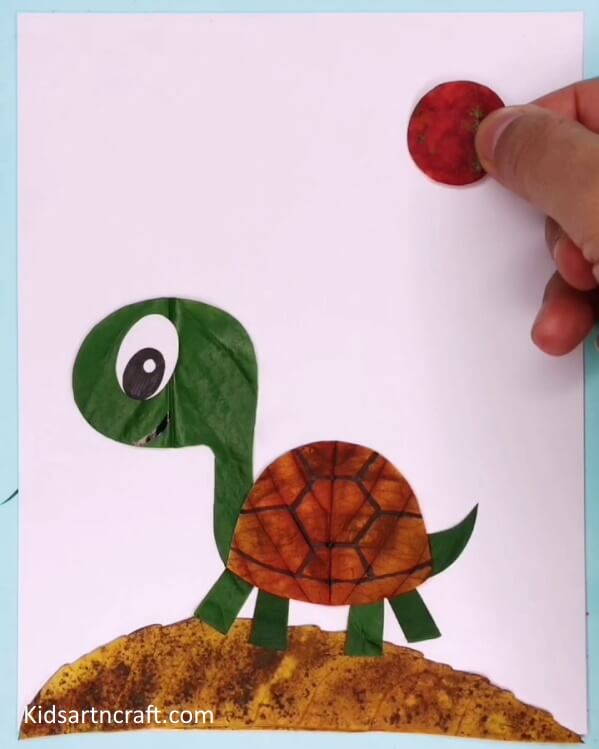

Later, draw a small curve for the mouth of the turtle and draw the irregular shapes on the shell of the turtle as shown in the above image. The turtle is pretty much ready now.
You just need to add the sun in the sky. For that, either take a red leaf or red craft paper and cut that into a circular shape. Paste that circle at the top right corner.
Creating Sun Rays with Circles – Step 11


Draw red lines around the circle to make them look like sun rays.
Creating a Grassland for a Turtle – Step 12
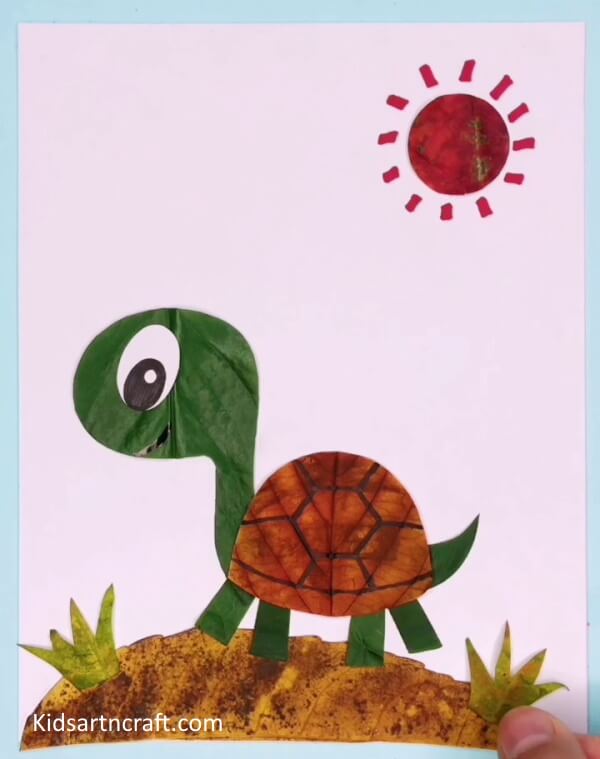

Now take a light green leaf and cut them in such shapes that they look like grass. Stick those pieces on the ground using glue around both sides of the turtle.
Creating a Sky Scene with a Blue Marker Pen – Step 13
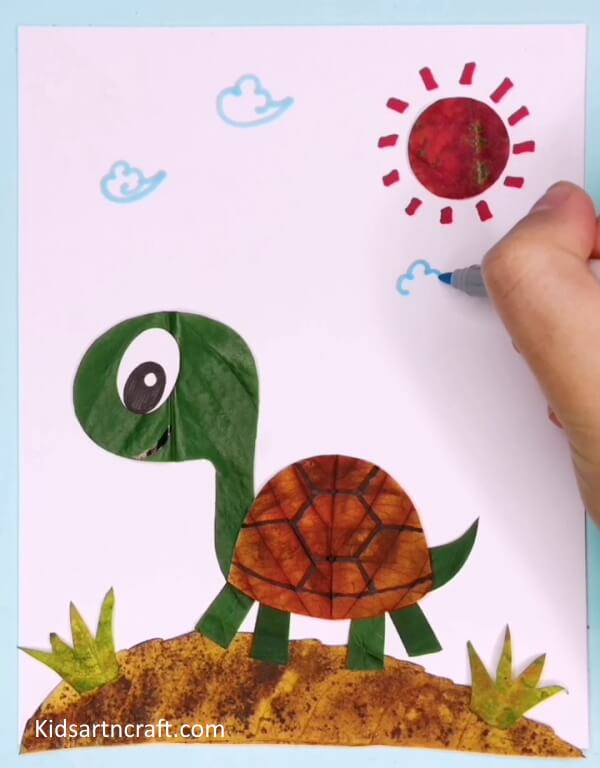
The next step is to take a blue marker pen and draw some clouds in the sky. 2-3 clouds are enough to make the sky look appealing.
Making Crafts with Kids: A Simple & Creative Activity – Final Steps
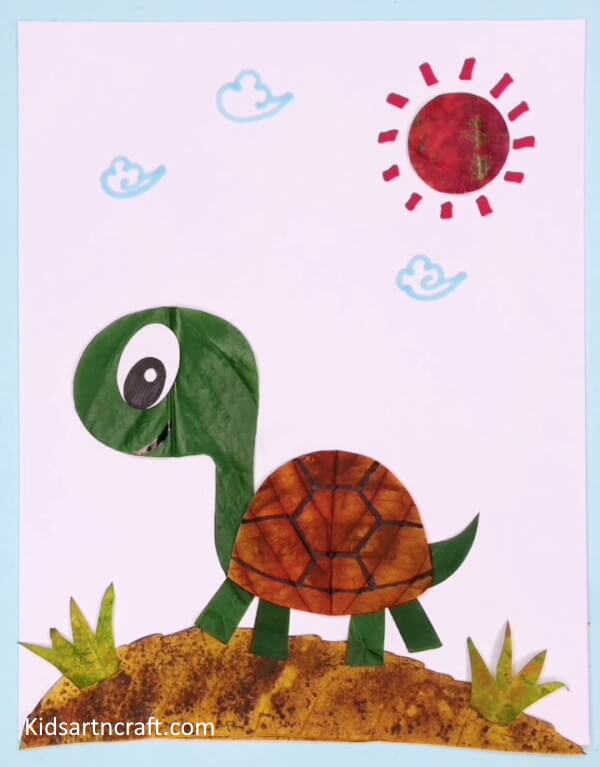

And there you go! Your craft is ready just like that. This art is quite simple yet creative and can make your kid happier. Kids appreciate making such cool crafts with their folks & family.
Some More Turtle Craft Tutorial
Easy To Make Clay Turtle Craft For Children

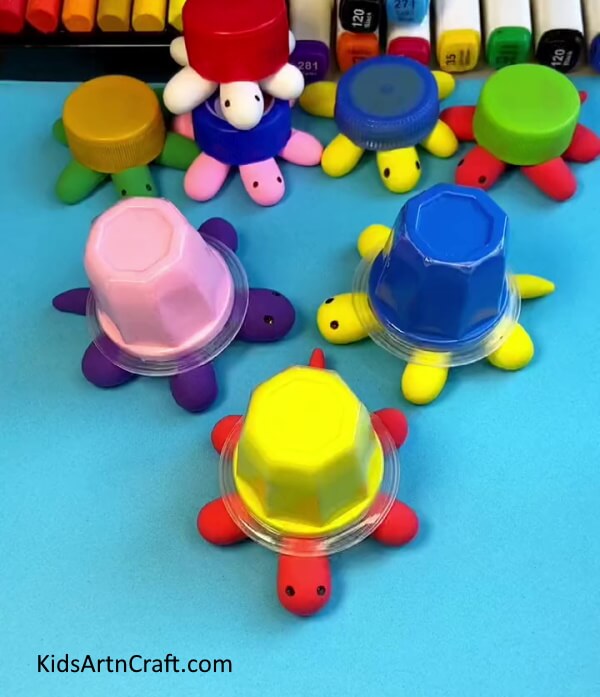
Image Source/Tutorial: Kids Art & Craft
This easy-to-make clay turtle craft is perfect for children! It is a fun and creative activity that will keep them engaged and excited. With just a few supplies and a little bit of time, kids can have a memorable craft that they can be proud of!
FAQs Related To Recycled Turtle Craft With Sun Using Leaves
1. What materials are needed to make a recycled turtle craft with sun using leaves?
You will need leaves, paint, scissors, glue, and a popsicle stick to make this craft.
2. Where can I find leaves to use for this craft?
Leaves can be found in parks, forests, or in your own backyard.
3. What colors of paint should I use for the turtle shell?
You can use any color for the turtle shell, but green or brown colors may look more natural.
4. What other items can I use to create the sun?
You can use other items such as paper, felt, fabric or construction paper to create the sun.
5. Do I need to paint the popsicle stick?
No, you do not need to paint the popsicle stick.
6. What other items can I use to decorate the turtle craft?
You can use other items such as googly eyes, buttons, sequins, or ribbon to decorate the turtle craft.
This recycled turtle craft is a fun and creative way to turn leaves into a beautiful sun. Crafting with nature is a great way to engage kids in nature and the environment.
Follow us on Youtube for art and craft tutorials and much more.
More Articles from Kids Art & Craft
- Easy Crafts With Buttons And Ribbons
- Tissue Box Guitar Craft Ideas
- DIY Plastic Bottle Ideas for Garden
- Beautiful Button Turtle Crafts For Kids
- DIY Easy Play-Doh Flamingo Decorative Art and Craft for Kids – Step-by-Step Tutorial