Cardboard Craft
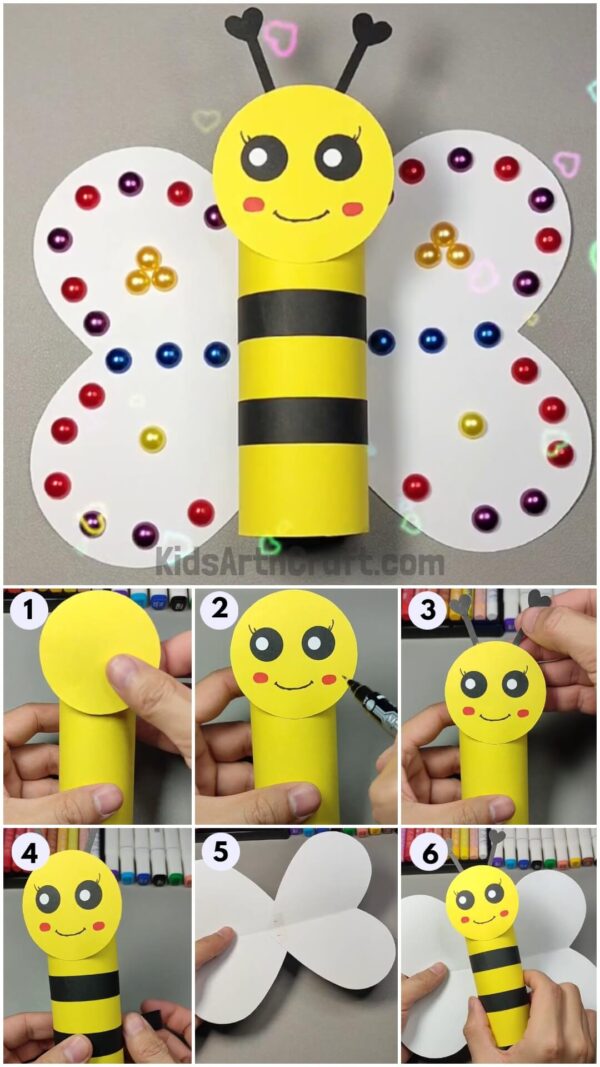
DIY Cardboard Roll Bee Craft For Kids

This activity is great for kids of all ages. It only requires a few materials like cardboard rolls, paint, etc. and your kids can make an adorable bee craft that they’ll love. Use our instructions to make this bee craft with your children.
Welcome to this cardboard roll bee craft tutorial! Kids are always obsessed with easy crafts. Do you have kids who love to make crafts and arts, then this tutorial is perfect for your kids. In this tutorial, we are going to learn about how to create your own cardboard roll bee craft. With some easy steps and simple craft materials like color papers, cardboard roll and some sketch pens even kids can make this craft by themselves. Are you ready?
DIY Cardboard Roll Bee Craft

Read More: Easy Cardboard Tube Tiger For Kids
Materials Required
- Color chart paper (Yellow, Black& white)
- Yellow foam paper
- Cardboard roll
- Scissors
- Glue
- Sketch pen (Black& Red)
- Color stones
Procedure
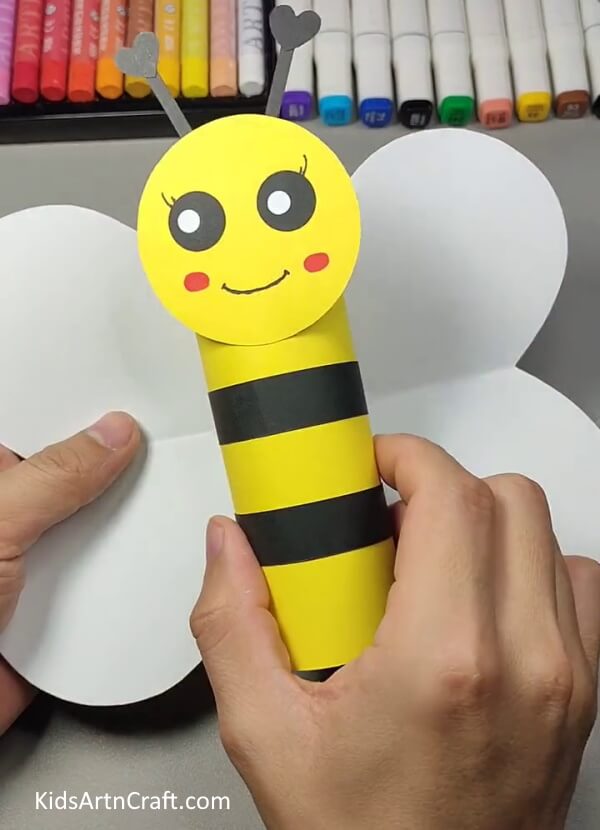
Step 1: Pasting Yellow Color Paper On Cardboard Roll
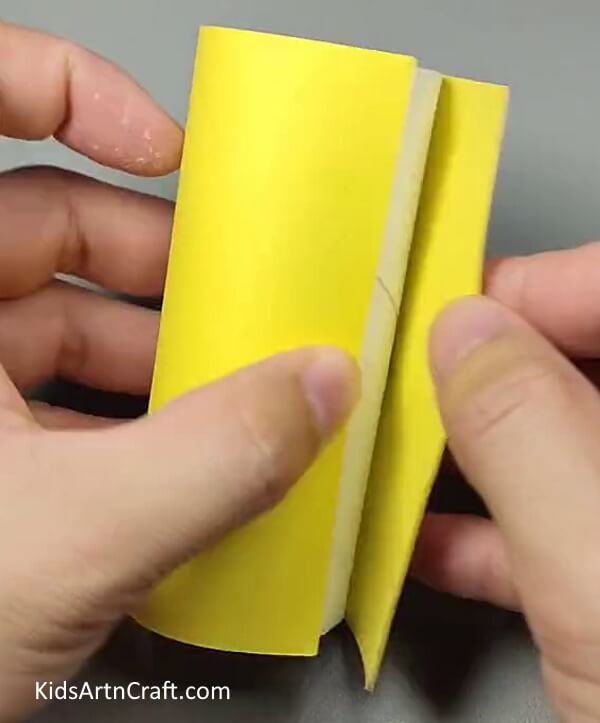

Let’s begin with cut a 10cm piece from cardboard roll. Then cut a rectangle piece from yellow foam paper, we have to completely cover our cardboard roll with yellow paper so take measurements according to your cardboard roll and then paste it with cardboard roll.
Step 2: Cutting A Circle From Yellow Paper And Pasting It With Cardboard Roll
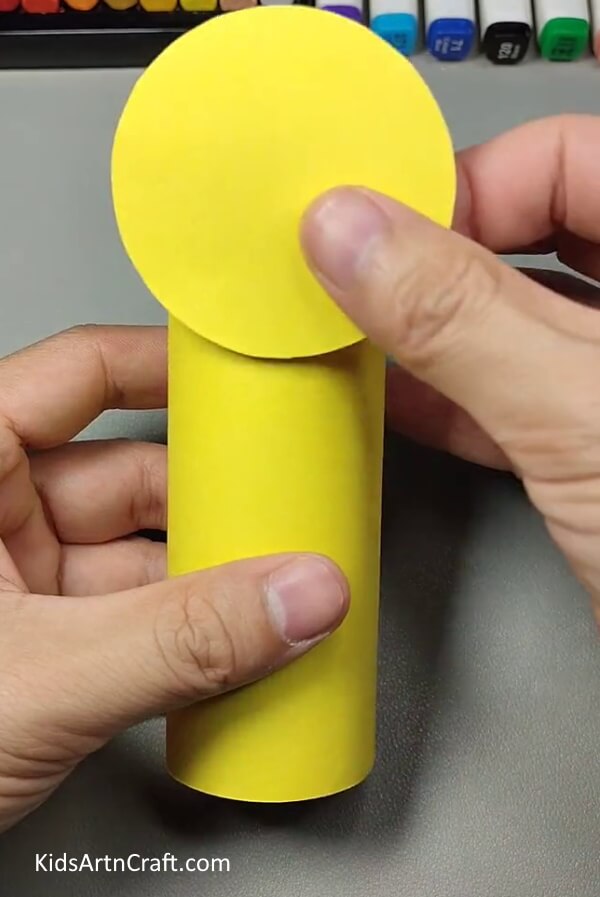

Take yellow color chart paper and cut a 5cm circle from it, then paste it on top of that yellow roll using glue.
Step 3: Making Eyes And Pasting It On Bee’s Face
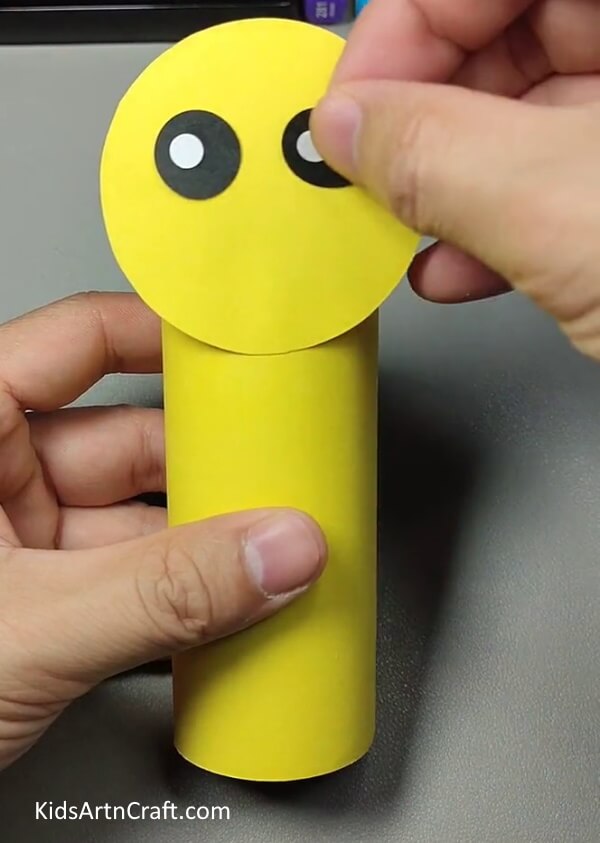

In this step we going to make eyes, take black color paper and cut two 1cm circles from it. Then take white color paper and cut two 0.5cm circles from it and paste those two white circles in the middle of two black circle pieces to make eyes and paste that eyes on bee’s face as shown.
Step 4: Drawing Mouth And Eyelashes For Our Bee
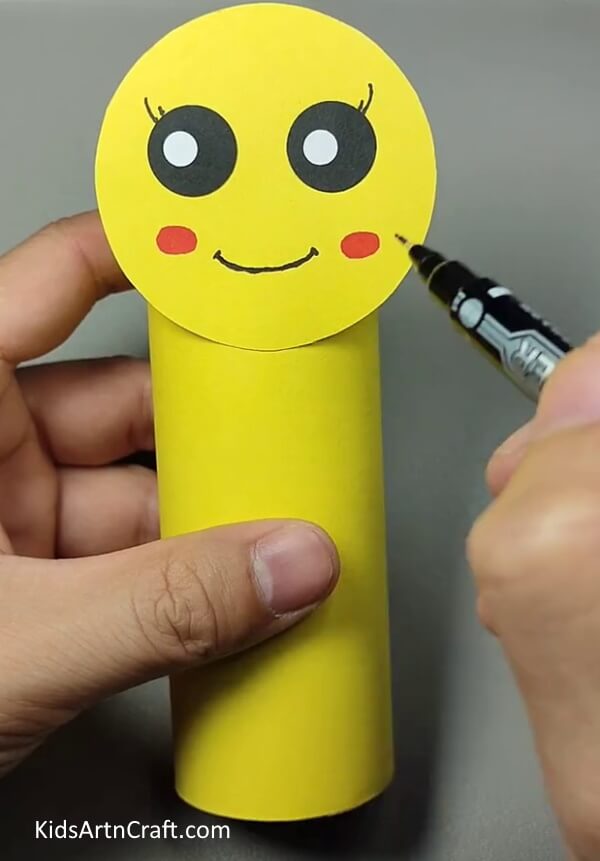

With the use of black pen, draw one curvy line for bee’s mouth under bee eyes as shown in the image, then draw eyelashes above bee eyes. Then take red sketch pen and draw two small red circles on both side of bee’s cheek.
Step 5: Making And Pasting Antennas For Bee
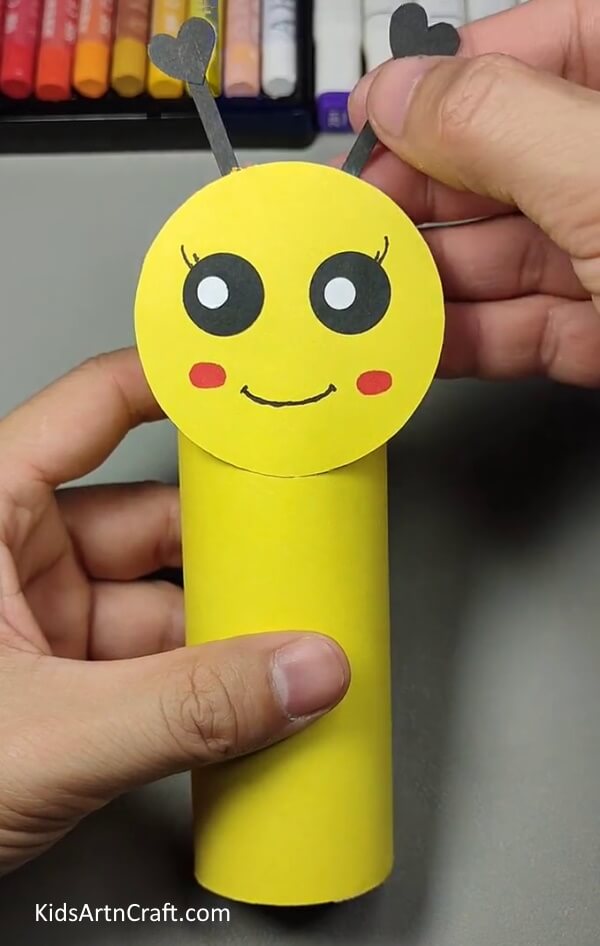

Are you ready to make antennas, then take black paper and cut two small hearts from it and also cut small thin rectangle pieces from it. Paste two hearts with those rectangles to make antennas. Paste two antennas behind bee’s head.
Step 6: Cutting Strip From Black Paper And Pasting It On Bee’s Body


Now take your black paper and cut two small strips from it and paste one piece of black strip under bee’s head.
Step 7: Pasting Second Strip
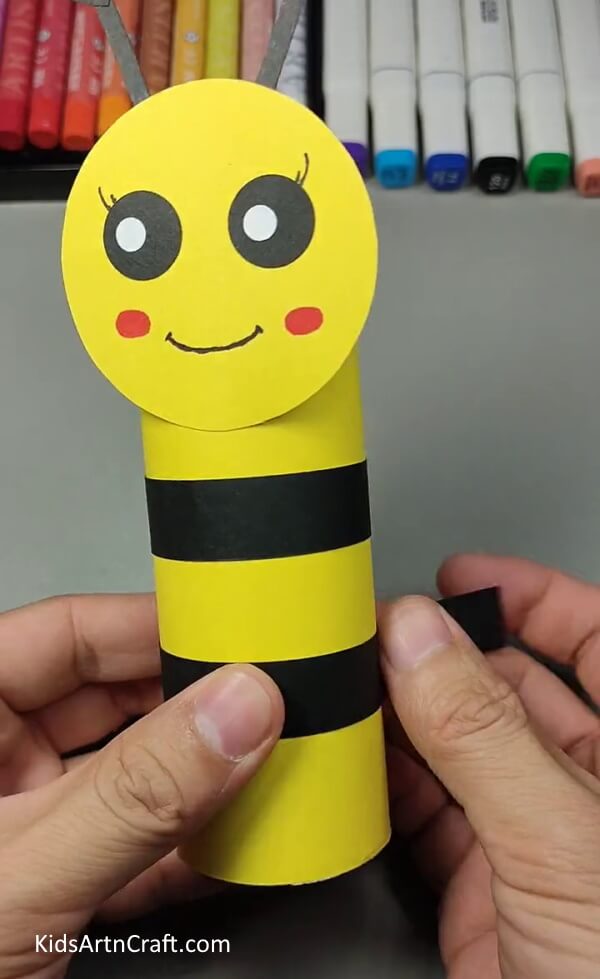

Then take second strip and paste it under your first strip as shown in the image.
Step 8: Cutting Wings From White Paper
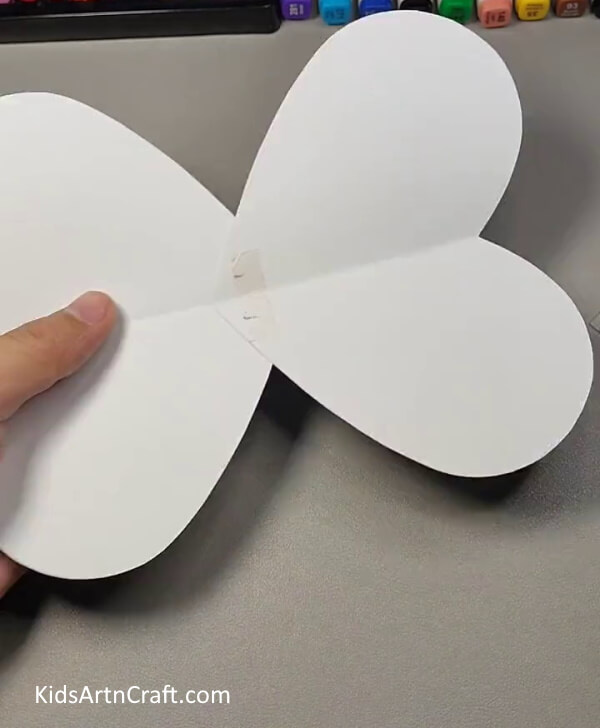

Take your white chart paper and cut two big hearts from it. Paste end of both hearts together with glue.
Step 9: Pasting Wings With Bee’s Body

Paste that wings with bee’s body as shown in the image.
Completing Our Bee Craft With Decorating Bee’s Wings
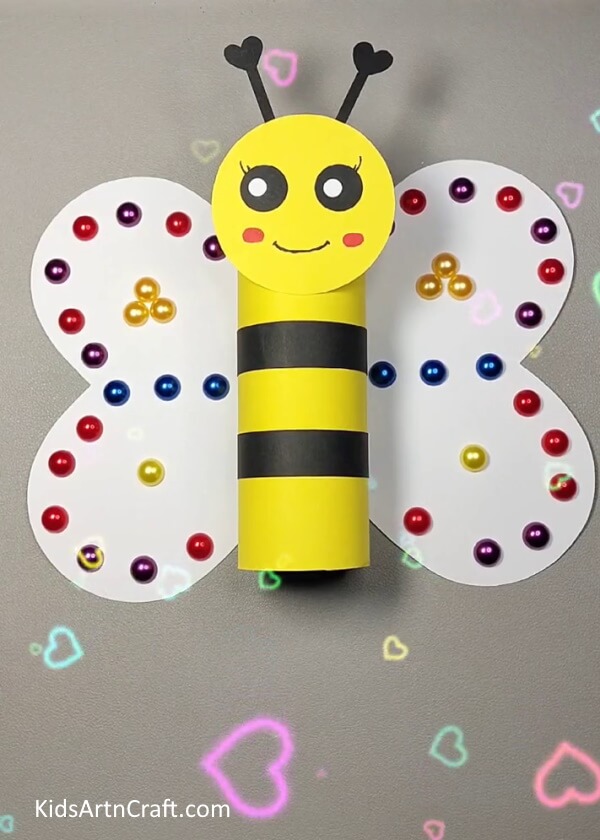

To decorate wings, take color stones with vibrant colors and paste it all around on bee’s wings as you like. Now, our cute bee is ready!
Hope you all like this cardboard roll bee craft step by step tutorial. Leave some comments on comment box below, let us know your thoughts about this craft. If you are interested in making easy craft like this, visit our website for more.
Some More Bee Craft Tutorial
Easy To Make Bee Craft Using Paper For Kids

Image Source/Tutorial: Kids Art & Craft
This craft is perfect for kids! With just paper and a few other materials, they can make a bee craft that is fun and easy. Kids will love creating their own bee crafts, and they’ll have a blast showing off their projects to their family and friends.
Thank you for visiting our website!
Follow us on Youtube for art and craft tutorials and much more.
More Articles from Kids Art & Craft
- Easy to Make Handmade Bee Craft Tutorial for Kids
- Plastic Bottle Bee Craft For Kids
- DIY Easy Paper Bee Craft for Kids
- Recycled Egg Cartoon Bee Craft Tutorial For Kids
- How to Make Ladybug with Toilet Paper Roll