


Cardboard Craft
How to Make Ladybug with Toilet Paper Roll

Welcome to our recycled toilet paper roll ladybug craft for kids! This fun and easy craft is perfect for kids of all ages and requires minimal supplies. It provides step-by-step instructions on how to make a ladybug with a toilet paper roll. Not only will your kids have a great time making this craft, but they will also learn about the importance of recycling and reusing materials. Get ready to create a unique ladybug with your kids using a few simple supplies and a recycled toilet paper roll!
Recycled Toilet Paper Roll Ladybug Craft For Kids

Read More: Simple Paper Crab Craft – Step-By-Step Tutorial
Materials Required:
- Toilet Paper Roll
- Colored Paper (Black, Red, and White)
- Glue
- Scissors
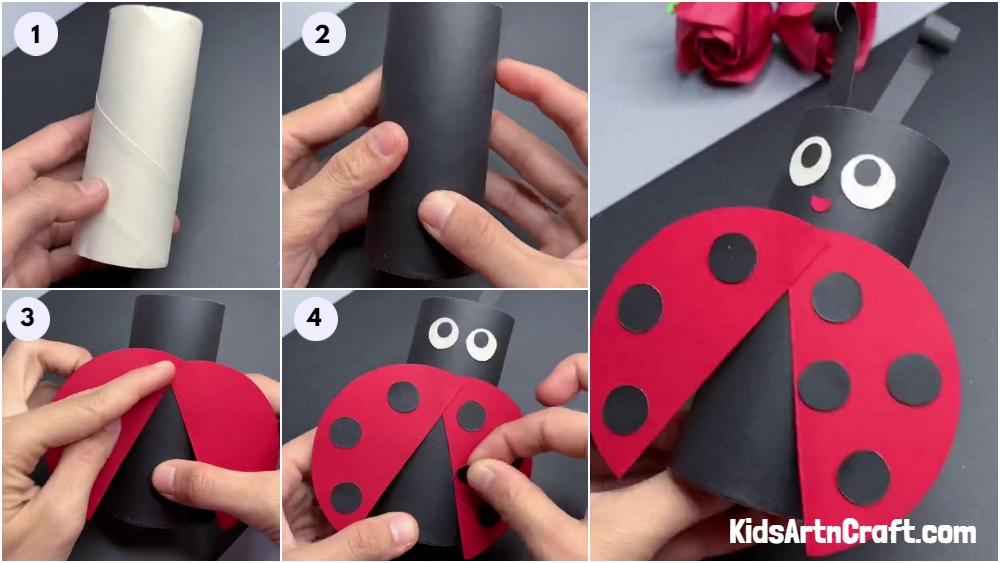
Step -1 Get Ready With a Toilet Paper Roll
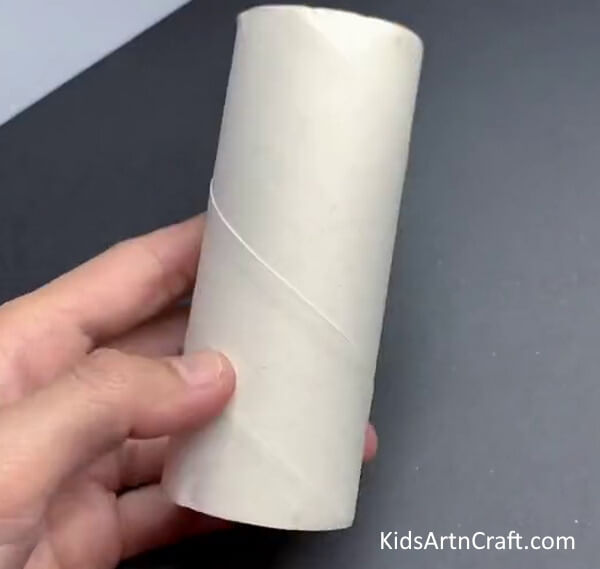
Let’s make the body of the ladybug first. To make the body, we need a toilet paper roll. So, get ready with it!
Step -2 Making The Body of Ladybug
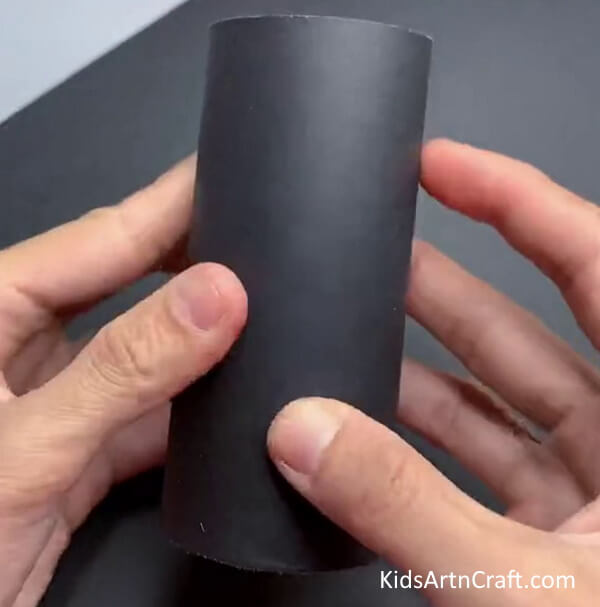
Now, take a black paper and wrap the toilet paper roll with it using glue.
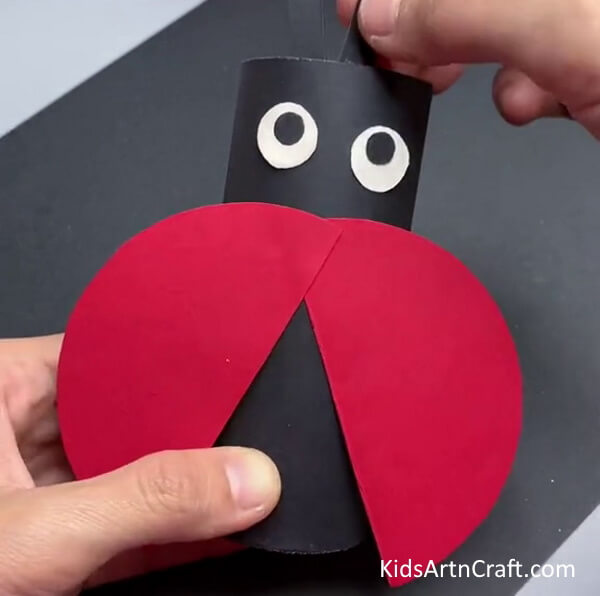
Step -3 Making The Wings of The Ladybug
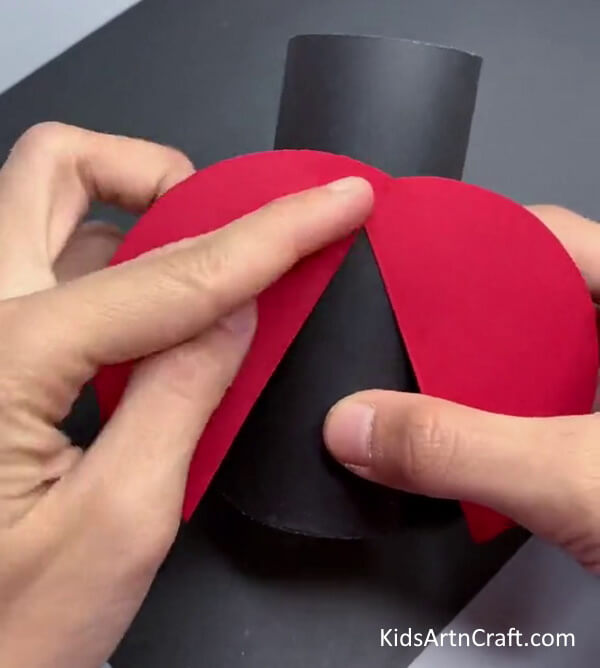
After making the body of the ladybug, we need to make the wings. Cut down a circle out of a red paper sheet. Now, cut the circle into two equal halves.
Paste the wings to the body as shown in the above image.
Step -4 Making Eyes of The Ladybug

You can either paste the googly eyes or make it. Here, we are making the eyes using sheets. Cut two white circles and two small black circles. Paste them on the the body to make the eyes.
Step -5 Adding Antlers of The Ladybug
To make the antennae, cut the black sheet into antlers and stick them inside the top of the paper roll using glue.
Step -6 Adding Black Spots To The Wings
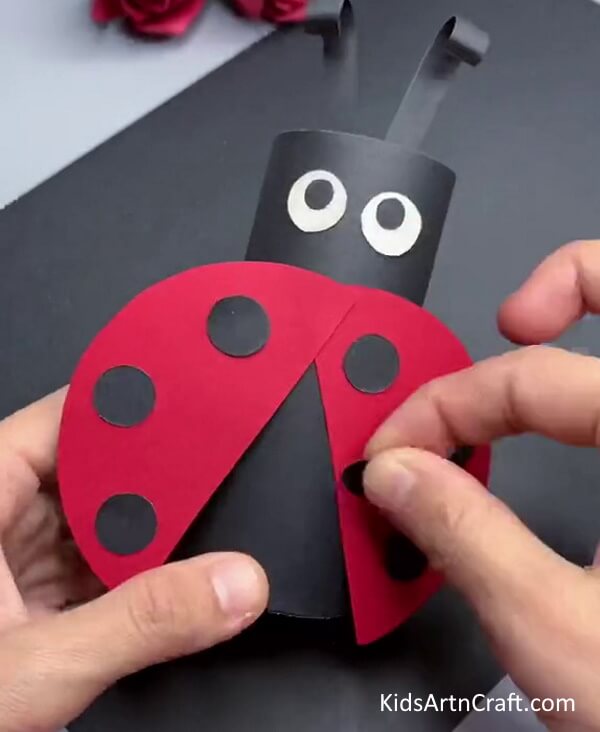
Cut down small circles out of black paper sheet to add the spots to the wings. Paste them to the wings using glue.
Step -7 Making The Ladybug Smile
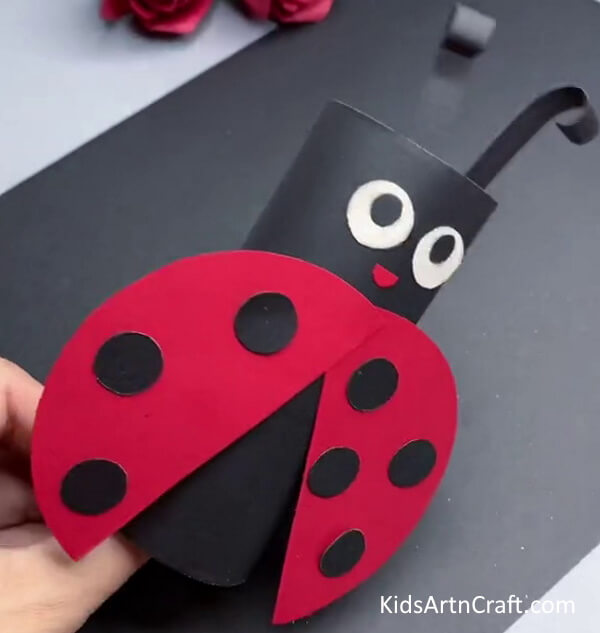
It’s important to make your ladybug smile. To give it a smile, cut a small semicircle from red paper and paste it under the eyes of the ladybug.
Final Image – And Your Ladybug Is Ready!
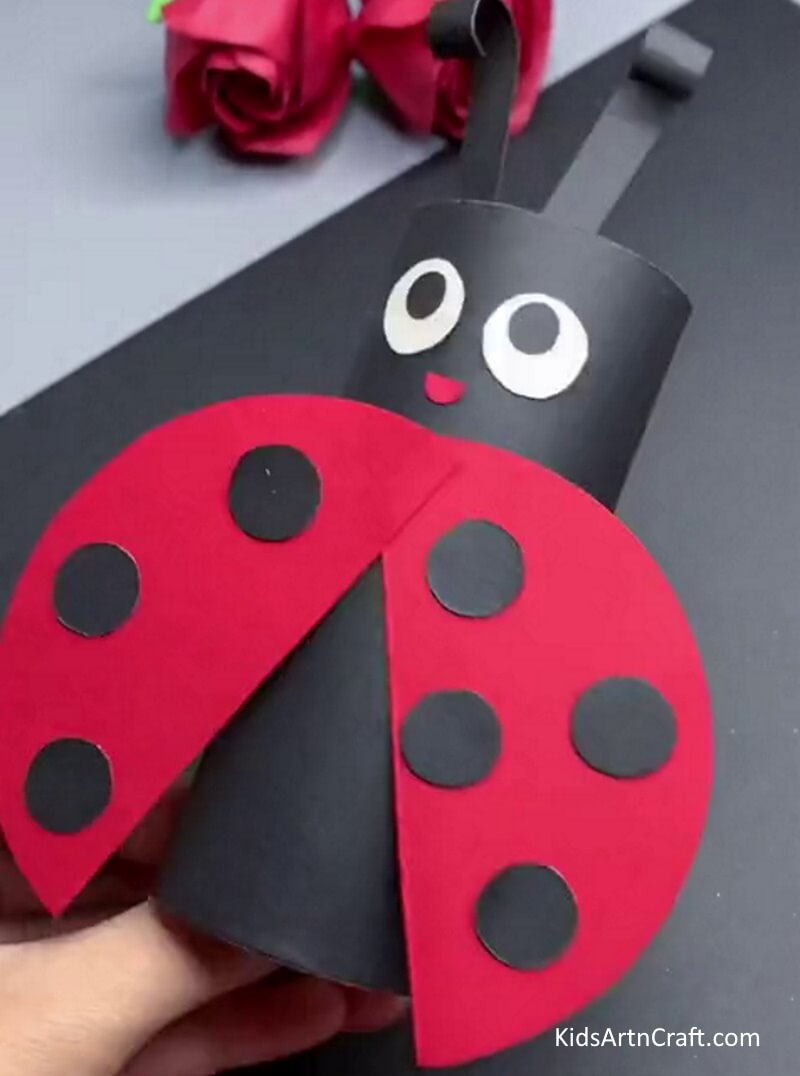
Your cute adorable ladybug is ready! With a minimal craft supplies and easy instructions, kids can make this ladybug in no time at home. This craft idea will bring fun and creativity in their life. This craft activity is perfect of preschoolers and older kids to enhance their fine motor skills and confidence. They can flaunt this craft in front of their friends and family and can be used as a decorative item for their room. Enjoy making this ladybug with your child today! Have Fun!
Some More Ladybug Craft
Learn to Craft Ladybug Artwork With Egg Carton
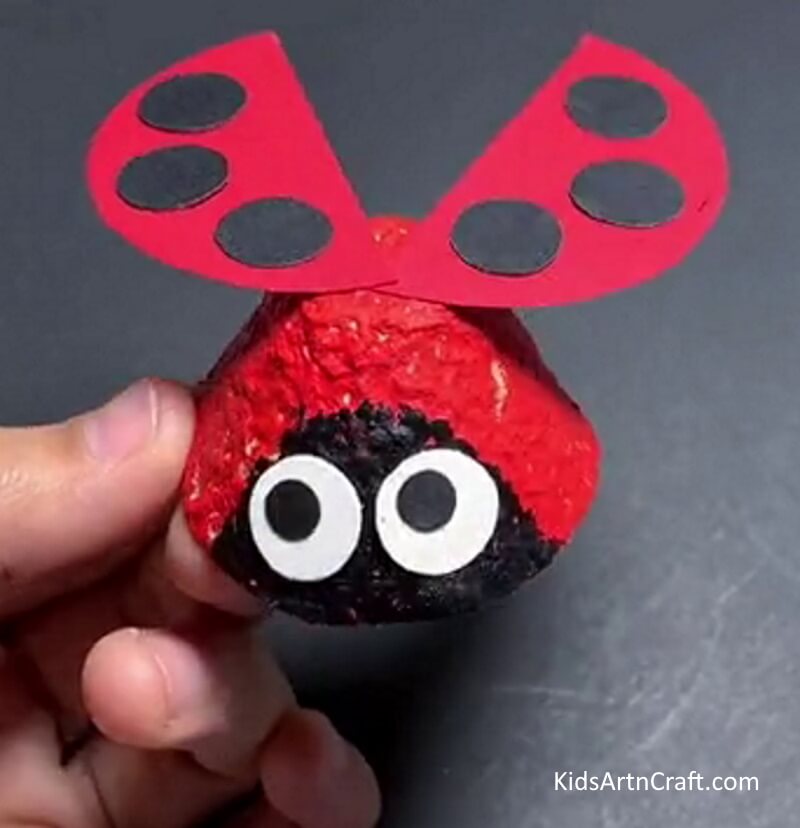
Image Source/Tutorial: Kids Art & Craft
Making art with an egg carton is a fun and easy way to create something beautiful. With a few simple supplies, you can learn to craft ladybug artwork as a fun activity for kids or adults alike. Get creative and make something special with an egg carton.
DIY Ladybug Art with Leaves
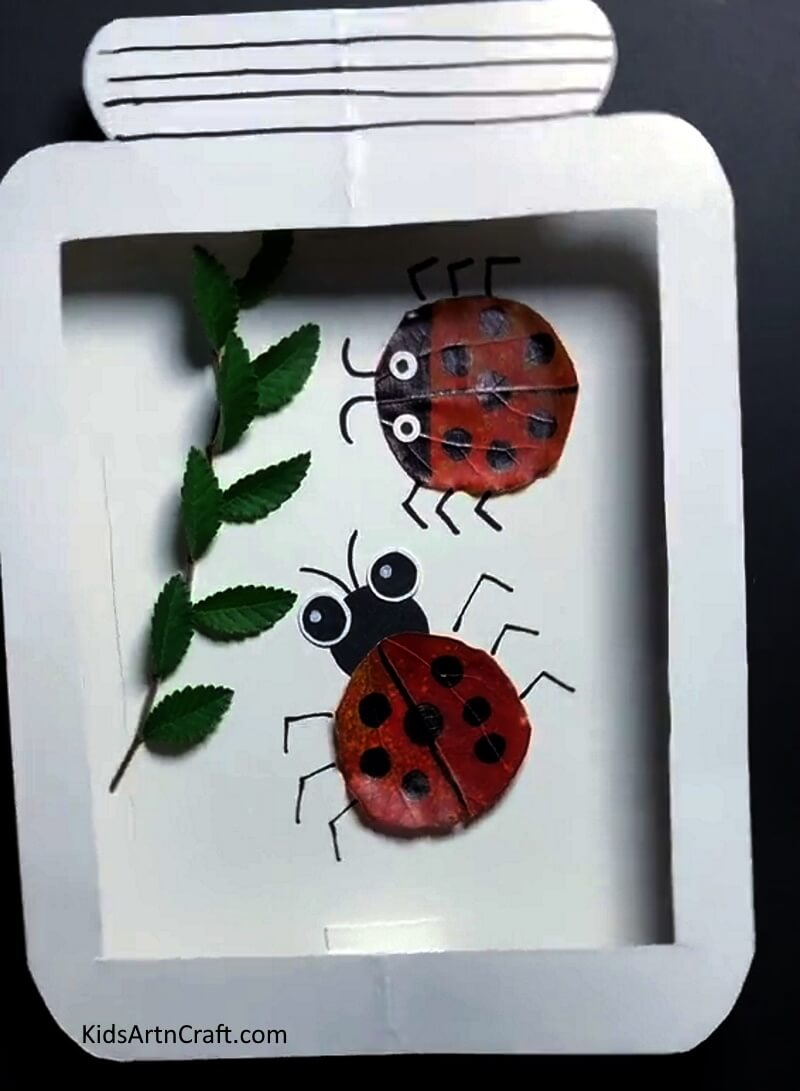
Image Source/Tutorial: Kids Art & Craft
DIY Ladybug Art with Leaves is a fun and creative way to use leaves to make a beautiful piece of art. It’s a great family activity for the fall season and a perfect way to get kids outdoors and exploring nature. Plus, the finished artwork looks great!
FAQ’s on How to Make Ladybug with Toilet Paper Roll
1. What materials do I need to make a ladybug with a toilet paper roll?
You will need a toilet paper roll, craft paint, brush, scissors, black pipe cleaners, red pom poms, white paper, glue, and a black marker.
2. How do I make the ladybug’s body?
To make the ladybug’s body, cut the toilet paper roll in half. Paint the entire roll with red craft paint. Set aside and let it dry.
3. How do I make the ladybug’s wings?
Once the body is dry, cut two white paper wings. Glue them to the back of the body.
4. How do I make the ladybug’s face?
To make the face, glue two red pom poms to the front of the body. Use a black marker to draw the eyes.
5. How do I make the ladybug’s antennae?
To make the antennae, cut two black pipe cleaners in half. Bend the pieces in the middle and glue them to the top of the head.
6. How do I put the ladybug together?
Once all of the pieces are complete, glue the wings and antennae to the body.
7. How do I make sure the ladybug stays together?
To make sure the ladybug stays together, you can use a hot glue gun or a strong craft glue.
8. How can I make the ladybug look more realistic?
To make the ladybug look more realistic, you can paint the wings with yellow or white paint. You can also add polka dots to the wings and body using a black marker.
9. How long will it take to make a ladybug with a toilet paper roll?
It should take about 1 hour to make a ladybug with a toilet paper roll.
10. What other things can I make with a toilet paper roll?
You can make many other things with a toilet paper roll, such as a bee, a flower, a caterpillar, or a butterfly.
Read More:
- Recycled Plastic Jewellery Craft Ideas
- Recycled Plastic Bottle Bird Feeders – Easy DIYs
- Recycled Egg Tray Mushroom & Flower Craft – Step by Step Tutorial
- Paper Woven Crafts & Designs for Kids
- Easy Leaf Art For Kindergarteners With Your Parents – Step by Step Tutorial