Home Decor
DIY Cardboard And Stick Cycle Centerpiece Home Decoration Craft For Kids

This tutorial is about an amazing DIY centerpiece making using up your cardboard and wooden sticks which will look like purchased from the market!
Want to make a pretty DIY centerpiece for your home?! Decorative centerpieces can be a little expensive, so, we brought you this amazing craft that you can use up as a centerpiece that will look like an expensive one purchased from the market! This is a pretty cycle made up of merely waste materials like cardboard and wooden sticks, which makes this an eco-friendly recycled craft! While this craft-making you can teach your kiddos the importance and concept of recycling by just investing some of your precious time! This can also be a fun and productive afternoon activity in the boring hours to spend quality time with your little ones!
DIY Cycle Centerpiece Home Decoration Craft

Read More: DIY Wall Decor Artwork Easy Tutorial for Kids
Materials Required
- Cardboard
- Pen
- Scissors
- Floral Tape
- Cutter
- Wooden sticks
- Glue Gun
Procedure
Step 1: Outlining The Tape
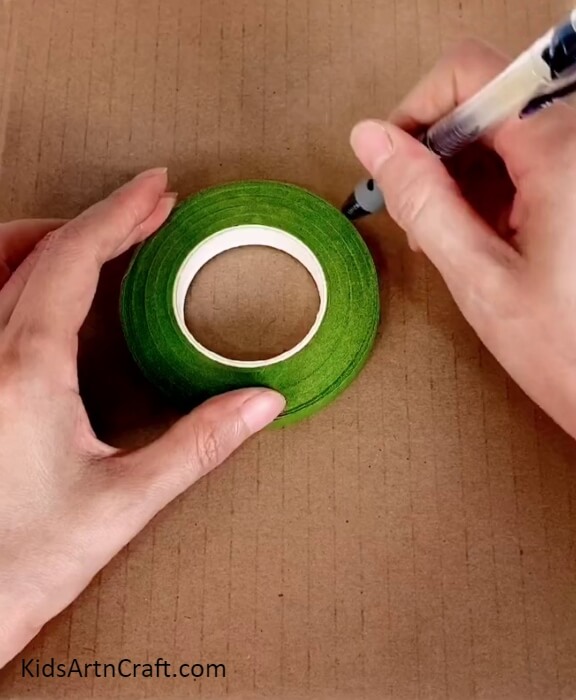

For the first step, take cardboard, floral tape, and a pen. Now using the pen, outline the tape structure over the cardboard.
Step 2: Cutting Out The Outlined Part
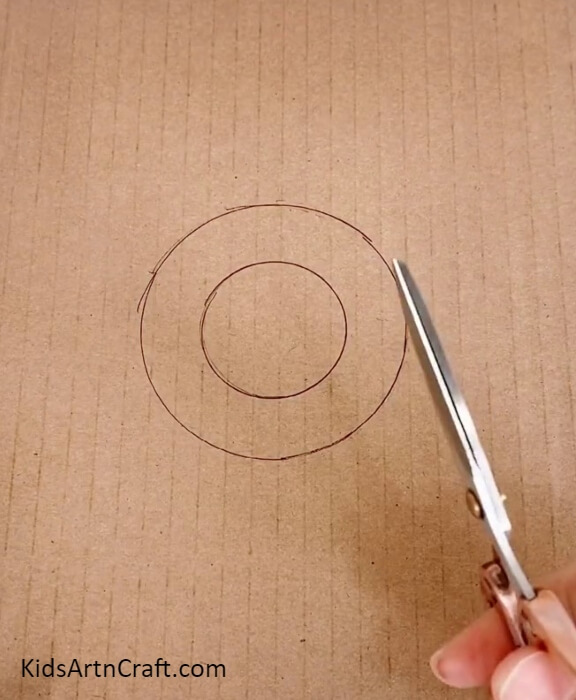
Using scissors, cut the outline part from the other circle of it, this will become the wheel of the cycle.
Step 3: Cutting Out The Inner Circle
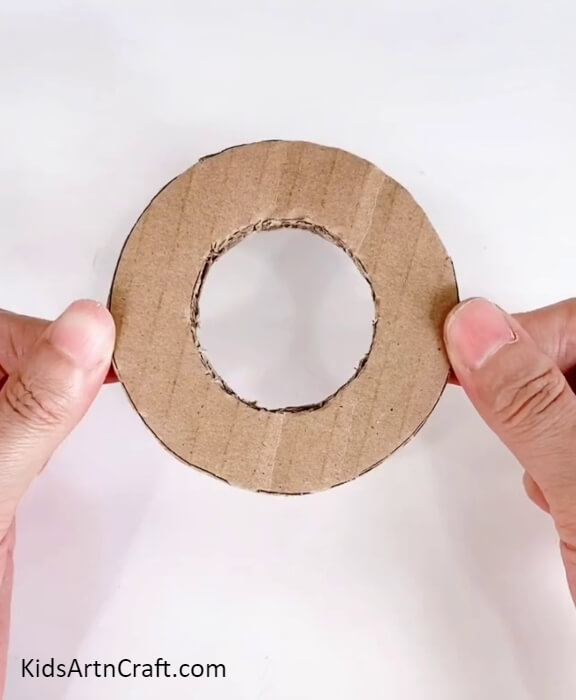
Using the scissors, cut out the inner part of the circular wheel.
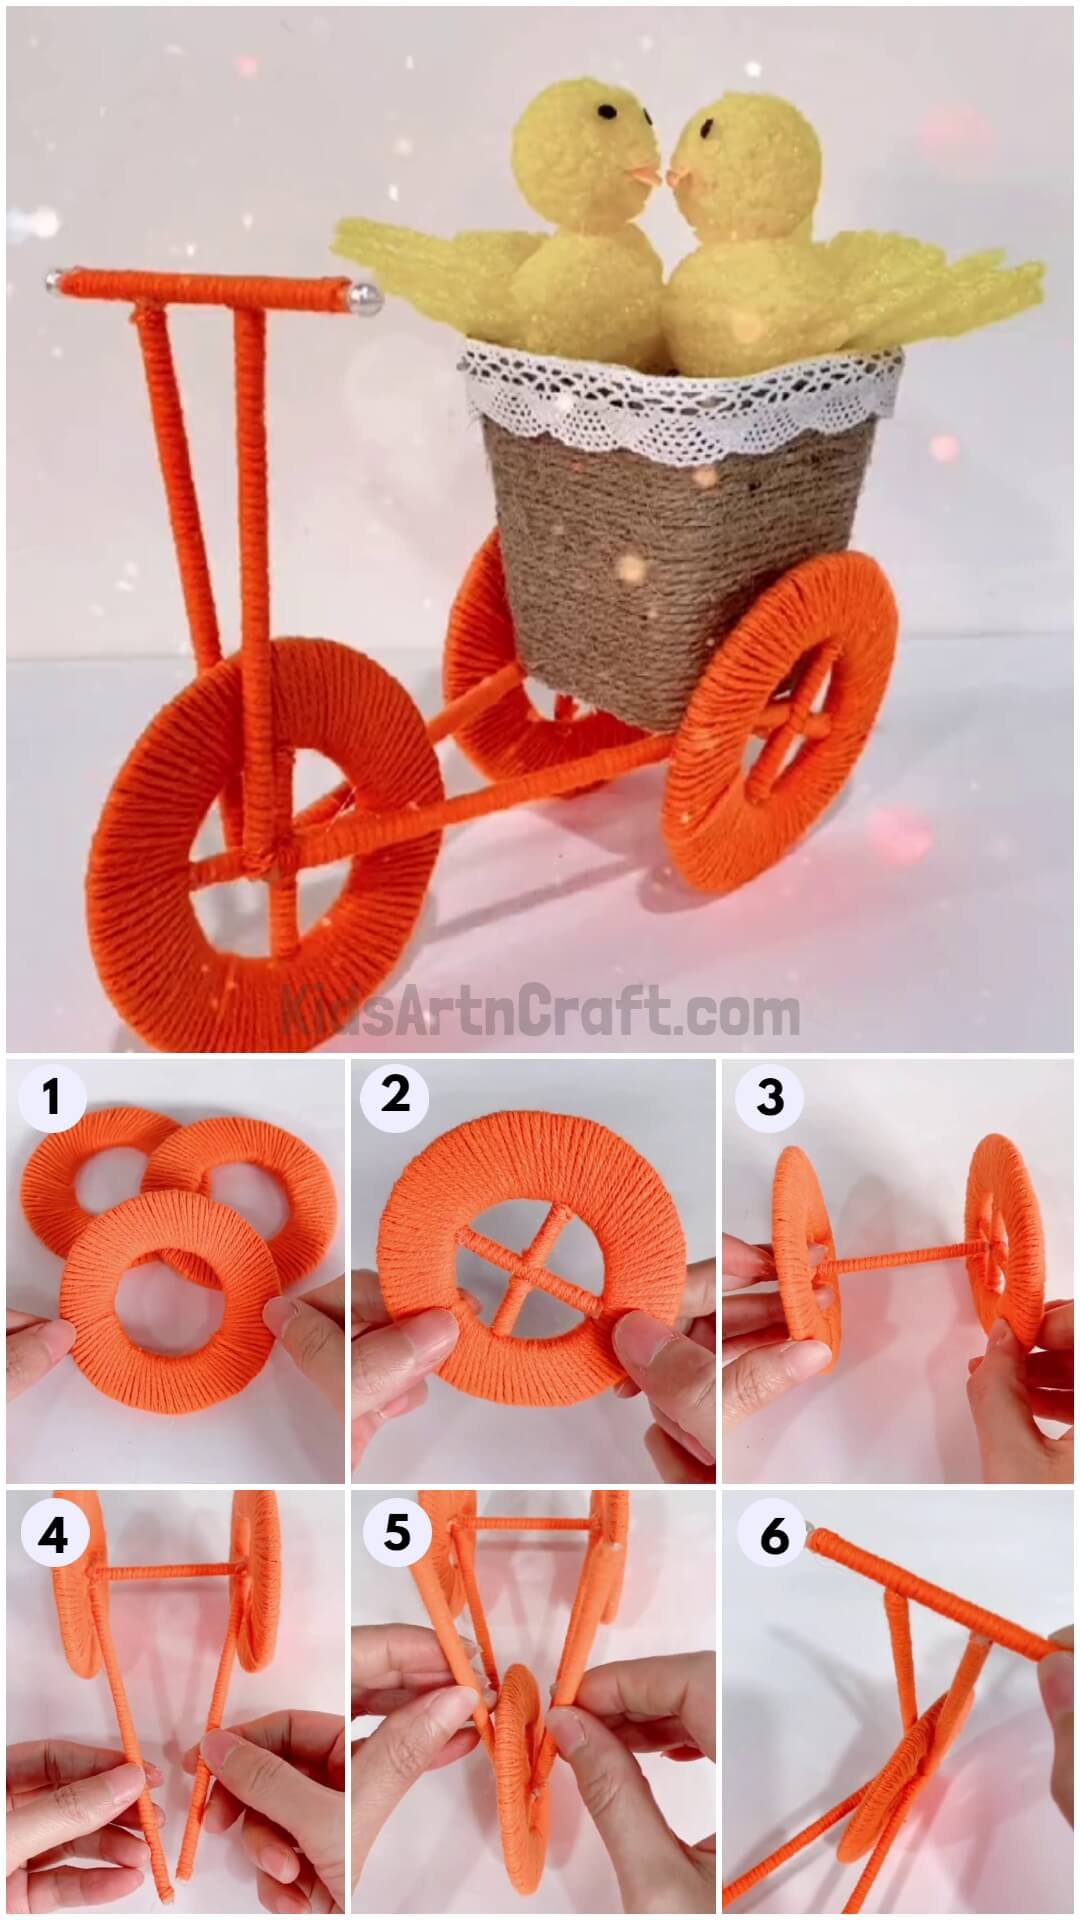
Step 4: Circling Thread Around The Wheel
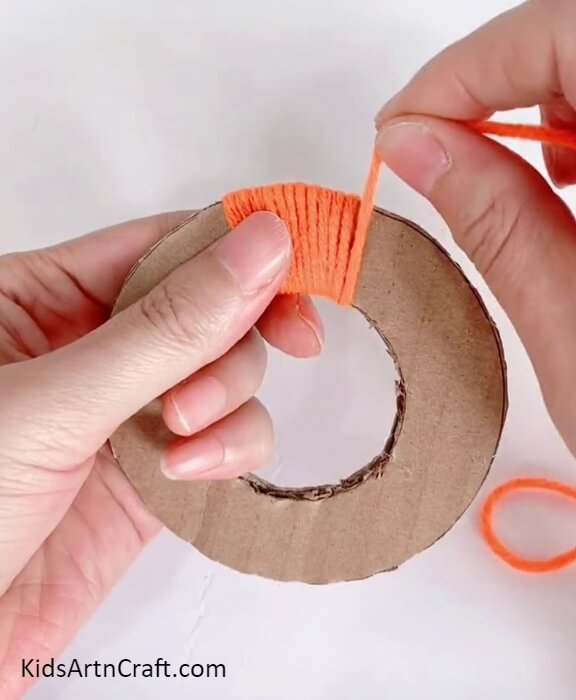
Take a thick orange thread and start circling it over the wheel to cover it wholely as shown in the image.
Step 5: Making 2 More Wheels
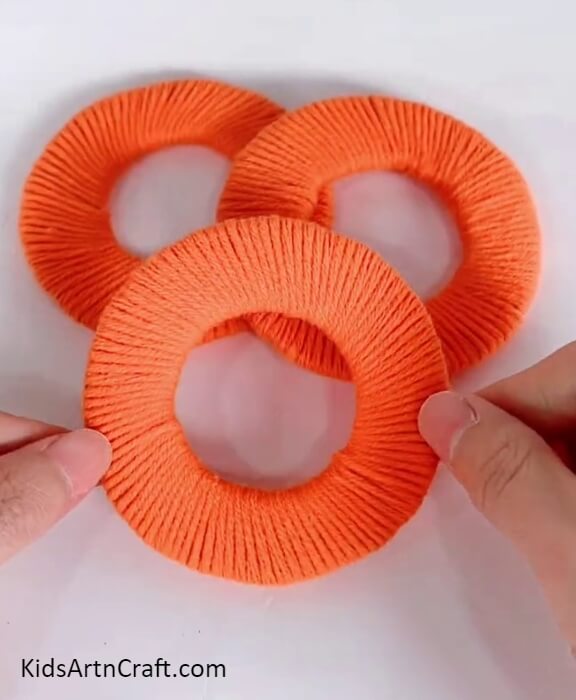
Follow the step 1-4, 2 times to make 2 more wheels.
Step 6: Wrapping A Stick With Thread
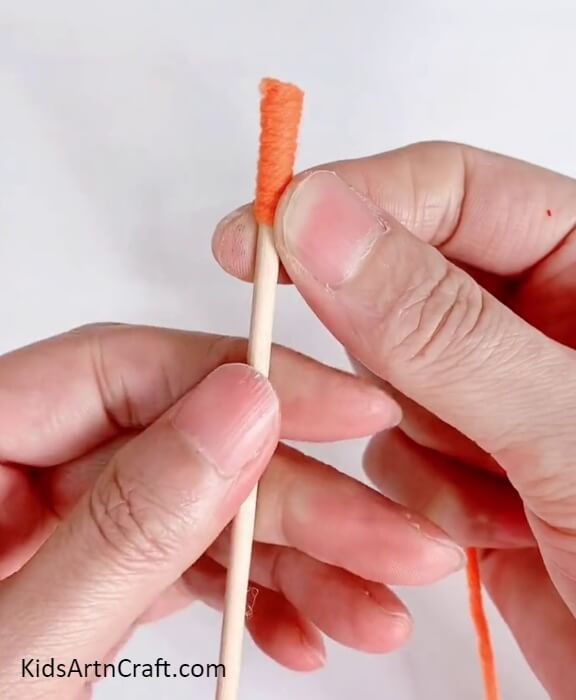
Take a wooden stick and the thread, secure the thread at the top of the stick using a glue gun then start to wrap it over the stick in a circular motion. This will make tread sticks.
Step 7: Making More Tread Sticks
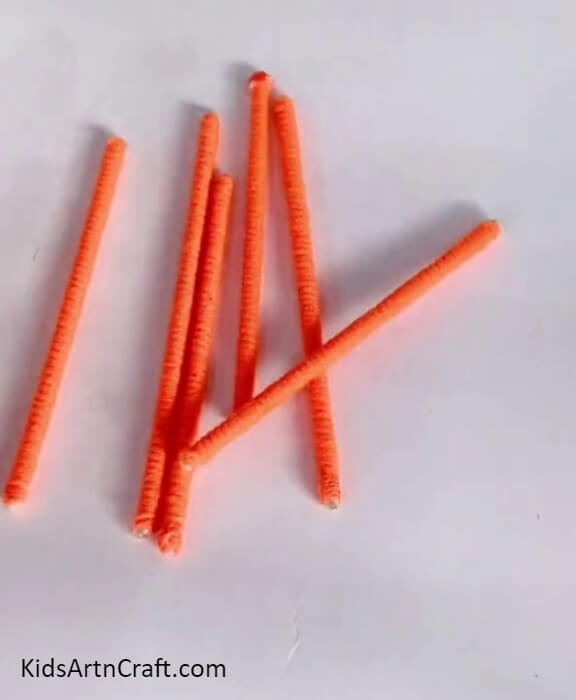
Repeat the previous step over 5 more sticks to make 6 thread sticks in total.
Step 8: Sticking A Piece Of Thread Stick In The Wheel
Cut out a piece of thread stick of the length that can be stuck in the middle of the inner circle of the wheel using a cutter. Now, using the glue gun place it in the same and stick it.
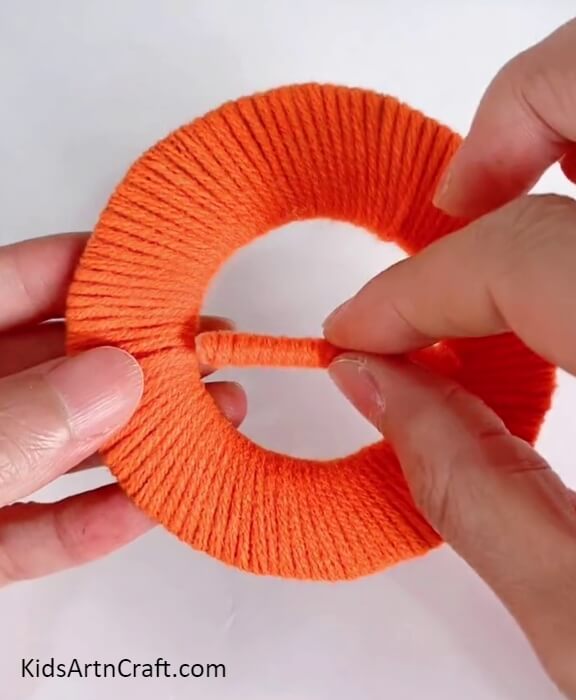
Step 9: Making A ‘+’ In The Middle Of The Wheel
Cut out 2 pieces of the stick and place and paste them in the middle of the inner circle of the wheel to make a ‘+’ in it.
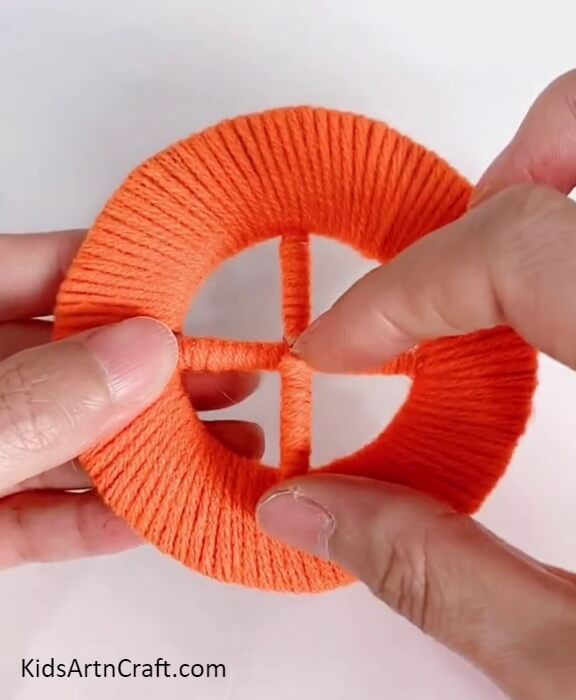
Step 10: Making ‘+’ In Other Wheels
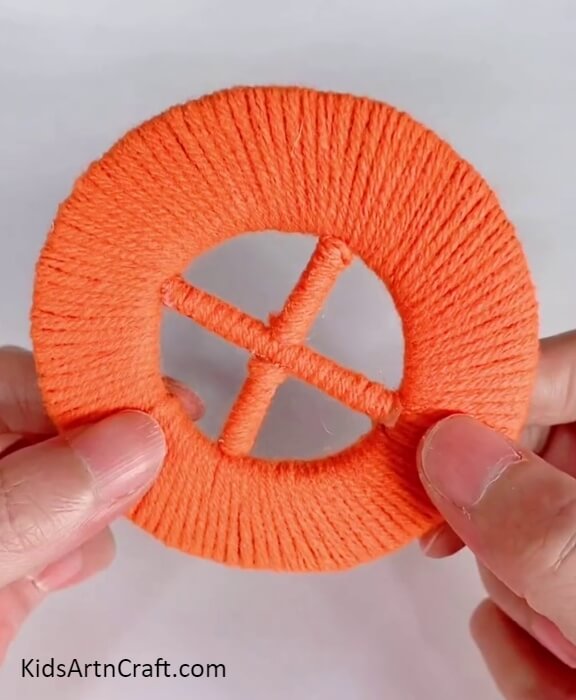
Following the same steps as mentioned before, make the ‘+’ in the other 2 remaining wheels.
Step 11: Making A Set Of Wheels
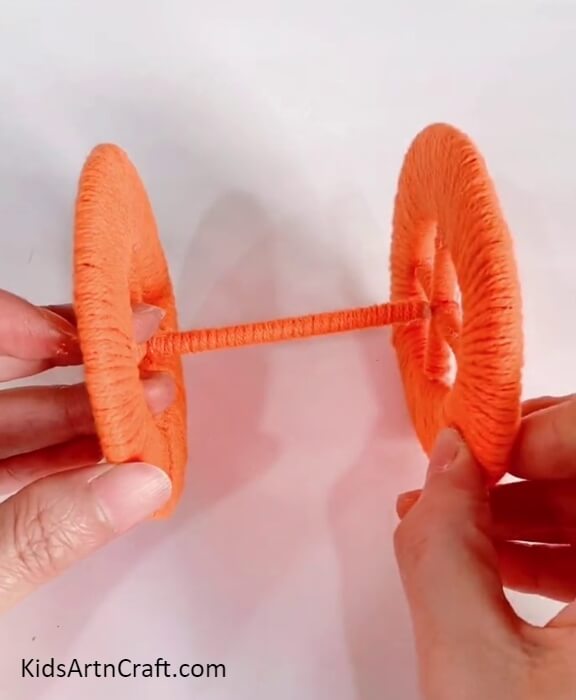
Now, paste another thread stick in the middle of the 2 wheels to connect them both using a glue gun.
Step 12: Making A Triangle Of Sticks
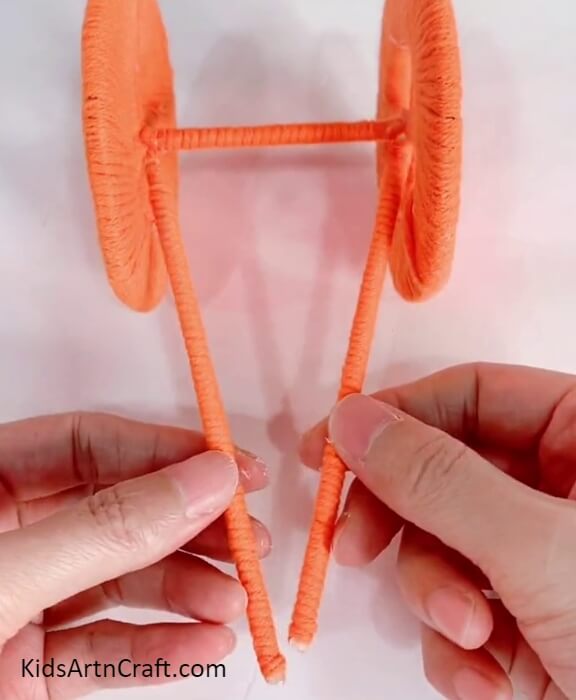
Paste 2 more sticks from the ends of the stick of the set of wheels in a tilted way to form a triangle using the glue gun. Make sure to not paste the ends of the tilted sticks together.
Step 13: Attaching The 3rd Wheel
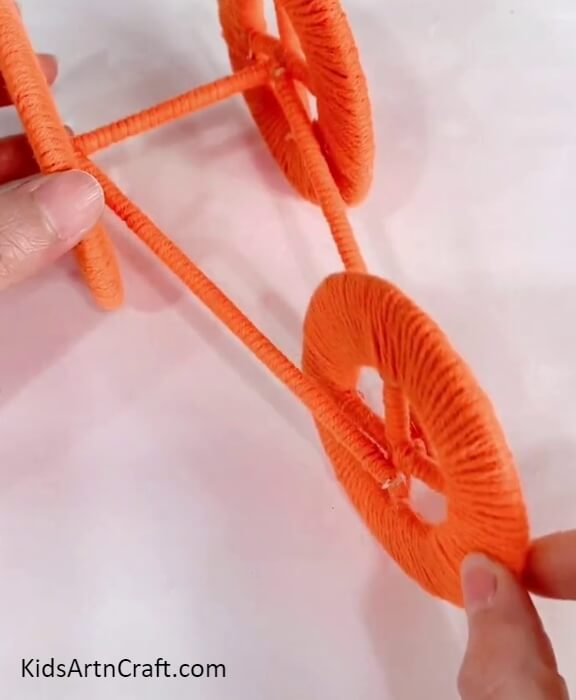
Place and paste the 3rd wheel in between the non-pasted ends of the sticks using the glue gun.
Step 14: Pasting 2 More Sticks Over The Front Wheel
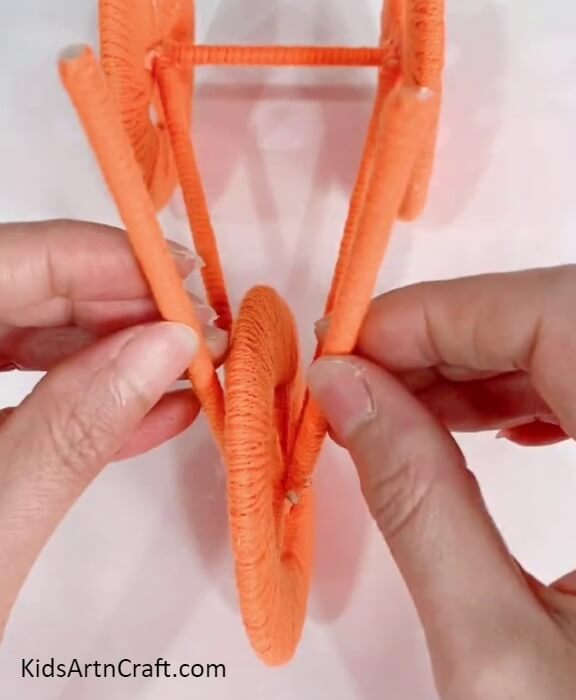
Paste 2 more sticks on each side of the front wheel of the cycle’s base straight and a little tilted as shown in the image using the glue gun.
Step 15: Making Handle Of The Cycle

Paste another stick over the sticks earlier pasted to make the handle of the cycle as shown.
Step 16: Letting It Dry
Let the hot glue gun dry so that every joint is stuck tightly.
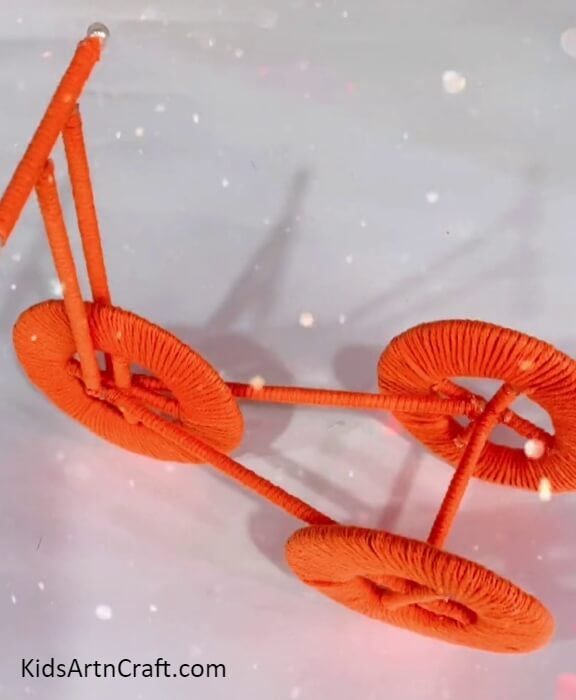
The Final Look Of Your Sticks And Cardboard Bicycle!
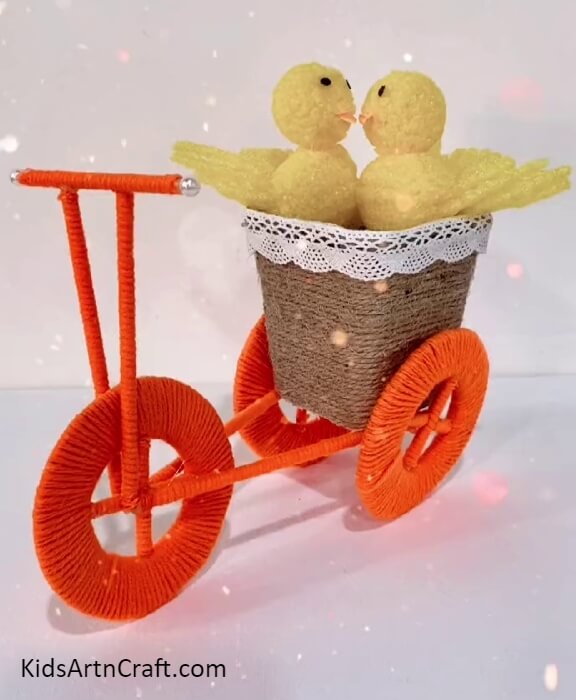
Voila! Look at the final results of your bicycle craft! Put on a pretty basket behind it with some love birds to make it look more stunning!
Decorate this over your dining or in any room, it will definitely thrive everywhere! You can even put on something else behind it, anything you can think of! You can even use it as a pretty handmade gift for your loved ones! I’m sure they will love it! Also, you can customize the appearance of this bicycle by using colorful threads and paint colors! Your imagination is the limit!
Follow us on Youtube for art and craft tutorials and much more.
More Articles from Kids Art & Craft
- Easy to Make Handmade Bee Craft Tutorial for Kids
- Easy Christmas Crafts for Kids to Make at Home
- Easy chicken family Decor craft for kids
- Easy To Make Paper Lantern Home Decor Craft Tutorial
- Glass Jar Decoration Ideas with Candles – Easy DIYs