Cardboard Craft
Creative Cardboard Track For Ball And Cars Game Craft Tutorial

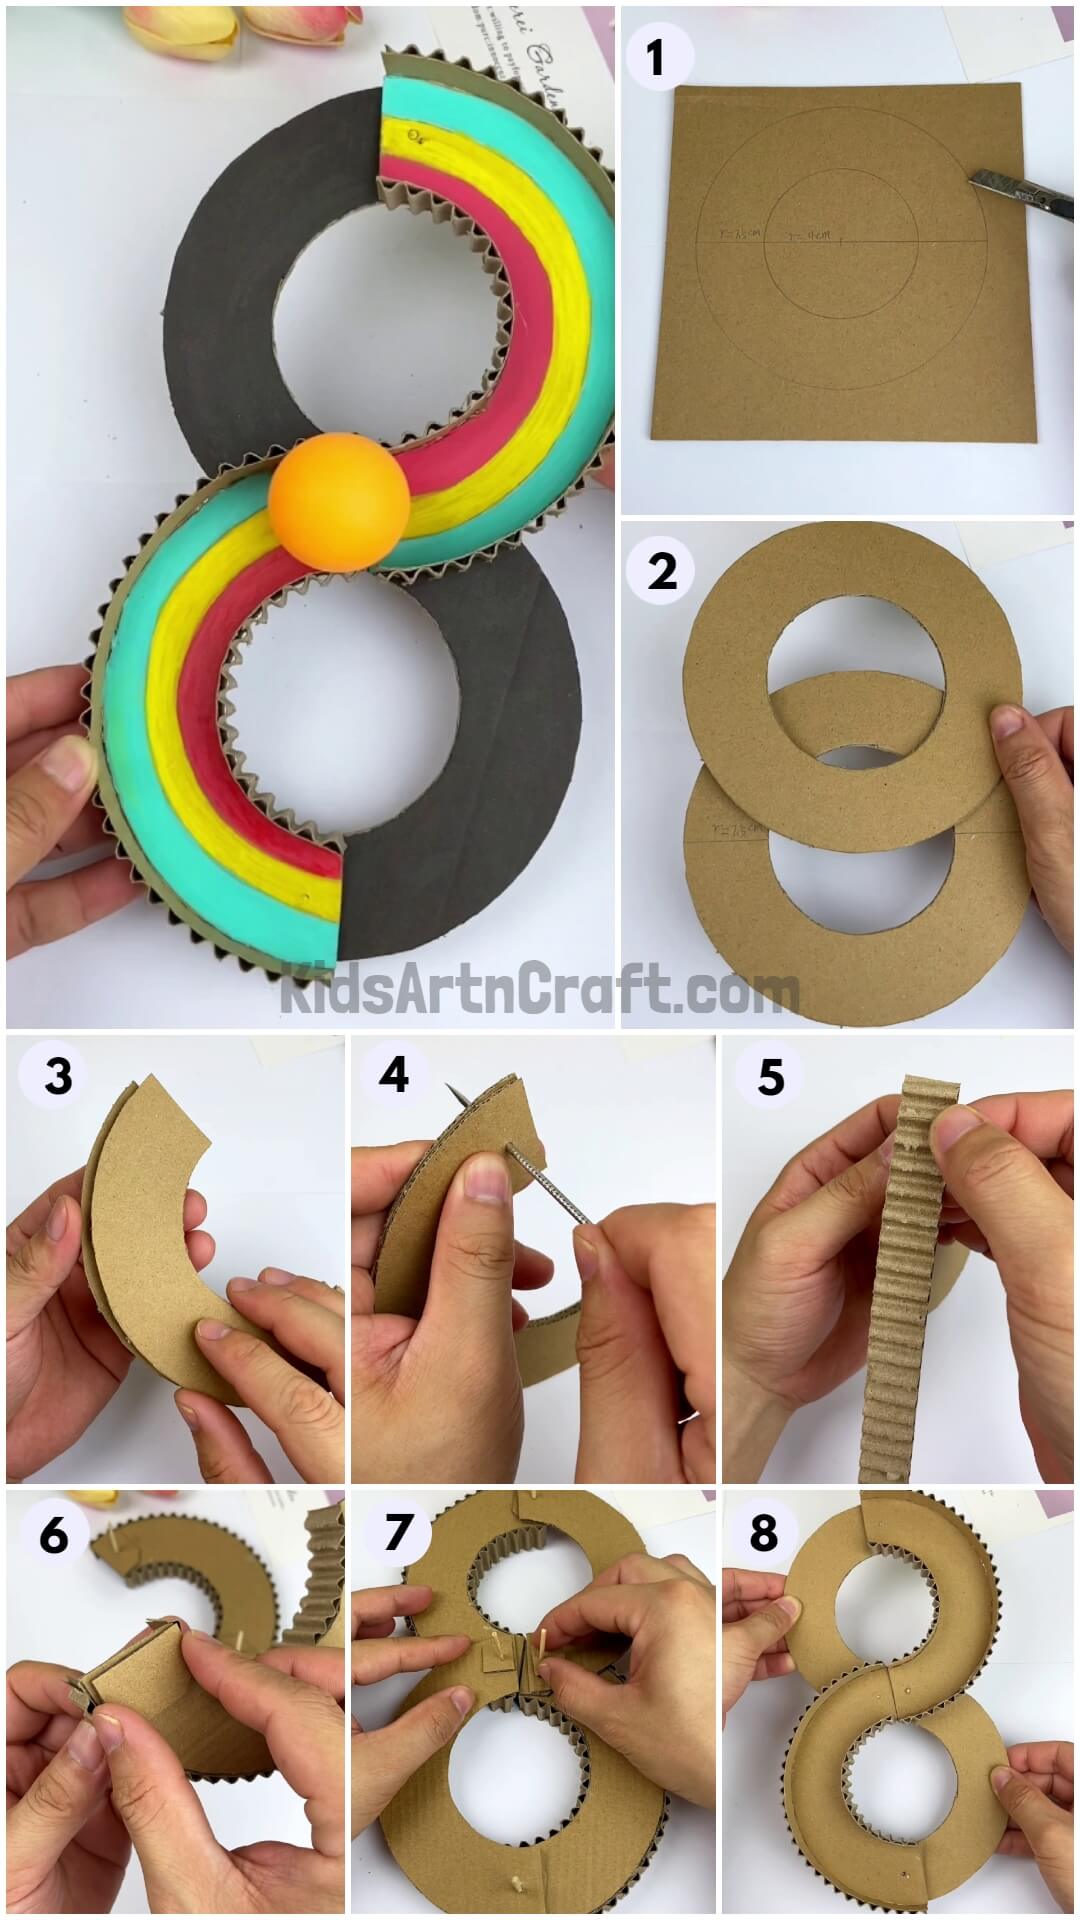
Create a movable race track! This step-by-step tutorial will help you to make a cardboard track on which you can race toy cars or even balls!
Are you a fan of hot wheels? If yes, then this craft is a must for you to make! This is a cardboard track that is movable and can use to race your toy cars or even a ball over this track! This craft will definitely be a hit for your little one and they will be keen to play with it! This step-by-step tutorial will be a perfect fit for making this craft easily as it includes instructions on each and every step of this craft journey! You can create this craft in the boring afternoon time to do something interesting which will even drive your motor skills and creativity!
DIY Cardboard Track For Ball And Cars Game Craft Idea
Read More: How to Make Cardboard Ice cream Craft in Easy Steps
Materials Required
- Cardboard
- Scissors And Craft Cutter
- Hot Glue Gun
- Pencil And Compass
- Craft Needle
- Wooden Sticks
- Paintbrush
- Paint Colors (Red, Black, Yellow, And Green)
Procedure
Step 1: Drawing A Ring Of Measured Circles
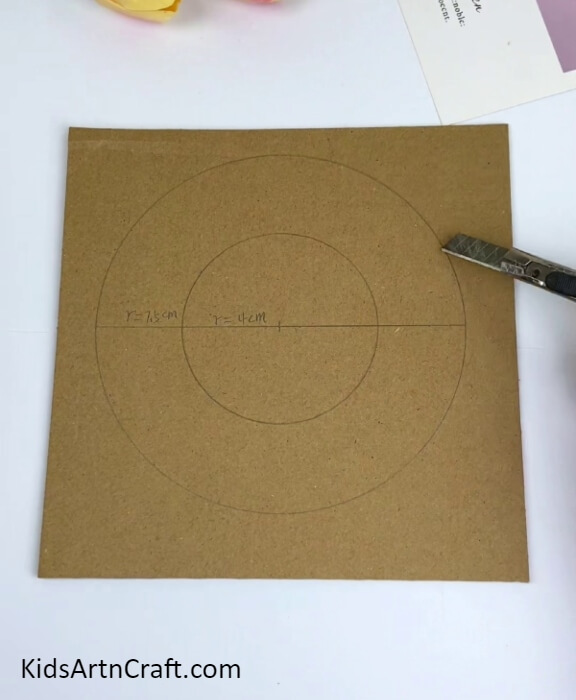
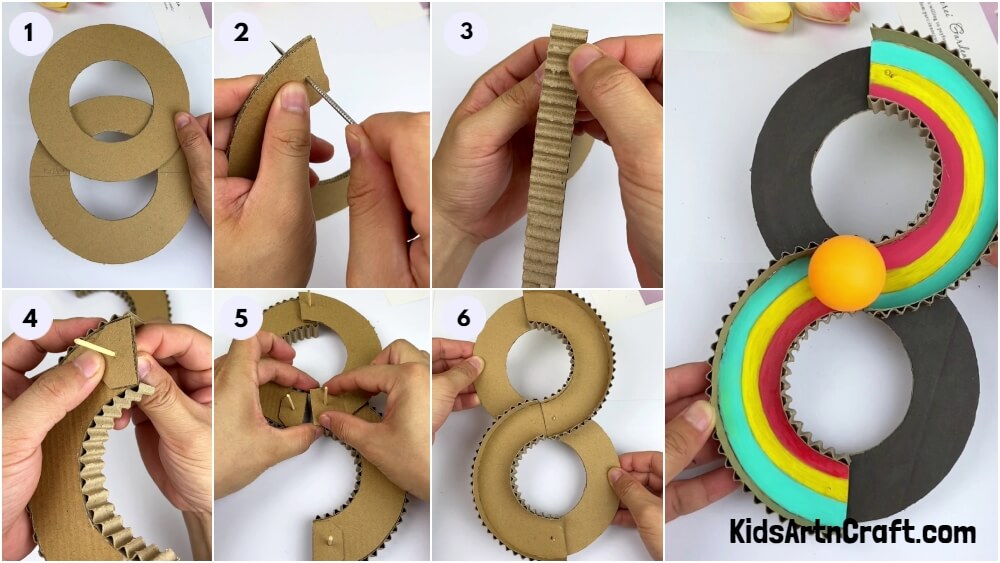
To begin this craft, take cardboard, a compass, and a pencil. Using the compass and pencil draw a circle of 4 cm radius over the cardboard and again a circle of 7.5 cm radius to create a ring.
Step 2: Cutting Out The Rings
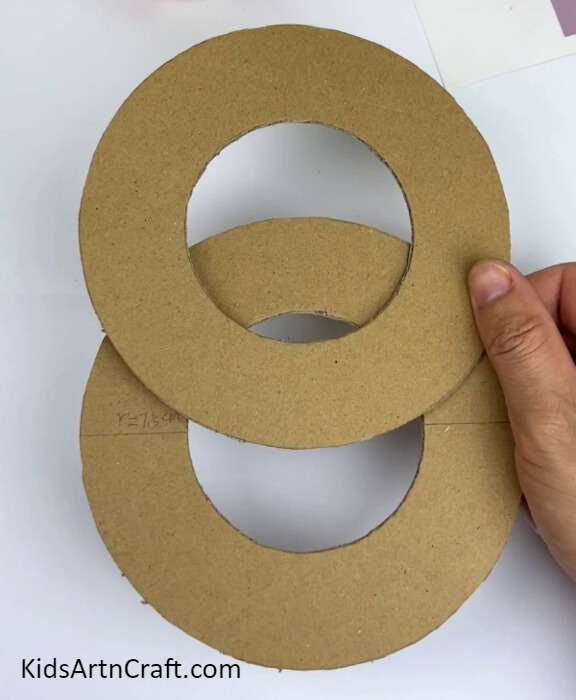
Cut out the ring drawn using a craft cutter and also trace over the ring on another cardboard and cut out that too.
Step 3: Cutting The Ring Into 2 Halves
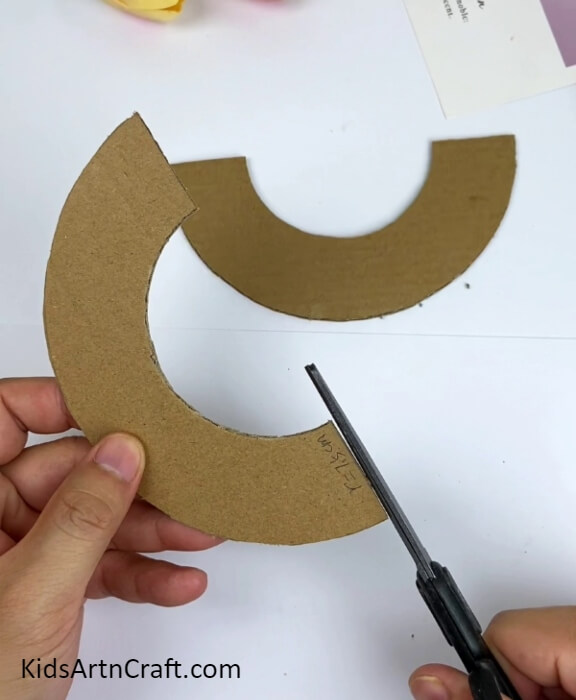
Using scissors, cut out the ring into 2 equal halves.
Step 4: Overlapping The Ring Halves
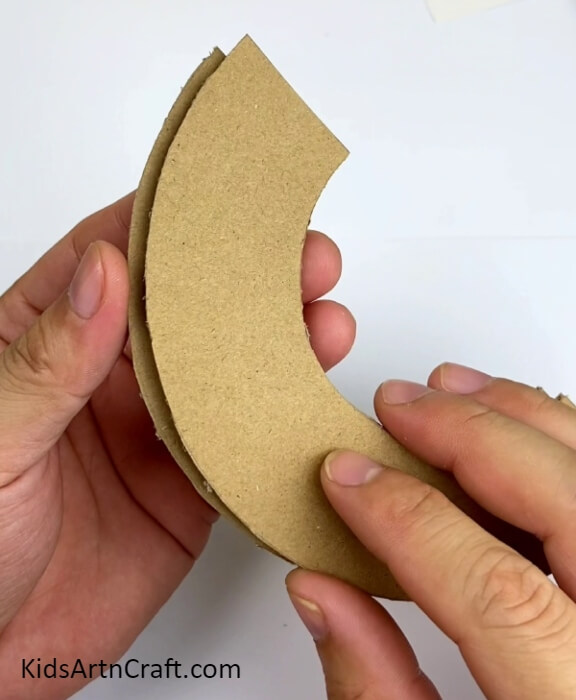
Place the ring half, one over the other them.
Step 5: Making Holes On The Overlapped Pieces
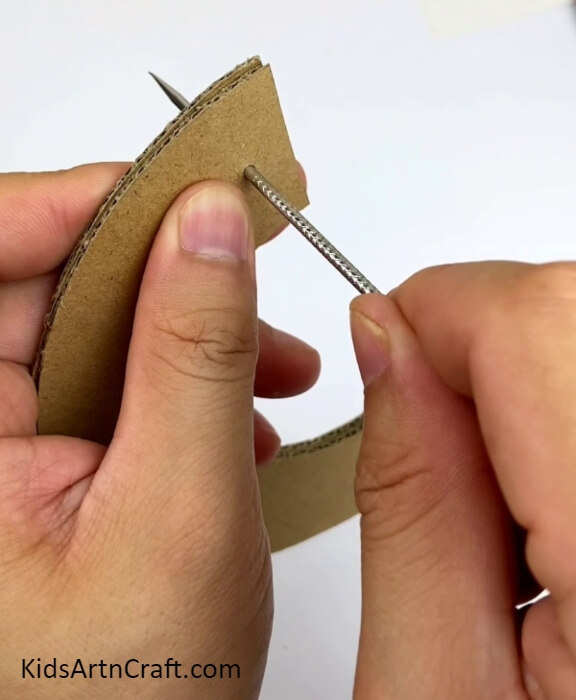
Using a sharp craft needle pierce holes from both sides of the overlapped ring pieces as shown in the image.
Step 6: Applying Hot Glue On The Boundary Of The Rig Pieces
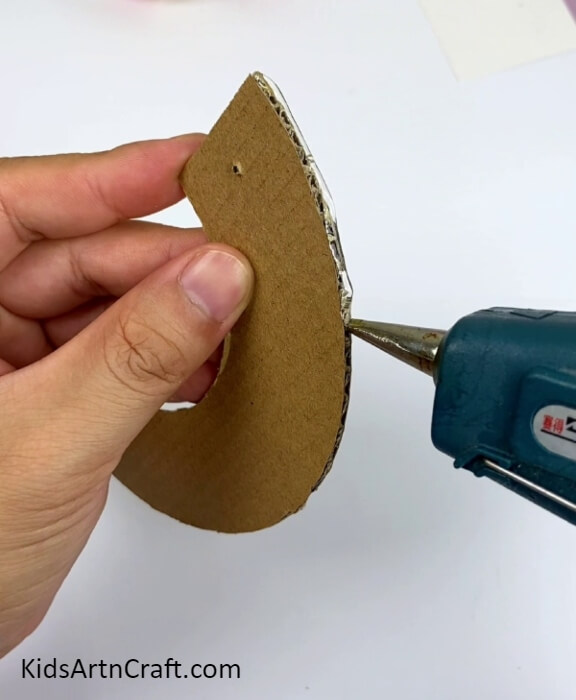
Using a glue gun, apply hot glue on the outer boundary of the ring pieces.
Step 7: Pasting A Wavy Carboard Strip
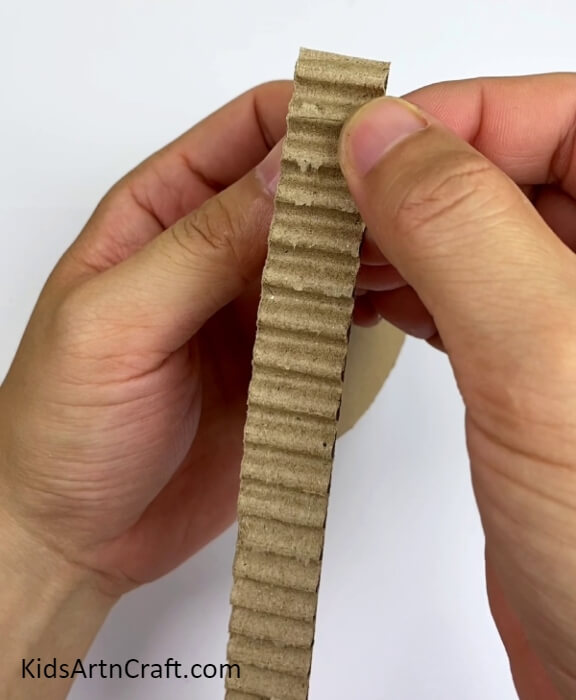
Cut out a cardboard strip and tear and remove the first layer of it to see a wavy cardboard strip. Paste the wavy cardboard strip on the puter boundary of the piece where glue is applied.
Step 8: Pasting The Strip Correctly On The Boundary
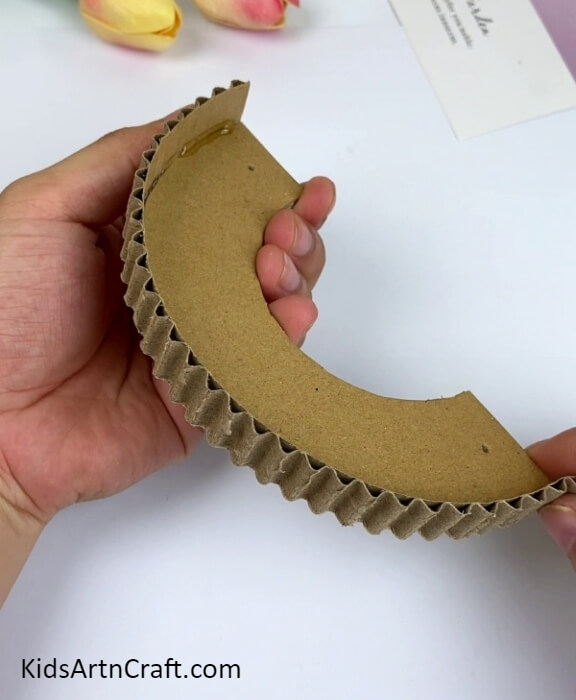
Completely cover the boundary of the ring piece with the cardboard wavy strip as shown in the image. Also, following the same paste wavy boundary on the other piece of the ring and also the inward boundary of both the pieces.
Step 9: Cutting Out Cardboard Pieces And Wooden Sticks
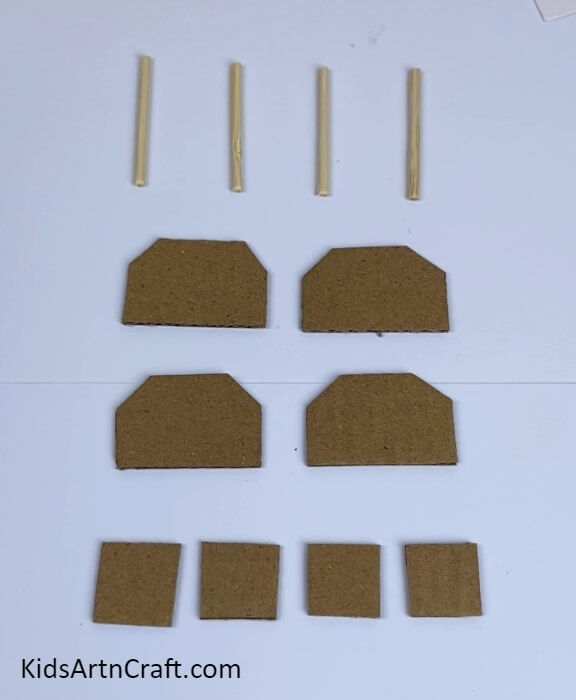
Cut out 4 small identical wooden stick pieces using scissors. Cut out 4 hexagons and 4 squares small of pieces from the cardboard using scissors as shown in the image.
Step 10: Aligning The Ring Pieces Into An ‘S’
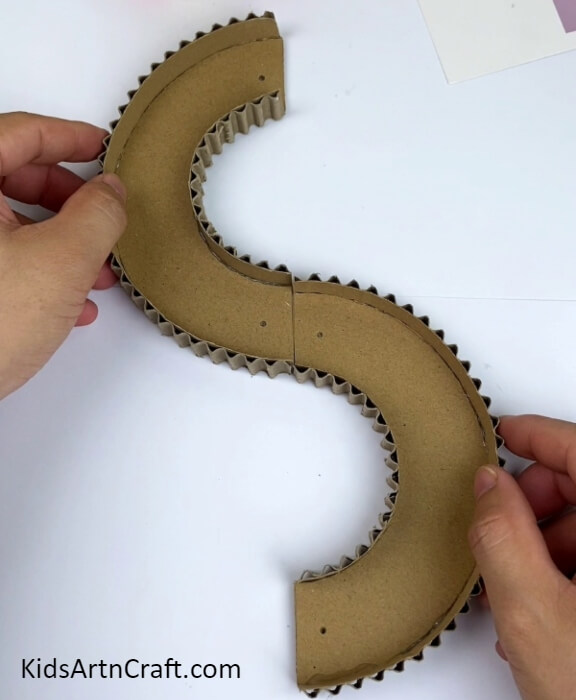
Align the wavy boundary ring piece into an ‘S’ shape as shown in the image.
Step 11: Placing The Hexagon Below The End Of The Ring Piece
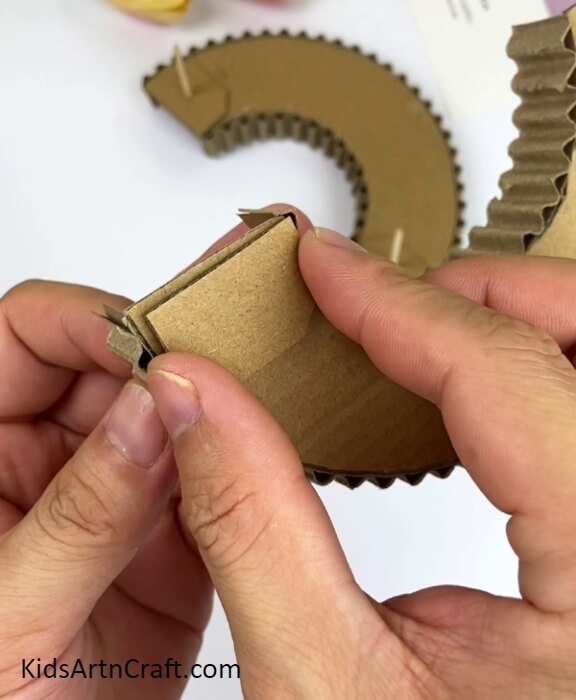
Turn over the ring piece and place a hexagon on one end of the ring piece.
Step 12: Inserting A Wooden Stick Into The Hexagon
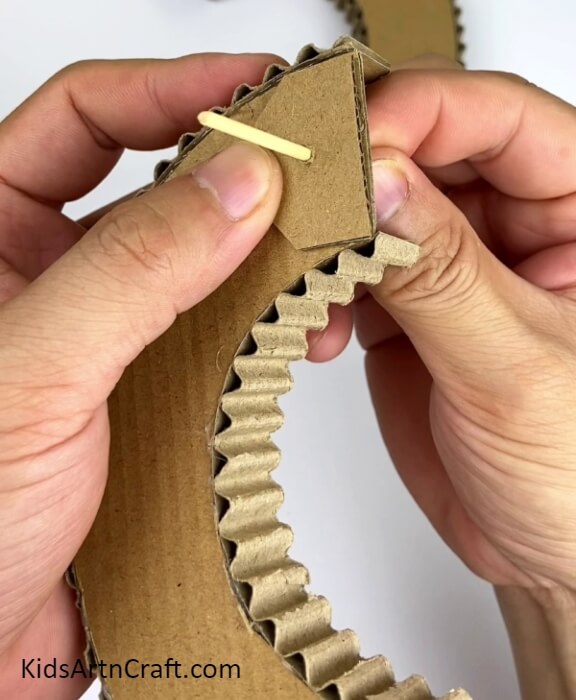
From the hole made into the piece, insert a piece of wooden stick into the hexagon.
Step 13: Securing Hexagons Over Each Hole Over Pieces
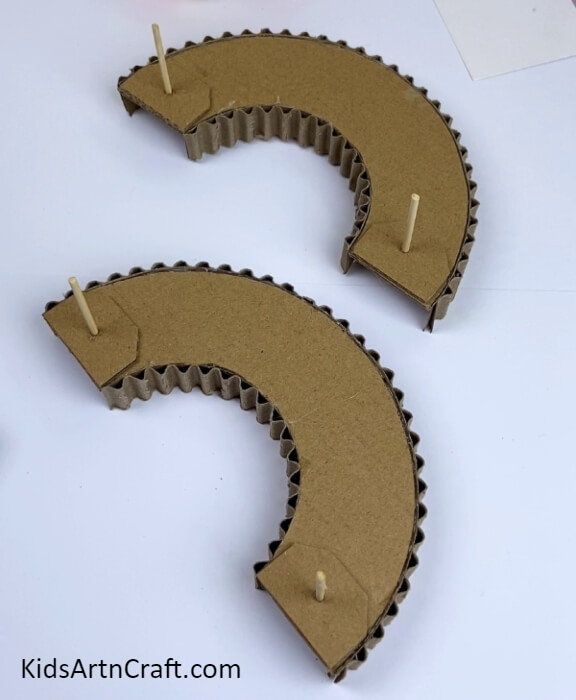
Following the same, place and secure the hexagon from below the pieces using the wooden sticks.
Step 14: Inserting The Other Ring Piece
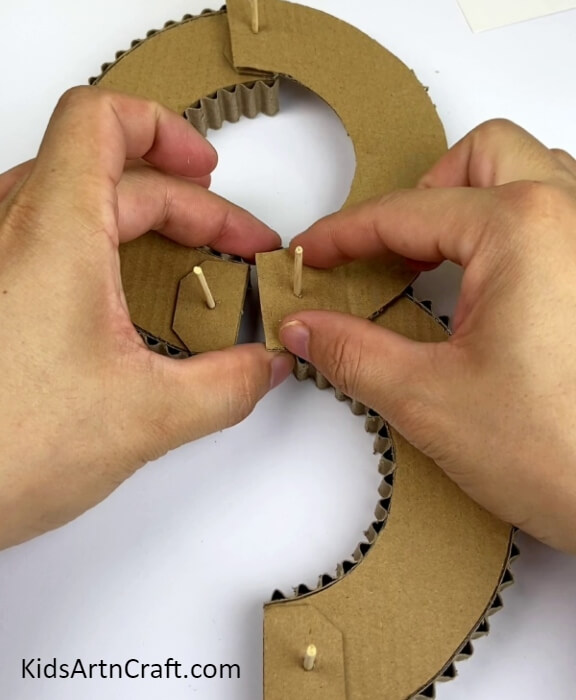
Insert the second ring’s piece into the wooden stick to make a complete circle over the top.
Step 15: Making An ‘8’ Shape
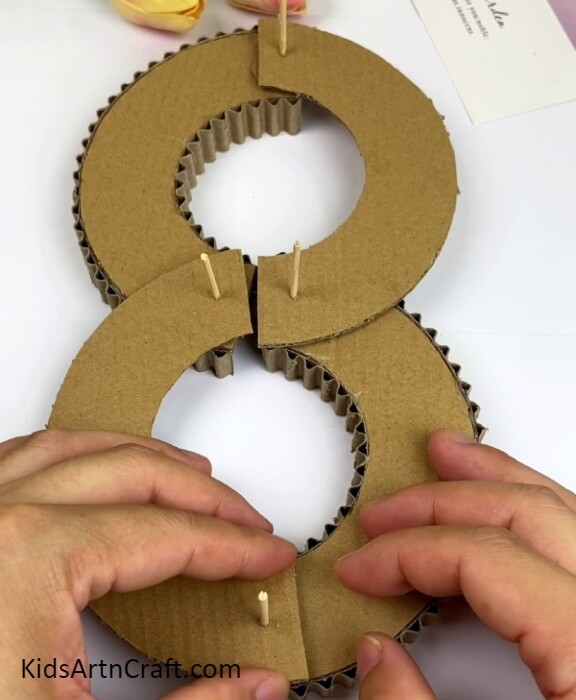
Insert the second ring’s other piece into the wooden stick of the below piece to the opposite side to form an ‘8’.
Step 16: Making A Hole Into A Square And Applying Hot Glue
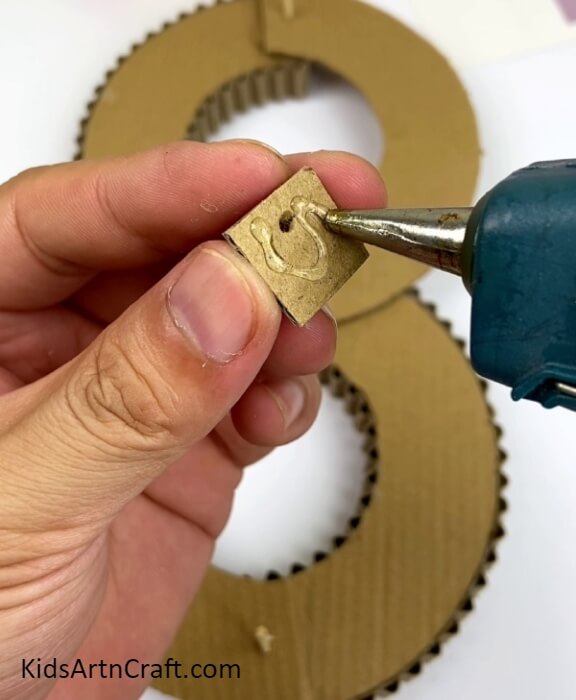
Using the craft needle make a hole into the square and apply hot over over the square.
Step 17: Inserting And Sticking The Squares Into Wooden Sticks
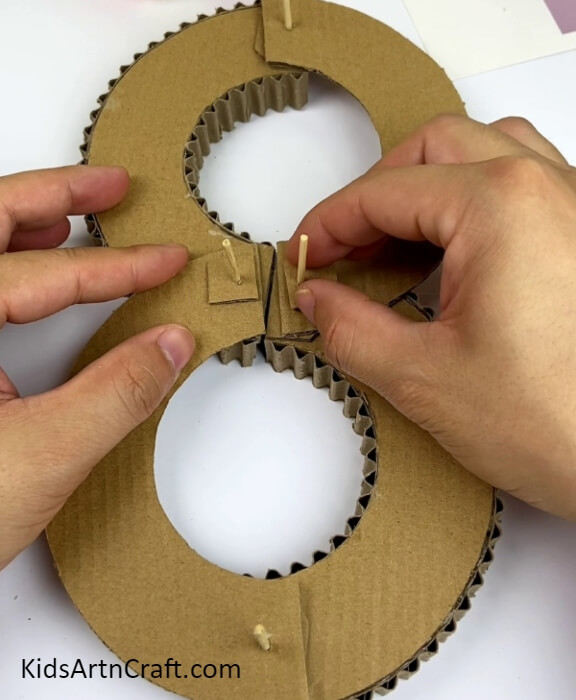
Make a hole in another square too and put in squares from the hole in the middle wooden sticks of the ‘8’ and secure them with the glue applied.
Step 18: Inserting Other Squares And Applying Hot Glue
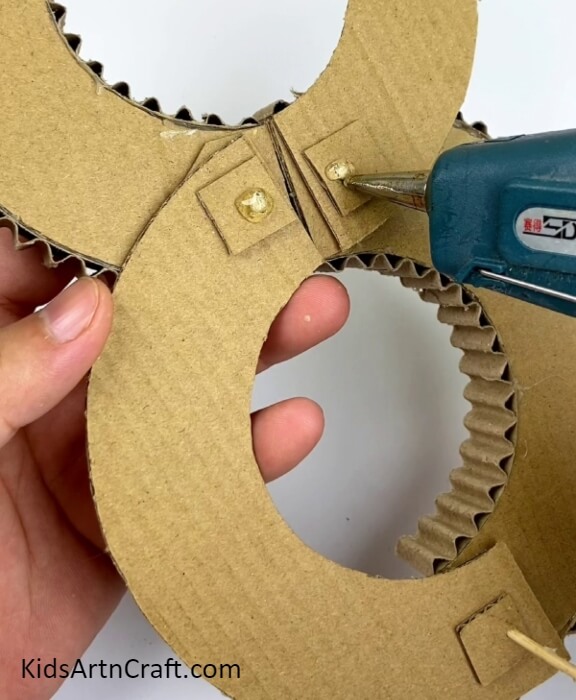
Make hole in the 2 remaining squares too and put and paste them in the remaining 2 wooden sticks. Cut the extra wooden stick coming out of the cardboard using scissors and apply hot glue over them to secure the put-in sticks.
Step 19: Turning Over The Whole Figure
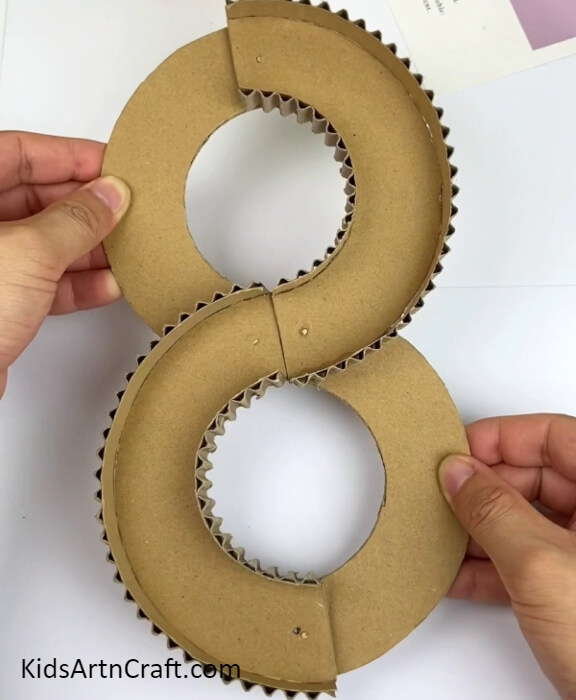
Flip and turn over the whole figure you made and you will see your track is almost completed.
Step 20: Moving The Track Open To See Its Working
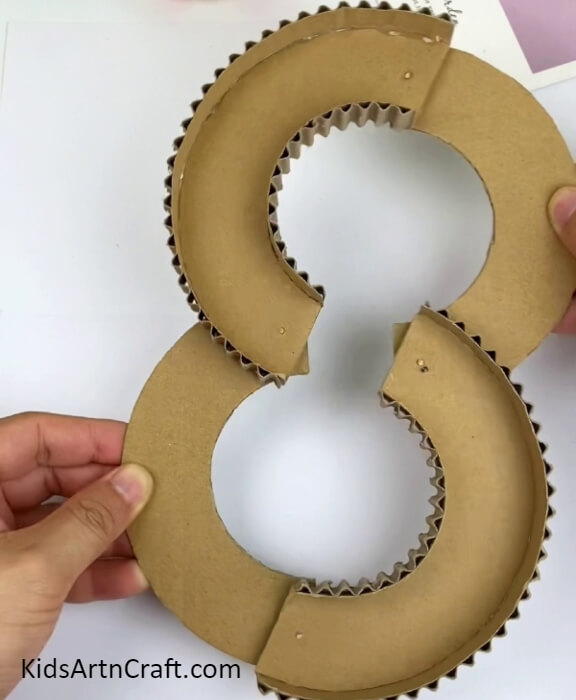
Slide out the ring piece and you will see your track can be opened.
Step 21: Painting The Track
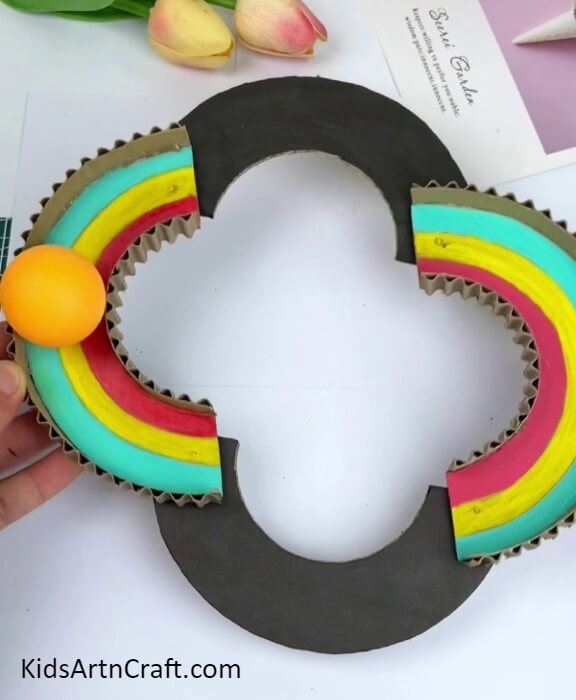
Using a paintbrush and black paint, paint the non-boundary ring pieces, and for the boundary pieces paint using red, yellow, and green paint into curved line strokes as shown in the image.
This Is The Final Look Look Of Your Race Track!
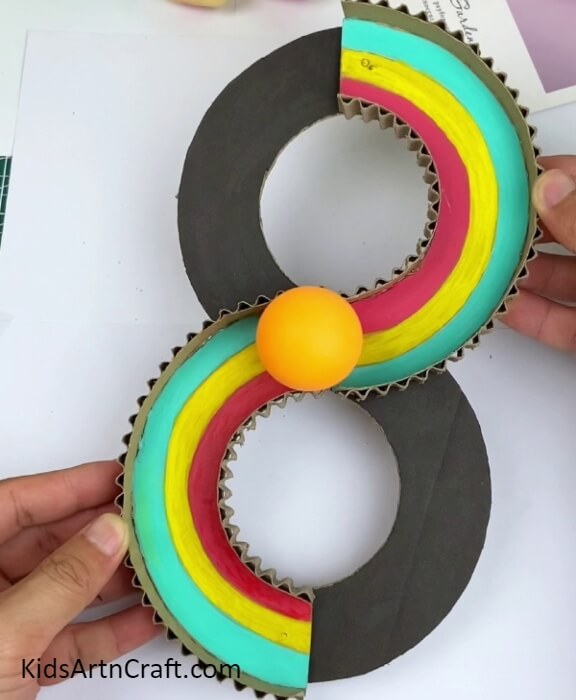
Congratulations! You have finally succeeded to make this toy race cardboard track in no time!
This craft is a perfect alternative to those expensive race tracks you can find in the market! The results will definitely be a piece to showcase! Show it off to your friends and family and let them admire your creativity and innovative skills! You can now play with it as much as you like, challenge your friends to take the ball or car to the other side of the track by moving the track! This will surely be fun! Try it out!
Follow us on Youtube for art and craft tutorials and much more.
More Articles from Kids Art & Craft
- DIY Cardboard Tube Owl Craft
- DIY Beautiful Flower Art & Craft Idea On Cardboard With Step by Step Tutorial
- DIY Cardboard Roll Reindeer Puppet Craft For Christmas
- DIY Cardboard Tube Octopus For Kids
- Toilet Paper Roll Bat Tutorial for Kids


