Drawing
Colorful Tree Landscape Craft Idea For Kids

This art project is great for getting kids excited about art! Let them use colorful materials to make their own unique tree landscape. It’s an easy and fun activity that everyone will love.
Welcome to this wonderful art tutorial! This tutorial presents to you a DIY colorful tree landscape that can be prepared by just using a few materials. The steps are easy to follow and the kids will finish the art piece with great ease and comfort. This landscape craft idea is aimed at creating the visual elements using a tearing activity that enhances the overall look of the craft. Kids will learn hand-eye coordination and will learn a new technique for crafting. So grab your craft supplies and let’s get started!
DIY Colorful Tree Landscape For Kids

Read More: DIY Bird Nest Paper Craft For Kids
Materials Required
- Craft paper
- Glue
- Scissors
- Black marker
Procedure
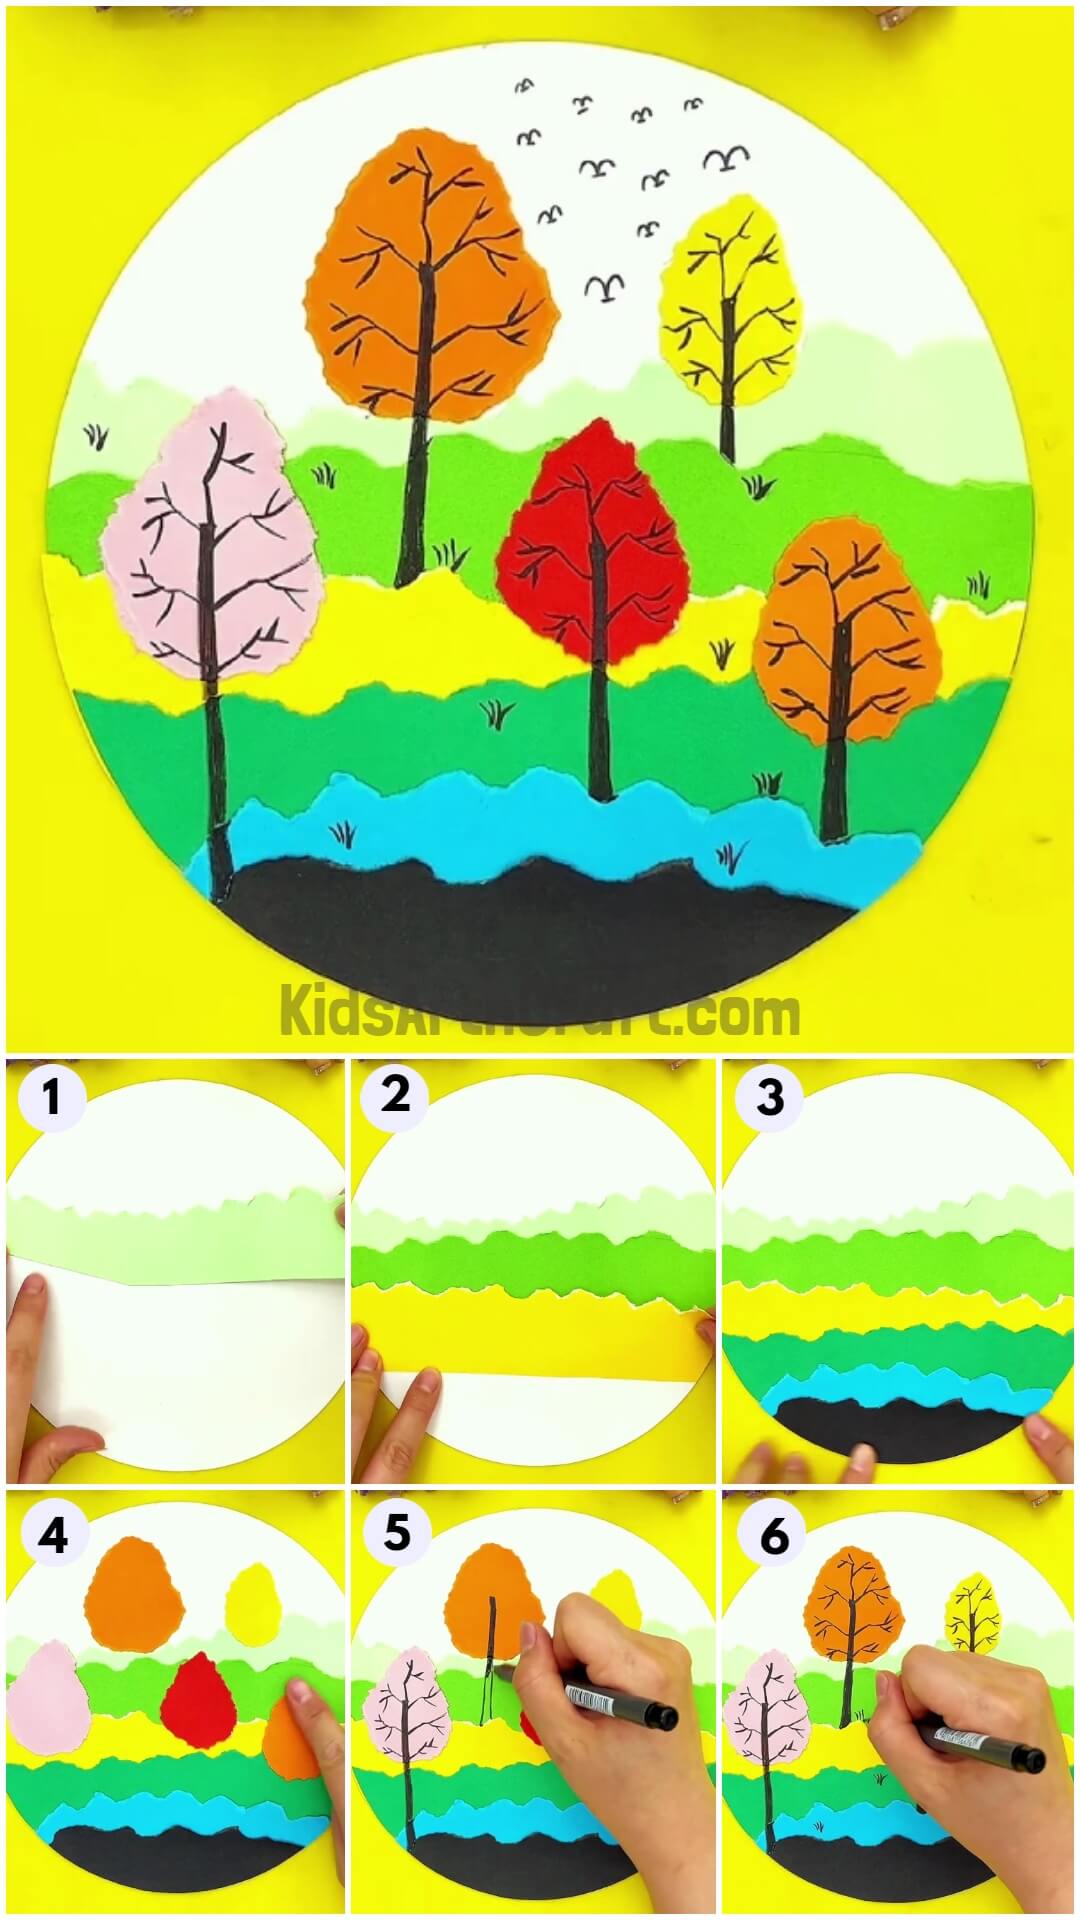
Step 1: Making The First Layer Of Landscape
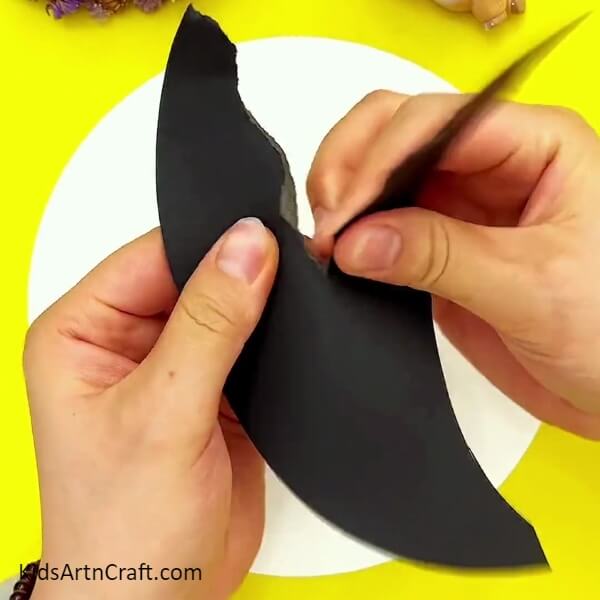

Let’s begin this craft by taking a white sheet of paper. Cut it into a white circle. This white circle will become the base of the white sheet. Take a piece of black paper, and cut a semicircle from it, equal in radius to that of the white circle. Now tear the upper edge of the black semicircle roughly as shown.
Step 2: Making A Light Green Layer
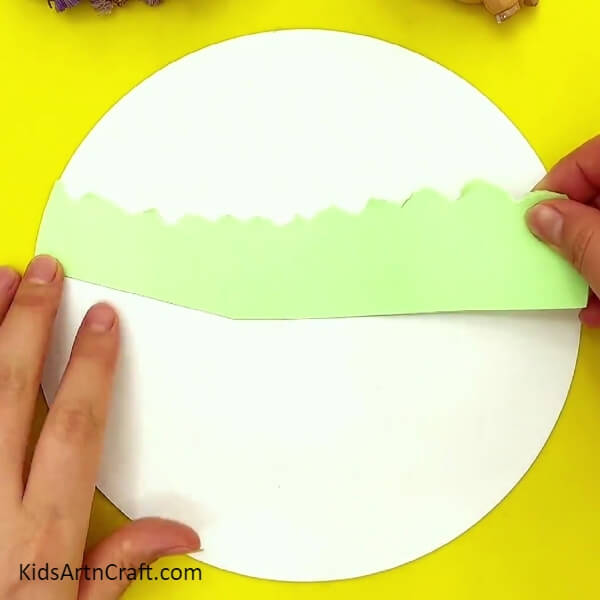
Take a light green shade of paper and cut it into a rectangle. Cut it unevenly from the bottom edge. Tear the upper edge with fingers to create an uneven curved shape on the upper edge as shown.
Step 3: Making A Dark Green Layer
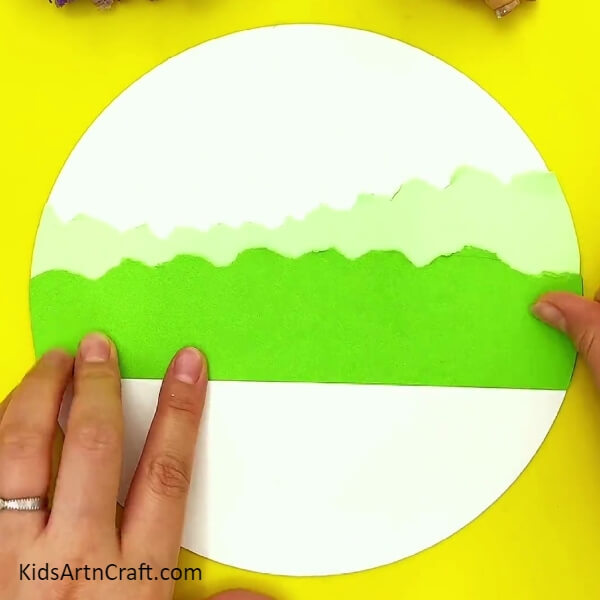
Take a dark green shade of paper and cut a rectangle. Tear the upper edge of the green rectangle to form uneven curved shapes as shown.
Step 4: Making A Yellow Layer
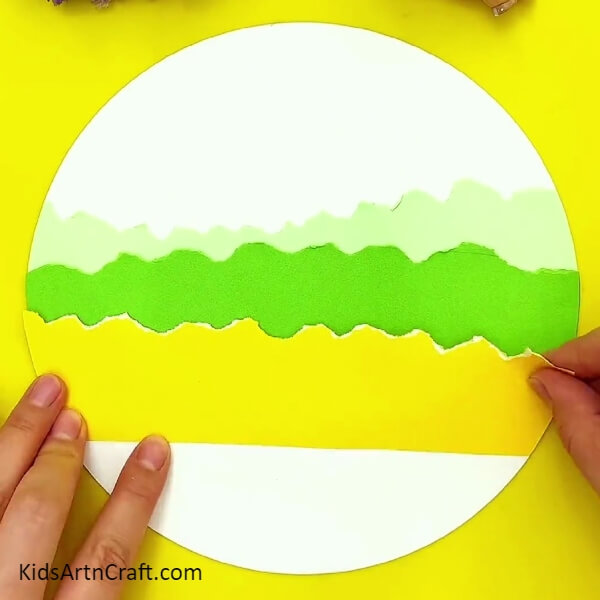
Take a yellow paper and repeat the above step to get a yellow layer as shown.
Step 5: Making A Green And Blue Layer
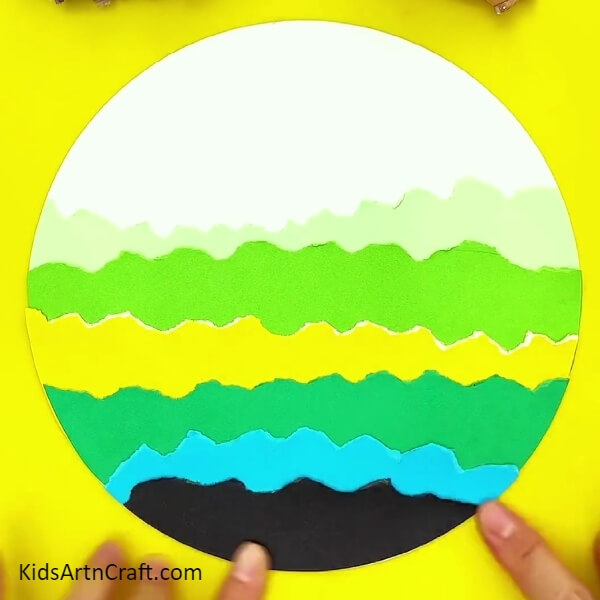
Take a green paper of the darkest shade and repeat the above step to make a green layer. Similarly, take a blue craft paper and repeat the above step to make a blue layer.
Step 6: Pasting The Body Of The Trees
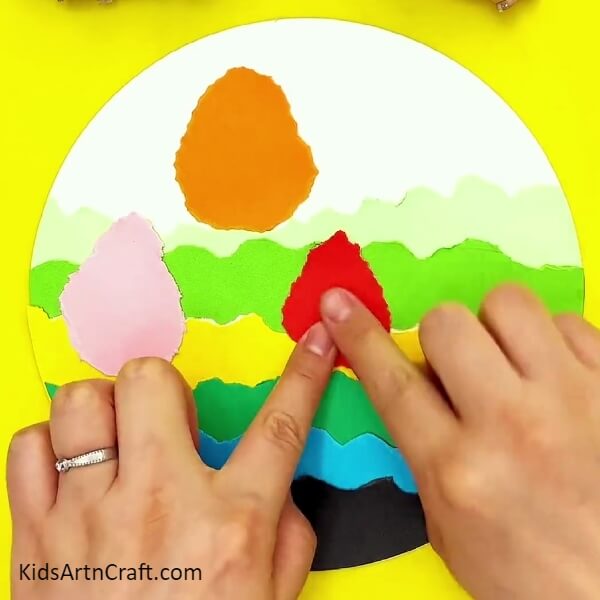
Take orange, pink, and red craft paper and cut an oval shape out of them. Using your fingers, make the boundaries of the oval irregular and uneven in shape as shown.
Step 7: Pasting More Trees
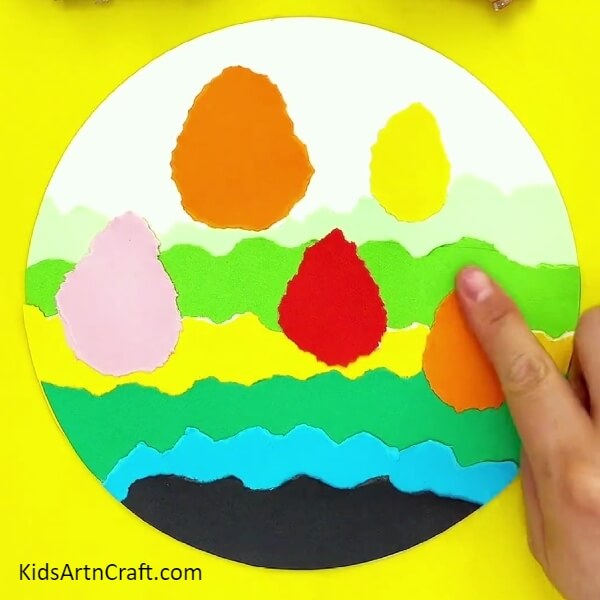
Take yellow and orange craft paper and repeat the above step, make the body of the trees as shown.
Step 8: Drawing The Branches
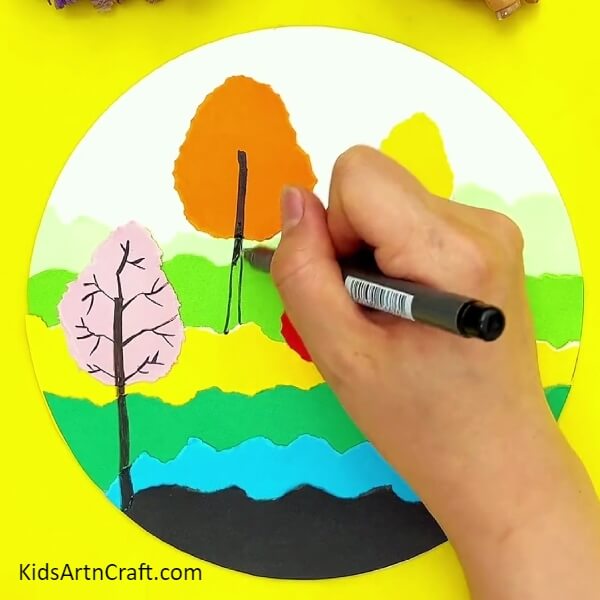
Take a black marker, and start drawing the tree trunk and the branches on the trees as shown in the image.
Step 9: Drawing The Grass
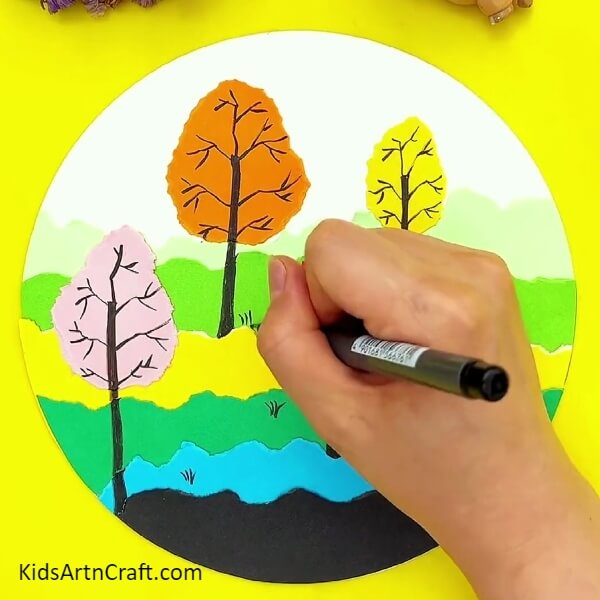
Using the black marker, draw the grass as shown in the image.
The Colorful Tree Landscape Craft Is Ready!
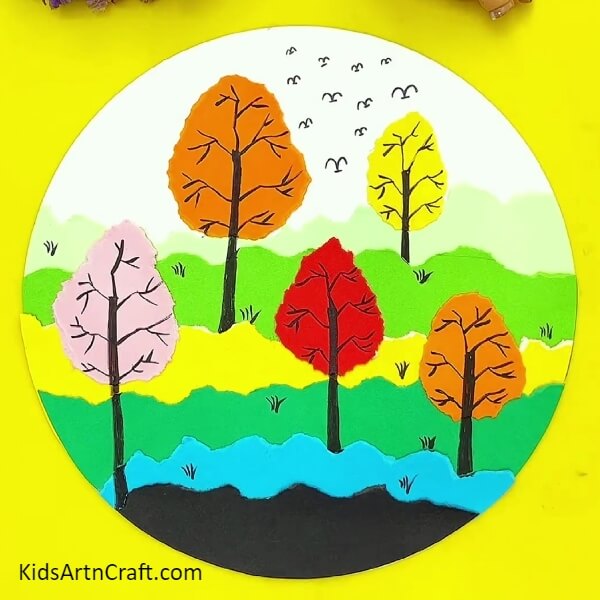
Using the black marker, draw some birds on the open sky as shown. And that’s it, your colorful tree landscape craft is ready!
Use your own creativity and add more visual elements to the colorful landscape. The tearing, cutting, and pasting activity will enhance the motor skills of the kids. It will improve their hand dexterity which will result in improvised handwriting. Creating art is a great form of self-expression and nurturing our creative minds and soul. Follow our website for more creative ideas and content.
Thank you for visiting our website!
Follow us on Youtube for art and craft tutorials and much more.
More Articles from Kids Art & Craft
- How to Make Ladybug Crafts Tutorial for Kids
- How to Draw Chicken Drawing Step-by-Step Tutorial
- How to Draw Colorful Birds on Branch Easy Drawing
- Planting a Tree Easy Drawing For Environment Day
- Easy Tree Craft From Fall Leaves Step-by-step Tutorial