


Paper Crafts
DIY Paper Carrot Step by Step Tutorial For Kids

This step-by-step tutorial will show kids how to make a DIY paper carrot. They’ll learn how to make the carrot shape, create the leaves, and make a stalk for the top. They’ll have a fun and creative activity that they can proudly show off.
With Easter just around the corner, it’s time to start getting creative! If you’re looking for a fun and easy craft project for the whole family to enjoy, look no further than this DIY Paper Carrot tutorial. Perfect as decorations for the holiday or as part of an Easter egg hunt, these paper carrots will be sure to add some fun to your celebrations.
Welcome to this fun and creative DIY paper carrot tutorial for kids! With this easy-to-follow tutorial, your child will be able to make their own paper carrot from scratch. Through this tutorial, your child will learn how to make a paper carrot with just a few simple supplies and techniques. This tutorial is perfect for children of all ages who are looking for a fun and creative activity. So let’s get started!
Simple Paper Carrot Craft Tutorial With Step By Step Instructions
Read More: DIY Paper Basket Step-by-Step Tutorial For Kids
Materials Required
- Construction Paper (Orange and Green)
- Double Side Tape
- Black Pen
- Scissors
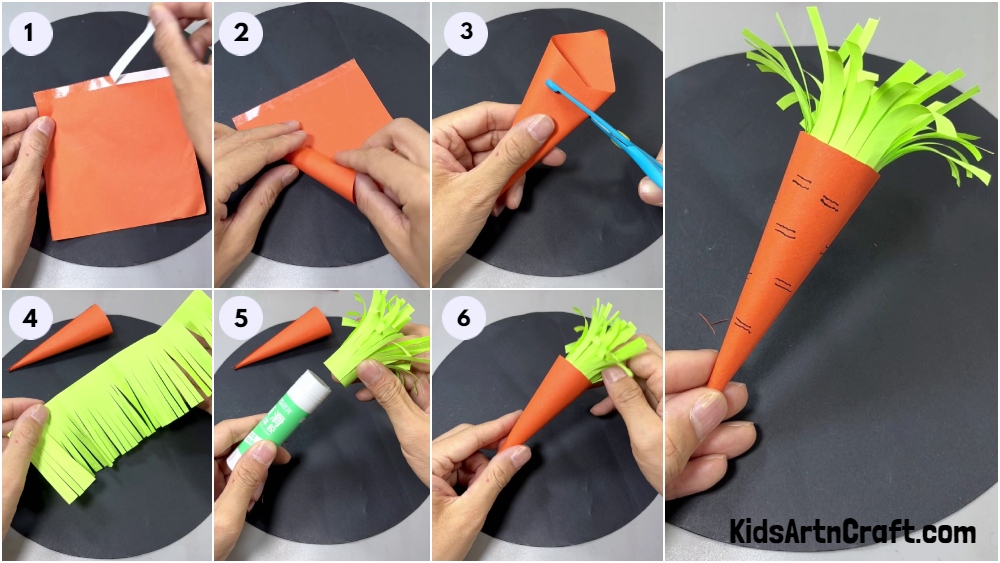
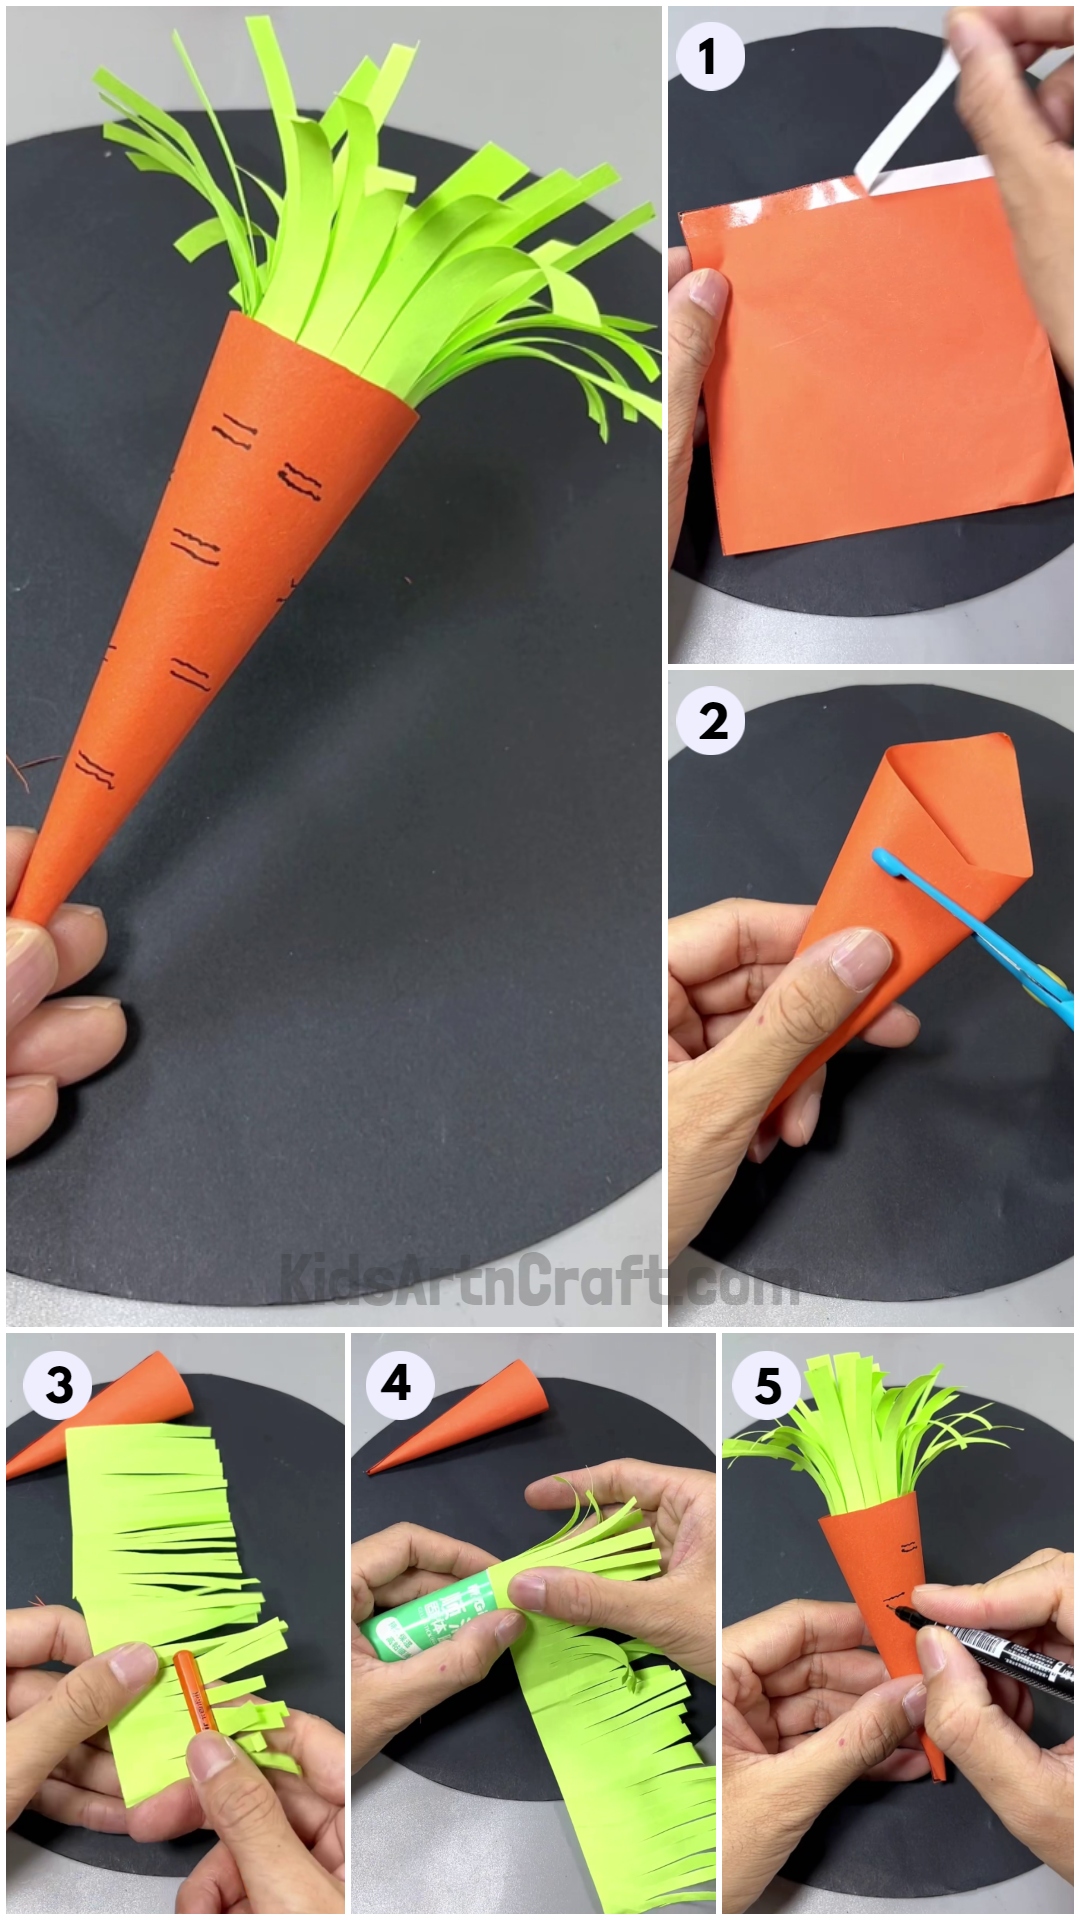
Procedure
Step 1: Applying Double Side Tape On Orange Square Paper Side
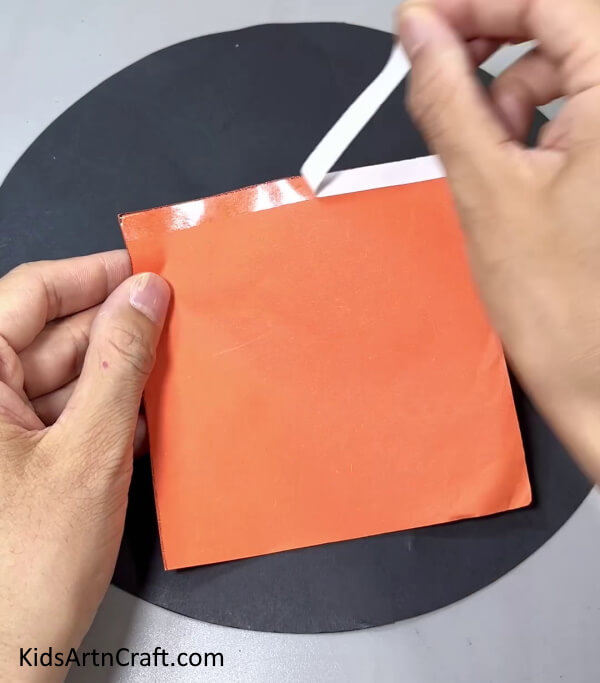
As a first step, take an orange square piece of paper and apply double side tape on one of its sides. Remove the white paper layer of the tape.
Step 2: Folding Paper To Form A Cone
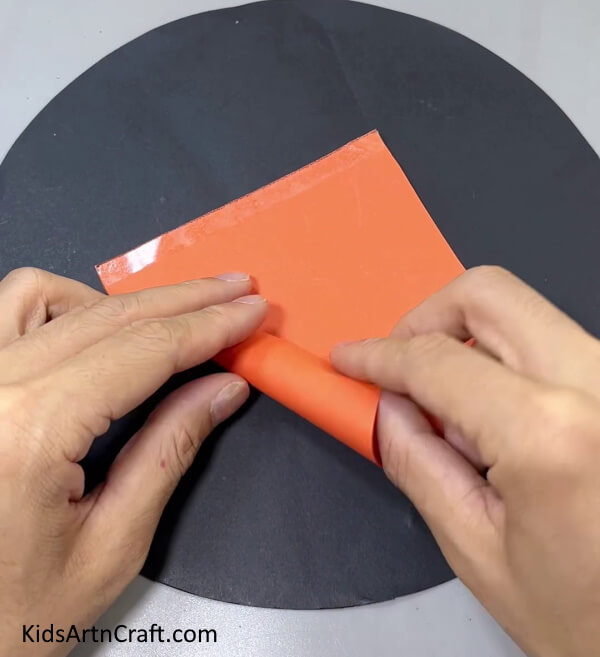
From the opposite corner of the square orange paper, start folding it to another corner to form a cone shape.
Step 3: Cutting the Top Of the Cone
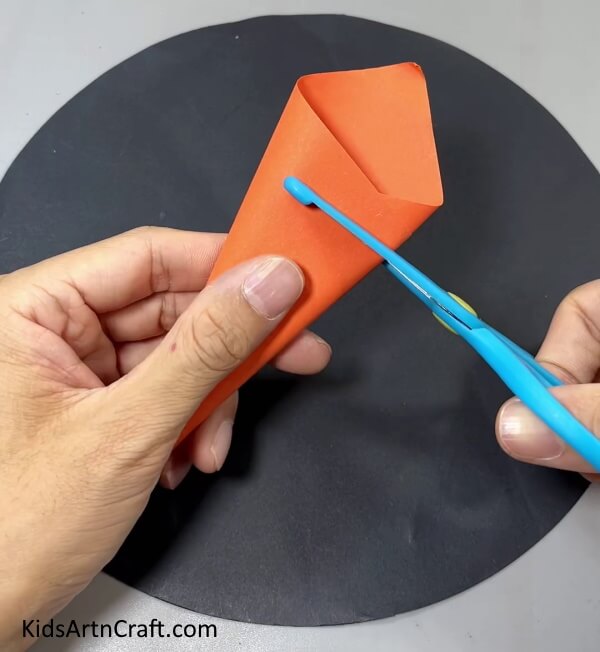
Cut the top of the cone using scissors.
Step 4: Making a Green Paper Fringe
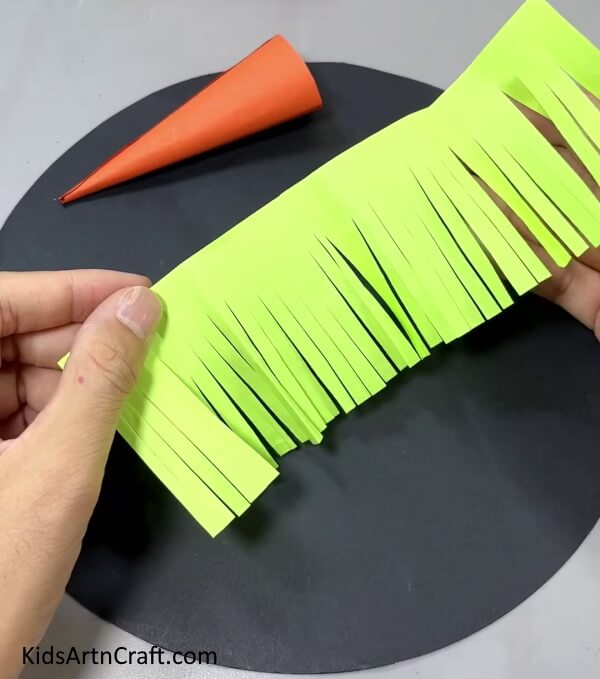
Once the paper cone is ready, take a green rectangle of paper and cut fringes out of it. To cut fringes, leave a margin on top and cut paper strips apart from the margin.
Step 5: Rolling Ends Of Fringe
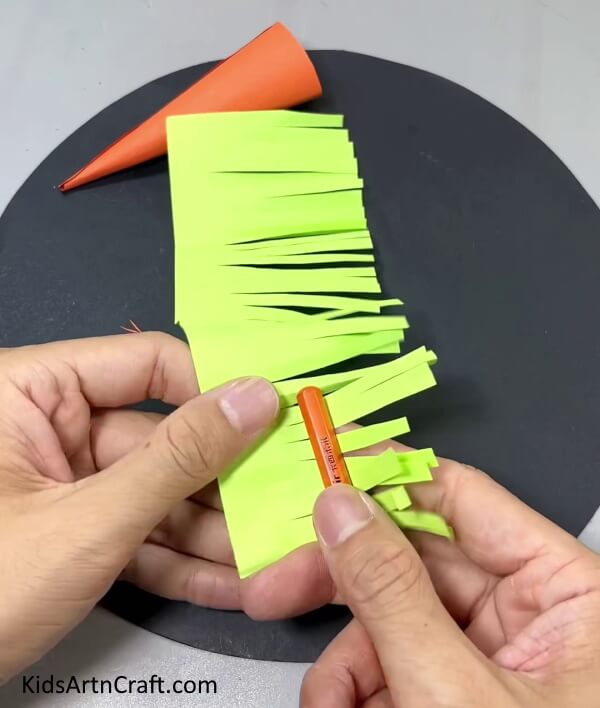
Take a pencil and fold the ends of the fringe to give it a 3d touch.
Step 6: Folding Fringe
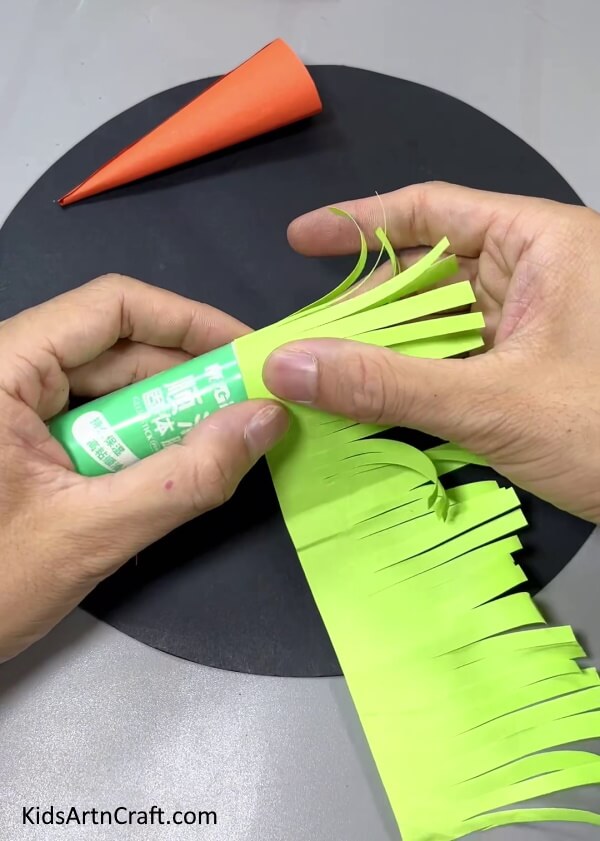
Now, starting from one corner of the paper fringe, roll the fringe with the help of a glue stick.
Step 7: Making Leaves Of Carrot
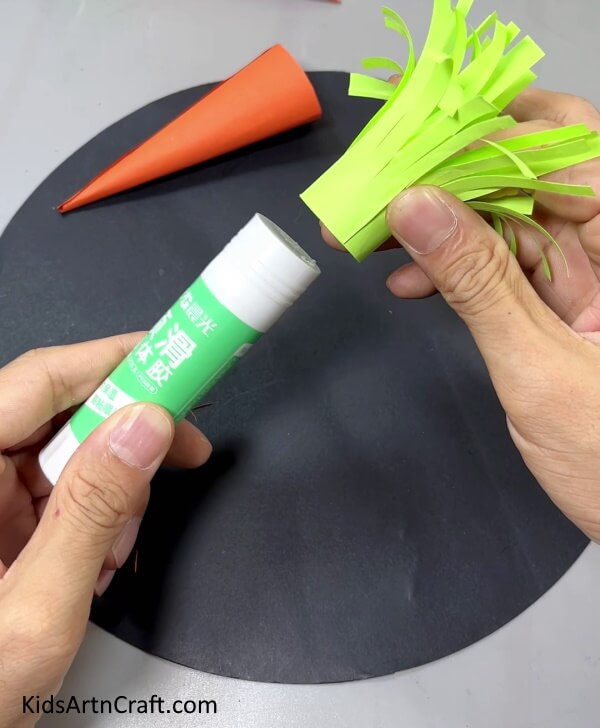
Roll the fringe around the glue stick till the end and paste the edge. This will act as the leaves of the carrot.
Step 8: Inserting Leaves In Cone
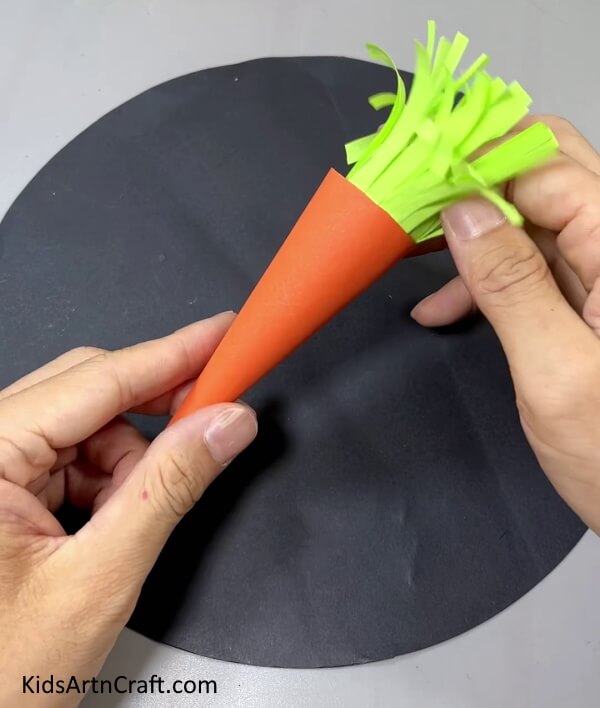
Insert the leaves in the paper cone from the top of the cone.
Step 9: Drawing Details Of Carrot

Lastly, using a black pen add texture to make the carrot more realistic.
DIY Paper Carrot Craft Is Completed!
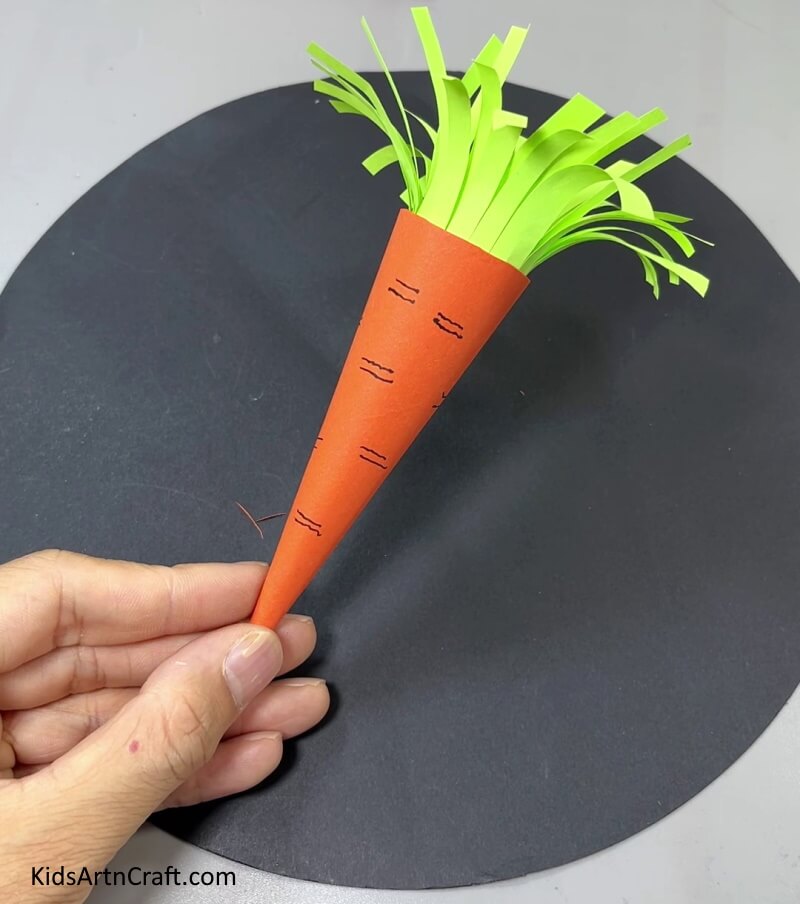
And there you have it! Your kids can proudly display their DIY paper carrots for everyone to admire. This paper carrot is a fun and easy way to get creative and make something special. With just a few simple supplies and some patience, you can now proudly display your paper carrot and its vibrant colors. Why not make Easter more memorable and fun with this craft? Give it a try with your kids! Enjoy!
FAQ’s DIY Paper Carrot Step-by-Step Tutorial For Kids
1. What materials do I need to make a paper carrot?
You will need colored paper, scissors, glue, and a black pen.
2. How long does it take to make a paper carrot?
Depending on your skill level, it can take anywhere from 10-30 minutes to make a paper carrot.
3. What age group is this craft project best suited for?
This craft project is best suited for children ages 5 and up.
4. What other things can I add to the paper carrot?
You can add extra details to the paper carrot by using markers, paint, glitter, or other craft materials.
5. How do I make sure the paper carrot is sturdy?
Make sure to use a strong glue and press the paper together firmly to ensure the paper carrot is sturdy.
6. What can I do with the paper carrots I create?
You can use the paper carrots to decorate a bulletin board, create a homemade Easter basket, or even hang them from the ceiling.
7. Is there any place I can get help if I have trouble making the paper carrot?
Yes, you can find helpful video tutorials online that show you step-by-step how to make a paper carrot.
This DIY Paper Carrot Step by Step Tutorial For Kids is a fun and creative way for children to make their own paper carrots. With just a few simple supplies and a bit of imagination, your kids can make their own paper carrots anytime.
Follow us on Youtube for art and craft tutorials and much more.
More Articles from Kids Art & Craft
- Paper Crafts And Activities Video Tutorial for Kids
- Learn To Make a Tree with paper step-by-step Tutorial
- Learn To Make Paper Duck Craft Tutorial
- How To Make A Paper Heart Bee Craft Tutorial
- Fun Paper Craft Ideas Make At Home Video Tutorial for Kids


