Christmas
DIY Popsicle Stick Photo Frame Craft Ideas

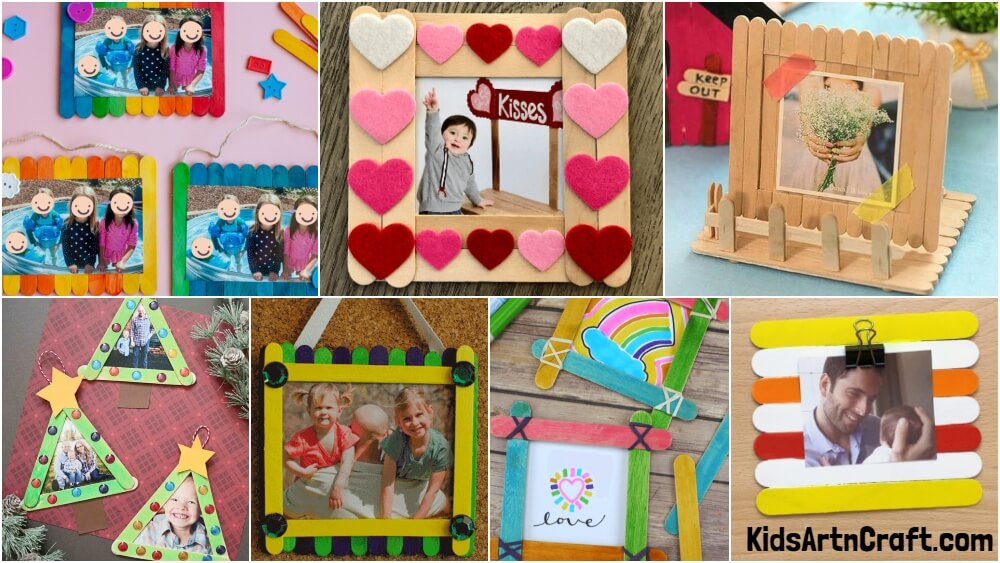
As we are in a tech era, we have several photos and can save them on the cloud, drive, laptop, or the phone’s internal storage. But in those days photographs were stored only in the form of printing and people used to file all those in albums. Though we have the facility of storing tons of photos on devices, making it an album and photo frame always have a unique place. Photos are memories so everybody loves to take photos and frame them. While seeing our photos it’ll take us back to those happy days. As taking photos is easy these days with super clarity, every happy moment is captured every second. From newborn babies seeing the world for the first time, the first school-going day, graduation day, birthday celebration, family photos, photos with friends, girlfriends, wedding ceremonies, and more. If you don’t wanna run to shops to frame all those photos, go ahead with your ideas as DIY work. Here we have listed different designs, and innovative ideas for making photo frames, easy and friendly for kids. See more ideas about frame craft using popsicle sticks in this post.
Easy Popsicle Stick Photo Frame Craft Ideas
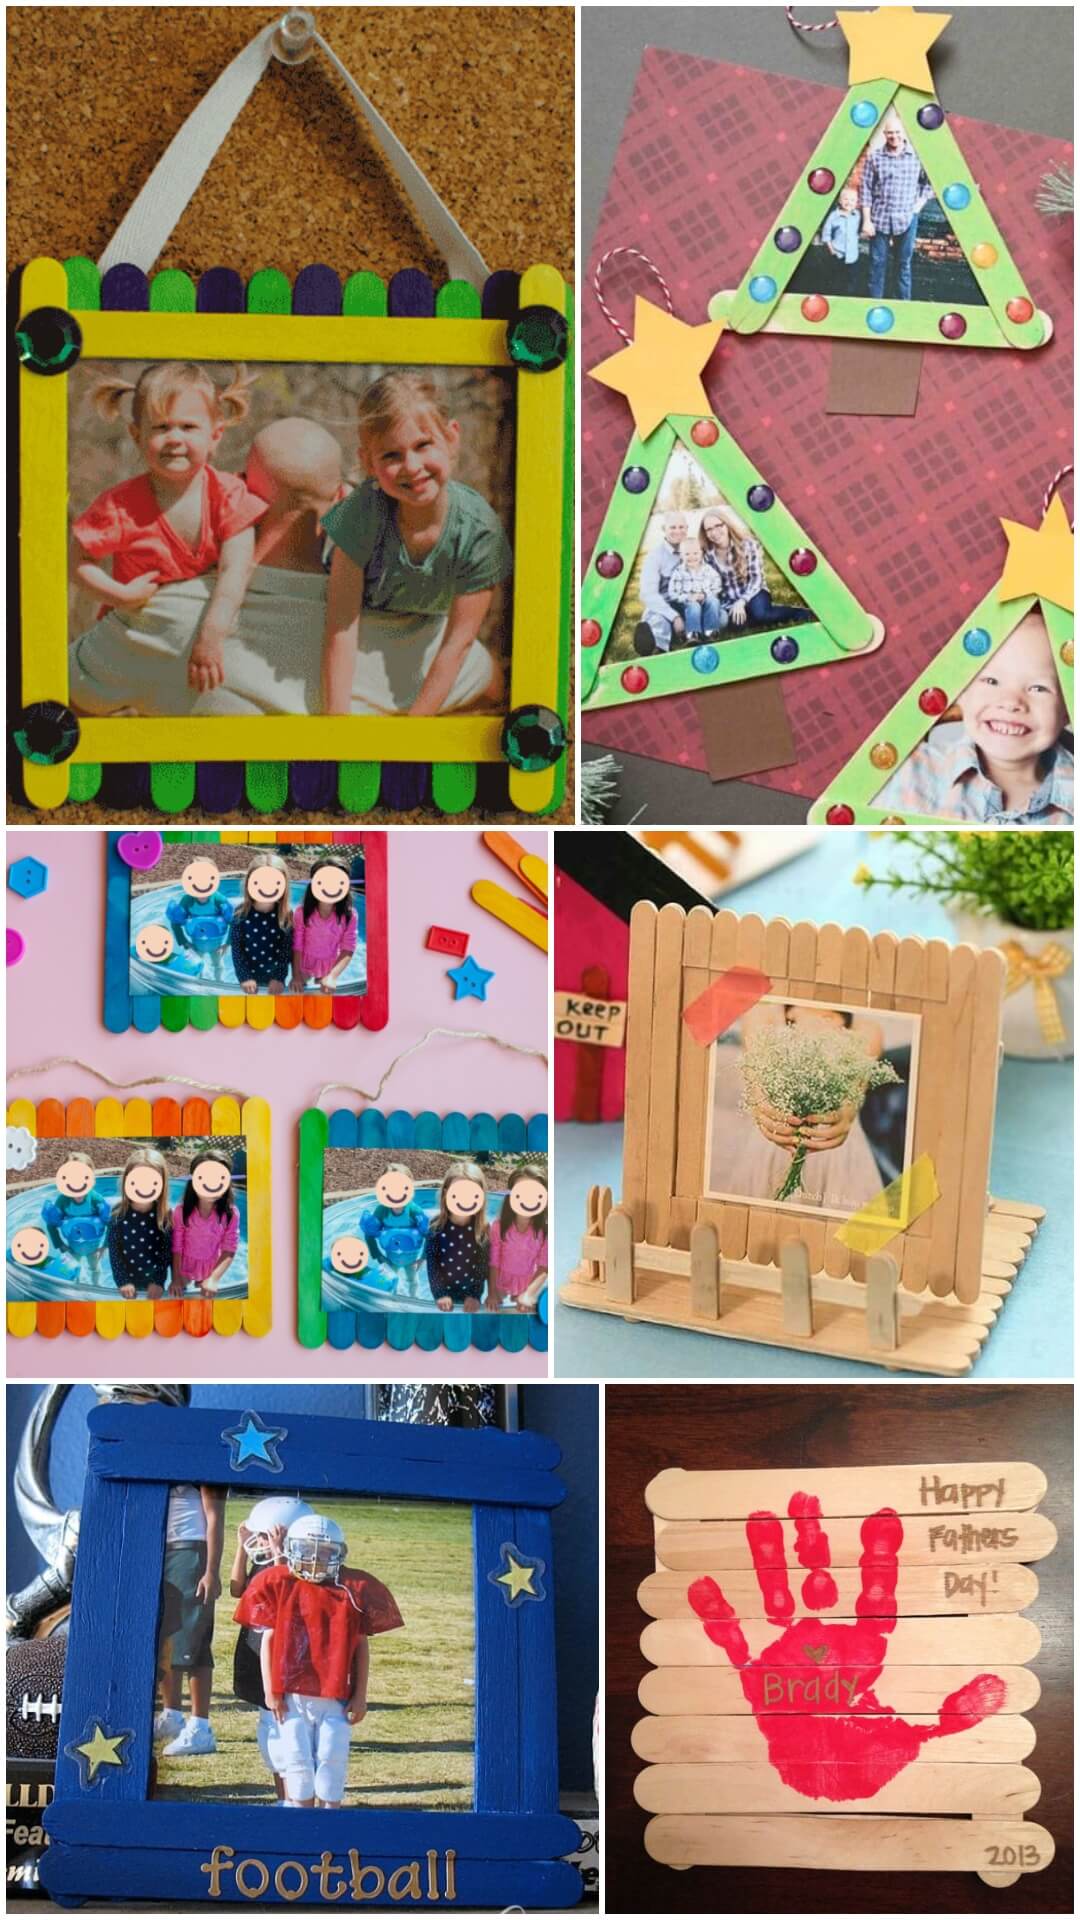
Read More: Popsicle Stick Father’s Day Crafts
First-Day School Frame With Popsicle Craft
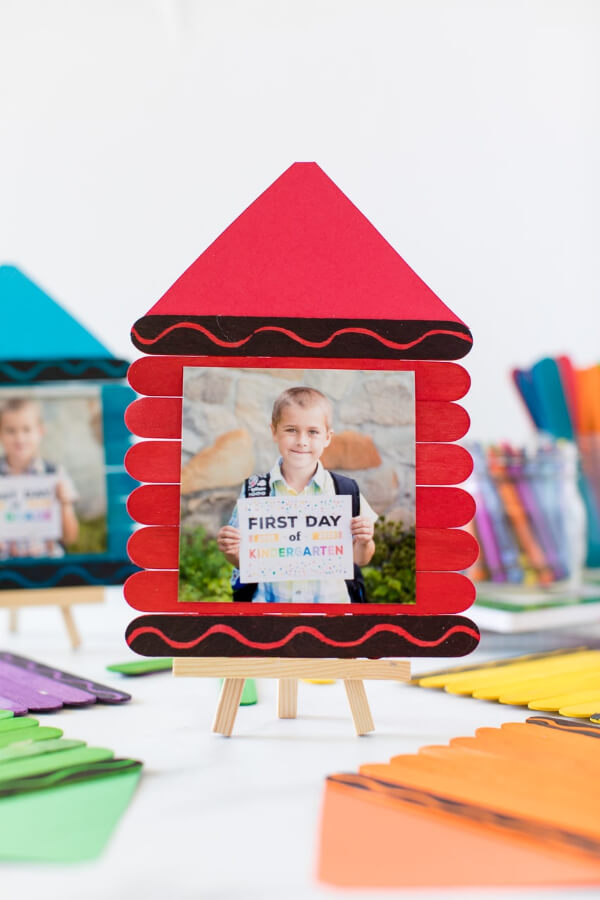
Image Source/Tutorial: Made To Be A Momma
The first day of school, college, and the office was exciting and memorable in all of our life. So capturing and framing that is the best to justify. The materials required are popsicles, glue, cardboard (optional) paint, and a paintbrush. The pattern of forming the craft stick is up to each individual. Here it is made in the form of a home in a simple arrangement. Just line up the painted sticks and glue them. Using cardboard make a triangular shape for the top of the house, you can make that in the craft sticks themselves. Using three sticks in a slanting position, give the completeness of the house. Finally, stick the first-day pic of your school (/office/college) at the center of the house. Decorate it with sequins and colored yarns.
Easy Craft Stick Photo Frame For Preschoolers
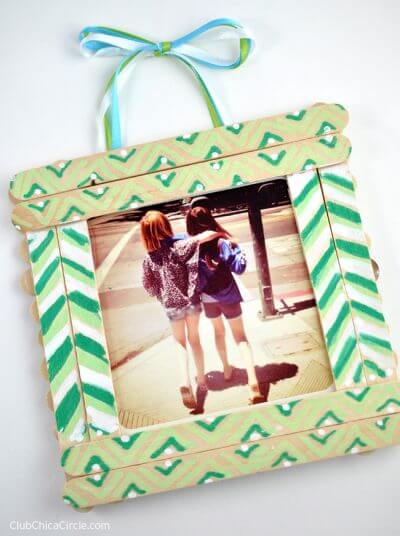
Image Source/Tutorial: Fun Family Crafts
Here we are with another craft stick photo frame simply so kids of all ages can do this in less amount of time. Line up the sticks one after another in a horizontal way to make the backside of the frame. You can also use cardboard as a back frame and go with the sticks for the front end. Place two sticks in all four directions as shown in the image above and paint decoratively to make it an adorable and realistic photo frame. Paste the ribbon (the same color as the painted craft stick) at the backside of the stick as a string to hang. Now place the image which you wish to put inside the frame and hang this on your wall or keep this on your writing table.
Back To School Frame With A Popsicle For School Kids
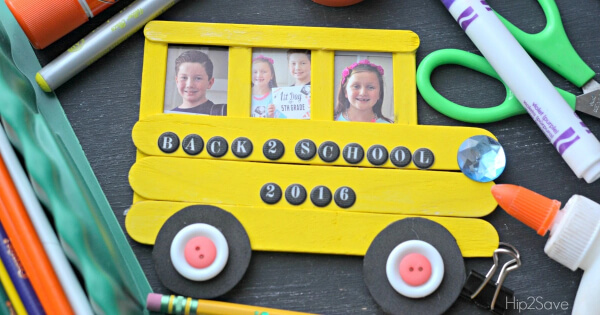
Image Source/Tutorial: Hip2Save
This is something innovative photo frame which stands unique. If your kids used to go to school by bus then they might get many friends there so let them try to create the frame which should tell the story of their friendship. Is there any procedure to go straight for a photo frame? No, right. So make this kind of innovative way. You need craft sticks, paint, a paintbrush, a black foam sheet, scissors, letter stickers, glue, buttons, gems, and embellishments. Arrange the 3 jumbo sticks one after another horizontally and glue the skinny sticks vertically at the back of the jumbo sticks as shown in the above picture. Leave space to paste a passport-size photo of your friends. Glue the stones and embellishments at the front to symbolize the headlight of the bus. Use black foam sheets and white and red buttons for the wheels. Finally, stick the letter stickers as shown in the above image, this is optional but this look will make the craft the best.
DIY Cute & Easy Frame At Home
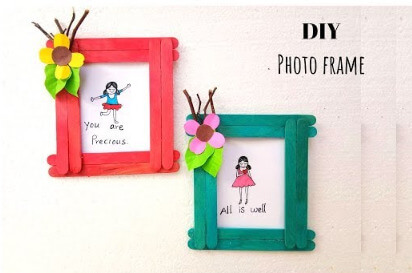
Image Source/Tutorial: Aloha crafts
The materials needed here are craft sticks, craft papers, twigs, glue, a whitepaper, scissors, paint, and a paintbrush. Kids of any age can make this craft as the process is so simple and time consumption is also less. Paint the popsicle in your desired color and paste two sticks in all four directions as shown above. You can leave that as plain and can go to the photo securing process but adding greenery at the corner will take your craft’s next step. A simple twist and turn on the paper will give you this flower and leaves shape. For kids, this step may feel difficult if they do this for the first time. But over time it’ll be easy for them. At last, paste the white paper at the backside of the craft stick on 3 sides by leaving one side to insert a photo through that.
Simple & Easy Popsicle Craft Ideas For Kindergarteners
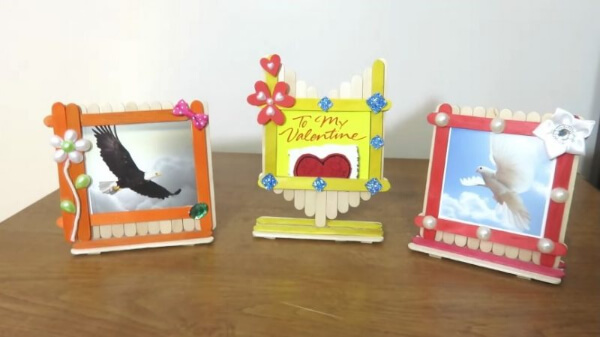
Image Source/Tutorial: Simple Craft Idea
Here we are with another craft stick photo frame in a different design. This craft shows that we don’t wanna paint all the craft sticks as decoration parts. The requirements are popsicle sticks, paint, a paintbrush, glue, and beads. The same paint, popsicle, and beads used in the above crafts are used in this craft but the idea differs. So this way we will get new and creative ideas if we do more kinds of craftwork because it stimulates the creativity part of our brain. For sample and practice reproduce the same pattern by seeing the steps given in the link. After a pivot point, you’ll start to think in various ways so you’ll end up with your designs rather than copying.
Read More: DIY Mother’s Day Craft Using Popsicle Sticks
Wall-Hanging Photo Frame For Preschoolers
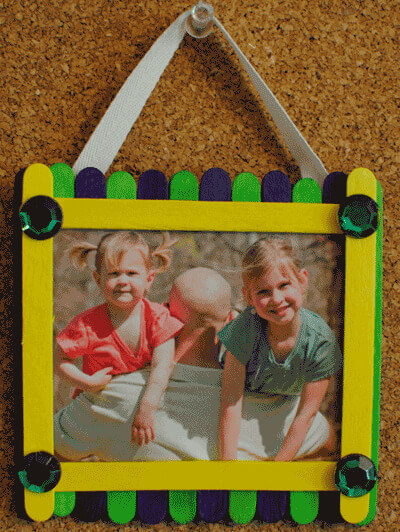
Image Source/Tutorial: Squiglys Playhouse
This suits preschoolers and for their birthday parties or their friend’s birthday parties hanging the photos is memorable and alluring. The materials needed are colored craft sticks, stones, lays, and embellishments for decoration which is a significant part of any craftwork. Does your craft box contain only plain (colorless) craft sticks? then paint using acrylic paint. Use multicolors for attraction. Place a ribbon at the back of the sticks and apply your childhood photos, your parents, friends, first-day school photos, and more. Hang these in the strings for birthday parties.
Hexagonal Photo Frame Gift To Your Lovable Ones
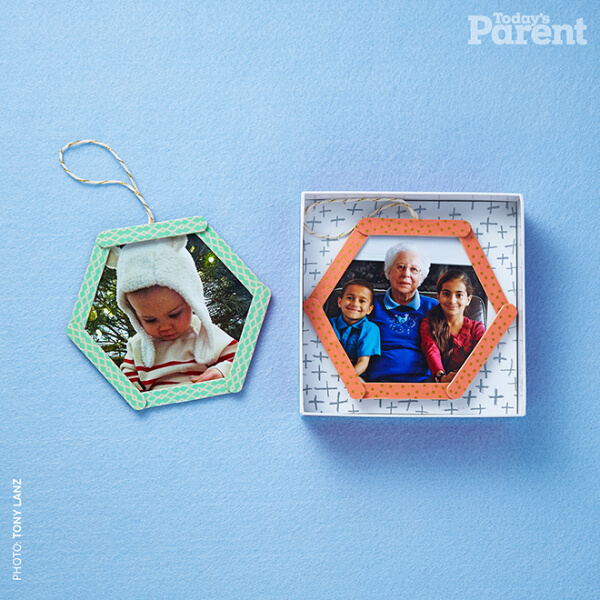
Image Source/Tutorial: Today’s Parent
Materials needed are popsicle sticks, washi tape, thread, scissors, and glue. This goes with the hexagon shape of the outer design. As a grandchild, you may think about what gift you can give to your grandparents. Only older age people know the most valuable thing in this life is time, love, care, and memories and not money. So giving your grandparents the costliest gift is a crap idea and go with DIY(do it yourself) craft items. For this Christmas or their anniversary surprise them with your innovative memory recollection idea which is a DIY photo frame. You can find smiles on their face when they open their gift and see it. You can’t bring that by giving the costliest or most branded items or gifts. Click the link mentioned above and see how easy it is to make and can surprise your lovable grandparents.
Easy Popsicle Photo Frame Craft For Kids
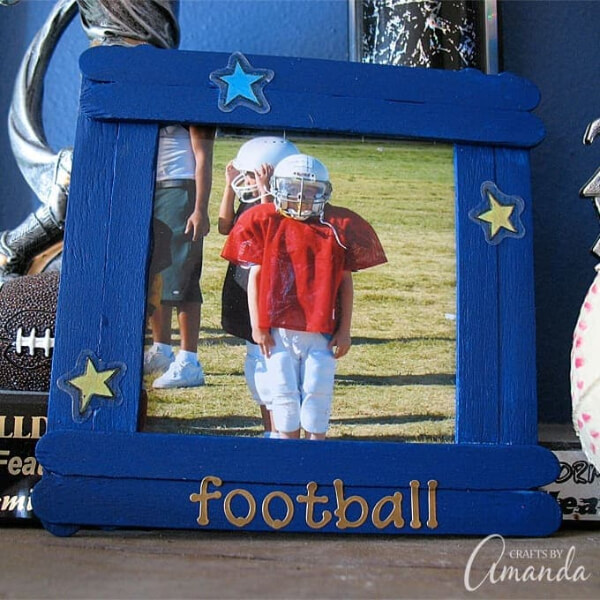
Image Source/Tutorial: Craftsbyamanda
Supplies needed are 8 craft sticks, a photo, glue, thin cardboard, a transparent sheet (optional), stickers, paint, and yarn. Preschoolers and kindergarten kids can easily do this craft. Make this frame, insert your family photo and gift this to your dad on Father’s Day. Sure he will feel happy and will place this frame on his desk. You can buy colored crafts or buy plain ones and paint them with acrylic paint. Decorate that with stickers and use letter stickers if possible like “you are my hero” or “you are my first best friend” to express your love. Draw the square shape and calculate the size on the cardboard. Trace the size, cut out the photo and paste the photo on the cardboard. Place the sticks in pairs and make a square shape of the paint. Place the stickers in the front and yarn upside down. Use a transparent sheet that will block the dust settling on the photo.
Capture Wonderful Moments In Simple Frame Craft
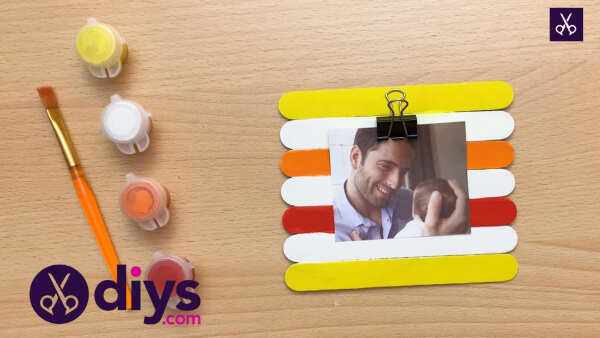
Image Source/Tutorial: Diys
Just three things are needed for this craft to make. If you use plain stick then paint that. Line up the sticks horizontally with edges spacing equally. Go with multicolors of the stick. Glue binder clips on the lined sticks leaving space at the top and cut the photo which you are gonna use here in a short length to give both image and a colorful craft stick view. If your kid used to watch craft-making videos before starting to do crafts then the video is embedded in the given link, scroll down to get that.
Easy Craftstick Ideas For Kindergarteners
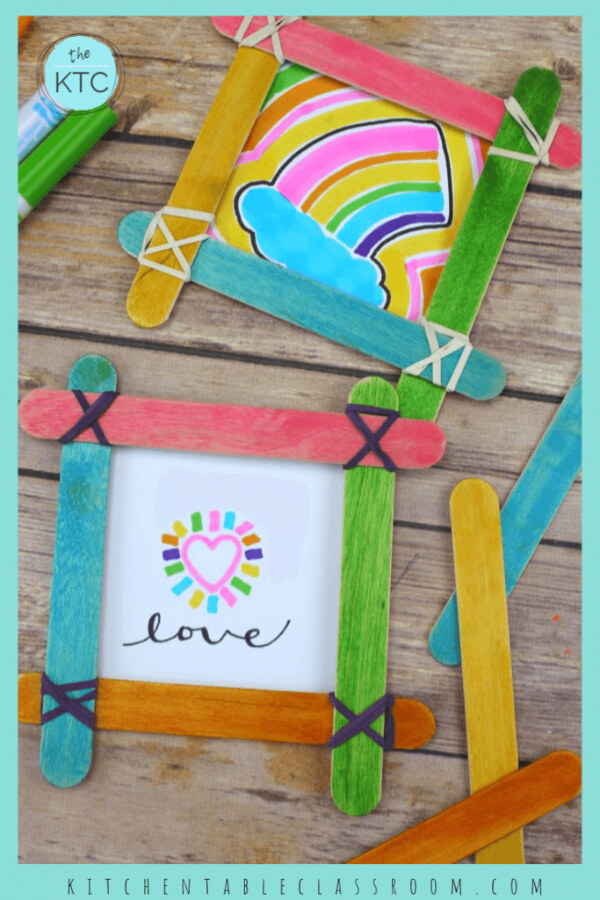
Image Source/Tutorial: Kitchen Table Classroom
Frame your kid’s artwork here. Photoframe is not only for framing our photos(memories), showcase your kid’s drawing talent through this. If you have colored sticks then your work is less, otherwise, color the sticks using markers or paint. Ask your kid to draw any theme on white paper using different colors and markers. Now place the sticks around the artwork and glue them together. Instead of directly gluing into the paper, stick the artwork into the cardboard to get a strong base point and then glue the sticks. This will best suit preschoolers and kindergarteners.
Read More: Easy Popsicle Stick Crafts For Beginners
Valentine’s Gift Using Popsicles And Buttons
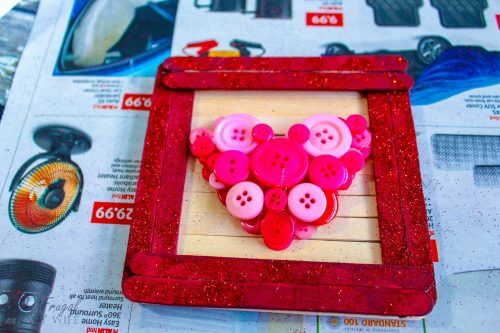
Image Source/Tutorial: The Frugal Navy Wife
It doesn’t mean that you should have a girlfriend if you want to celebrate valentines day. You can give your gift to all your loved ones, say, parents, grandparents, friends, etc. Say to your kid that love is not just the one showing between hero and heroines in movies, it’s care, affection, and more. So if they(kids) get to understand they’ll love everyone without being rude. This craft needs 18 popsicles, hot glue, red glitter, and red and pink buttons. This is a simple and cute valentines gift that easily can be made in a few minutes by kindergarteners. Align the popsicles line by line and glue them at the back using hot glue. Turn the sticks upside down and draw a heart shape using a pencil and paste the combo of pink and red buttons in a heart shape. You can go with a single or multiple layers for heart buttons. For decoration, sprinkle the glitter on the edge of the sticks and paste 3 layers of red and pink buttons on the 4 merging corners of the stick.
Simple Popsicle Stick Photo Frame Craft
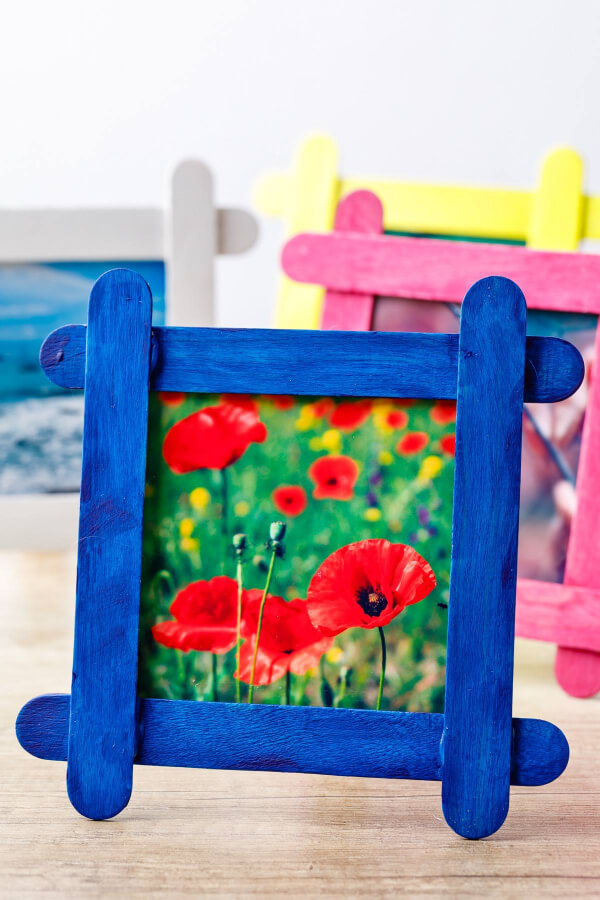
Image Source/Tutorial: Dodoburd
This is the best suitable frame craft for toddlers as the process is super easy. Materials needed are 5 popsicles, glue, cardboard, paint, scissors, and a photo. You can go with a square or diamond shape using 4 sticks. Place this shape on the cardboard. Before you glue it, crop the photo which you have decided on and glue it on the cardboard. Above this now paste the popsicles you’ve prepared. Glue a craft stick in a slanting position at the back of the frame. Ask your kid to make a frame for their(kids) 1st drawing or 1st writing(alphabets – where they have started writing). It’ll be memorable forever.
Cute Triangle Hanging Photo Frame Craft With Popsicle Stick
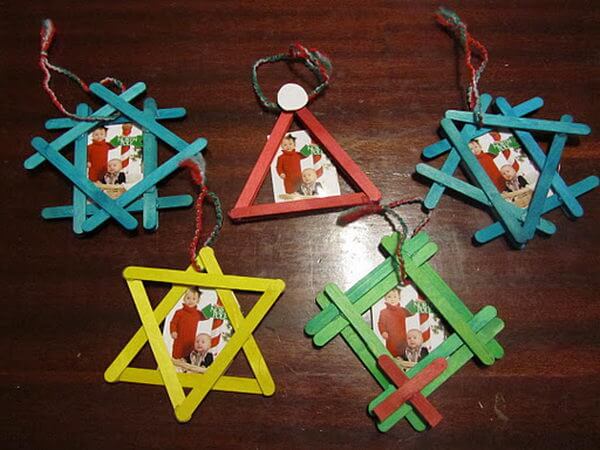
Image Source/Tutorial: Hative
This popsicle craftwork is not only confined to children, as it is versatile, and can make wonderful and creative ideas in craft sticks. Here is the testimony, you can go through the link given below the image, it consists of lots of innovative craft stick ideas for both kids and adults. Through this teach your kids the patterns, and designs and tempt them to create their designs. Make the craft sticks in your desired pattern as shown in the above image and place your image at the center. Now hang all those using yarn.
DIY Popsicle Photo Frame Craft For Kids
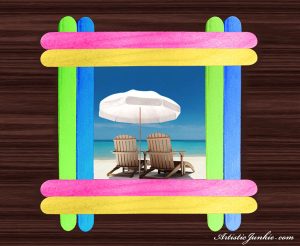
Image Source/Tutorial: Artistic Junkie
Another simple photoframe using craftsticks. Just place the sticks in parallel with the gap you want. Color it and decorate it with your idea. The materials needed are craft sticks with or without colored, glue, and paint(optional). Easy for preschoolers and teach them slanting lines and sleeping lines by placing the sticks in those directions which they will learn while writing the alphabet for the first time. Place a simple nature image at the center. Repeat the process and make more crafts like this.
Easy to Make Pencil Photo Frame Craft With Popsicle
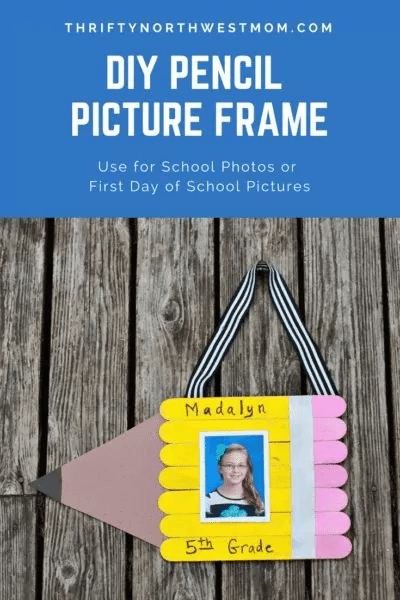
Image Source/Tutorial: The Savvy Age
Here we are with super easy craft work for preschoolers. Guide them with the materials needed for this craft and the rest will go. It is inexpensive and will take only a few minutes to do for even kids. We have seen just the craft horizontal stack and image at the center in the above posts. Here we have the theme as a pencil with an eraser where this popsicle act as an eraser part. Glue the sticks together and place the white band by leaving three-fourths of the stick. Paint two colors, one on the three-fourth part and the other on the rest part. Place the photo at the center and write something at the top or bottom if you want. Cut the construction paper like the pencil tip and paint them with respective colors.
Read More: Easy Washi Tape & Popsicle Stick Crafts For Kids
School Bus Photo Frame Craft For Student
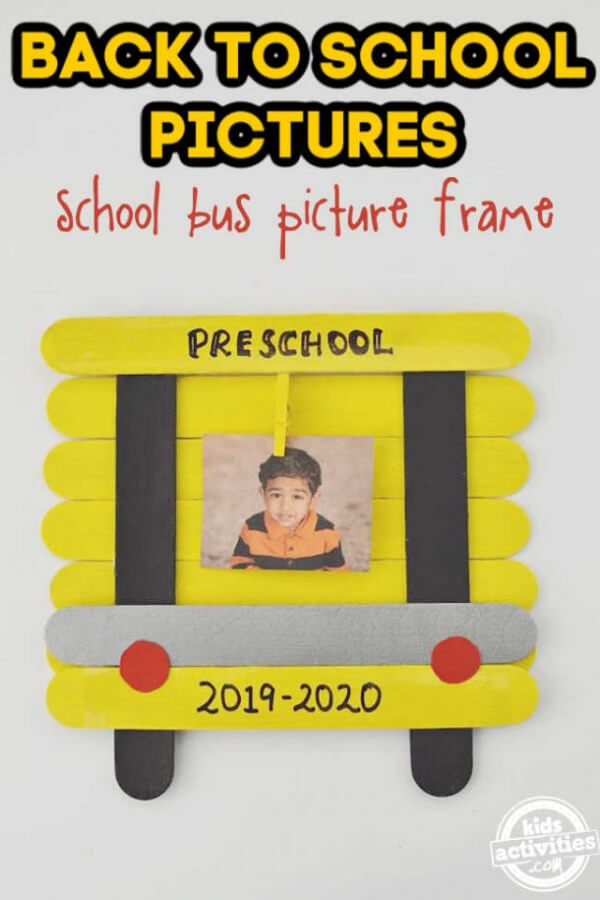
Image Source/Tutorial: Kids Activities Blog
This activity improves the hand-eye coordination of your kids and the patience to complete the craft. Some kids won’t have the patience to complete the task that they have taken. This gives the discipline of completing the whole task until it gets finished. Materials needed are craft sticks, red card stock, glue, tape, cloth pin, and paint of yellow, grey, and black. Line up six sticks horizontally after painting the sticks in yellow color. Place black coated sticks vertically in opposite directions shown in the above image. Place yellow and grey sticks above the black stick and red cardstock in a round shape indicating the light of the school bus for a signal. Place the photo at the center using a cloth pin Actually, this image is the craftwork of a school bus in a simple way for preschoolers. Stick this craft on the fridge or place it on the desk.
Colorful Popsicle Photo Frame Craft Using Button
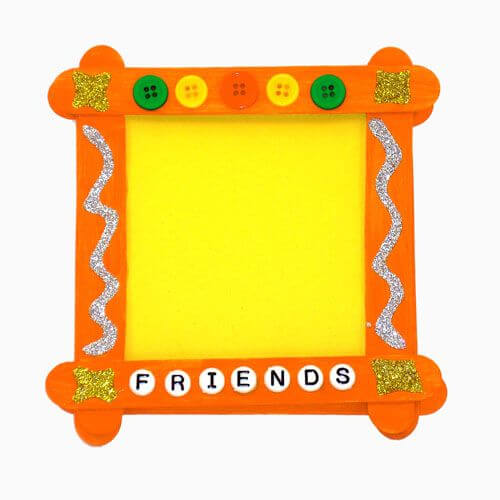
Image Source/Tutorial: Pinterest
Another photo frame template in craft sticks for kids. Color your sticks in any color and place them in a square shape. Paste a cardstock of any color that will act as a base and repeat the process of making a square in popsicles. Using glitters, buttons and stickers decorate the sticks, and finally, insert a photo into the frame you made. This is easy for preschoolers and asks them to make it themselves and you give the instructions on how to make it.
Fun to Make Popsicle Photo Frame Craft
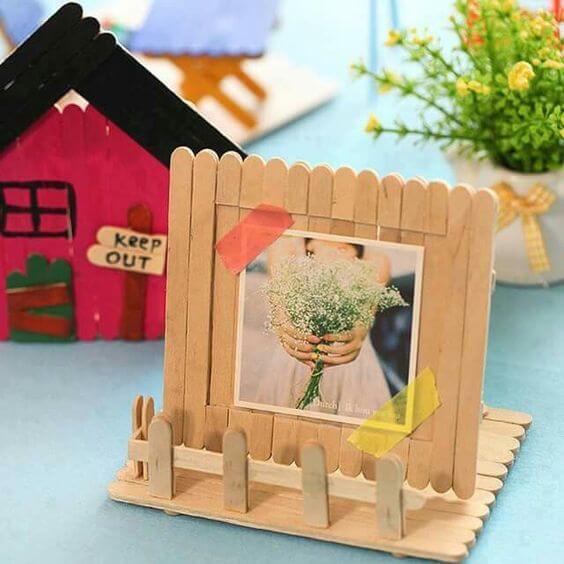
Image Source/Tutorial: Pinterest
It suits school kids. This looks simple, elegant, and aesthetic. So far we have seen many plains, as well as designed photo frames for kids, and those, gave absolute kids leveled appearance but this is so simple for kids and will give an adult-level look. Guide your kid as to how to make this. Only two things are required, one is popsicles and glue. Line up the sticks horizontally one next to the other, and choose your desired length. Repeat the same process and once you are done with those, place one set horizontally and the other vertically above the horizontal set as shown in the above image. Adding a small fence will look good so cut the sticks half away and glue them one after another with some gap and unite them with a long stick to indicate the fence structure. Finally, stick the image at the center. You are through!
Hand Impression Craft idea Using Popsicle Stick
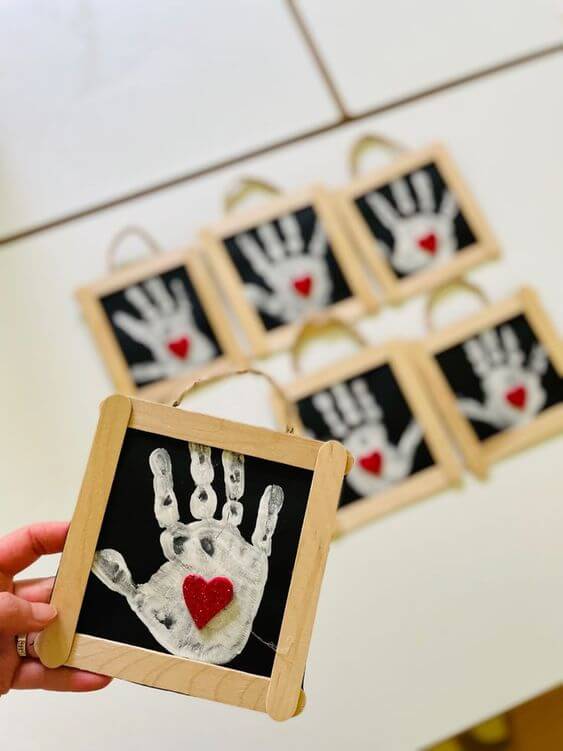
Image Source/Tutorial: Pinterest
From kids to adults, people love to make impressions. Here we are with the activity of handprint frame. I did this with my niece and she was enthusiastic while we made this. Materials needed are popsicles, glue, a black foam sheet or cardstock, white paint, and red cardstock (optional). Pour the paint into the paper plate and dip your Lil one’s little fingers in them otherwise, paint your kid’s hand using a paintbrush. Now mark the impression on the black cardstock and stick the 4 popsicles around the impression and cut out the excess sheets. Paste the twine at the back of the frame to make them hang. Adding this red heart cardstock is optional and the rest is your decoration. You can leave it as it is also.
Handprint Frame Craft For Father’s Day
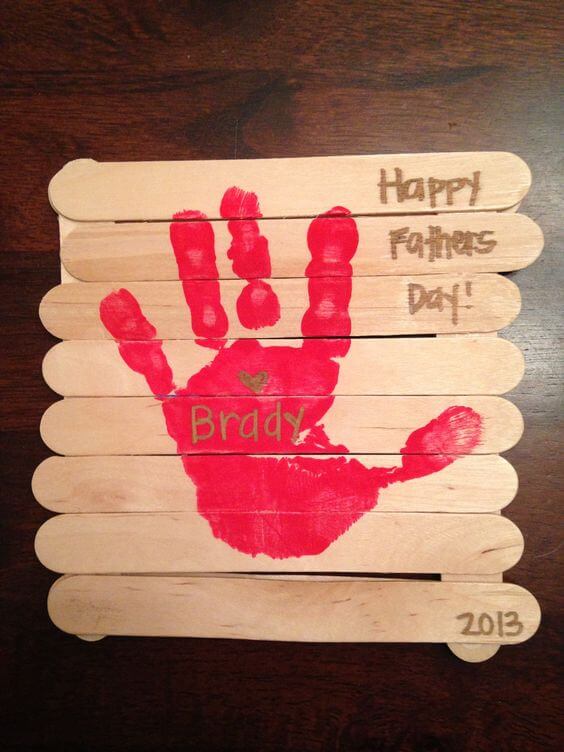
Image Source/Tutorial: Pinterest
Here we are with another handprint in the popsicles. The requirements are popsicles, paint, and a marker or paintbrush. Line up the sticks horizontally and glue them. Place sticks on the ends of the lined popsicles. Now print your kid’s hand impression directly on the sticks and write what you want on the sticks. Based on the theme you can write and gift that.
Read More: Popsicle Stick Craft Ideas For Kindergartners
Rainbow Photo Frame Craft Project
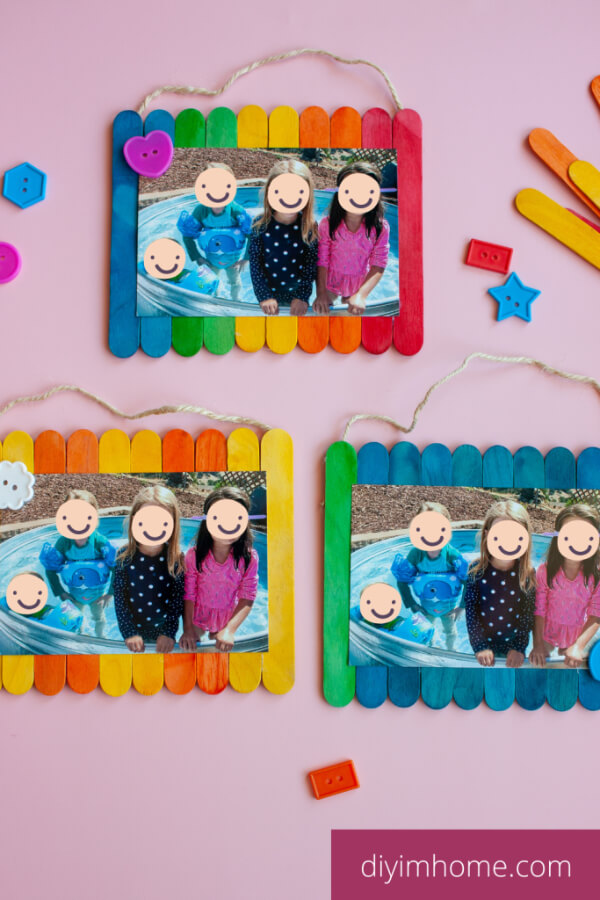
Image Source/Tutorial: Diyimhome
Be ready with your sticks, paint, and photos. Color your popsicles in a different color, try rainbow colors. Arrange the sticks of red, orange, yellow, green, blue, indigo, and violet and glue them in the same order to get the rainbow frame. Paste the photo above the colored stacks and add yarn at the ends of the sticks to hang them up. You are through!
Colorful Hanging Photo Frame Decoration Craft For Home
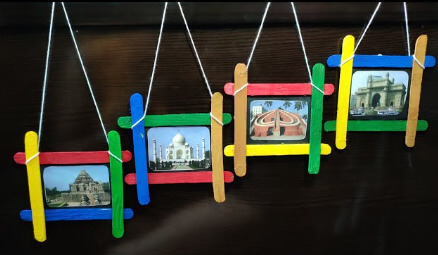
Image Source/Tutorial: Creative House Of Art
If you are a school teacher then you can assign this as project work for your students. We have seen the way of making a photo frame above i.e) Pasting the photograph on black cardstock to get the background and sticking the popsicles around them. Give the assignment as 7 wonders of the world, kings of your land in ancient times, and so on. Ask them to make this only through popsicles and see your student’s creative minds.
Sports Themed Photo Frame Craft Idea For Kids
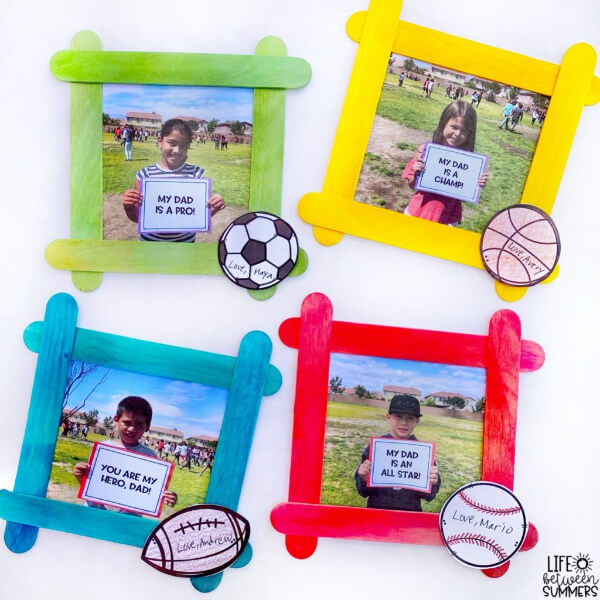
Image Source/Tutorial: Life Between Summers
The theme here is Father’s day gifts. Apart from making the frame as a gift to their father, the photograph like in the above image matters more for this theme. One is taking a photograph with a board of “you are my hero Dad” this will surely make a smile on their dad’s face. If they couldn’t take a photo then ask your kid to write a letter to their father and this “dad is my hero” board as the center of the frame.
Easy & Simple Frame Craft Using Popsicle Stick
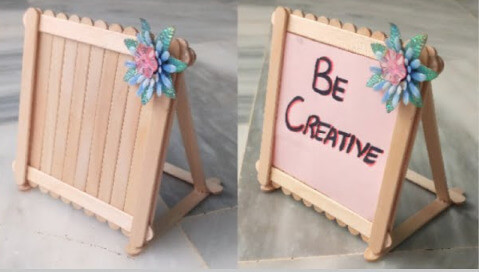
Image Source/Tutorial: Laiba’s Creativity
Let us try a simple desktop craft board. Line up 11 to 12 sticks horizontally and glue them together. Paste four sticks border over the horizontal sticks. To make a stand, use five sticks, place two of them in a slanting position and merge those with the other three sticks as shown above. If you wanna watch the video the link is embedded here. Place a flower design at the corner otherwise, plain vanilla won’t be attractive. Insert positive quotes poster and put this on your table, start your day full of positivity and you can gift too.
Popsicle Stick Photo Frame Craft For Christmas
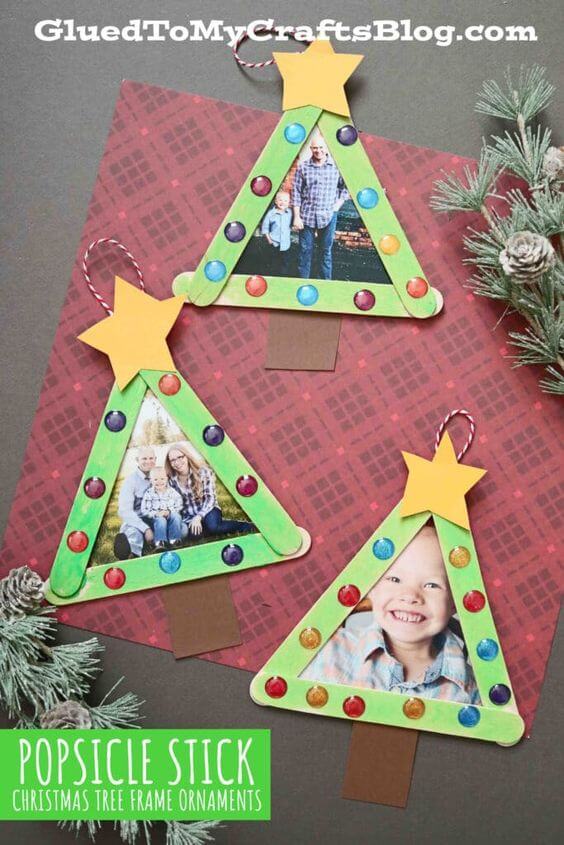
Image Source/Tutorial: Gluedtomycraftsblog
As we are heading towards Christmas your mind might be full of Christmas decoration plans. Join your kid on your decoration team this year! This Christmas tree is a mix of memories plus Christmas celebrations. Materials required are colorful construction papers, scissors, glue, rhinestones, and photos. Make a triangle shape in popsicles and ask them to paint. Cut brown construction paper for the stem of the tree and yellow for the star at the top of the tree. Trim your photo to fit into the Christmas tree and paste it. Use twine or yarn to hang them on the Christmas tree. Stick rhinestones on the popsicles. Ta-Da! we are done!
Read More: Easy Popsicle Stick Rainbow Crafts For Kids
DIY Photo Frame Craft With Heart Border
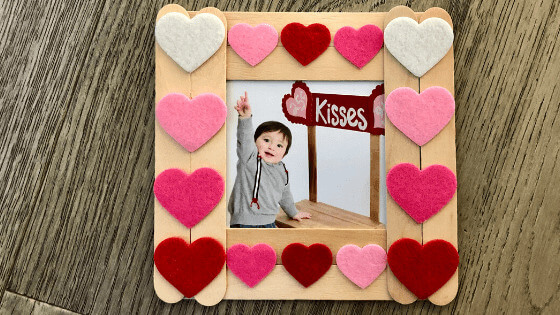
Image Source/Tutorial: Mombrite
Materials required are popsicles, photos, a cloth pin, glue, and velvet clothes(red and pink). Glue two sticks together and make a square shape like given in the above image. Cut the velvet clothes into heart shapes and then paste them on the sticks as decoration work. Make in any shape say triangle, pentagon, hexagon, or any, this gives you the chance and space to teach geometric shapes to your kids.
Simple & Adorable Photo Frame Craft Idea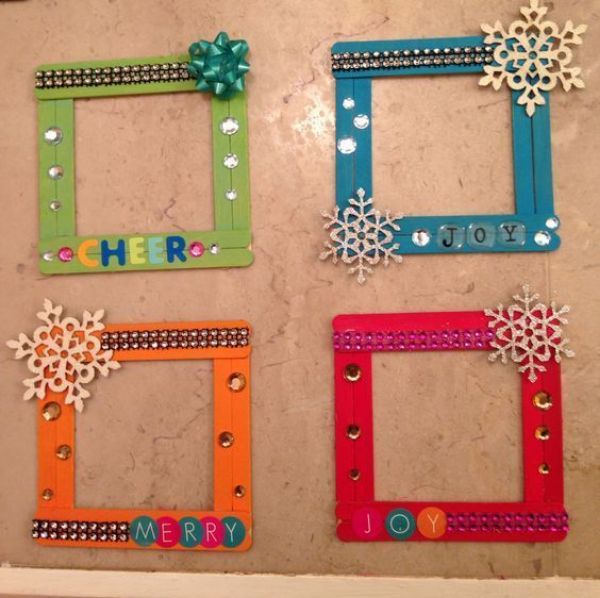
Image Source/Tutorial: Kids’ Art n Craft
This is the usual frame but the decoration part makes the difference and looks alluring. Go with the same color of paint for a stand and make more frames with unique colors for each frame. Materials needed are 8 popsicles for 1 frame, paint(optional), lace, stones, stickers, and flower design. If you have gone through the above posts you might have known that only the decoration part differs. Glue the colored sticks together and stick lace, stones, and letter stickers. This flower design is the highlight of this craft so this is a must. At last, insert the photo and present it to your friends or family members.
I hope, you have visited all posts and got an idea to assign craft work for your buddies this weekend. Help your kiddo by giving instructions and making fun conversation with them, and do artwork in a fun way. Go through our other posts which consist of tons of ideas for both kids and adults. Transform your time into productive and meaningful. Stay tuned to k4craft.
Follow us on Youtube for art and craft tutorials and much more.
More Articles from Kids Art & Craft
- DIY Newspaper Frame Ideas for Home Decoration
- DIY Photo Frame Craft Ideas for Kids
- Simple DIY Bookmarks For Kids With Paper, Popsicles & More
- Wall Hanging Decoration Ideas With Popsicle Sticks
- DIY Miniature Popsicle Stick Hut Crafts


