Kids Activities
Easy Finger Painting Activities for Kids

The most engrossing way to keep your kids puddled up and busy is by letting them play with watercolors…
Yes, that is true! Even toddlers are first attracted to the variety of coloured objects present around them!!
Parents generally stereotype painting and watercolors for grown-up children projects but fingerprinting art as such is an innovative way in which small kids can exercise their hands and paint their dreams on paper or in particular canvas for that matter. We just need to keep a watchful eye and clean the mess they make during this exercise!
Playing and learning go hand-in-hand. To develop a kid’s creativity in the easiest, fun-filled and actualized manner- let them recognize and mix paints to obtain hues or shades of endless kinds. Let them put to use their different fingers, thumbprints, palms, sides and edges of different fingers, their knuckles to create shapes of various sizes in many colours.
I name it -“Creativity at its best”. This painting and drawing colourful activities will- a) Firstly make smaller kids self-conscious, better aware of different colours, shapes and sizes. b) Will render recognition of different types of animals and their characteristics.
Five examples of pictorialism are below to see for yourself how painting art can transform impressions into beautiful cartoon animals.
DIY Thumb Painted Colourful Quirky Animals
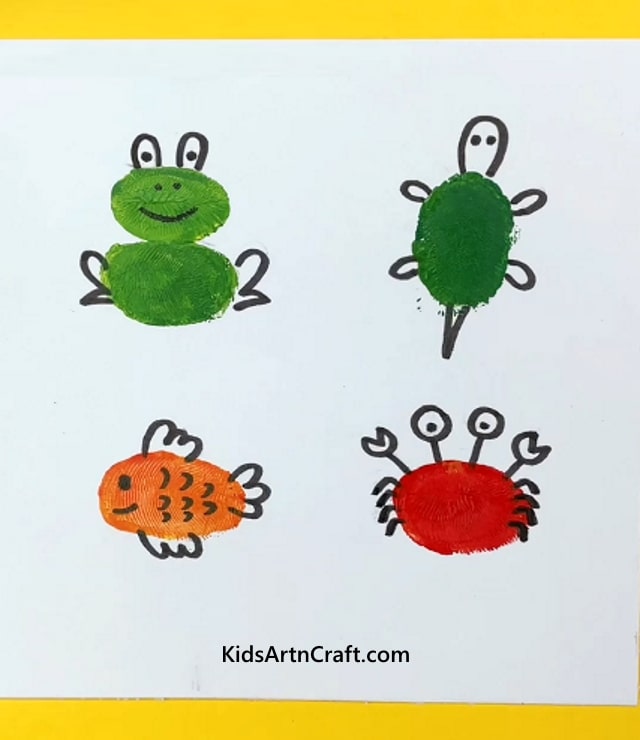
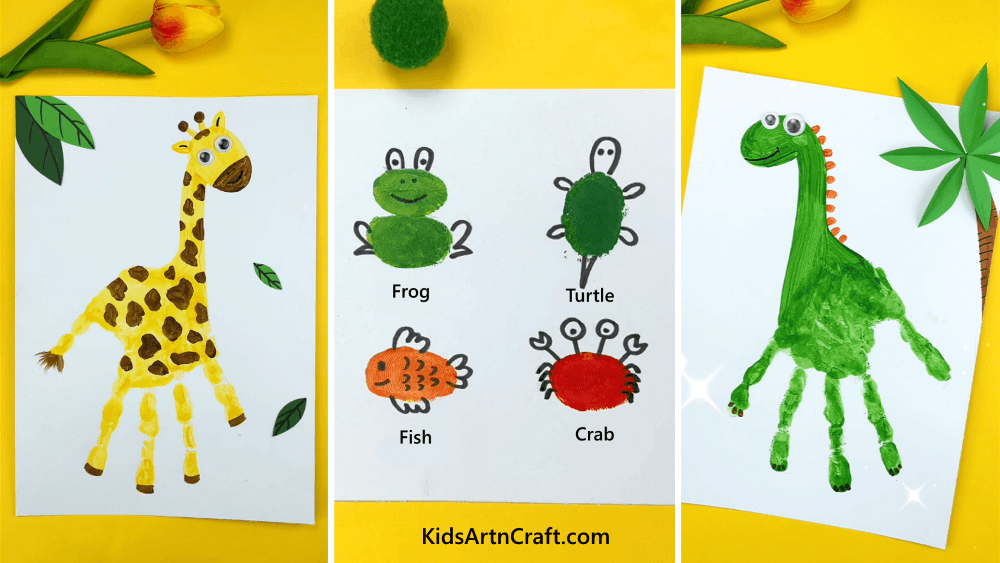
A child can dip his hands into different painting colours and make impressions of them on White Paper. With a black sketch pen, give these small-sized thumbprints eyes, nose, hands, legs and gills to form frog, tortoise, fish and crab as shown in the above sketch. The concept behind this activity or play idea is to teach kids how amusingly animals can be contrived from thumb painting in different sizes and colours. This means any sort of random-looking fingerprint can turn into an animal of their choice.
Hand-Palm painted Yellow Giraffe with Brown Finger Painted spots
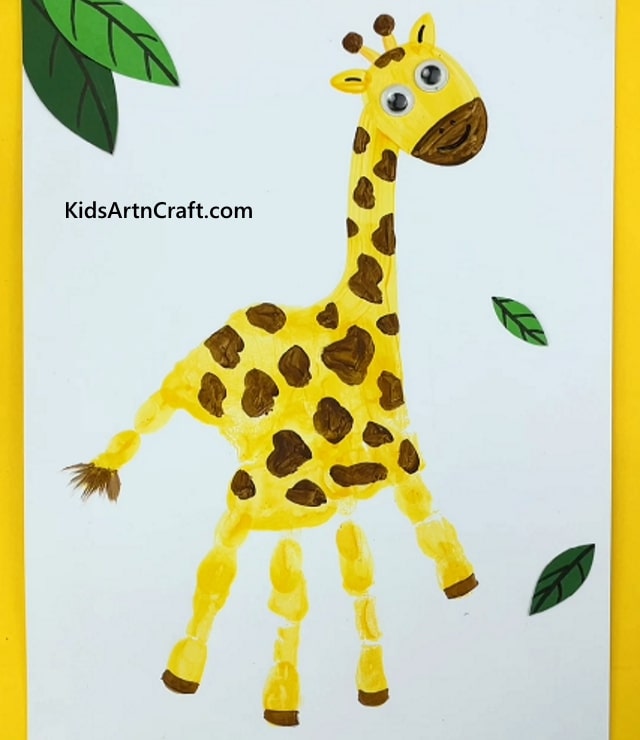
Make your toddler dip his hand in yellow watercolour and press that hand firmly on the sheet of paper to obtain a perfect yellow palm print. Now randomly using different fingers excluding the thumb, ask them to stamp the giraffe body with brown spots separated by a little space from each other. Show them how to turn this handprint into a beautiful giraffe by turning fingertips into legs, thumb into giraffe’s ponytail and rendering eyes, mouth, antlers, ears to the giraffe with the help of a brown and yellow sketch pen. More the practice, the more perfect the giraffe becomes!
Plant-Eater Green Dinosaur from Hand Painting Art
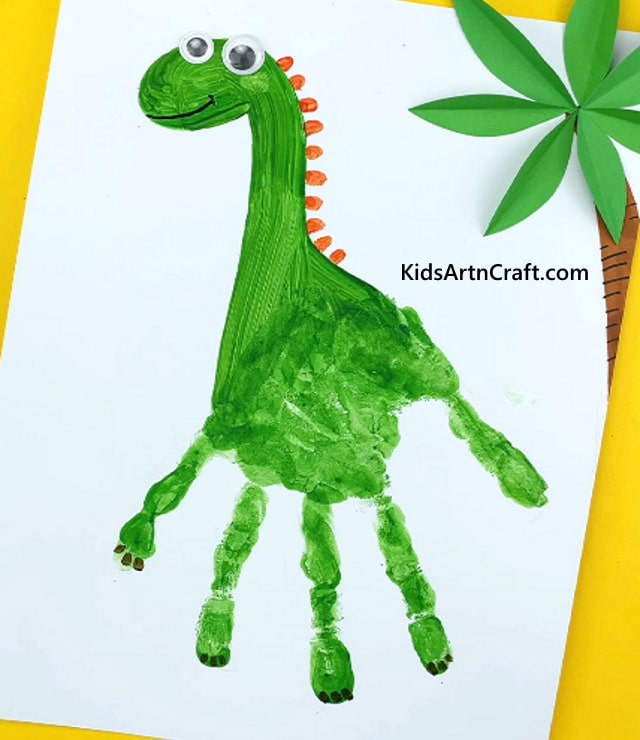
This time cover your toddler’s hands with green paint. Press it firmly against the white sheet to get a clear palm print. Use green and black sketch pens to perfectly outline this dinosaur. Artify with nails. eyes and body scales. You can draw a tree and a few floating leaves in the background to give a perfect background to this plant-eating dinosaur. This idea can be used to make an ideal greeting card for special occasions with a toddler’s palm-print that becomes the very basis of that painting!
Fingers Painted Colourful Caterpillar sitting on a Green Leaf Painting
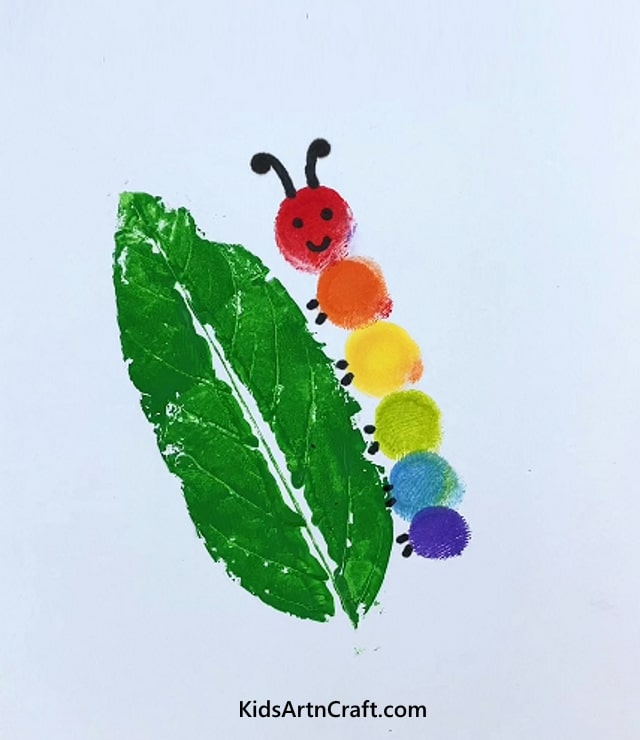
Distinct watercolours such as purple, light blue, sheen green, yellow, orange and red coloured have been used here to donate the fused segments of a caterpillar body. Besides caterpillar fabrication from different size fingerprints arranged in an increasing to decreasing order right from the head to toe, leaf painting is also a vital part of this art form. One side of a leaf has been painted in green watercolour and imprinted clearly on the white sheet of paper. On this, the caterpillar can be seen climbing and smiling back happily. Its legs, eyes and antennae have been sketched out using a black sketch pen.
White-Dotted Finger-Painted Cutesy Reindeers
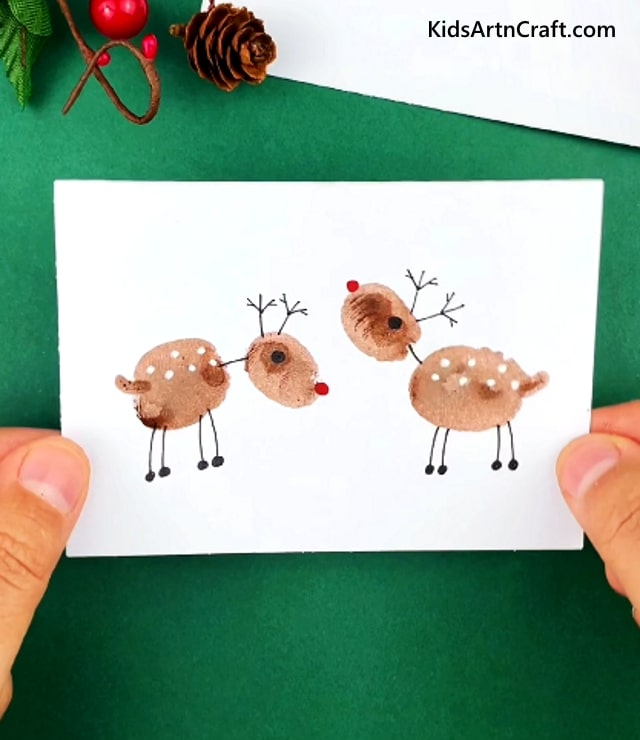
Here, Thumbprints have been used to paint the reindeer’s body and finger paints to make the head of the two reindeers. After the light brown painting colour dries off completely, white dots spread over the entirety of the reindeer’s body have been made using a white sketch pen. While a black sketch pen has been used to shape up and work out eyes, legs plus both reindeer’s antlers; a red sketch pen will suffice the requirements of the nose.
Fingerprinting or Finger painting drawings and Handprint painting activities for toddlers raise the excitement level in toddlers to heights. Learning becomes fun and the family gets to spend some creative time together. Besides giggles, added benefits include the development of fine-motor skills and the development of coordinated reflexes.
In my opinion, a kid can paint or print more beautifully as compared to colouring already outlined images using crayons that they still are not able to get a perfect hold on!
If you find this article interesting, take out some time to go through other articles on this website!
Comment and let’s know what topics you would like us to write about. We are looking forward to your presence and constructive feedback on our articles. Kindly feel free to reach out to us without any hesitation!
FAQ’s on
1. What materials do I need for finger painting?
Answer: You will need finger paints, paper, and something to cover your work surface.
2. How can I keep the mess to a minimum?
Answer: Cover the work surface with newspaper or an old sheet. Wear old clothes and put a smock on your child.
3. What kind of paper should I use for finger painting?
Answer: Finger painting paper is best, as it is thicker and won’t curl up when it gets wet. You can also use cardstock or construction paper.
4. Is finger painting safe for young children?
Answer: Yes, finger painting is a safe activity for young children. It helps to develop their fine motor skills.
5. What kind of paint should I use for finger painting?
Answer: You can use traditional finger paints, or you can make your own paint with flour, water, and food coloring.
6. Should I use a brush or my fingers for painting?
Answer: Using your fingers is the best way to finger paint as it allows for more control.
7. What techniques can I use for finger painting?
Answer: Experiment with different techniques such as dabbing, swirling, and dragging your fingers.
8. Can I make interesting shapes with finger painting?
Answer: Yes, you can make all kinds of shapes with finger painting, such as stars, circles, flowers, and more.
9. How can I keep my finger painting from getting smudged?
Answer: Let the painting dry completely before moving it.
10. What can I do with the finished paintings?
Answer: You can hang them up in your home, frame them, or make cards or gifts with them.
Read More:
- Cotton Bud Painting Hacks for Kids
- Stamping Art Ideas for Earth Day
- Playful Paint Combination Ideas for kids
- Easy Painting Ideas For Kids
- Fall Activities for Toddlers


