Paper Crafts
Easy Paper Strips Peacock Craft Tutorial for kids

This fun and easy Paper Strips Peacock Craft Tutorial is perfect for kids. Learn how to make a beautiful peacock out of colorful paper strips and simple craft supplies. Perfect for a crafting afternoon, birthday party, or any occasion!
Are you looking for a fun and creative craft project to do with your kids? Look no further than this easy paper strips peacock craft tutorial! This is a great activity for kids to get creative and have fun while learning the basics of crafting. This project uses simple supplies and is a great way to teach your kids about the beauty of nature. The colorful end result also makes a great decoration for any room. It’s an easy step-by-step tutorial that will guide you through the process of creating a beautiful paper peacock. All you need is a few simple materials and some patience! So grab your supplies and let’s get started!
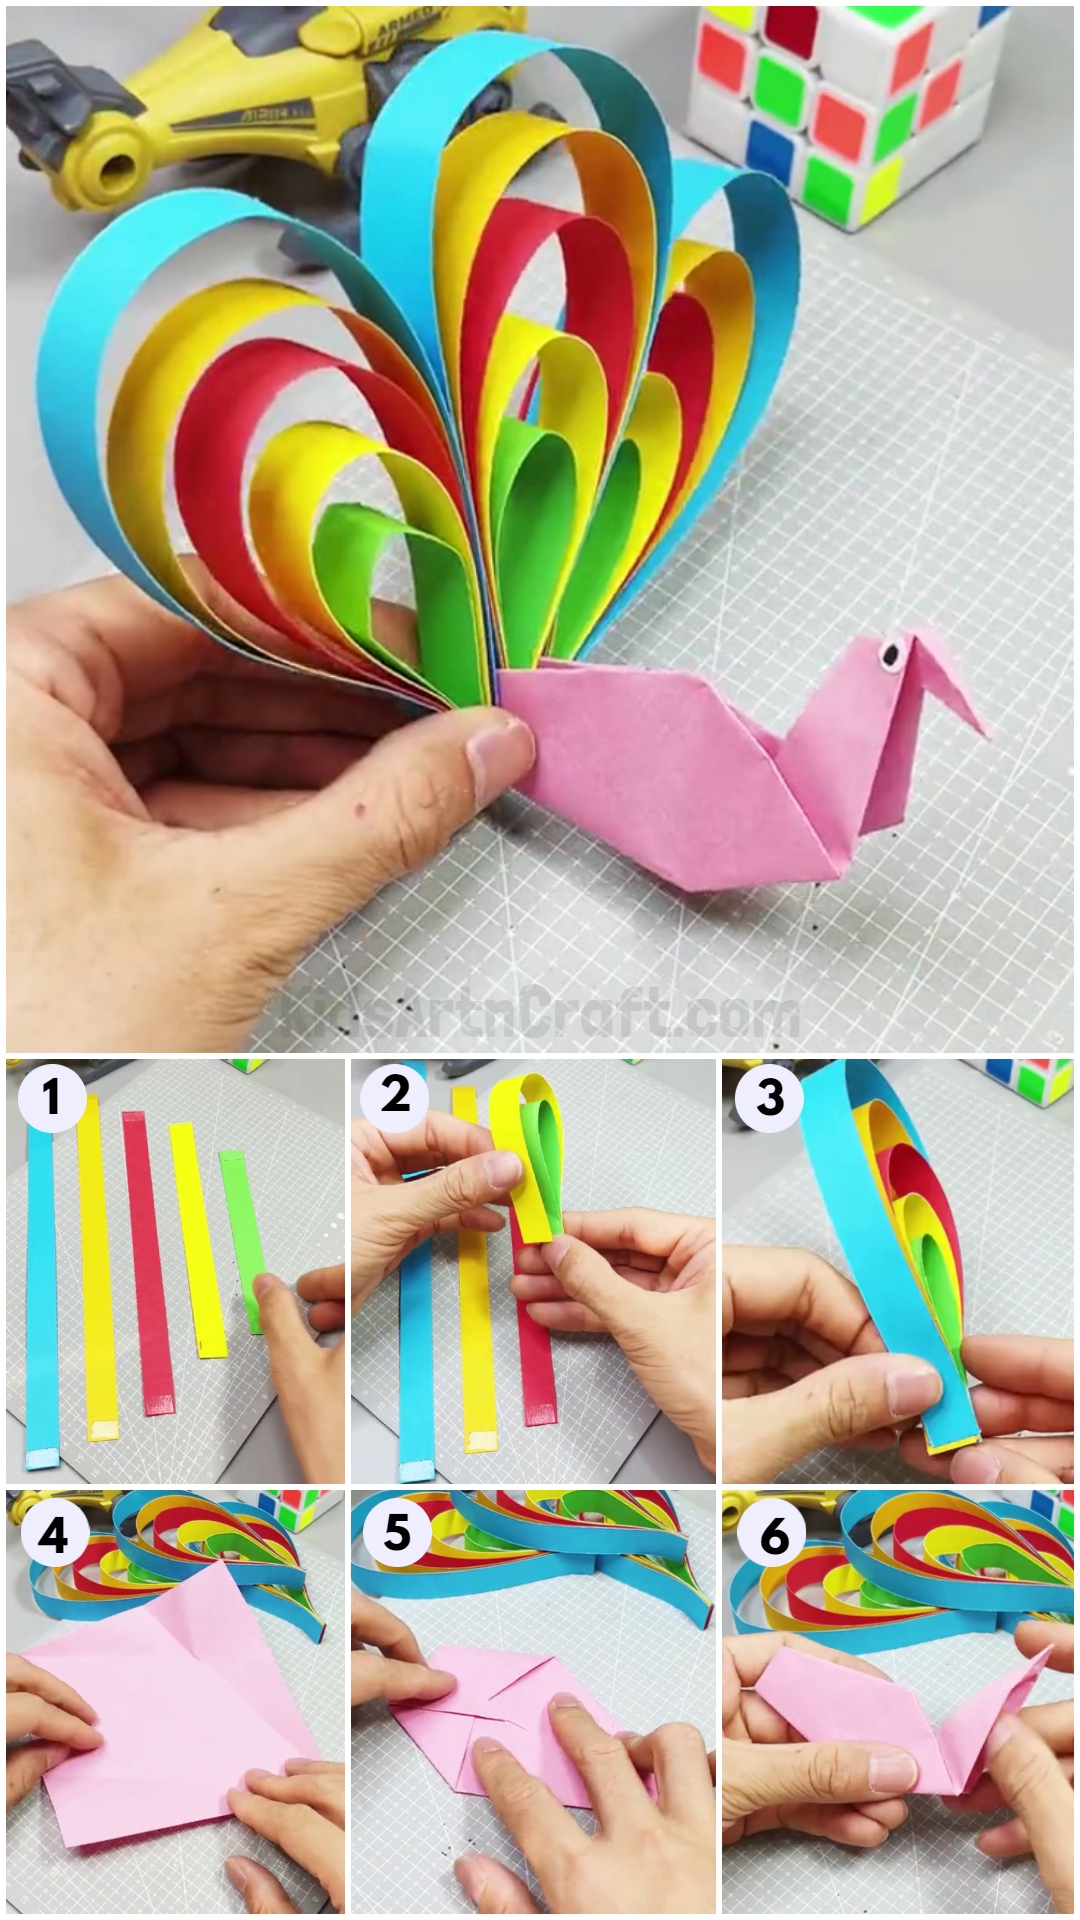
Awesome Peacock Craft Made With Colorful Paper Strips

Read More: DIY Easy Paper Strawberry Tutorial For Kids
Materials Required
- Colorful Paper Strips
- Pink origami paper
- Double-sided tape
- Scissors
Procedure
Step 1: Cutting Out 5 Strips Of Colorful Paper
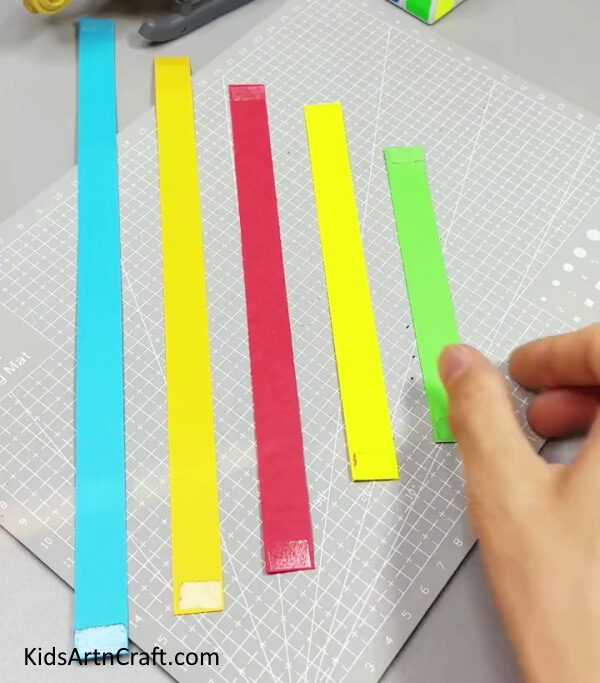

To start with this craft, first cut out 5 paper strips of colors present in the peacock’s tail in increasing order length. Put double-sided tape on each side of the strips.
Step 2: Pasting The Strips
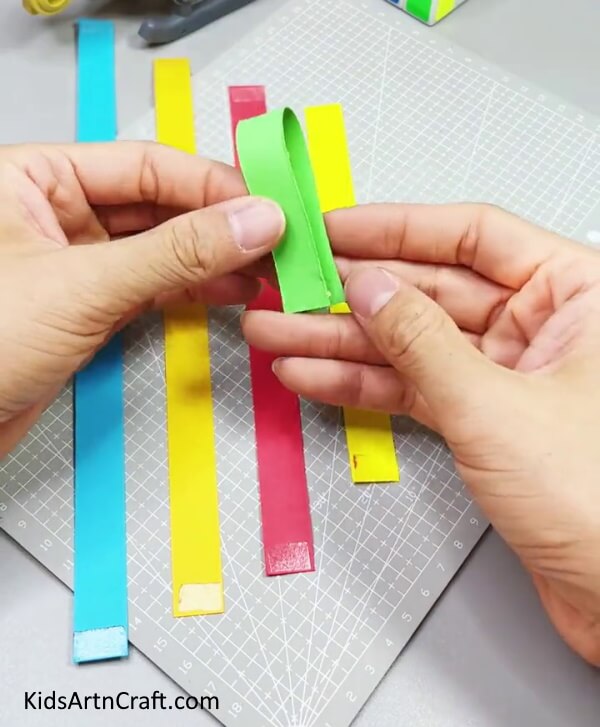

Paste the first smallest strip to its ends and form a loop.
Step 3: Pasting The Next Strip
Paste the next order strip over the first in a manner that it’s stuck on both the ends of first strip and forms a loop over it.
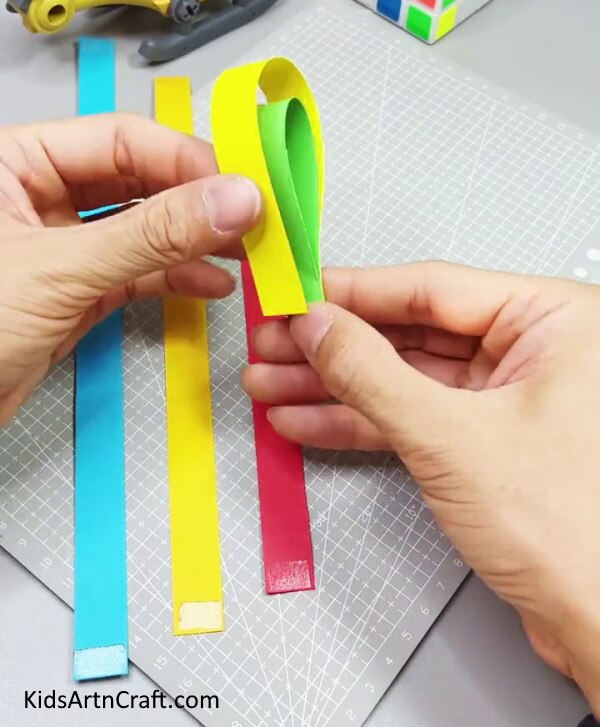
Step 4: Pasting The Other Strips and Making the Tail of the Peacock
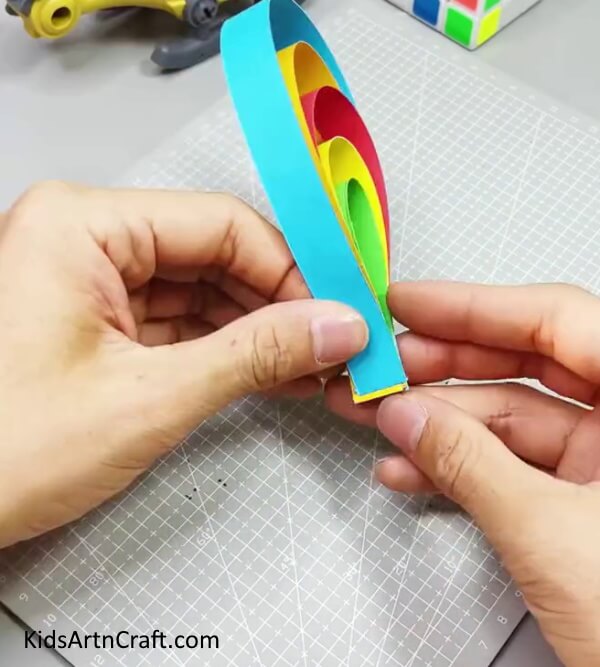

Paste the remaining strips over each other following the previous step, and make the tail of the peacock.
Step 5: Make the Other 2 Tails
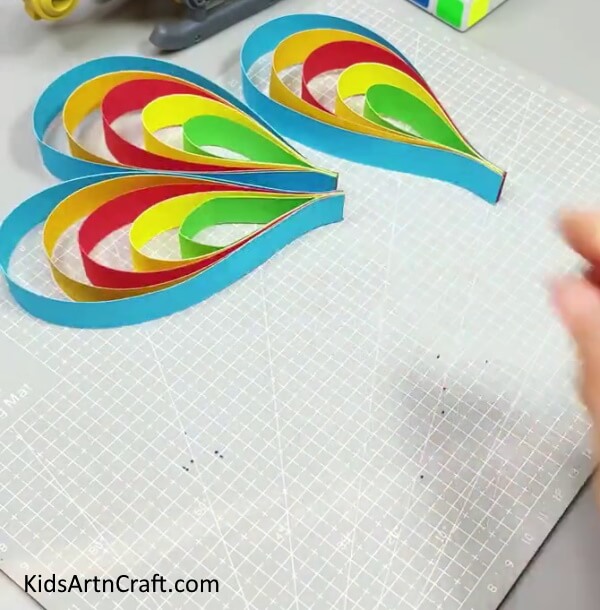

Make the other 2 tails of the peacock by following the previous steps mentioned.
Step 6: Making A Peacock
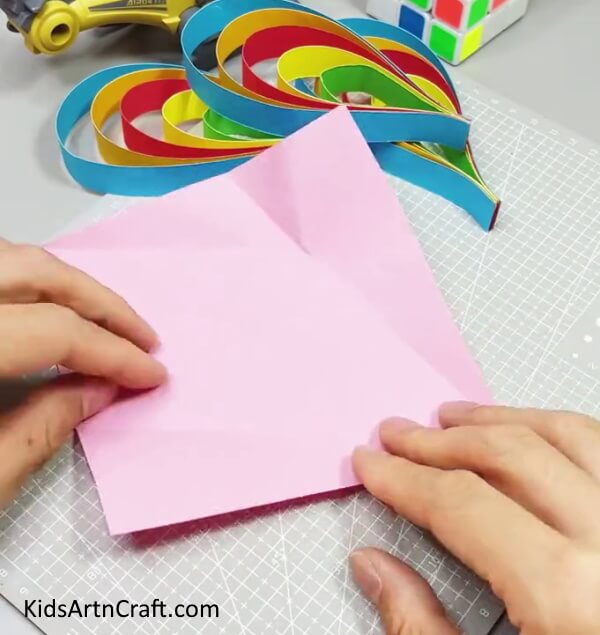

Take a piece of pink origami paper fold it in half to form a triangle and open it again after making a crease.
Step 7: Forming a Kite Shape
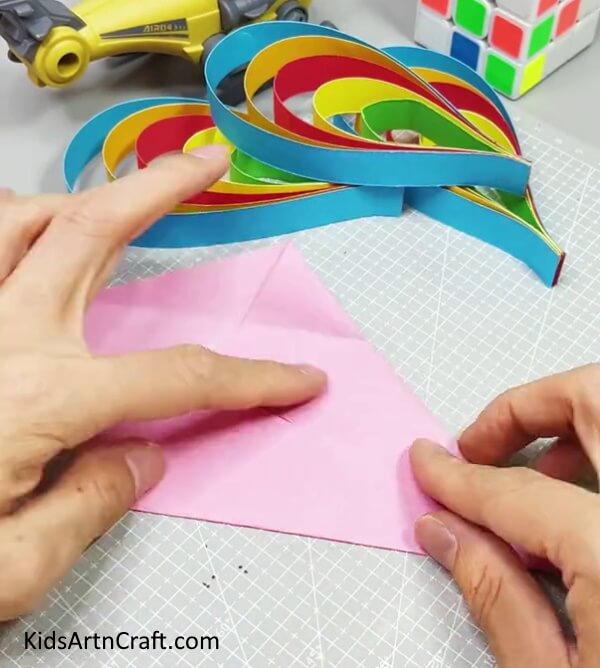

Take the corners of the paper opposite to the crease, hold them, and take them to the crease to form a kite shape.
Step 8: Forming a Diamond Shape

After the kite shape is formed, hold both the shorter side of the kite and take them to the crease to form a diamond shape.
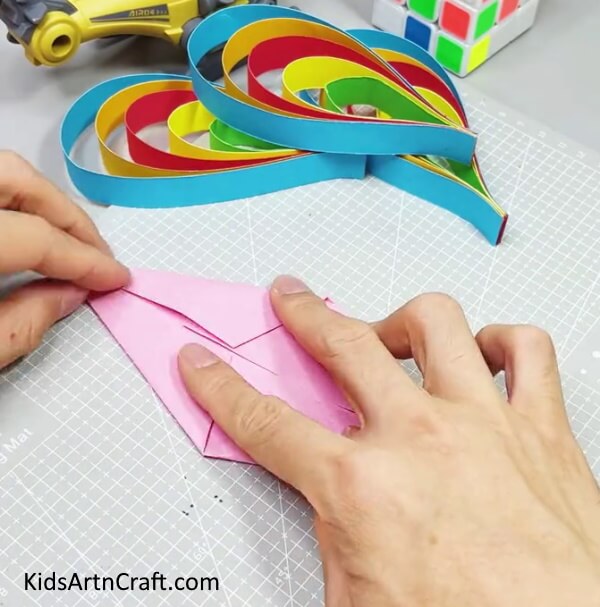
Step 9: Forming A Pentagon Shape
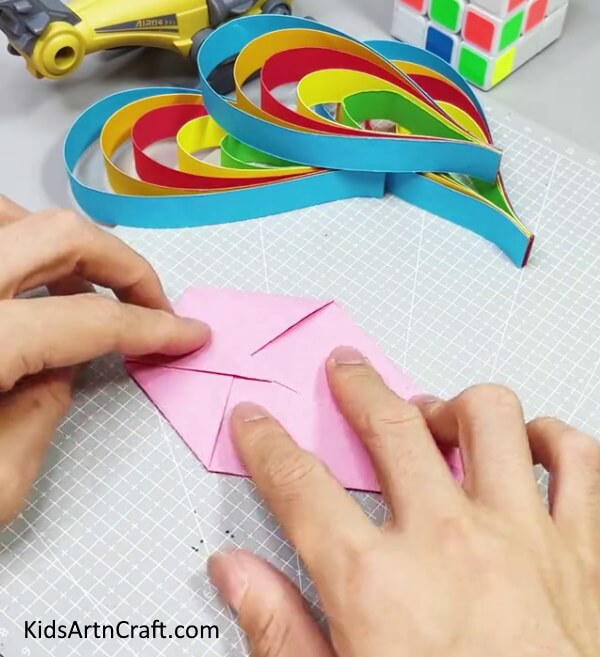

After forming a diamond shape, hold the paper from the top, fold it in till the middle of the diamond and make a crease. This will form a pentagon shape.
Step 10: Folding the Middle Crease

Fold the middle crease on the other.
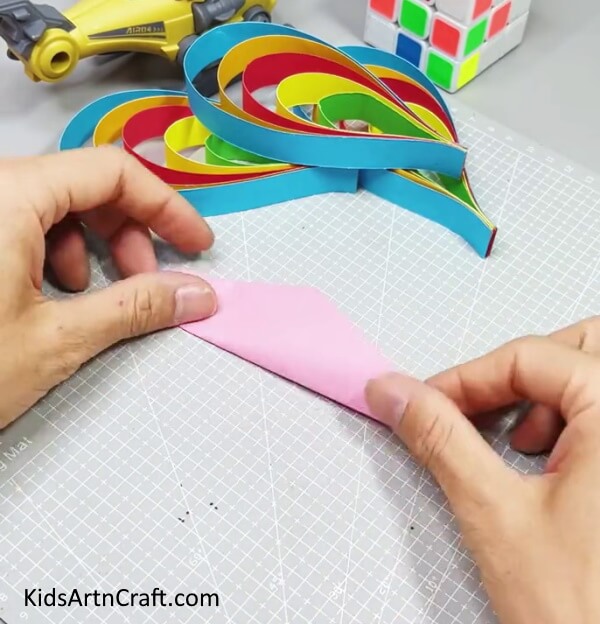
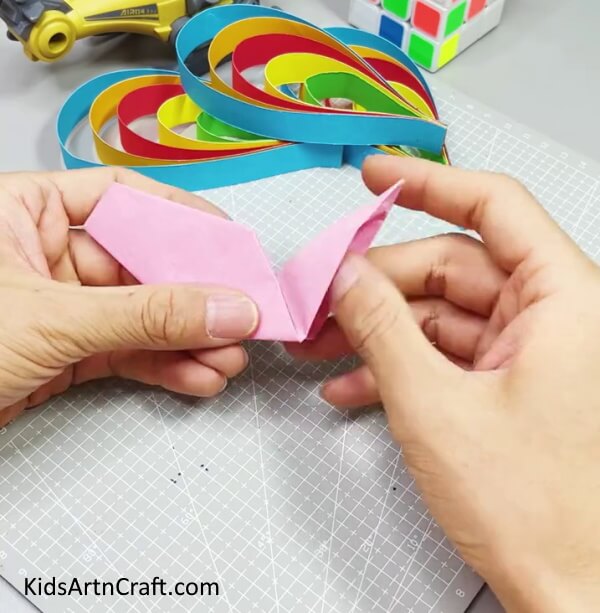
Step 11: Folding the End Of the Paper to 90 Degrees
Fold the end of the paper to 90 degrees and make a crease to form the neck of the peacock.
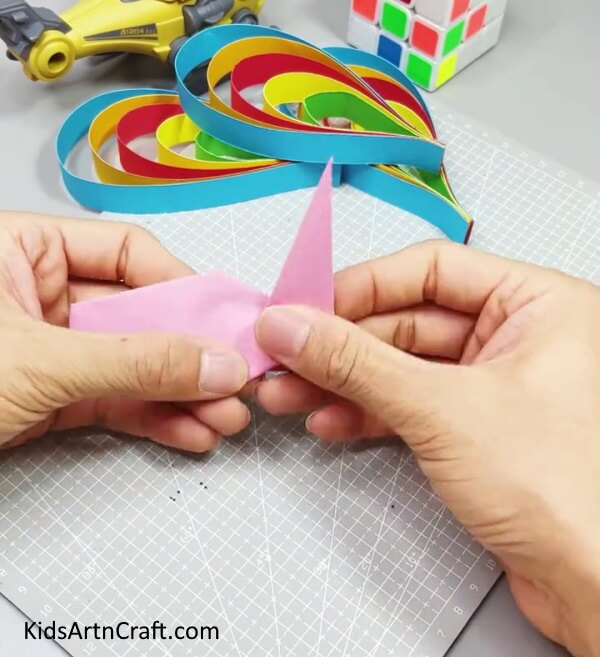
Step 12: Making the Neck of the Peacock

Step 13: Making the Face of the Peacock
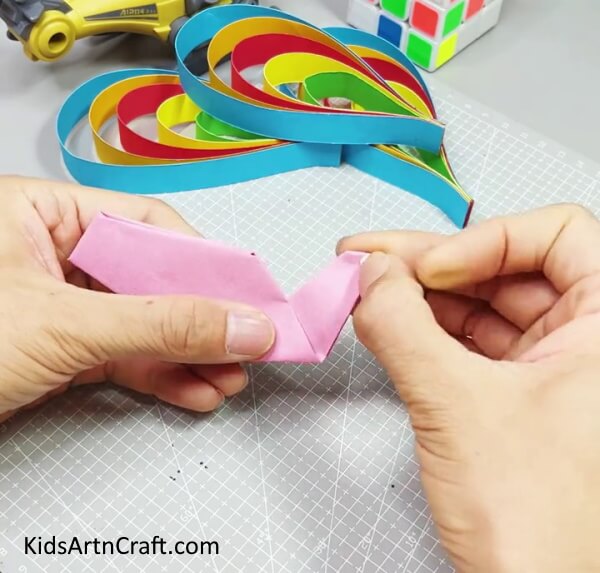

Push the top of the neck inside the neck open from the middle to form the face of the peacock. Cut out a small eye from a white sheet and paste it on the face of the peacock.
Step 14: Pasting the Tails Of The Peacock
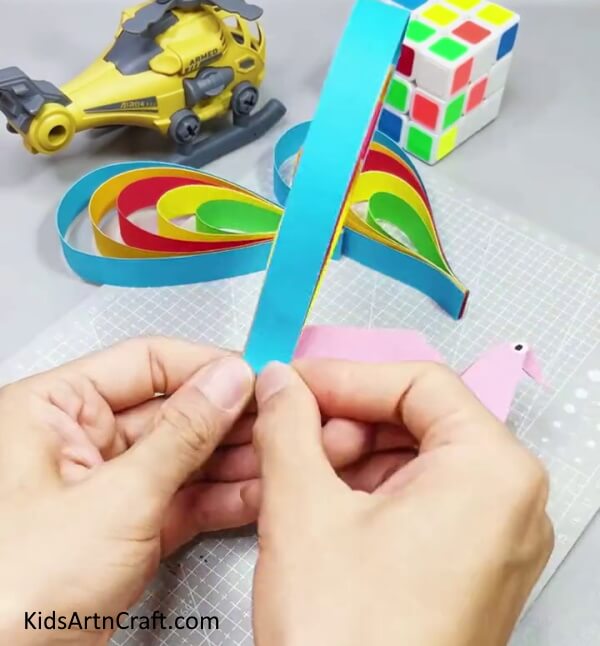

Paste the tails of the peacock on each side and the middle of the page at the end of the peacock.
Your Paper Strip Peacock Craft is Ready!
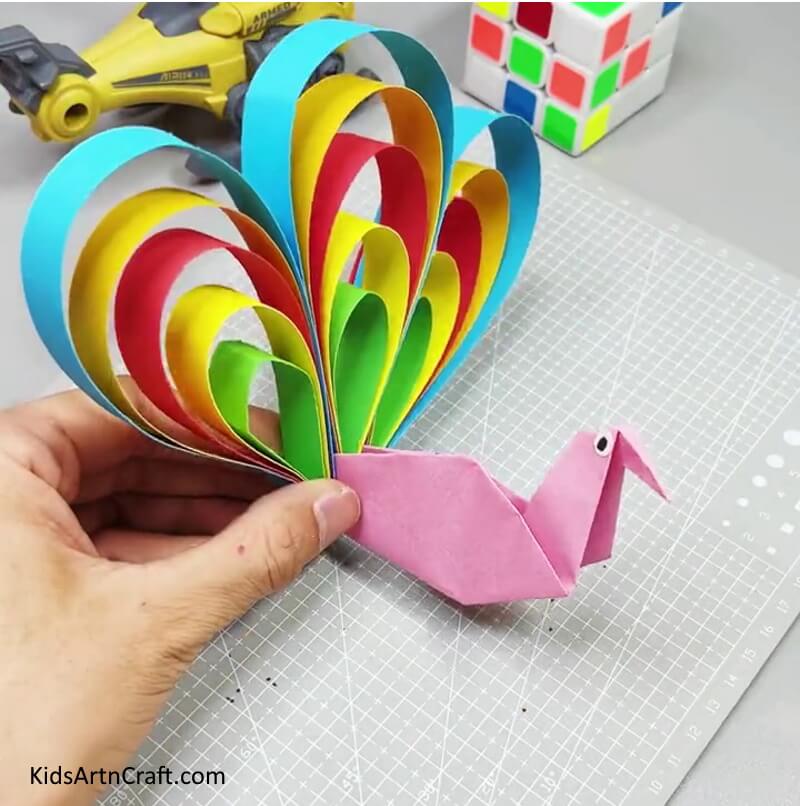

Yay! Your awesome DIY peacock is ready. It is so pretty and colorful that can decorate any part of your home beautifully! This easy paper strips peacock craft tutorial is a great way to let your kids unleash their creativity. Let them get creative with the colors and materials they use to make their peacock. This project is sure to bring hours of fun and learning. Enjoy!
FAQs Related to Easy Paper Strips Peacock Craft Tutorial for kids
1. What kind of materials do I need for this Easy Paper Strips Peacock Craft?
You will need Colored paper strips, paper, scissors, glue, a pencil, and a black marker.
2. How long does it take to make this Easy Paper Strips Peacock Craft?
It should take around 30 minutes to complete.
3. Can I make this craft with my kids?
Yes, this craft is suitable for kids of all ages.
4. Is there a specific size of paper I need?
You will need paper strips of different lengths for the tail feathers.
5. How do I attach the paper strips?
You will need to use glue to attach the paper strips.
This Easy Paper Strips Peacock Craft Tutorial for kids is an excellent way to introduce some creativity and color into your kids’ lives. With just a few simple materials and some creativity, they can create a beautiful peacock craft project that they can be proud of.
Follow us on Youtube for art and craft tutorials and much more.
More Articles from Kids Art & Craft
- Step-by-Step Drawing Tricks Video Tutorial for Beginners
- DIY Easy Paper Cup Octopus Craft For Kids
- Paper Strips Frog Craft Step-By-Step Tutorial
- Water Bottle Airplane Tutorial for Kids
- How to Make Toilet Paper Roll Penguin Craft For Kids