


Recycled Crafts
Fruit Foam Net Lotus Flower Craft Tutorial For Kids

Create a pretty craft or a decoration piece of lotus using just fruit foam nets and paper sheets with the help of this step-by-step tutorial!
We welcome you to this amazing step-by-step craft tutorial article on making a pretty lotus model using up merely waste like a fruit foam net! This craft will definitely be a banger! The results will bring a smile to everybody’s faces who looks at it! This craft is suitable for kiddos of any age and for the younger kids, this craft will be a learning one which will teach them to cut and paste! It is not at all time-consuming and will give you and your kids a joyous craft journey and experience! Let’s begin!
Simple Fruit Foam Net Lotus Flower Craft
Read More: DIY Foam Net Home Craft For Kids
Materials Required
- Fruit Foam Net (Pink And Yellow)
- Scissors
- Double-sided Tape
- Cardboard
- Colored Paper Sheets (Blue And Green)
Procedure
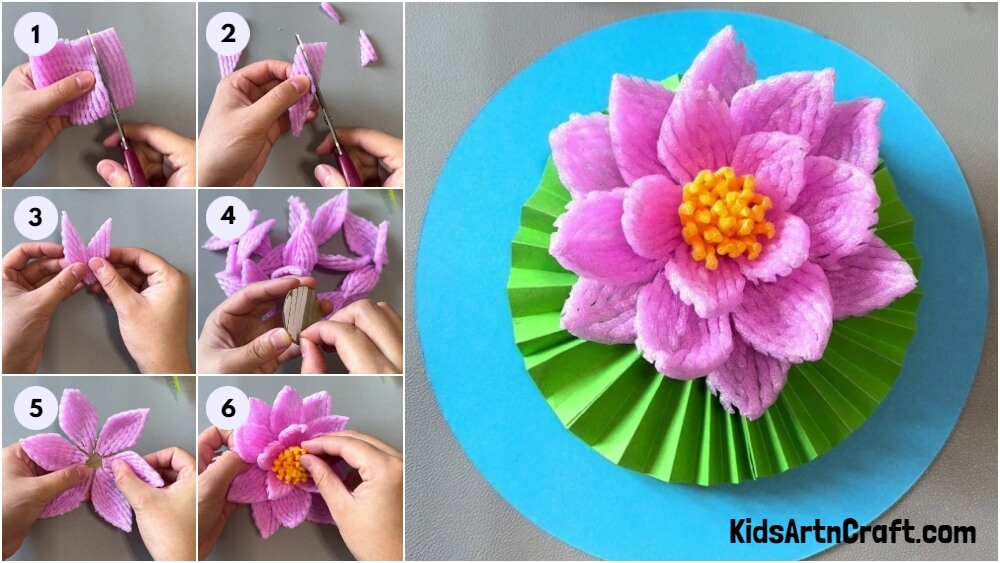
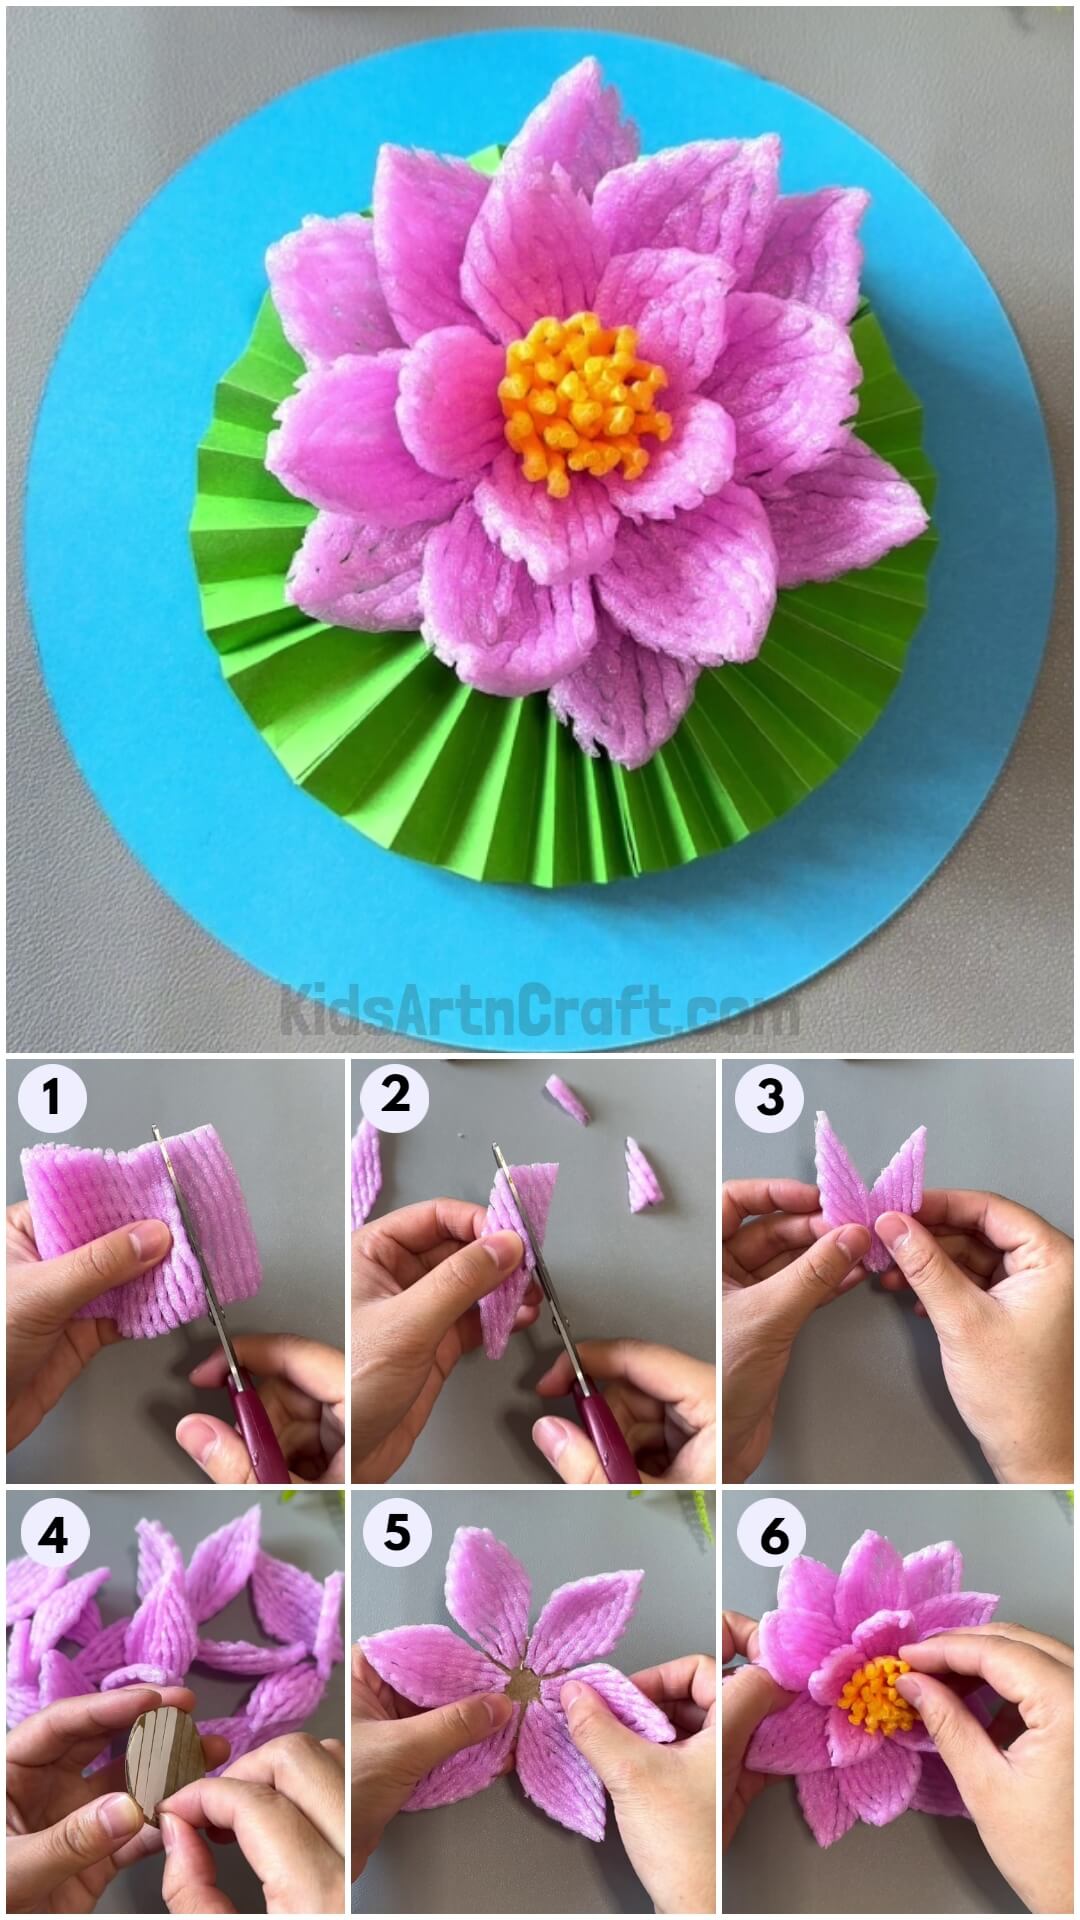
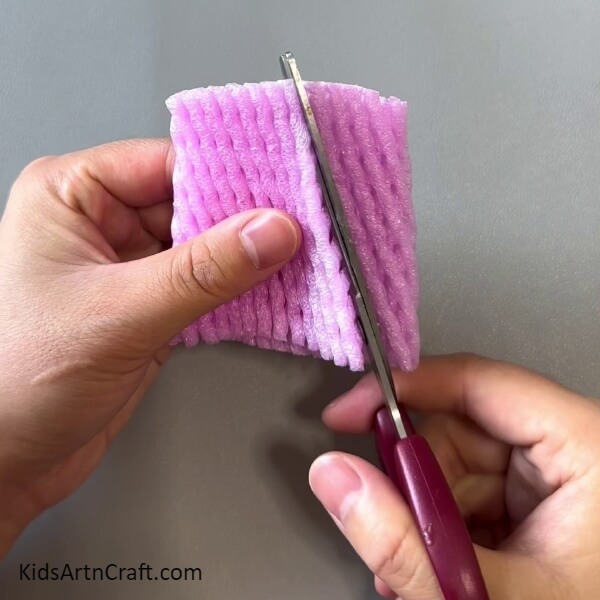
Step 1: Cutting A Fruit Foam Net In Halves

Begin this craft by taking a pink-colored fruit foam net and a pair of scissors. Using scissors, cut the fruit foam net into half from the longer side to make 2 loops.
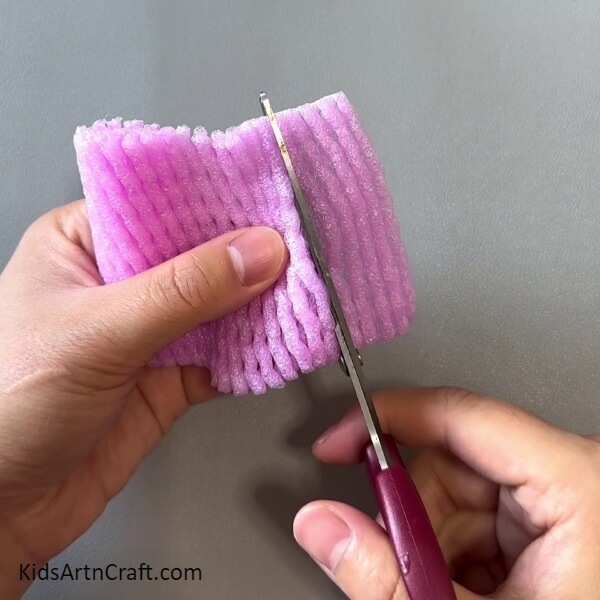
Step 2: Cutting Along The Net Lines
Using scissors, cut the net along the slanting line of the fruit foam net.
Step 3: Cutting Out A Strip
Using scissors, cut out a strip of the net by making another cut along the slanting line of the net as shown in the image.
Step 4: Cutting Out Diamond Shapes
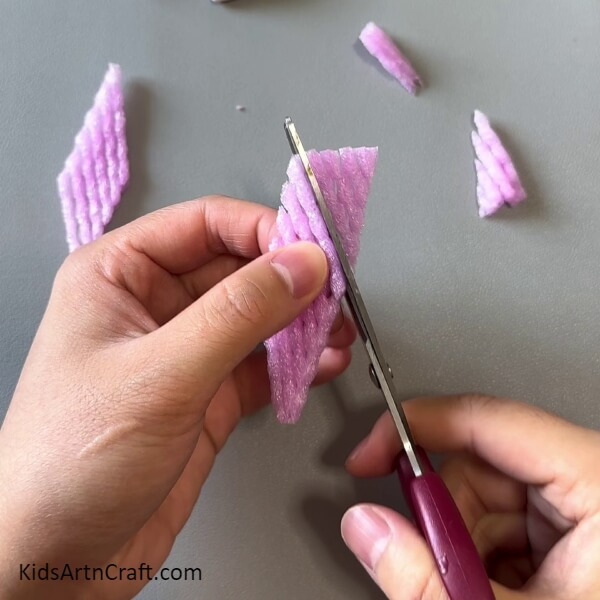
Using scissors, cut the foam strips into diamond shapes as shown in the image.
Step 5: Pasting 2 Diamond Shapes Together
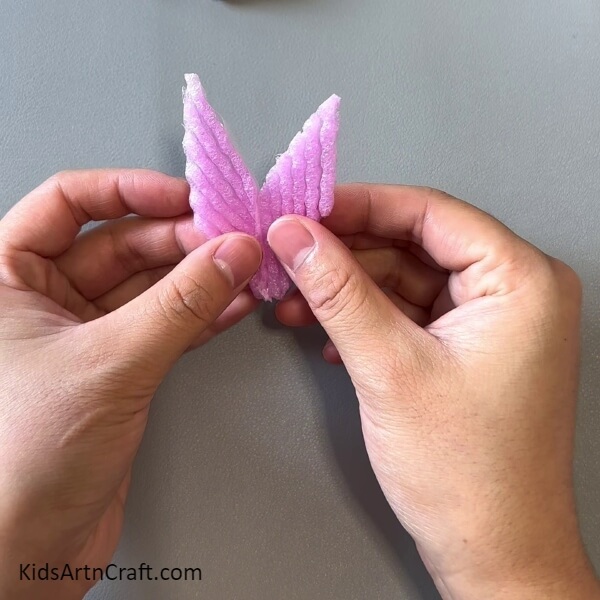
Using double-sided tape, paste 2 diamond shapes together from their boundary.
Step 6: Making A Petal
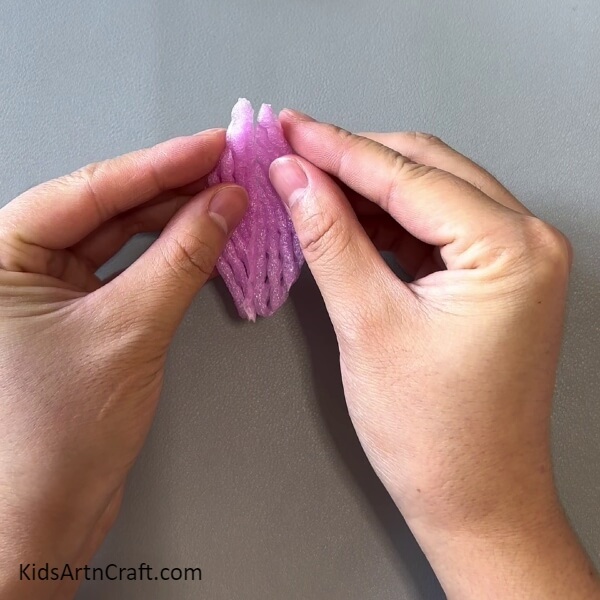
Paste the whole boundary of 2 diamond shapes to make a curvy petal.
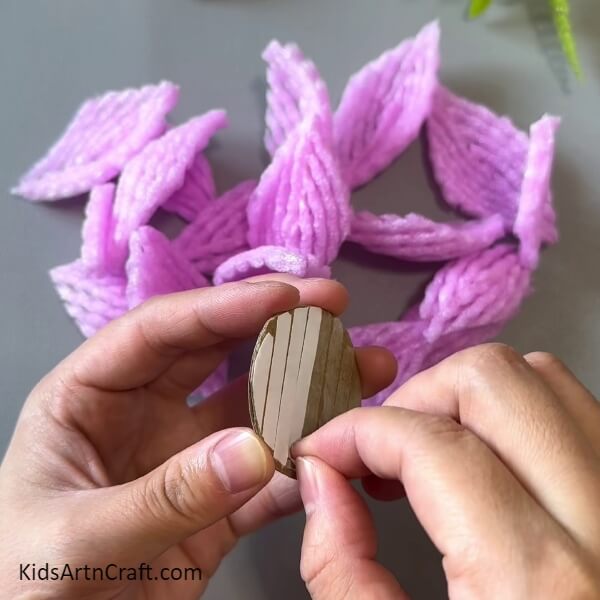
Step 7: Making More Petals And Taking A Cardboard Circle

Following the same, make more and more foam petals, and use scissors to cut out a circle from the cardboard.
Step 8: Applying Double-Sided Tape On The Circle
One by one apply the layers of double-sided tape on the cardboard circle and remove the peel of them.
Step 9: Pasting The Petals On The Circle
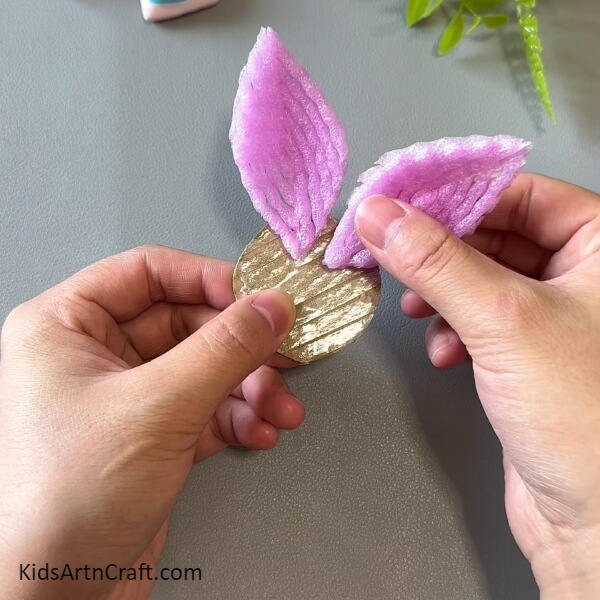
Start pasting the foam petals on the boundary of the circle as shown in the image.
Step 10: Completing A Layer Of The Petals
Complete pasting the foam petals on the circle boundary to complete a layer of petals.
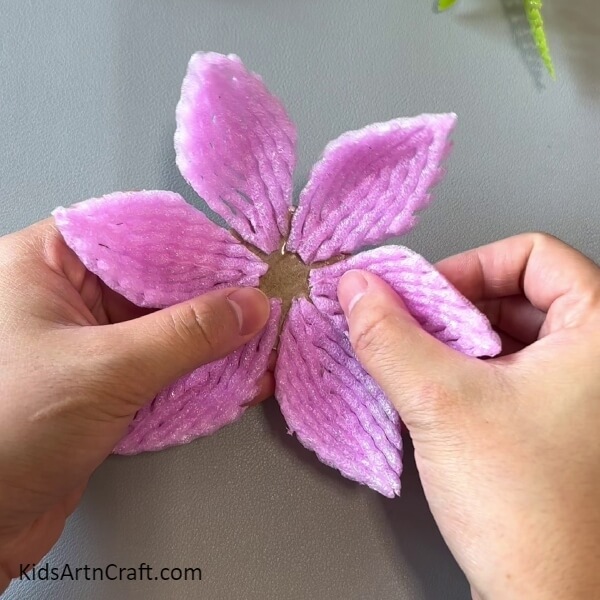
Step 11: Forming Another Layer Of Petals
Paste the foam petals in the middle of the cardboard circle and keep this layer’s petals in the middle of the petals of the previous layer.
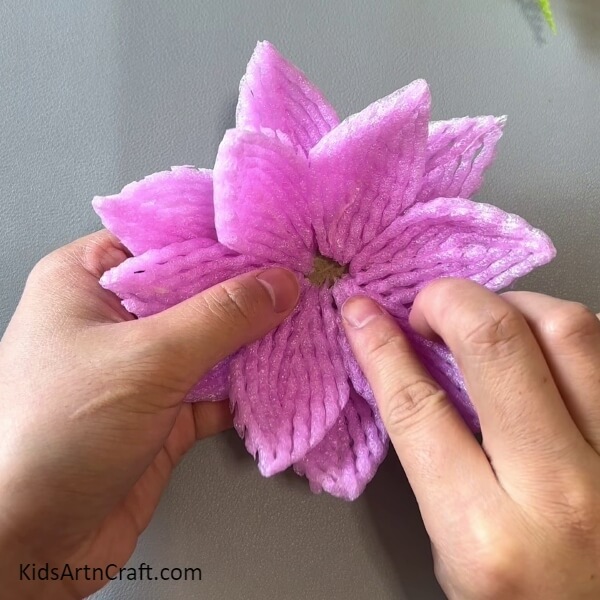
Step 12: Forming The Last Petals’ Layer
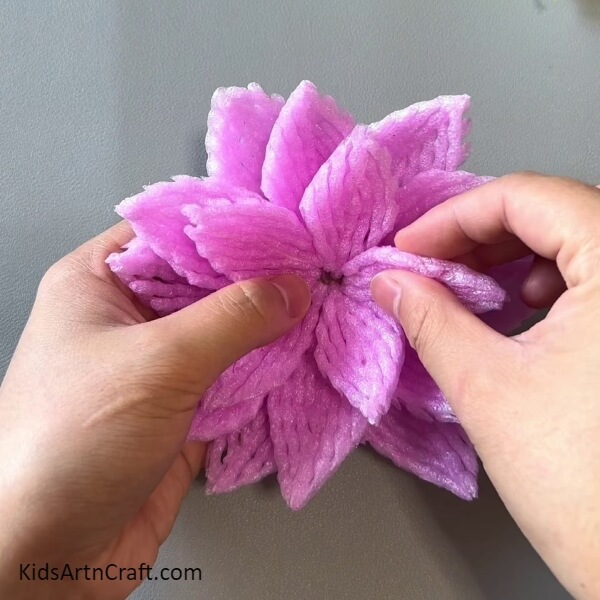
Paste more foam petals but this time of smaller size in the very center of the cardboard circle and in the same way you pasted the previous layer’s petals.
Step 13: Cutting Out A Layer loop From Yellow Foam
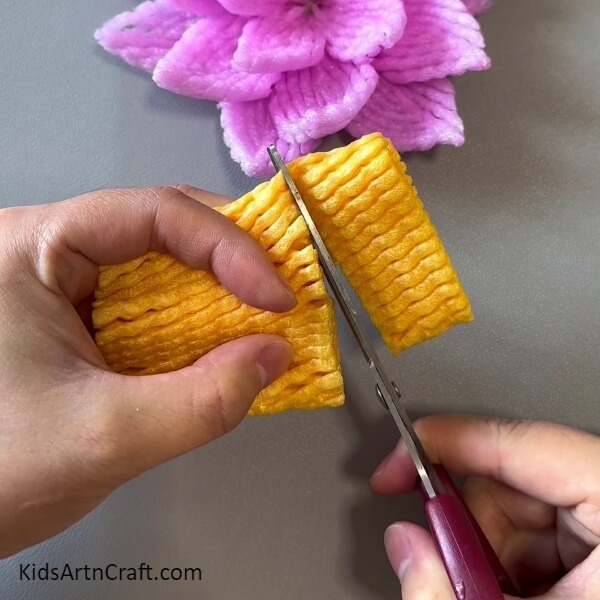
Take a yellow-colored fruit foam and using scissors cut out a thin layer loop of it from the side. Also, cut open the loop into a strip.
Step 14: Pasting Double-Sided Tape On The Yellow Strip
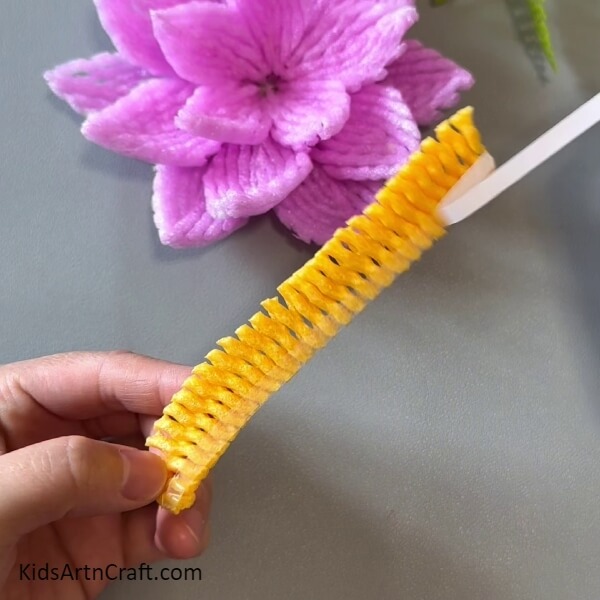
Apply double-sided tape on one longer side of the yellow foam strip.
Step 15: Rolling Over The Yellow Foam Strip
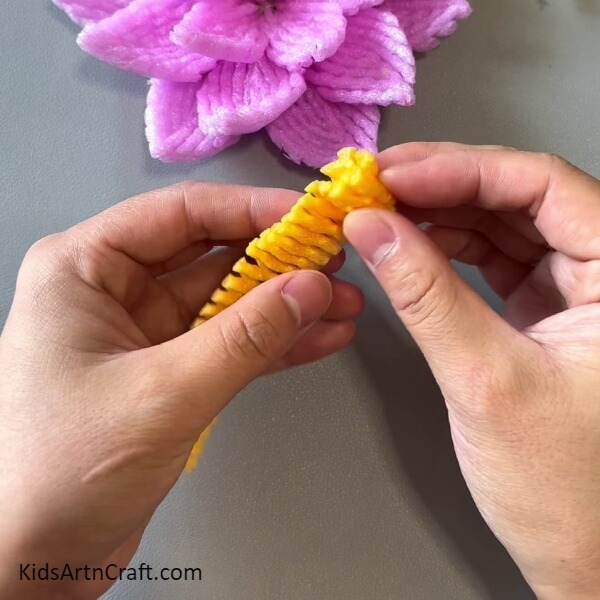
Roll the yellow foam strip over to make it stick over the tape.
Step 16: Making The Center of The Lotus
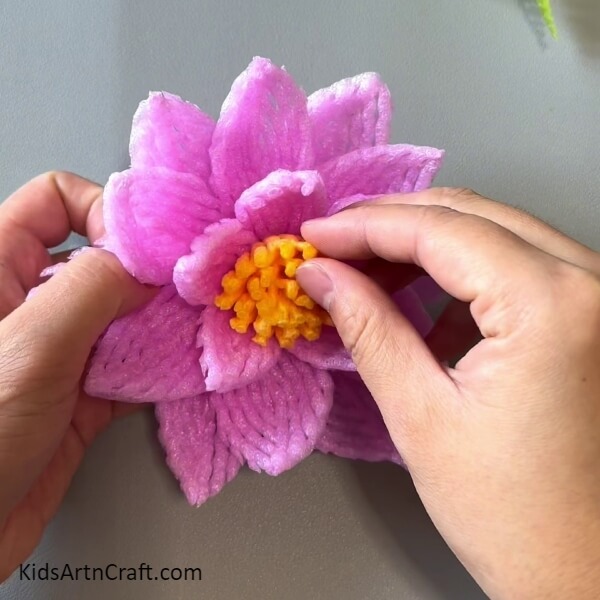
Stick the yellow foam roll in the middle of the lotus using double-sided tape to make the center of it.
Step 17: Applying Double-Sided Tape On Green Zig-Zag Strip
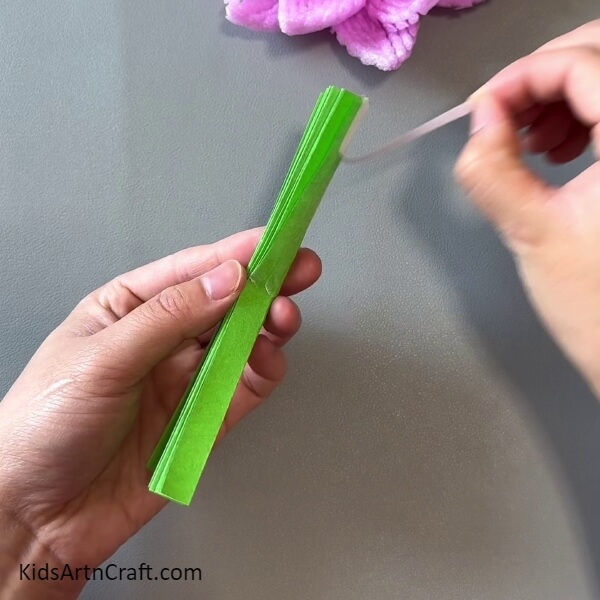
Take a green square paper sheet and fold it into zig-zag strips then apply double-sided tape on the half of the strip as shown in the image.
Step 18: Folding And Pasting The Strips In Half

Fold the strip into half to paste the ends to each other with the applied tape.
Step 19: Opening Up The Zig-Zag Folds
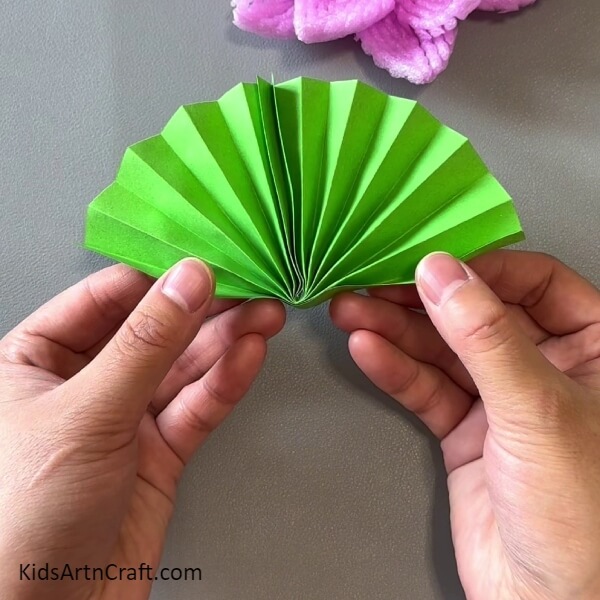
Open up the zig-zag folds to make a 1/3rd part of the leaf of your lotus.
Step 20: Making The Lotus Leaf
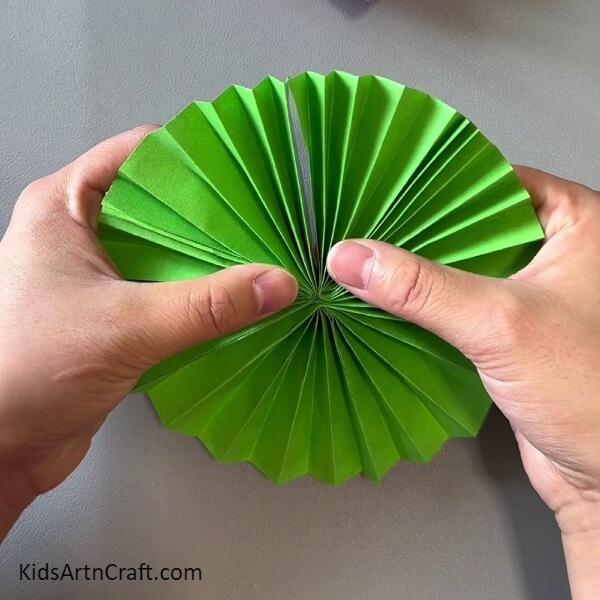
Following the same previous step, make 2 more parts and stick them together with the help of double-sided tape to make a whole lotus leaf.
Step 21: Pasting The Lotus Over The Leaf
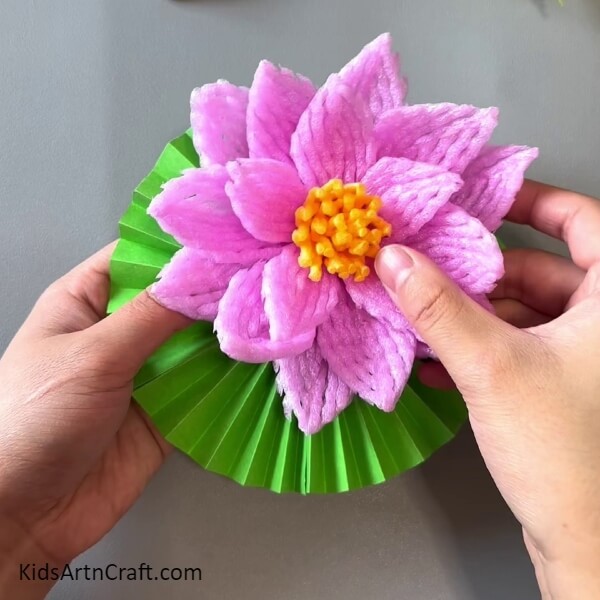
Paste the lotus over the leaf from the cardboard circle using double-sided tape.
Your Fruit Foam And Paper Lotus Craft Is Ready!

For the last step, take a blue sheet and using scissors, cut it down in a circle and using double-sided tape, paste the leaf with your lotus over the blue sheet.
Well, well this craft was made just in time! You can now use it to decorate your home or your room! You can even customize it by changing the flower petal shape, or taking another colored fruit foam net, anything! You can even change the size, imagine what a giant lotus would look like on your wall! The idea itself is fascinating right?! This craft can be a family fun time as you can all together make pretty lotuses for your home, it will be fun!
Hope you liked this article, do give it a like and share it with your friends! Also, tell us about your craft journey in the comments section, we would love to hear that!
Follow us on Youtube for art and craft tutorials and much more.
More Articles from Kids Art & Craft
- Fruit Foam Net Easy Corn Craft Tutorial for Kids
- DIY Easy Paper Flower Craft For Kids
- Pretty Straw Flower Bouquet Craft Tutorial For Kids
- How to Make Flowers From Fruit Foam Covers Idea For Kids
- Easy Paper Flower Toy Craft Tutorial For Kids


