Kids Activities
How to Make Handmade Paper Toy Train for Kids

Learn how to make a handmade paper toy train for your kids. Step-by-step instructions and helpful tips make it easy for everyone to create a fun and interactive toy for your little ones. Perfect for kids who love crafting and playing with trains.
Do you want to make your own train toy at home but have no clue how and where to start? No worry! This tutorial will guide you on how to make a paper toy train at home to play. Making a handmade paper toy train is a fun and easy activity that can provide hours of entertainment for children. It is an enjoyable activity that will bring creativity to kids. You just need a few craft supplies and a little bit of your time to craft this paper toy train. So, get ready with your craft supplies and let the fun crafting begin!
Fun to Make Paper Toy Train Craft Activity For Kids

Materials Required
- Toilet Paper Roll
- Colored Papers
- Double Side Tape
- Pipe Cleaners
- Glue
- Scissors
Procedure
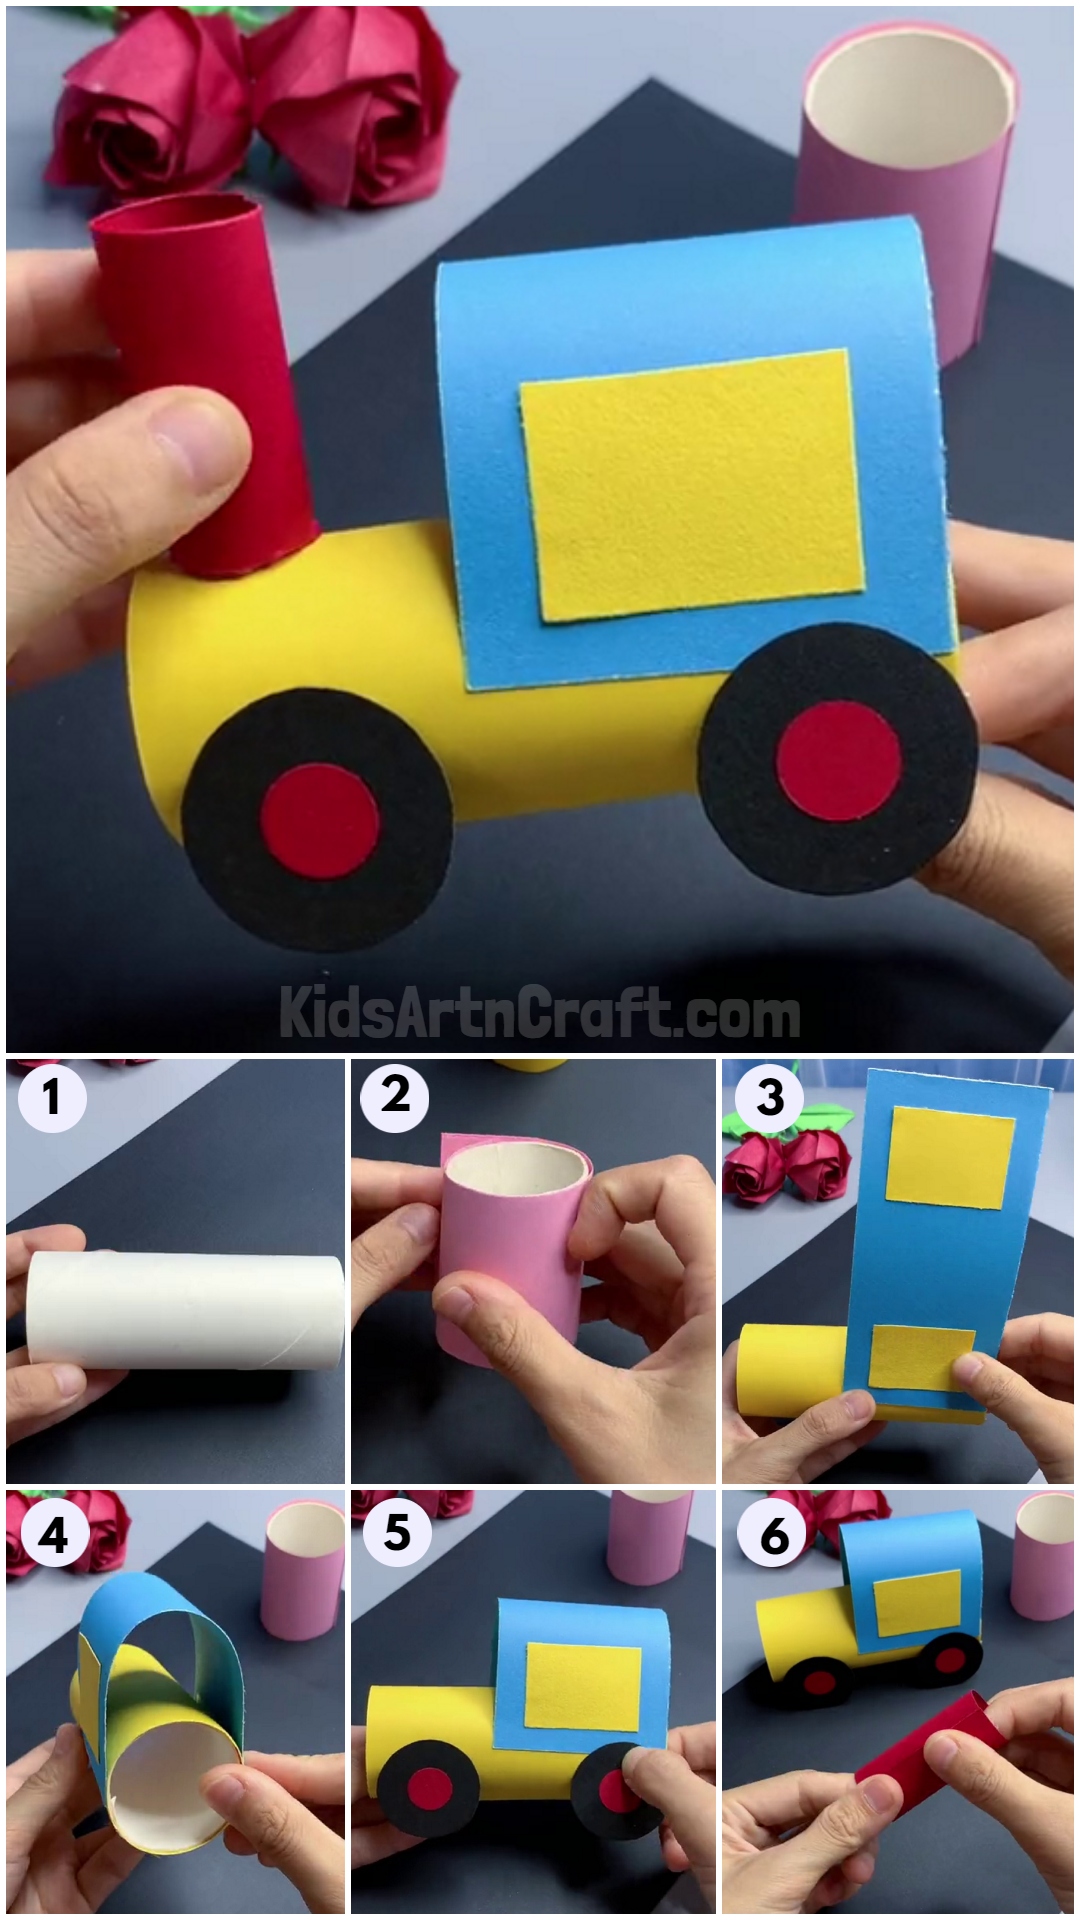
Step 1: Taking An Empty Toilet Paper Roll


Let’s begin this craft by taking an empty toilet paper roll.
Step 2: Covering Rolls
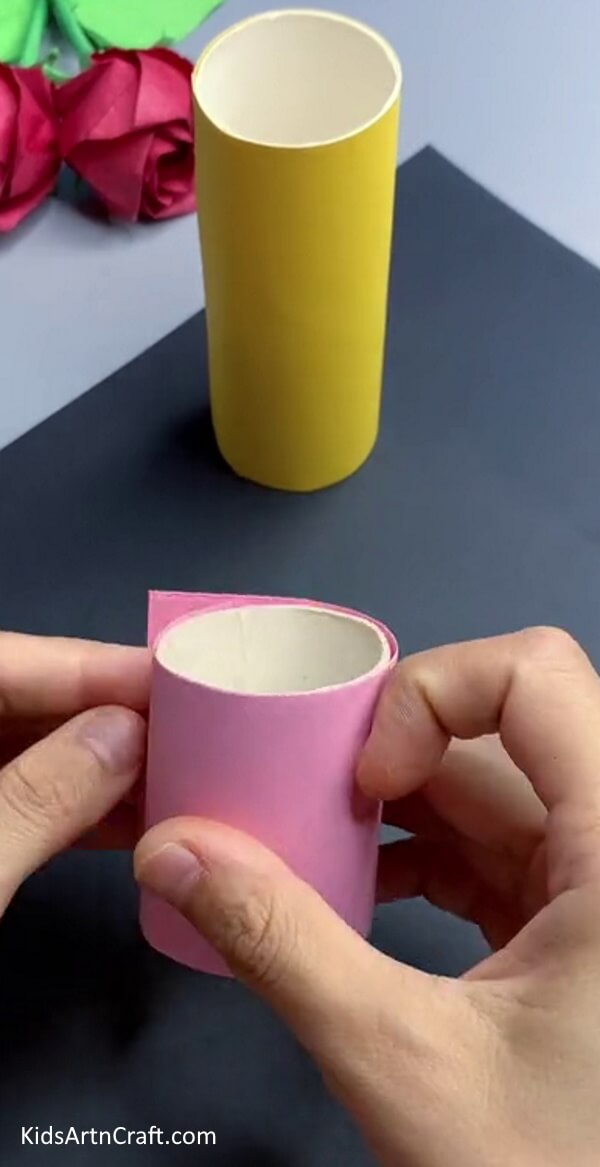

Take another empty roll, shorter than the first. Cover both the rolls, the bigger one with yellow paper and the smaller one with pink paper using glue.
Step 3: Pasting Windows Over A Rectangular Blue Paper
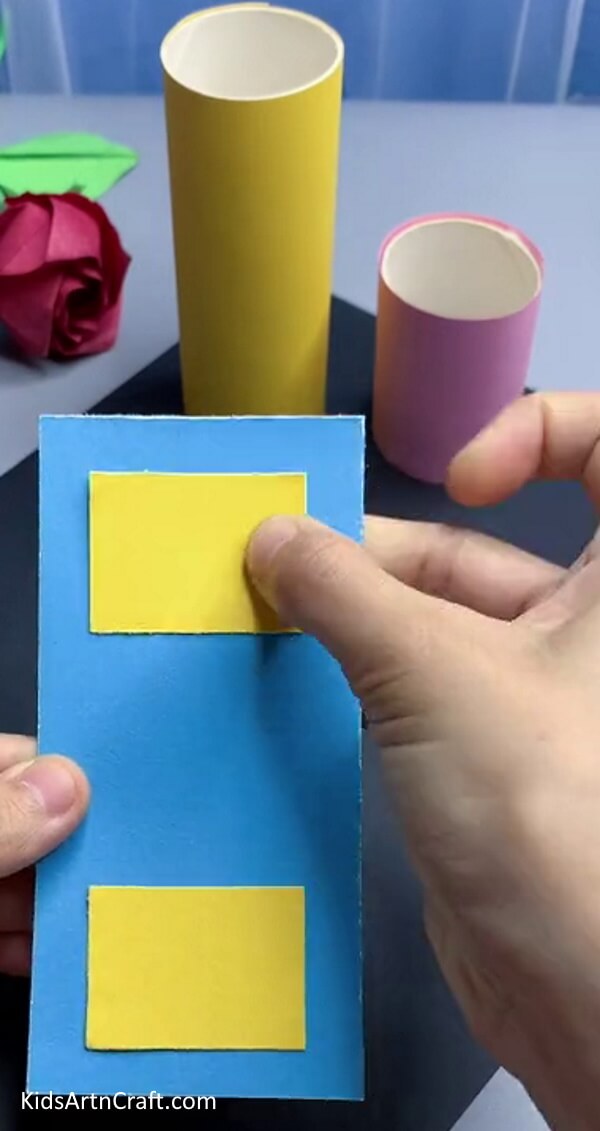

Cut out a rectangle from blue-colored paper and paste 2 yellow-colored windows on both sides of it.
Step 4: Pasting The Sheet Over The Yellow Roll
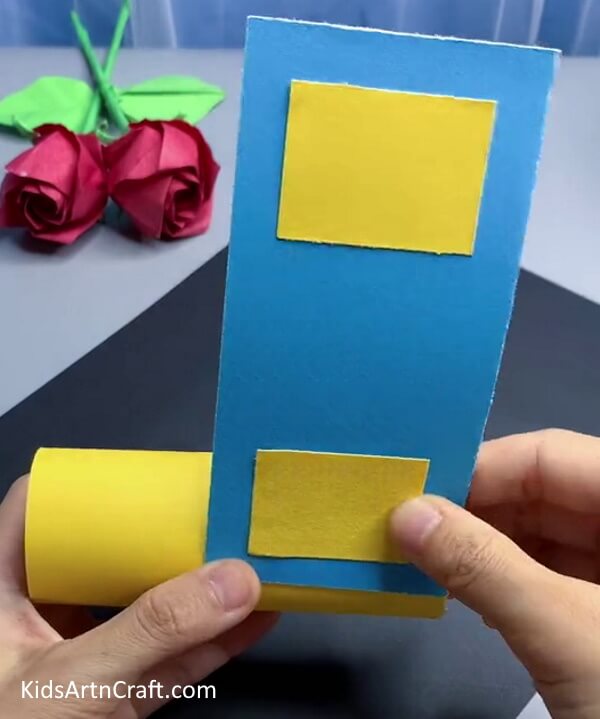

Paste the rectangle on one side of the yellow roll.
Step 5: Pasting The Other End Of The Rectangle
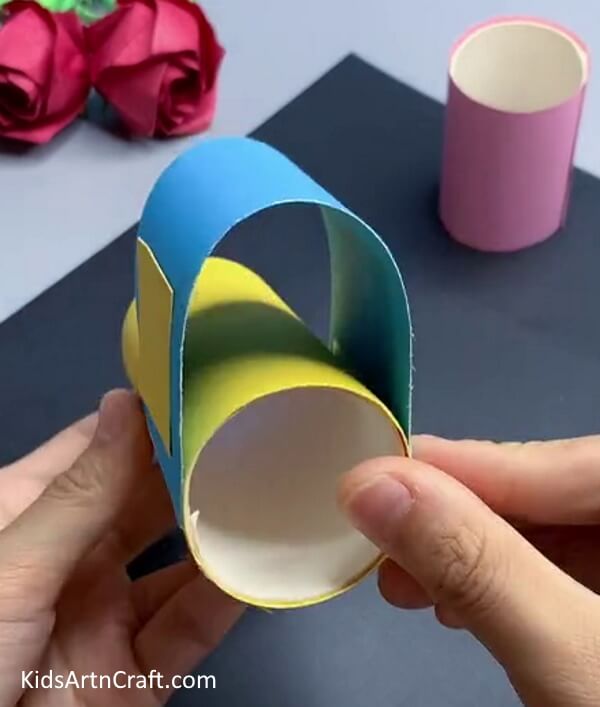

Paste the other end of the roll by forming a loop over the roll as shown.
Step 6: Making Wheels
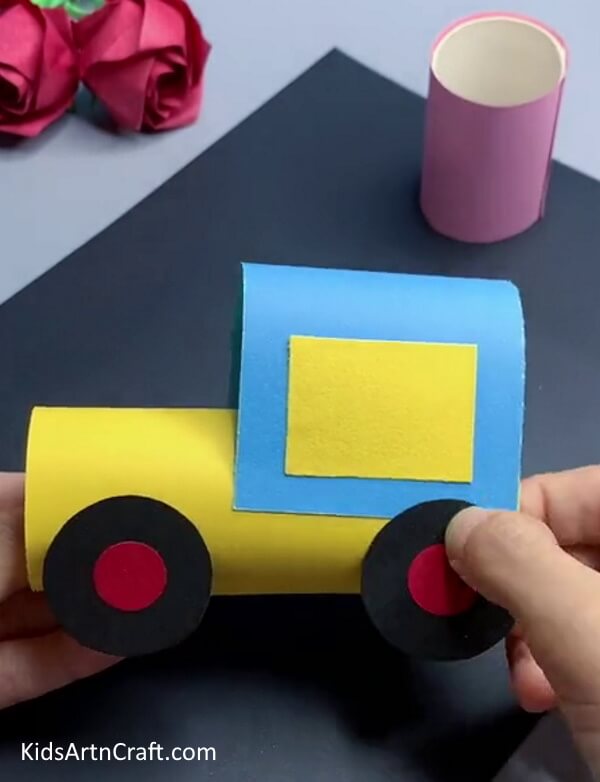

Make wheels using a black and red sheet by cutting out 4 big black circles and pasting red small circles over them to make the tires. Paste the tires on the bottom on both sides of the roll as shown.
Step 7: Rolling A Red Paper
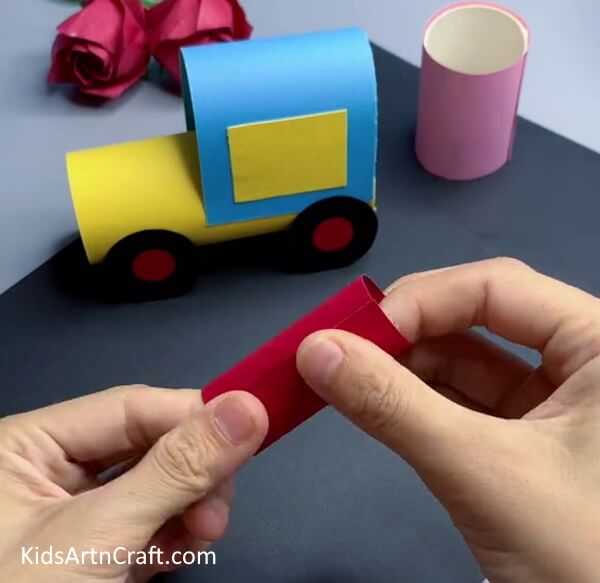

Take a piece of red paper, roll it to form a cylinder, and secure it with glue.
Step 8: Cutting Strips From The End Of Red Cylinder
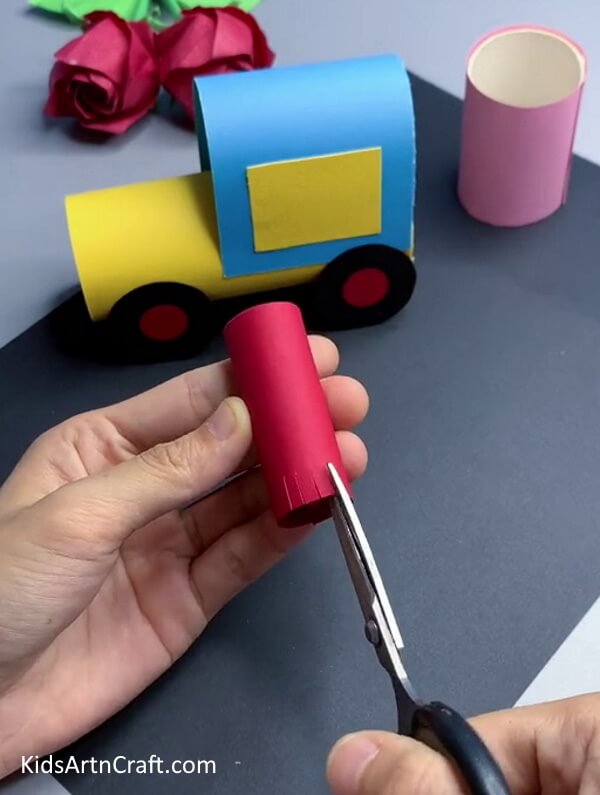

Using scissors, cut small strips from one end of the cylinder.
Step 9: Closing The End Of Cylinder And Applying Tape
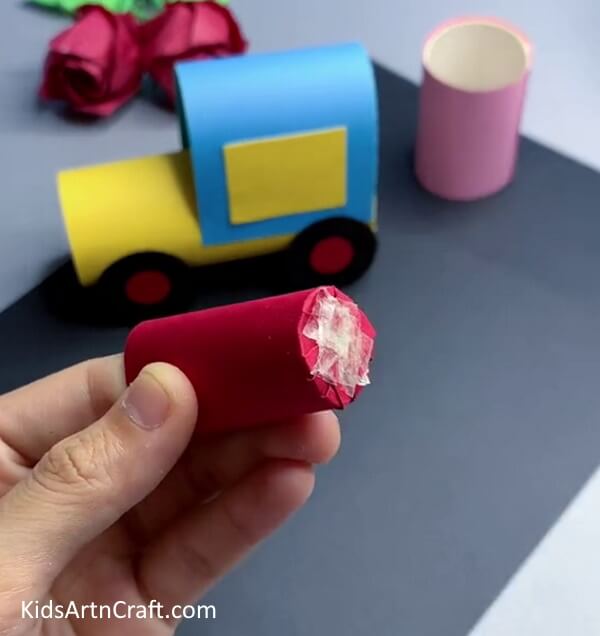

Fold the strips inwards to close the cylinder from one side and apply double-sided tape over it.
Step 10: Pasting The Cylinder Over The Yellow Roll
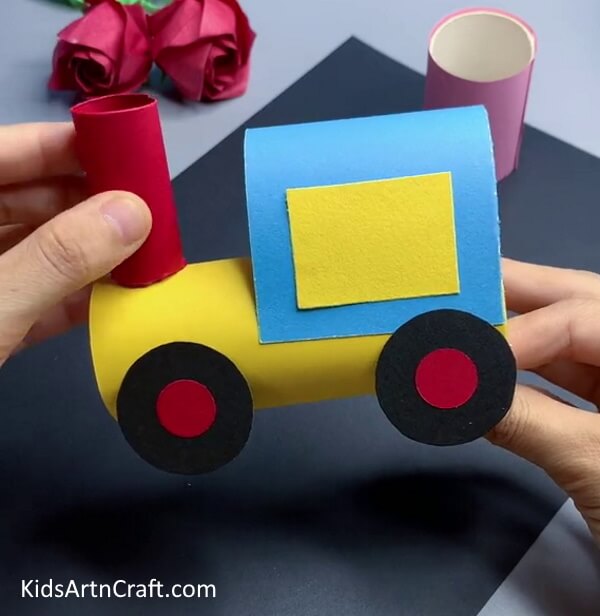

Paste the cylinder from the closed side over the yellow roll in ahead to make a train as shown in the image.
Step 11: Attaching The Small Roll With the Train
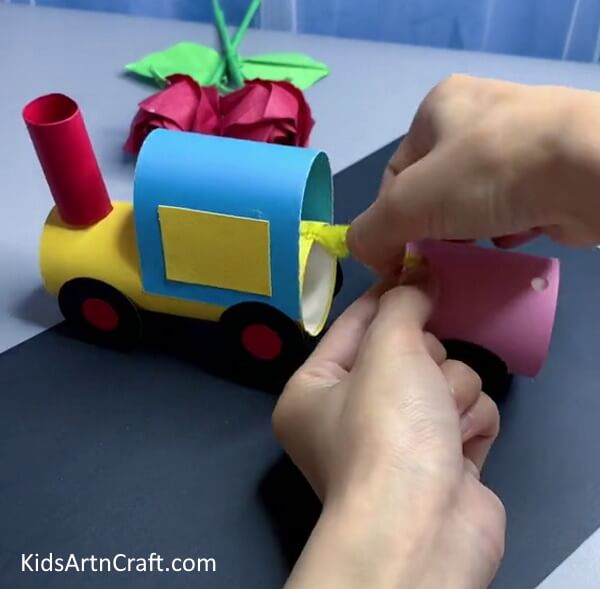

Make the wheel of the pink roll the same way mentioned above and attach it behind the yellow train with a piece of pipe cleaner
Yay! Your Paper Toy Train Craft Is Ready!
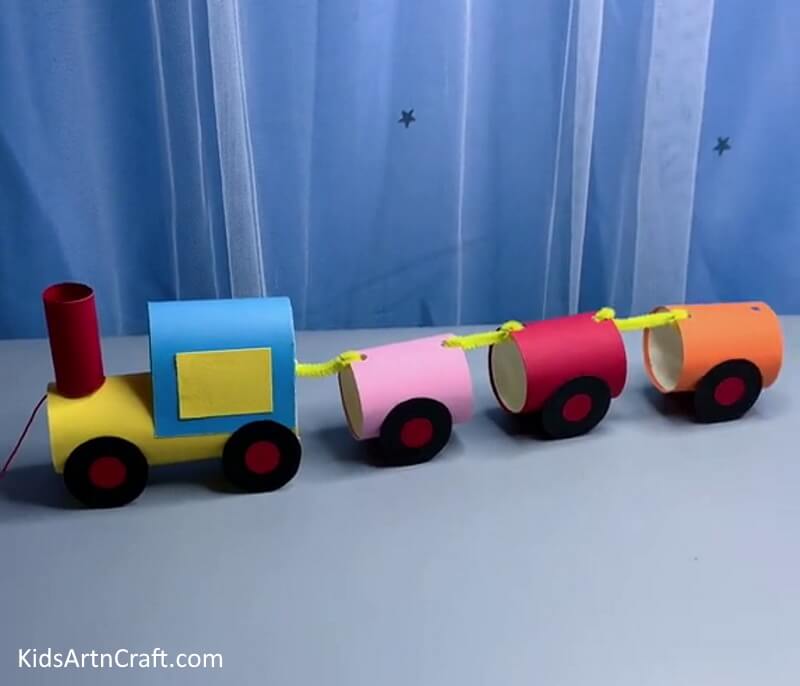

Compete for your train by attaching 2 more colorful rolls behind one another using pipe cleaner. That’s all. Your paper toy traincraft is ready in no time.
Making handmade paper toy trains can provide hours of entertainment to kids and families. Spark your creativity and imagination level with this craft and enjoy playing with the train toy made by you. So, why not try this craft idea? Stay Creative!
Some More Toy Craft Tutorial
Pleasant Toy Car Activity Using Straw For Kids

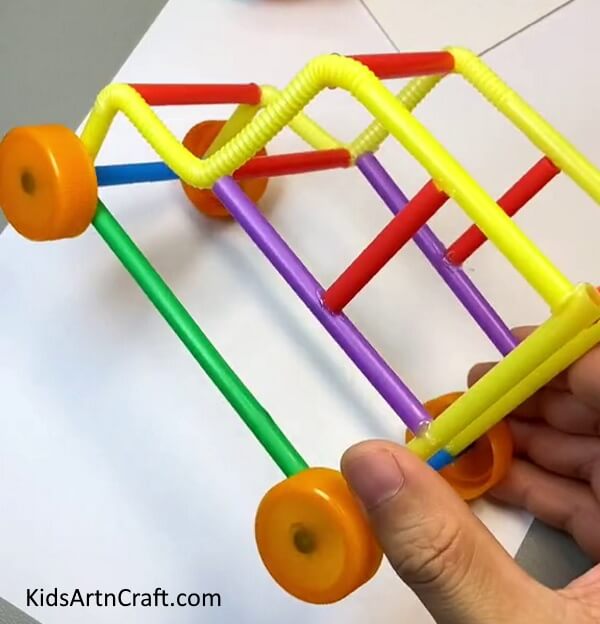
Image Source/Tutorial: Kids Art & Craft
Making a toy car using straws is a great activity for kids. It’s easy, fun, and requires minimal materials. This is a great way to get creative and to help children develop their craft skills. Plus, it’s an activity that kids of all ages can enjoy!
Adorable Toy Car Craft Using Chopsticks And Bottle Caps

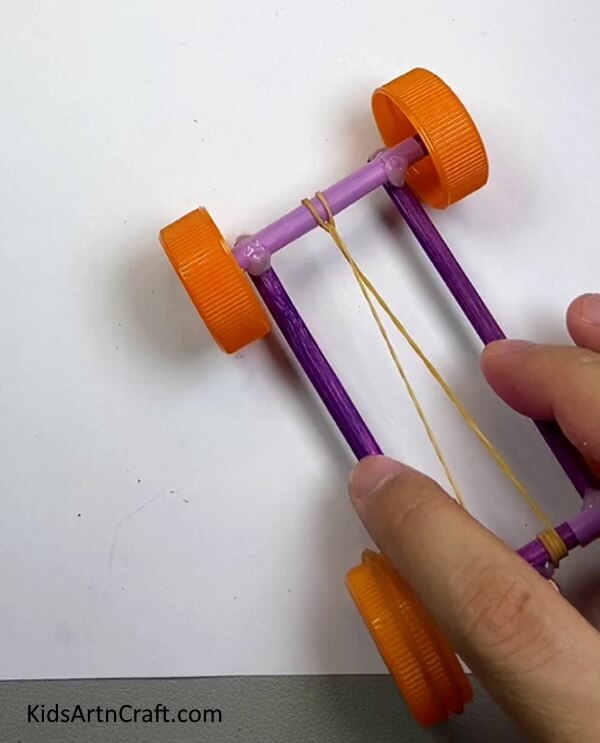
Image Source/Tutorial: Kids Art & Craft
This craft is the perfect way to upcycle chopsticks and bottle caps to create an adorable toy car. It’s a fun and creative activity for kids and a great way to teach them about recycling and upcycling.
Follow us on YouTube for art and craft tutorials and much more.
More Articles from Kids Art & Craft
- Easy to Make Paper Toy Crafts Video Tutorial for Kids
- Fun Paper Craft Ideas Make At Home Video Tutorial for Kids
- How To Make Sunflower Clock Craft Using Paper
- Colorful Fish Paper Craft To Make With Kids
- Easy Origami Cat Folding Craft for Preschool Kids – Step-By-Step Tutorial