Drawing
Easy & Simple Handprint Dog Painting For Kids

This fun and easy handprint dog painting project is perfect for kids of all ages! With the help of a few simple supplies, your little ones will have a blast creating their very own paw-some artwork!
Welcome to this easy and simple handprint dog painting for kids tutorial! This tutorial is designed to help kids of all ages create a fun and unique painting using their own handprints as the main form. With just a few supplies, kids will be able to make a creative painting that they can be proud of. With step-by-step instructions, it’s easy to follow. So grab some paint, paper, and a brush and let’s get started!
Handprint Dog Painting Art Idea For Kids
Read More: Cloud & Rainbow Paper Craft for Kids – Step-by-Step Tutorial
Material Required:-
To make Handprint Dog Painting
- A4 size white sheet
- Black Marker Pen
- Pink, Brown, Red & Blue Marker Pens
- Yellow Highlighter
Instructions:-
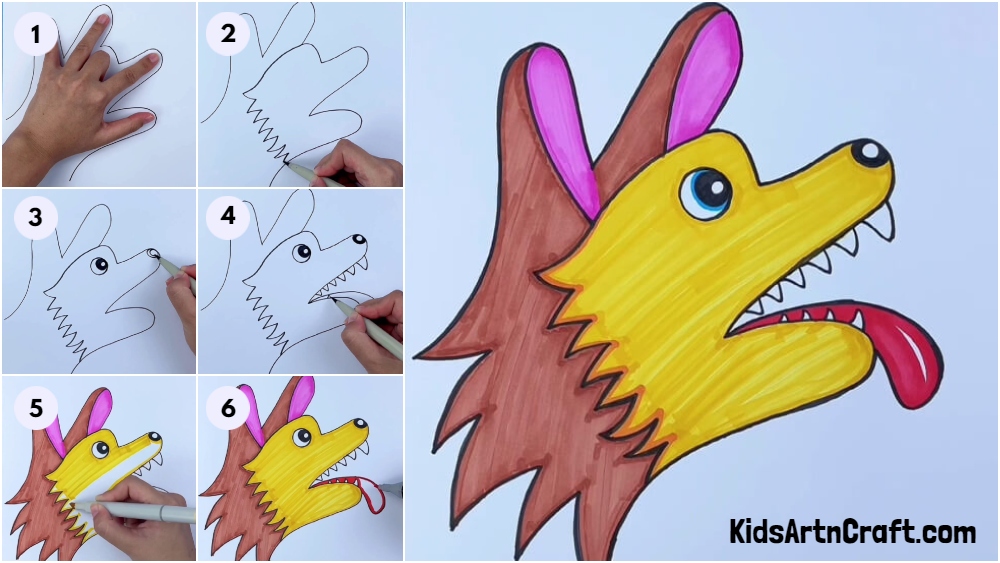
Creating An Awesome Craft With a White A4 Sheet and a Black Pen – Step 1
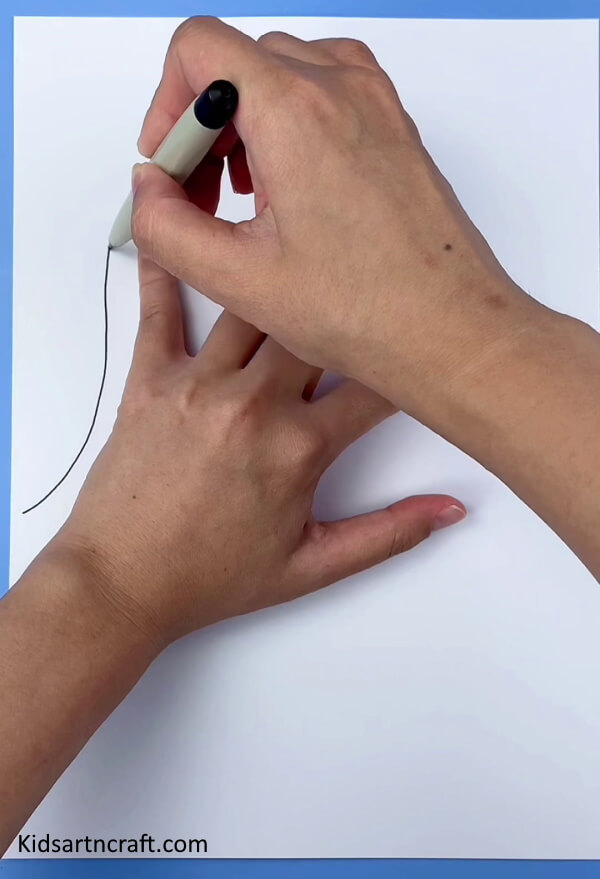
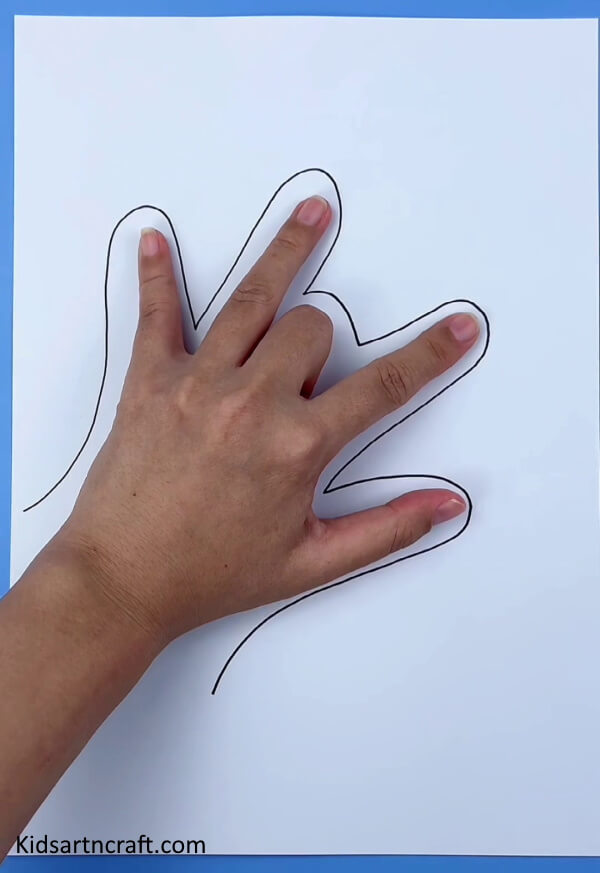
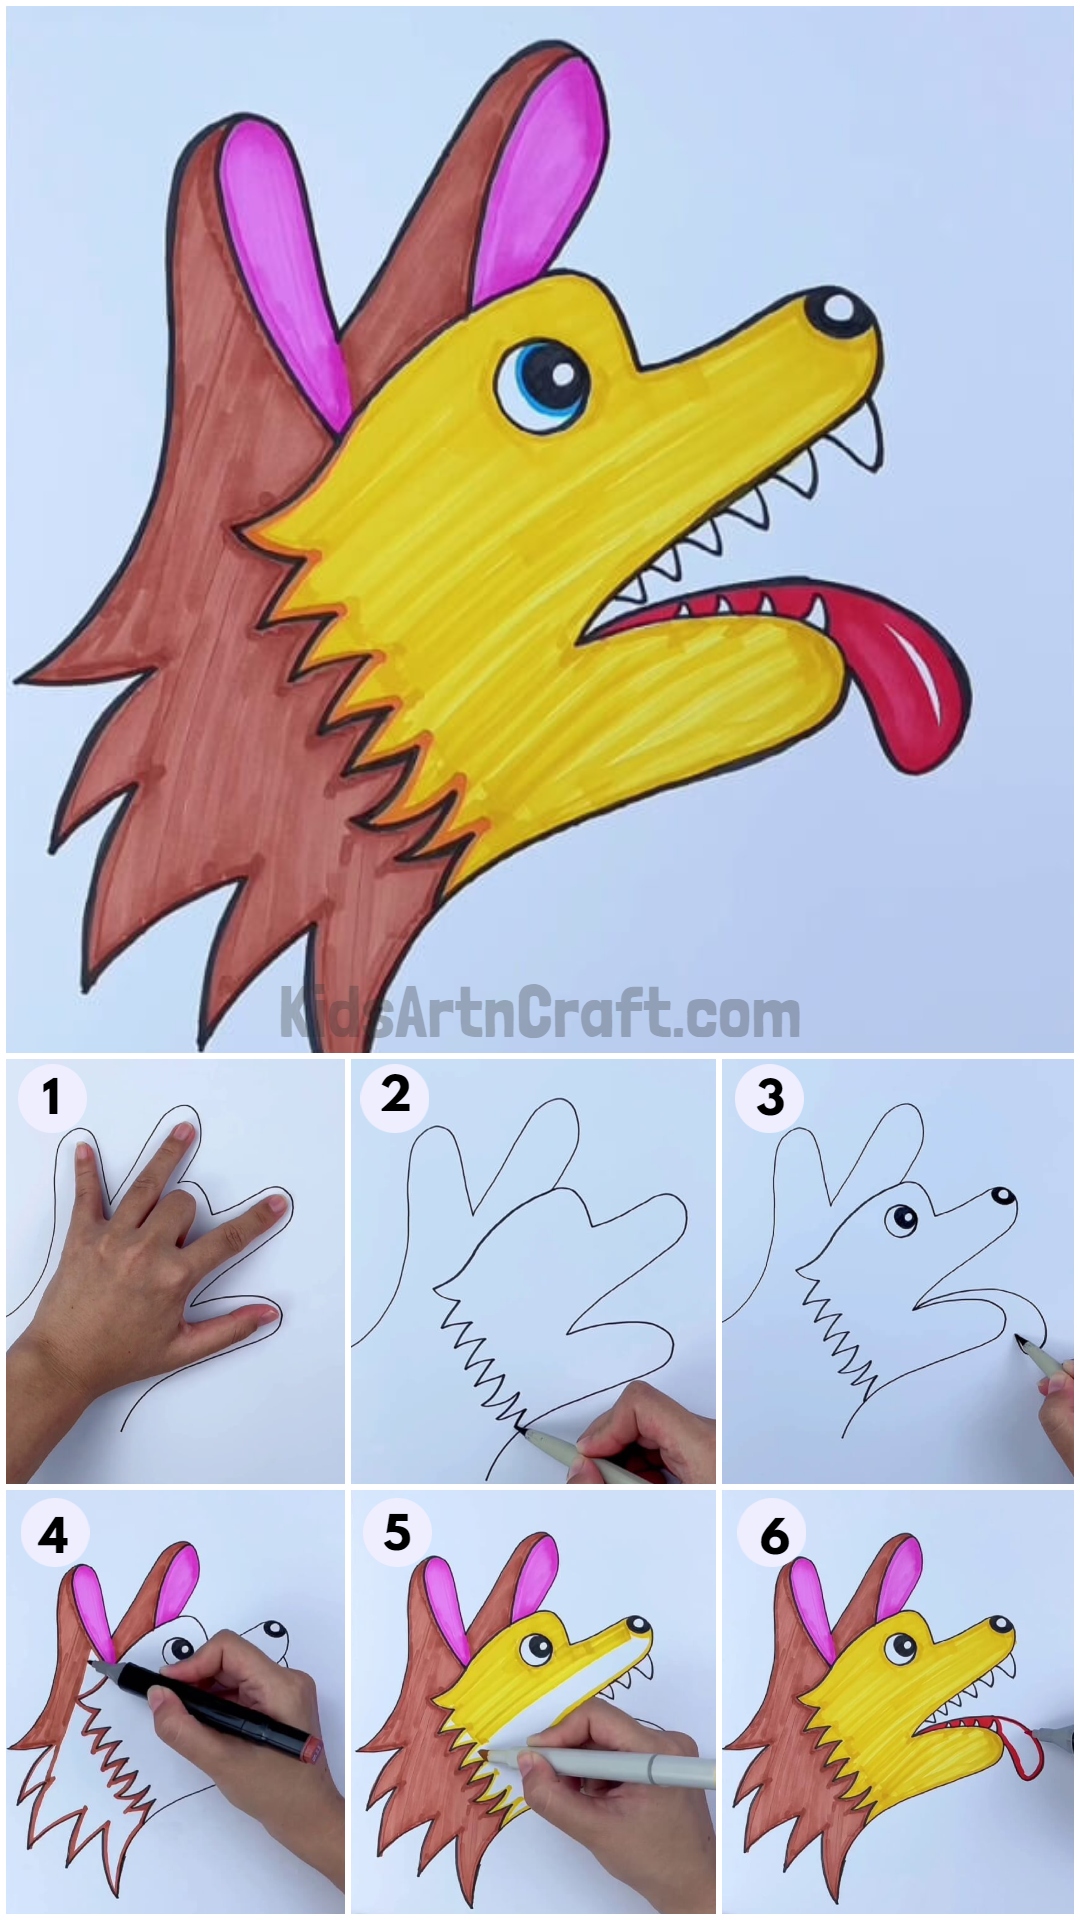
Let’s start making this awesome craft by taking a White A4 Sheet. Fold your middle finger and place your left hand on the paper in a similar fashion as shown in the above image (or watch the step-2 image).
Take a black pen and start drawing the outline of your fingers. Do this while keeping the pen in touch with your hand so that the drawing takes the shape of your fingers.
Drawing Fingers with One Continuous Line – Step 2
Slowly & Carefully draw the full shape of your fingers in one go, without lifting the pen from the paper. You need to draw the outlining from one side of the wrist to the other.
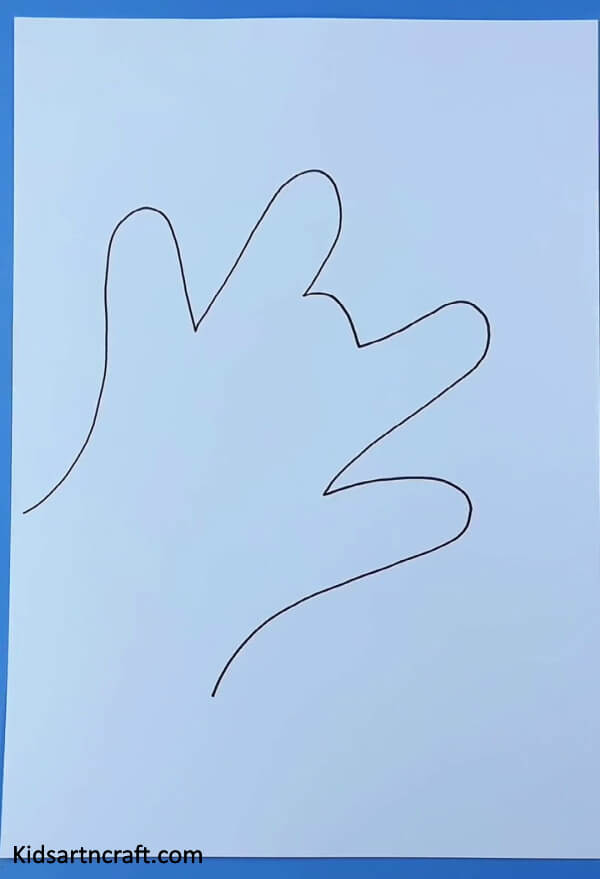
Creating an Outline with Your Left Hand – Step 3
After lifting your left hand from the paper, the outlining will look something like this.
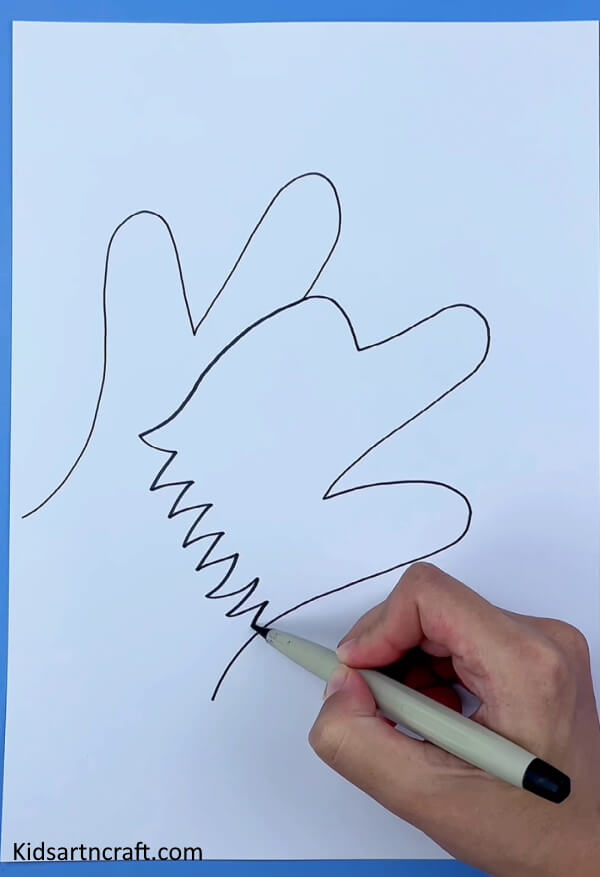
Drawing a Zig-Zag Facial Hair Pattern – Step 4
Now, draw a line from the start of the middle finger to the start of the thumb with a zig-zag pattern in between (for facial hair pattern).
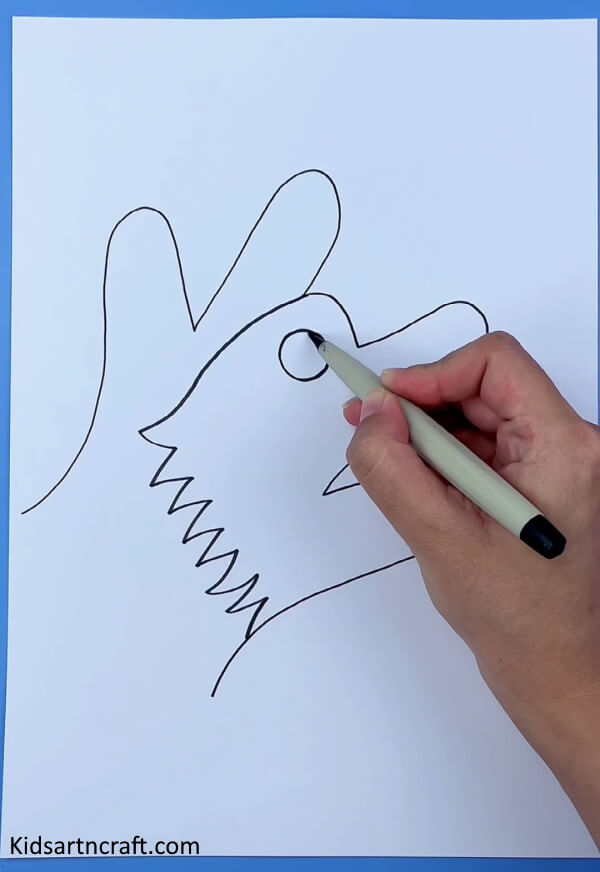
Creating a Detailed Eye for a Dog Drawing – Step 5
Now, draw a circle using a black pen for the eye of the dog. And shade it properly for a detailed look of the eye. As shown in step 6.
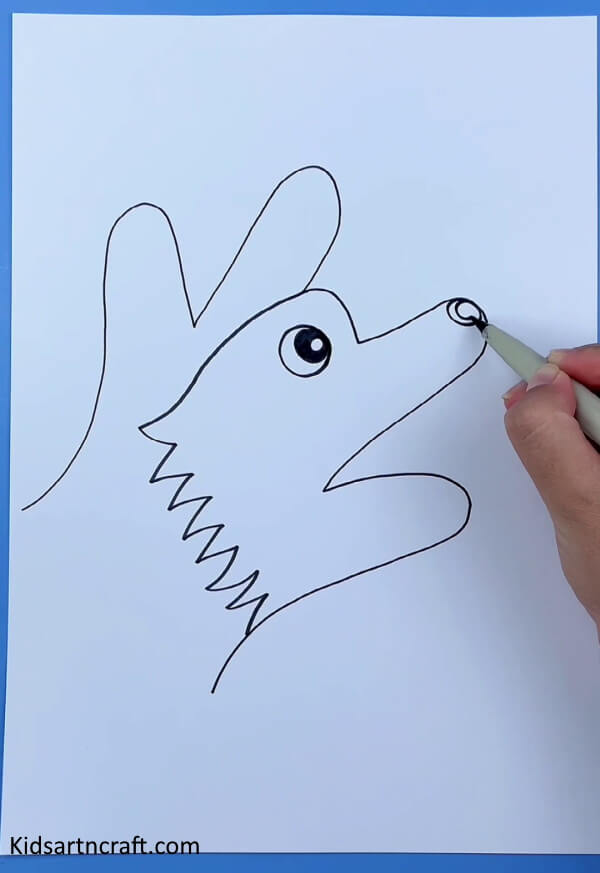
How to Draw a Dog Nose Tip – Step 6
Draw another circle at the end of the index finger for the nose tip of the dog. Shade it as shown in the image above.
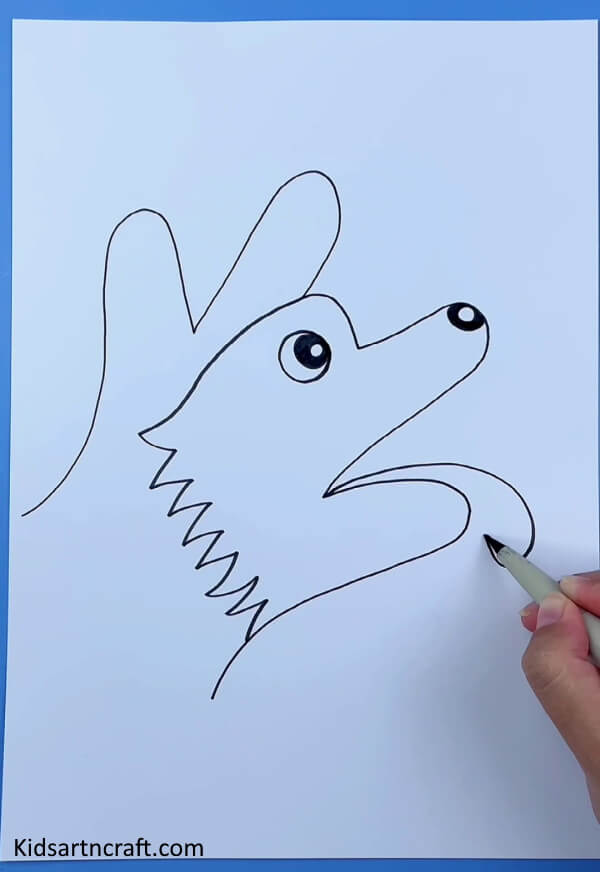
Drawing the Tongue: A Step-by-Step Guide – Step 7
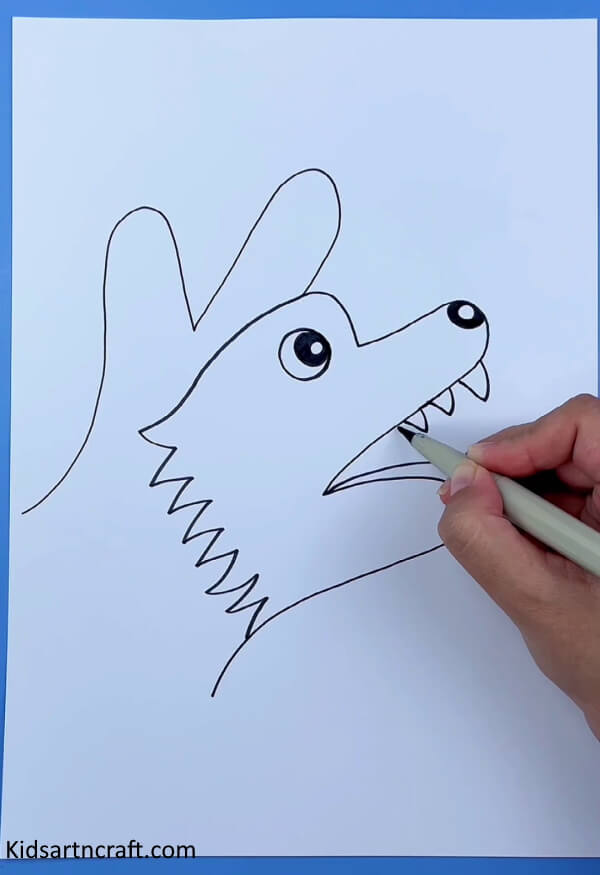
Now comes the tongue part, draw a curved line starting from the place where the index finger and thumb are meeting.
Drawing the Dog’s Teeth – Step 8
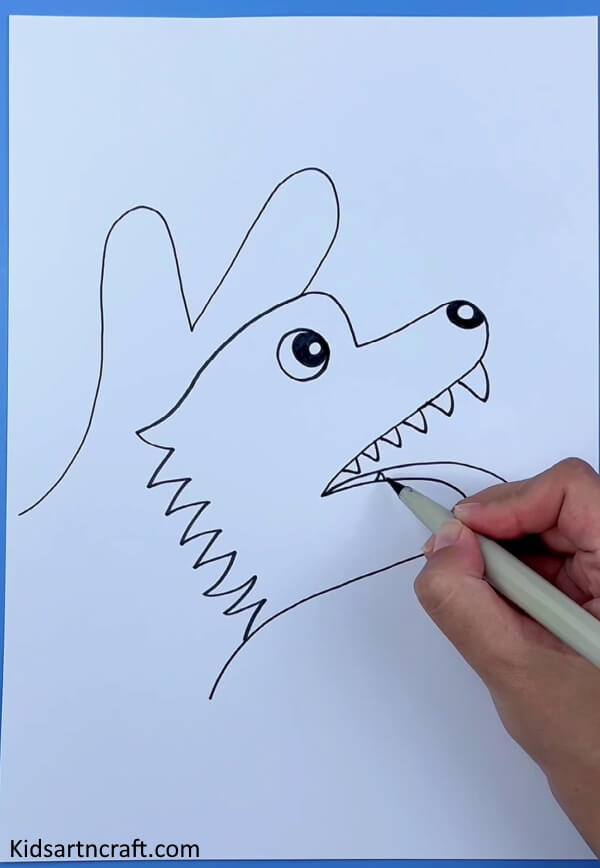
In this step, we will draw the teeth of the dog. Make small V-shapes below the index finger at little gaps. Make such 5-6 V’s for the upper jaw.
Constructing Inverted V’s for Dog’s Lower Jaw – Step 9
Make similar inverted V’s for the lower jaw of the dog.
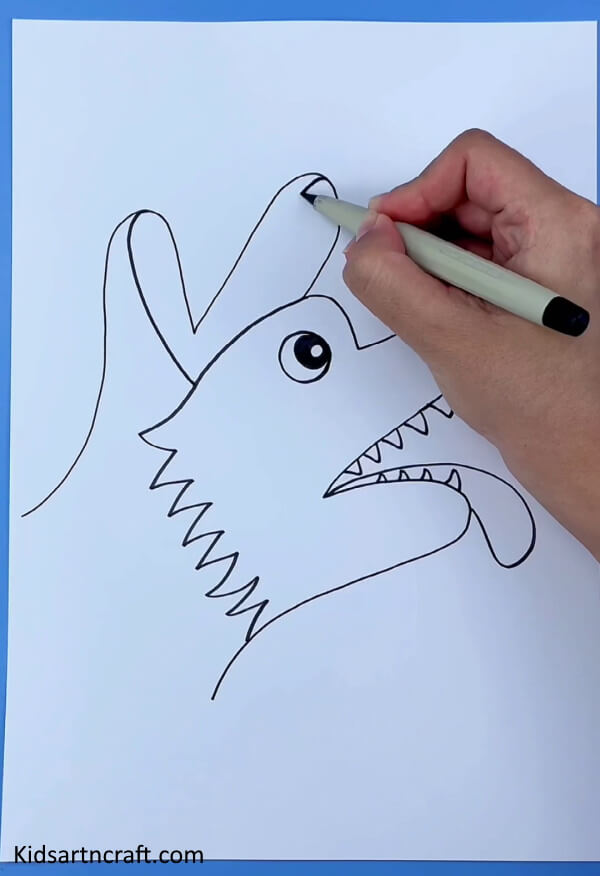
Adding Extra Detailing with Small Curves – Step 10
Now, draw 2 small curves for extra detailing. One from the middle of the pinky finger and another from the ring finger, as shown in the above image.
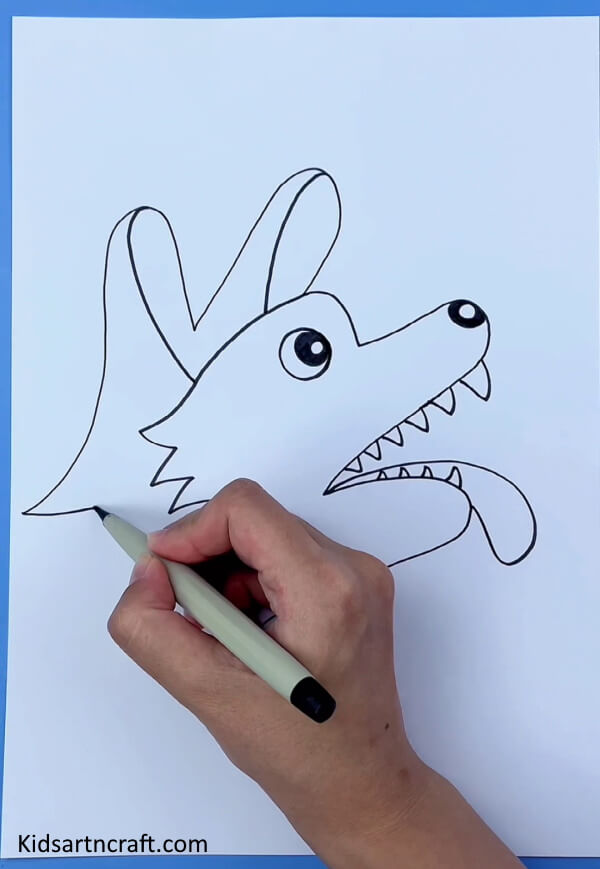
Drawing a Zig-Zag Pattern for Neck Hair – Step 11
Now, draw a zig-zag pattern from one end of the wrist to another end of the wrist for the neck hair.
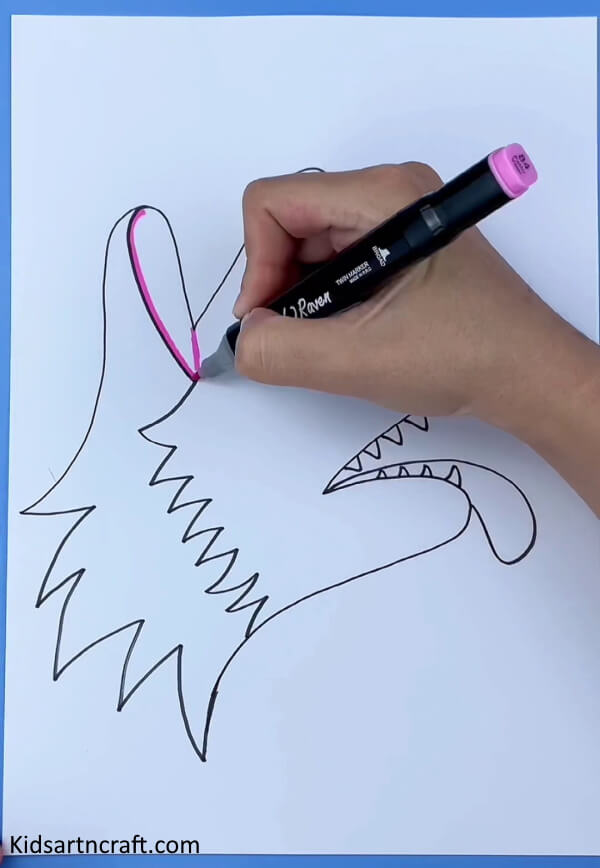
Coloring the Ears with a Pink Marker – Step 12
Now comes the part of the coloring.
Take a pink marker, and shade the inner part of the ears.
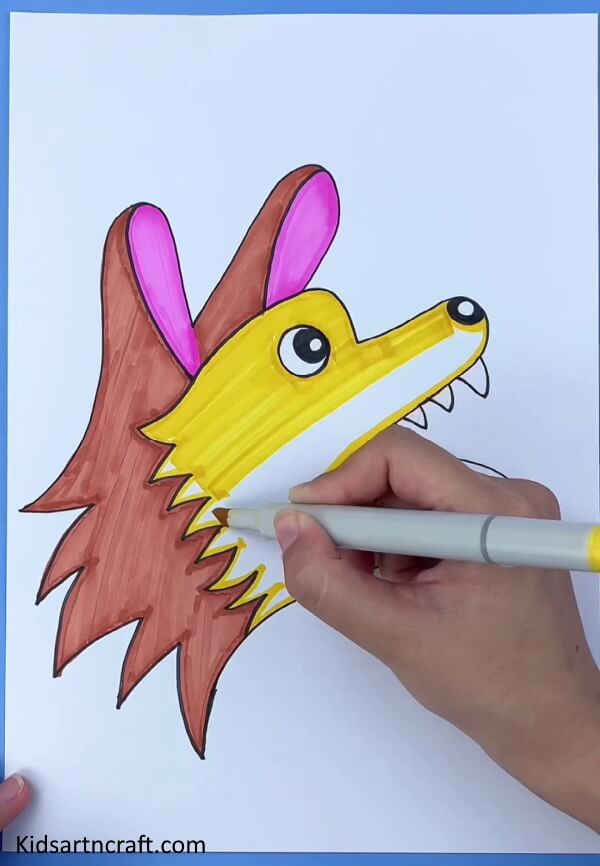
Coloring the Dog’s Hair with a Brown Marker – Step 13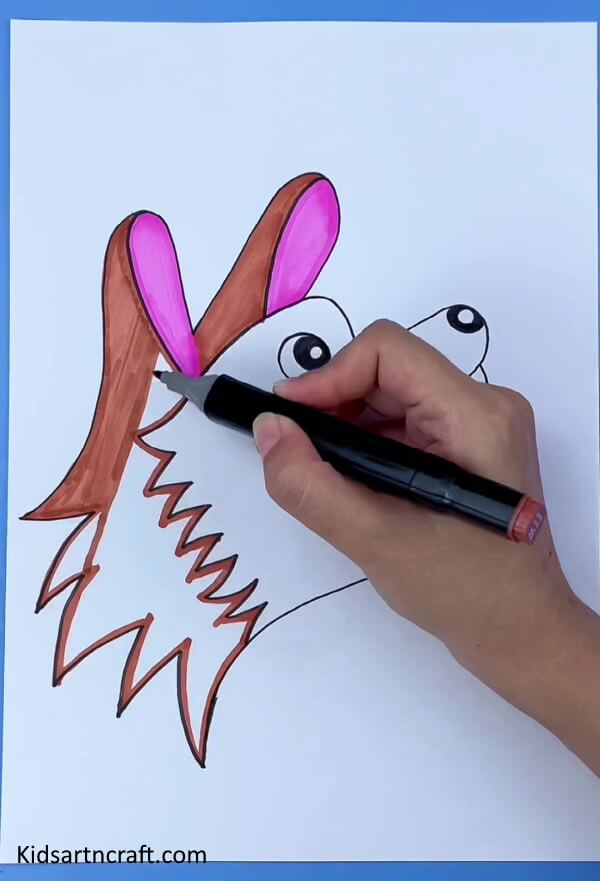
Next, take a brown marker for coloring the dog’s hair.
Start by outlining the edges first and then color in between those brown lines. Take the above image for reference.
Highlighting the Zig-Zag Line – Step 14
Now, take a yellow highlighter for the face part on the right side of the zig-zag line. Color the edges first and then fill in the yellow color for proper shading.
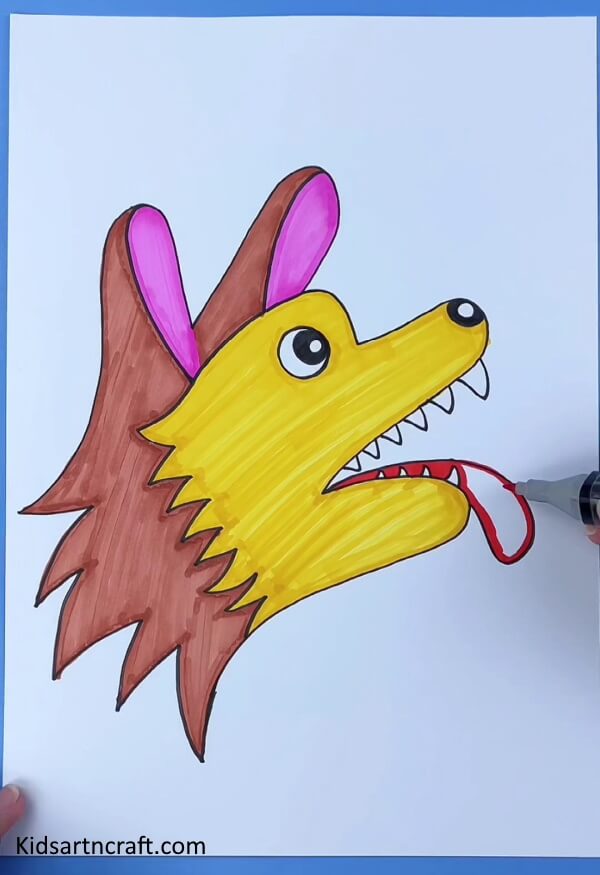
Coloring the Tongue Carefully with a Red Marker – Step 15
In this step, take a red colored marker and color the tongue part carefully. Make sure you don’t color outside the edges.
Leave a narrow white space in between the tongue to create a proper shading effect.
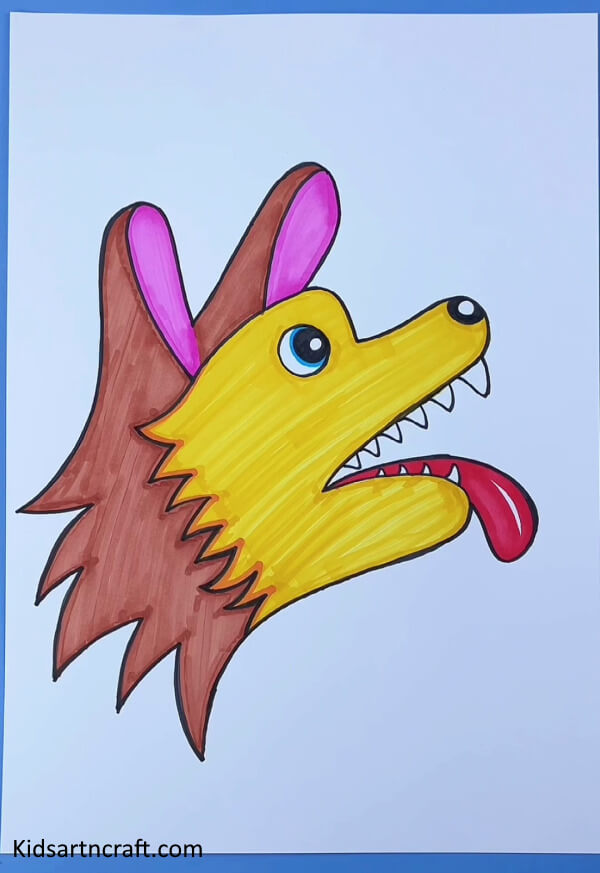
An Easy Hack to Make a Fun Craft in Minutes! – Final Steps
At last, use a blue color marker for the eyes. Draw a narrow blue curve around the cornea of the eye.
And bingo!! With that, your craft is ready. It was super fun, isn’t it? This hack is very cool as you can use your hand to make a quick outline of the dog’s face. Through this hack, children can easily make such cool crafts within minutes all by themselves.
FAQs Related To Easy & Simple Handprint Dog Painting For Kids
1. What materials do I need to make a handprint dog painting?
You will need paper, paint, a paintbrush, and a pencil.
2. Can I use any type of paint?
Yes, you can use any type of paint, but water-based paint is best for this activity.
3. Can I add other details to the painting?
Yes, you can add other details such as whiskers or a collar.
4. Should I let the painting dry before I add other details?
Yes, it is best to let the painting dry before adding other details.
5. Can I use other colors to make the painting?
Yes, you can use other colors to make the painting.
6. Can I use other materials to make the painting?
Yes, you can use other materials such as markers, crayons, or fabric to make the painting.
This easy and simple handprint dog painting for kids is a great way to get children involved in art while having some fun.
Follow us on Youtube for art and craft tutorials and much more.
More Articles from Kids Art & Craft
- Glitter Foam Sheet Crafts Ideas
- DIY Painting Hacks for Kids – Flower Making Step-by-Step Tutorial
- DIY Beads Coaster Crafts For Kids
- Recycled Winter Craft Ideas For Kids
- Easy Santa Claus Craft Ideas For Kids


