Home Decor
Jute Thread Decoration Tissue Box Craft Step by Step Tutorial

Create a gorgeous tissue box and say bye to the hideous tissue boxes that you don’t like to have in your room! This tutorial will guide you to the same!
Hello and welcome to the wonderful world of crafting! Here we can get creative any way we imagine! Like in this tutorial, we will make a beautiful tissue box! Yes, you heard it right, you can even convert the boring and annoying tissue box which doesn’t look good in your room, into a pretty one that you will love to have in your room! All you need to do is, gather the basic materials which are mentioned further in this article and invest some time in this craft-making, and you will be done in the blink of an eye! This craft-making will be a fun journey that you will not even realize when it is completed! So, read on to roll on!
Jute Thread Decoration Tissue Box Craft


Read More: Easy to Make Handmade Bee Craft Tutorial for Kids
Materials Required
- Plastic Box
- Craft Cutter
- Jute Rope
- Glue Gun
- Designer Cloth Strips
- Checks Cloth Piece
- Tissue Paper Pack
Procedure
Step 1: Applying Glue Gun On Plastic Box
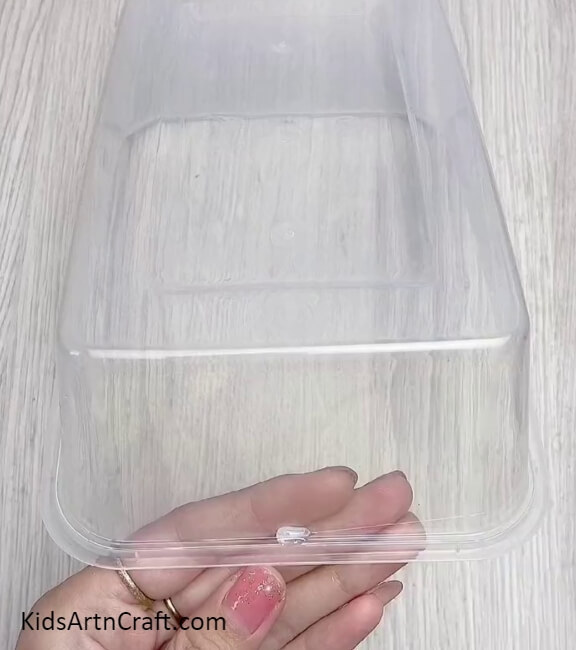

To begin this craft, take an ordinary plastic box, over the outer side of the box apply a hot glue gun in the bottom mid-end.
Step 2: Pasting The End Of Jute Rope
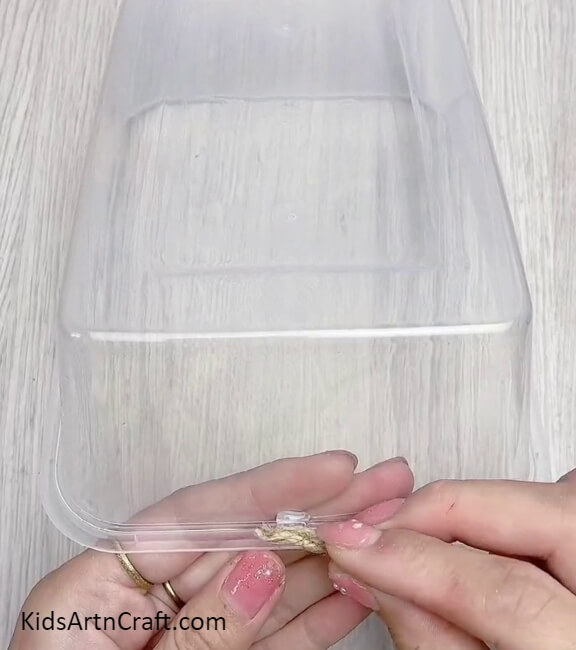
Take a jute rope and paste its end on the hot glue gun.
Step 3: Wrapping The Rope Around The Box
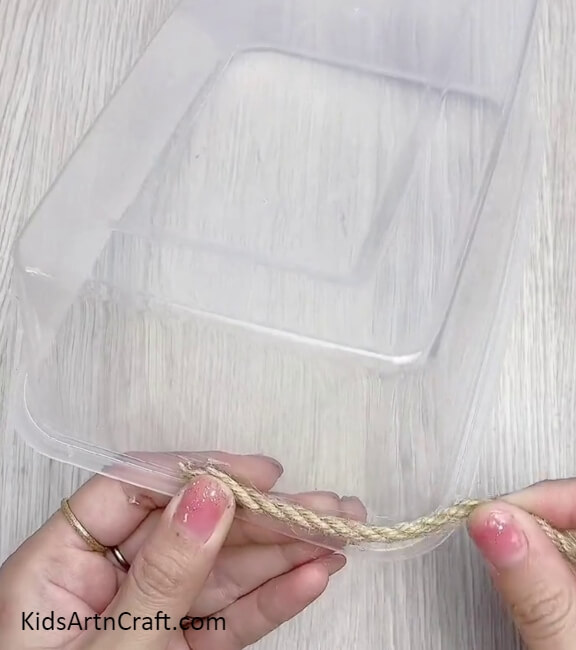
Now, start wrapping the rope over the plastic box in the same circular motion.
Step 4: Making Layers Of Wrapped Rope Of Box
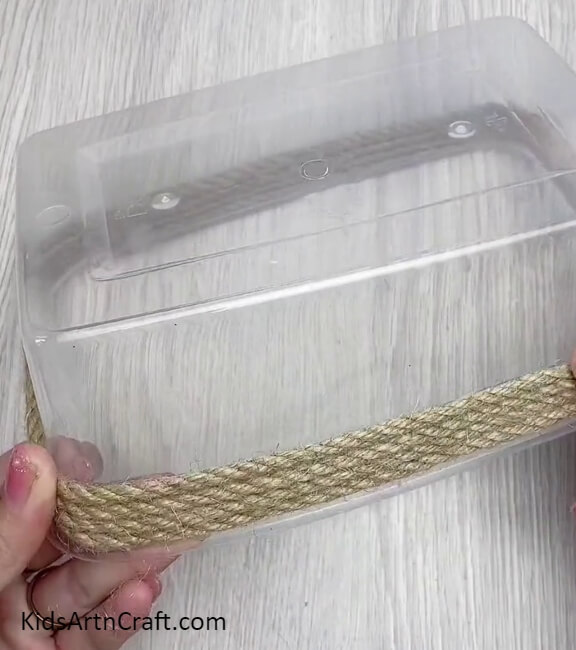
Continuously wrap the rope again and again above each other and you will notice 4-5 layers formed of the rope over the box.
Step 5: Adding A Design Cloth Strip
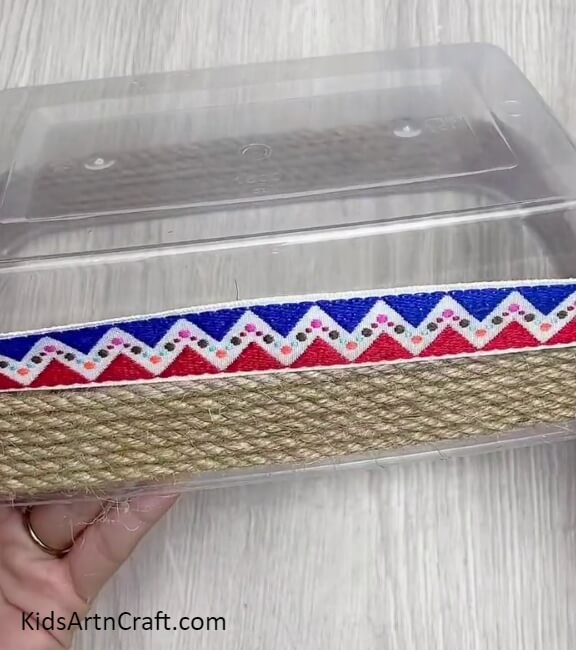
After 6-7 layers are formed, paste a designer cloth strip around the box using the glue gun.
Step 6: Covering The Box Sides With Jute Rope
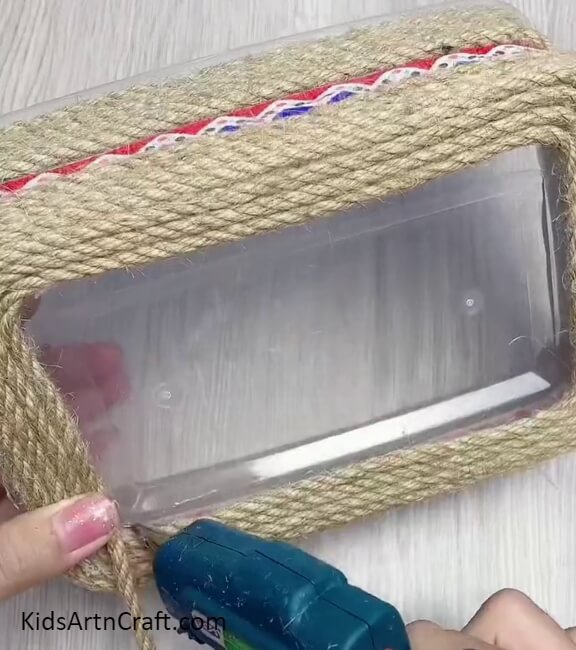
Again continue covering the box sides with the jute rope. When wholely cover on all 4 sides, secure the rope end with the glue gun.
Step 7: Coving The Jute Rope Over The Bottom Side Of The Box
Now, again apply the glue gun to the sides of the bottom rectangular base of the box and start sticking the jute rope over it by continuing circling and wrapping along the sides of the rectangle. Make sure to apply a glue gun at every layer of the rectangular spiral. Stop to wrap once you see a small strip-like space remaining over the base.
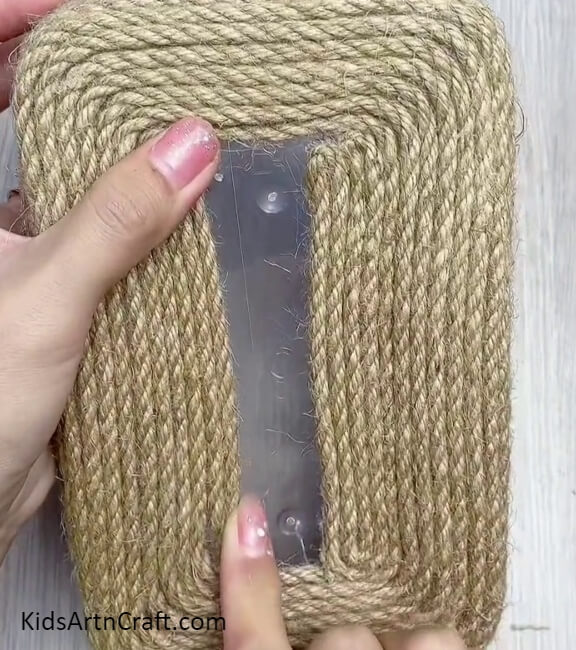
Step 8: Cutting Out The Remaining Base
Using a craft cutter, cut out the rectangular remaining strip-like base from the box completely.
Step 9: Cutting Out The Imperfections
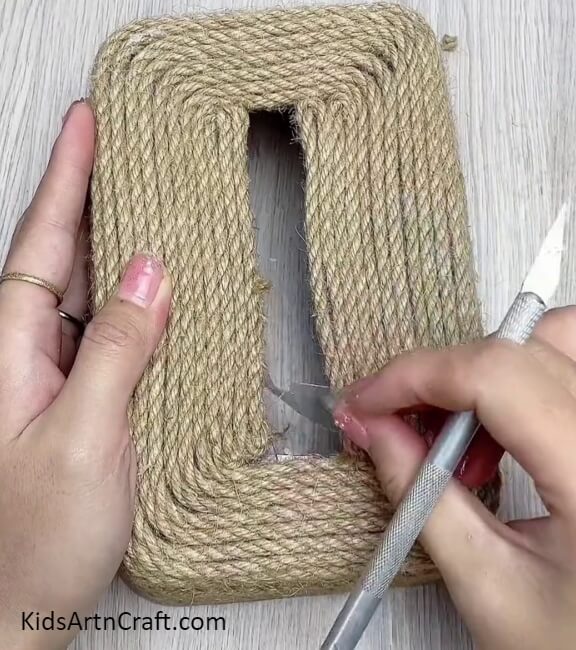
If there are some imperfections remaining in the rectangle strip, then carefully cut them out too from the box.
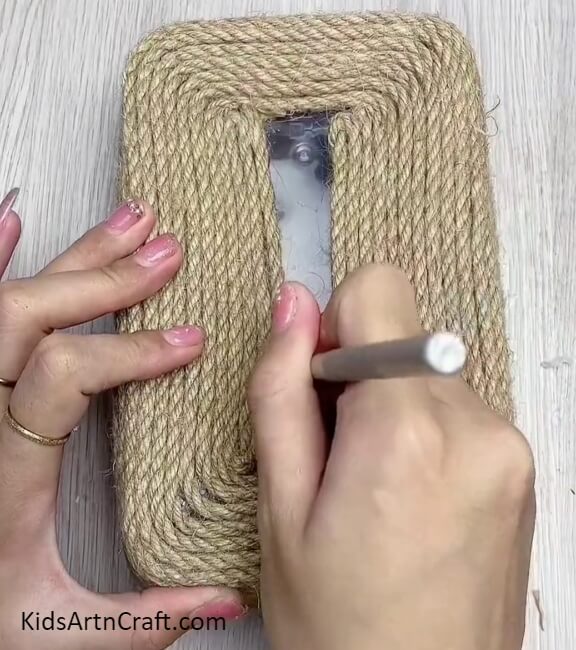
Step 10: Adding Another Designer Cloth Strip
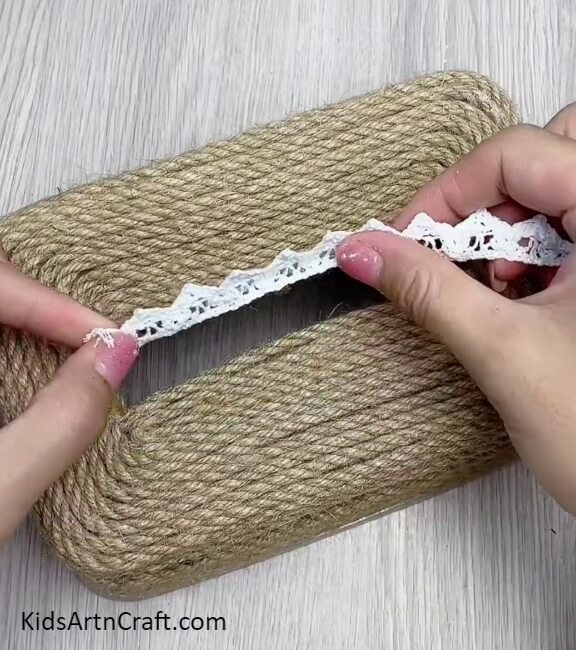
Over the corners of the cut-out rectangular strip on the box, paste a designer cloth strip all over the boundary using the glue gun.
Step 11: Completing Pasting The Cloth Strip
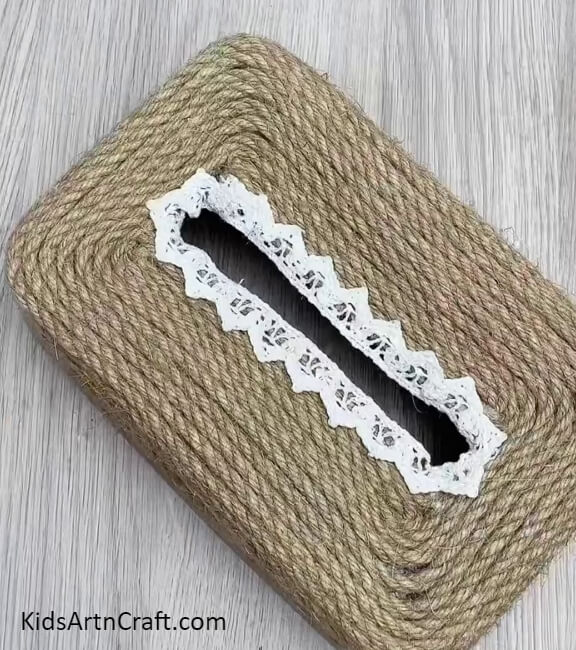
Carefully and completely paste the designer loth strip on the boundary of the rectangle cut-out. Also, secure the end of the strip using a glue gun once you have covered the whole cut-out.
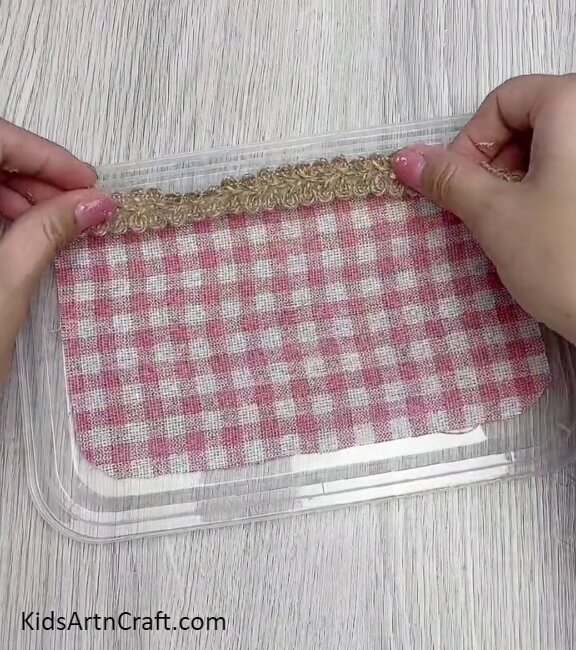
Step 12: Pasting A Cloth Piece On The Lid Of The Box
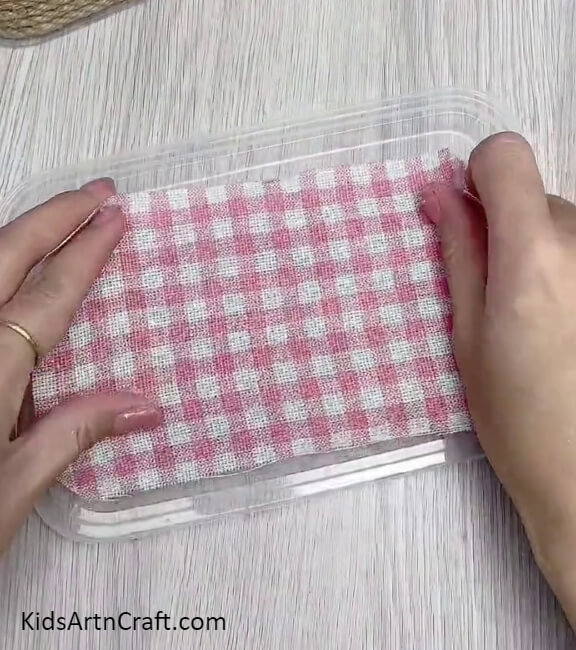
Paste a checks cloth piece over the lid of the container box using the glue gun.
Step 13: Pasting A Designer Cloth Strip Over The Lid
Paste another designer cloth strip over the checks cloth sides to completely cover the lid and paste it using the glue gun.
Step 14: Pasting The Cloth Strip On The Borders
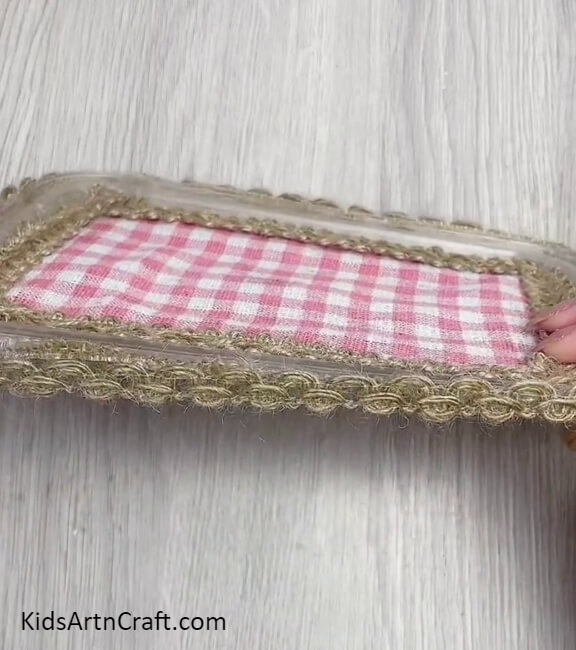
Circle around and paste the cloth strip around the borders of the lid using the glue gun.
Step 15: Putting The Tissue Paper Pack Over The Lid
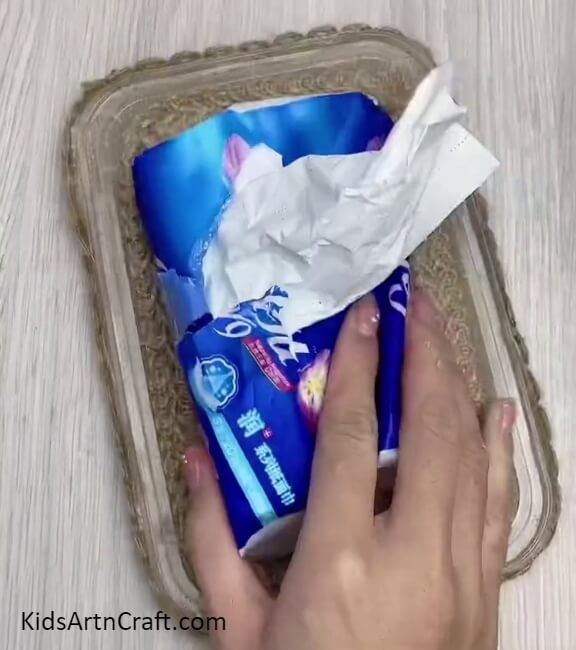
Turn the lid to the other side and put over the tissue paper pack over the lid, by opening it.
Your Crafty Tissue Paper Box Is Ready!
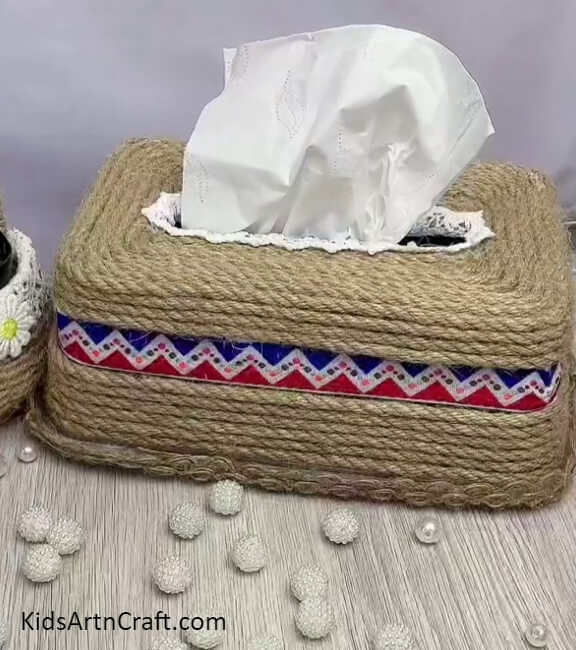
Put and seal your box over the lid and stretch out tissue paper from the rectangular hole over the base.
Tadaa! Can’t take your eyes off a tissue box?! Haha! Told you before!
You can now decorate in your room to make your room look full of creative things, even a tissue box! I’m sure everybody would like this idea! Show it off to everyone and even flaunt your creativity and innovative skill through it! You can even customize this craftwork by taking some colorful threads rather than jute! Your imagination is the limit! But trust me, the jute thread gives the whole craft a subtle look that is attractive and can be suited anywhere!
Follow us on Youtube for art and craft tutorials and much more.
More Articles from Kids Art & Craft
- Easy Christmas Crafts for Kids to Make at Home
- Chicken Family Easy Craft for Easter Decoration
- Unique Decoration Ideas At Home Video Tutorial for All
- Easy chicken family Decor craft for kids
- Easy To Make Paper Lantern Home Decor Craft Tutorial