Paper Crafts
Easy To Learn Ladybug Craft Tutorial For Kindergartners

This easy-to-follow ladybug craft tutorial is perfect for kindergarteners! With clear, step-by-step instructions and simple materials, your little one will be able to make this fun and easy ladybug craft with ease.
This easy-to-follow Ladybug craft tutorial is perfect for kindergarteners! With just a few simple materials, you can help your little ones create a fun and educational project that is sure to bring a smile to their faces. Follow along with step-by-step instructions and helpful pictures to make a unique ladybug that your kids can proudly display.
Easy To Make Ladybug Craft For Kids

Read More: DIY Paper Butterfly Easy Craft For Kids
Materials Required
- Black, yellow, and white craft paper
- A pencil
- Black sketch pen
- Scissors
Procedure
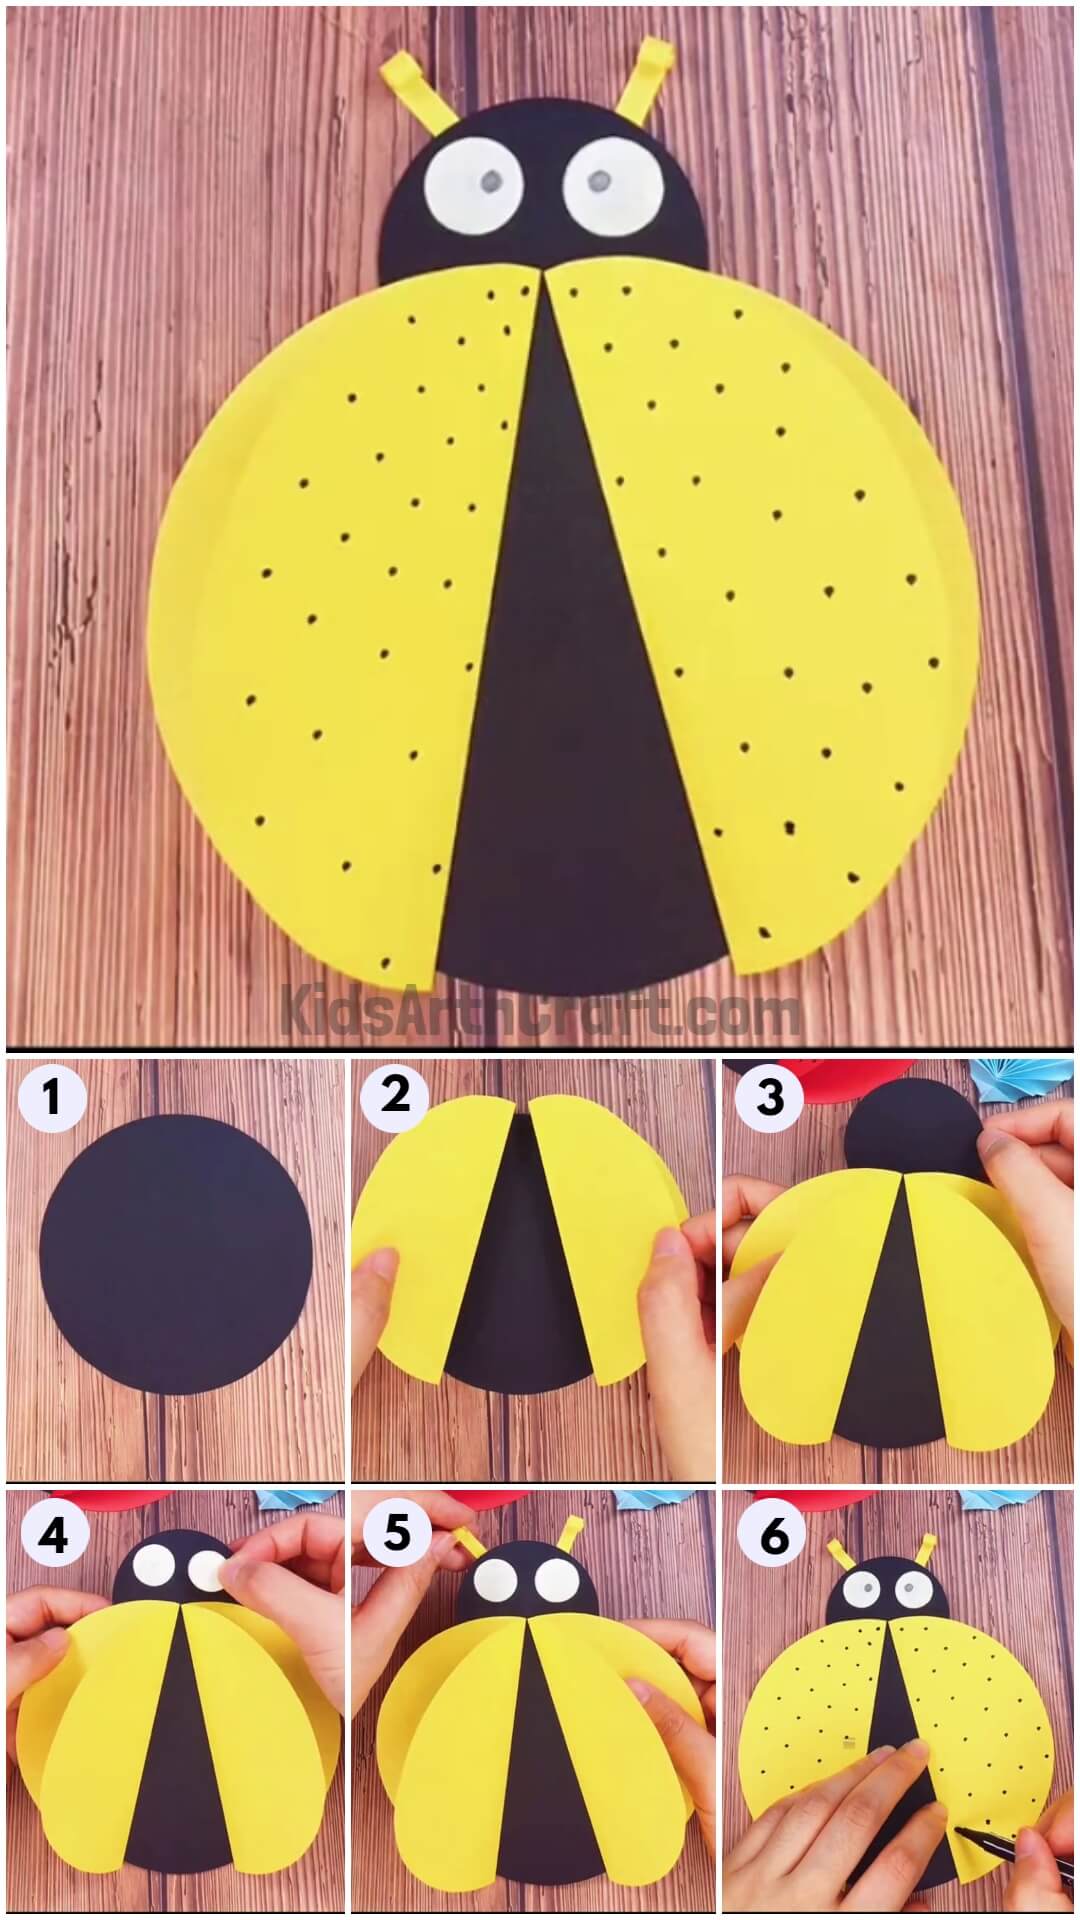
Step 1: Drawing A Big Circle On Black Paper
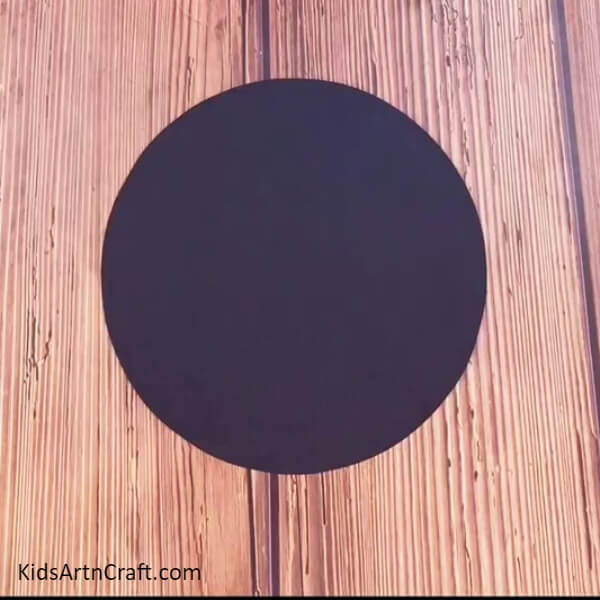

Draw a big circle on the black craft paper and using your scissors cut it out. This circle will be the base of our ladybug.
Step 2: Cutting Yellow Craft Paper
You will now cut out a circle the same size as the black one, from some yellow craft paper. Make sure it’s as big as the black circle.
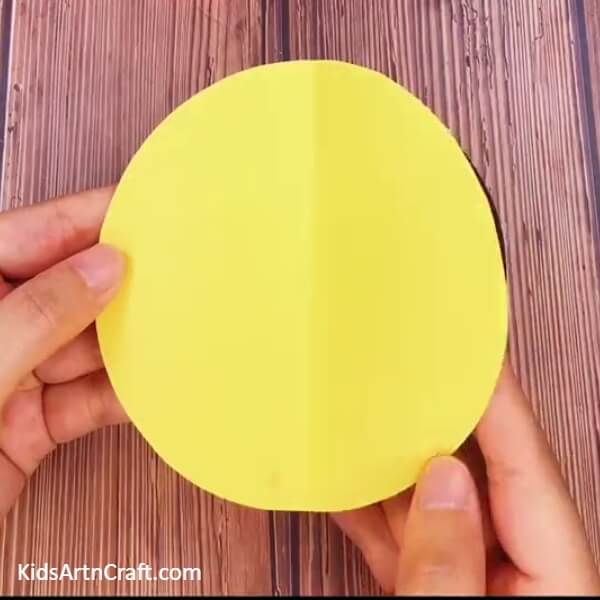
Step 3: Folding Paper Into Half
Once you have the yellow circle cut out, fold it into half from the middle.
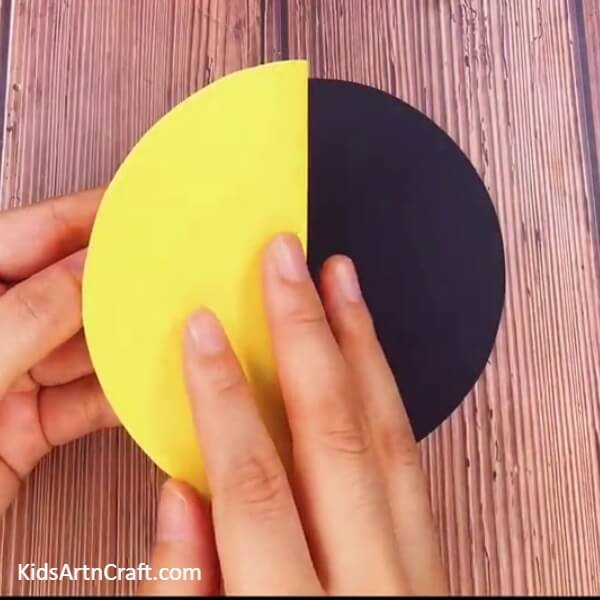
Step 4: Folding The Second Circle As Well
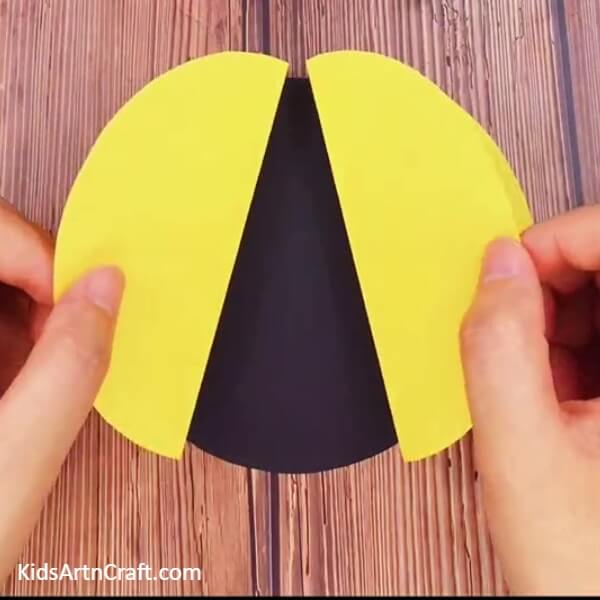
Repeat the previous step and fold the second yellow circle into half as well. Now using glue, stick these to folded circles on the black circle in a diagonal position, such that their upper tips are touching each other and the lower ones are far apart.
Step 5: Cutting Black Paper For Head
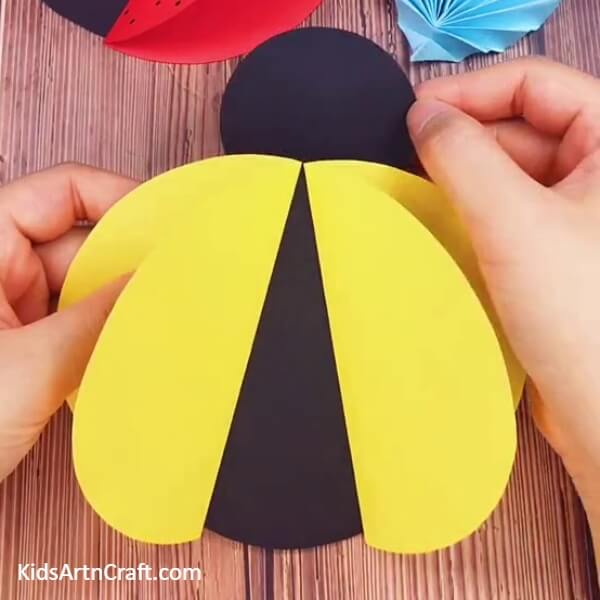
For the head of the ladybug, cut out a small circle from black craft paper. Stick it under the bigger black circle such that almost half of the face circle is covered.
Step 6: Making a Eyes
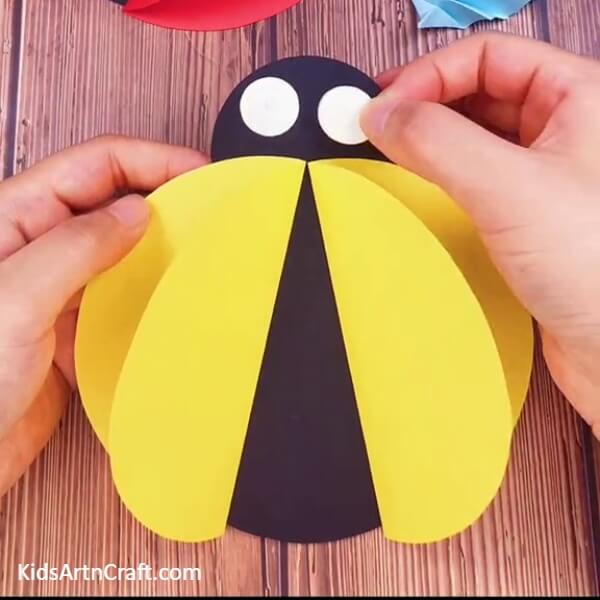
Cut out two small circles from white craft paper and stick it side by side on the face of the ladybug.
Step 7: Making a antennas

Next, make you will make the antennae of the ladybug. Cut out two thin strips from yellow craft paper. Roll or curl these strips such that they have a roll on one end. Stick these on the head of the ladybug.
Step 8: Drawing Two Dots Inside The Eyes
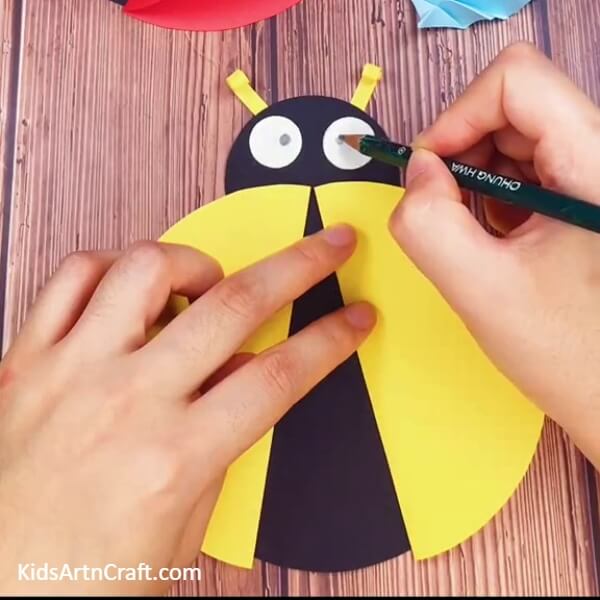
Grab your pencil and draw two dots inside the two white circles to complete the eyes of the ladybug.
Step 9: Making A Black Dots On Wings
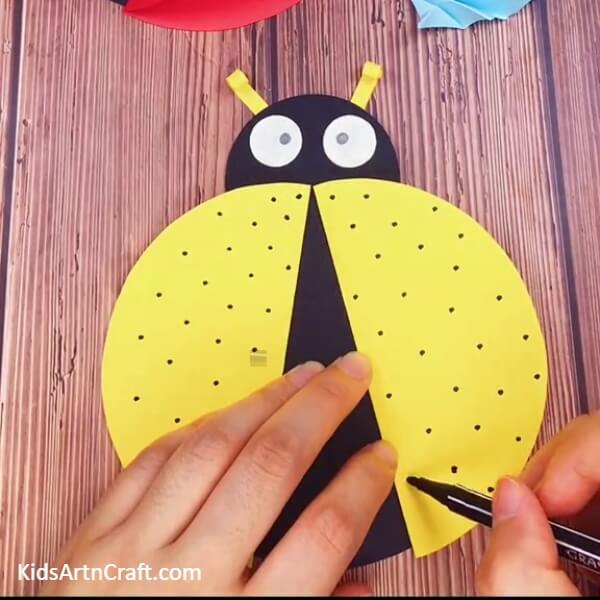
You will Lastly grab your black sketch pen and cover the yellow wings of the ladybug with dots. Space the dots well to make it look neat and tidy.
Finally, Ladybug Craft Is Ready!!
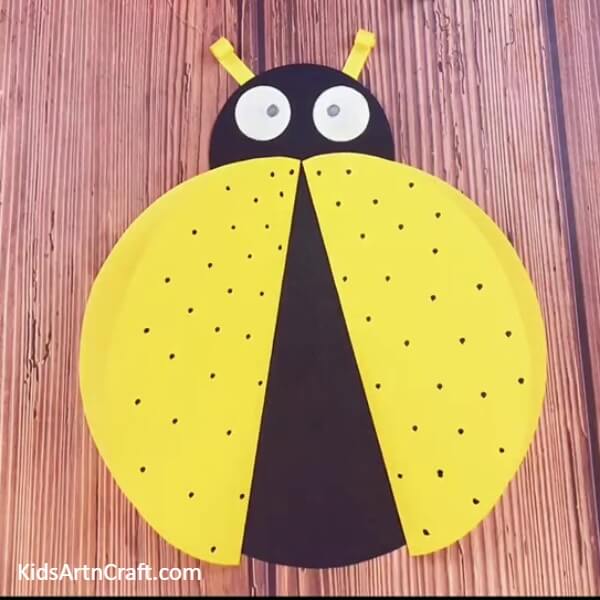
Ta-da! Your Ladybug Craft is ready!!
Kids as young as kindergarteners can easily make this amazing craft using this step-by-step tutorial. This ladybug is perfect for craft projects. This craft is creative, engaging, and fun. It is super easy and quick to make and kids can easily catch on to the steps and spark their creative streak. With this tutorial and with some assistance, kindergarteners can easily showcase their craft skills. So give it a try and engage your kids and yourself in a fun craft-learning activity!
Hope you like this amazing Easy to Learn Ladybug Craft step-by-step tutorial for kindergarteners. We would love to hear your thoughts in the comment section below. Be sure to visit our other articles for more craft and DIY ideas!
Thank You for visiting our website!
Some More Ladybug Craft Tutorial
Easy To Make Paper Ladybug Craft For Little Ones


Image Source/Tutorial: Kids Art & Craft
This paper ladybug craft is a fun and easy activity for little ones! It is a great way to get creative and explore different colors and shapes. Kids will love the end result and will have a blast making it.
Follow us on Youtube for art and craft tutorials and much more.
More Articles from Kids Art & Craft
- DIY Bird Nest Paper Craft For Kids
- Easy Paper Robot Craft Step By Step Tutorial
- How to Make Easy Paper Snowflakes Tutorial
- Easy Paper Handprint Bunnies Craft for Kids
- How to Make a Paper Bunny Easy Tutorial for Kids