Fall & Autumn
Beautiful Leaf Peacock Craft Step-by-step Tutorial

Create an eye-catching Leaf Peacock craft with our step-by-step tutorial! Using simple materials, you can create a beautiful and unique art piece that will add a touch of whimsy to any room.
This art is a fun activity that will keep the children engaged in artistic learning and also will utilize their leisure time in a productive. This art will also teach the children to make use of dried and waste leaves.
Beautiful Leaf Peacock Craft For kids

Read More: How to Make a Paper Peacock Easy Craft
Materials Required
- 1 dried maple leaf
- 10-15 red autumn leaves
- buxus textured green leaves
- white sheet (in circular cutting)
- scissors
- glue
- black marker (thin nib)
- white refill pen
Procedure
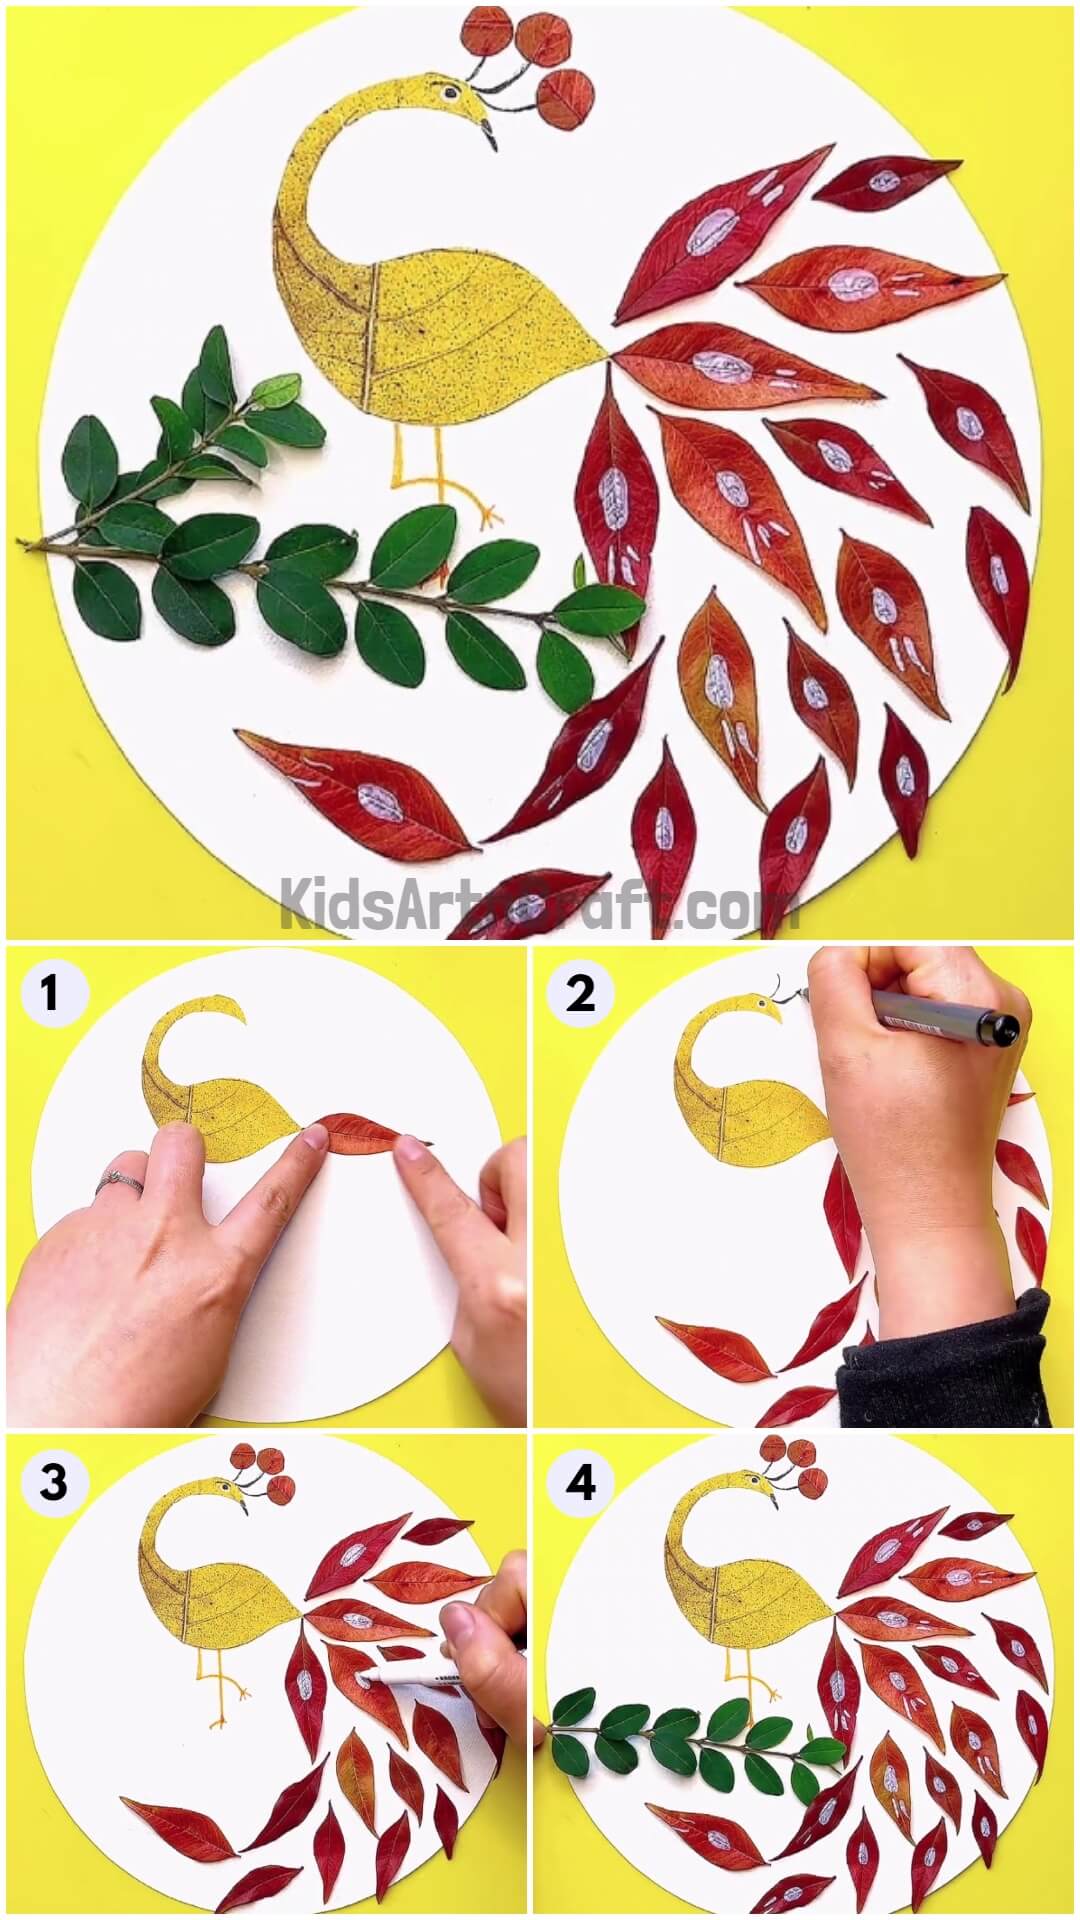
Step 1: Setting The Base
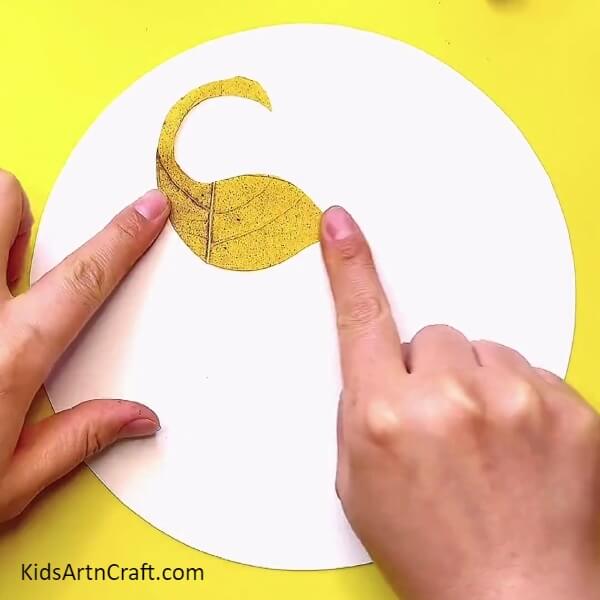

Take a dried maple leaf and cut it down as per the design given in the figure above. And then paste it on a circular sheet as shown in the figure.
Step 2: Making Peacock Feather
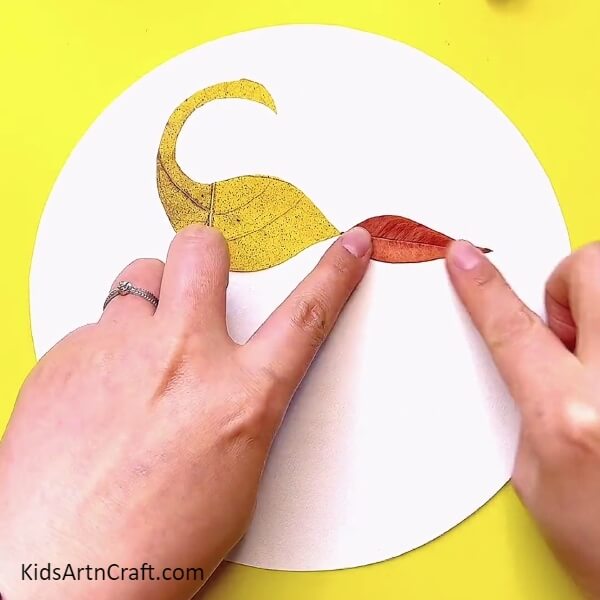
Take one red autumn leaf and paste it on the corner of the maple leaf design as shown in the figure.
Step 3: Making Base Of Peacock Body
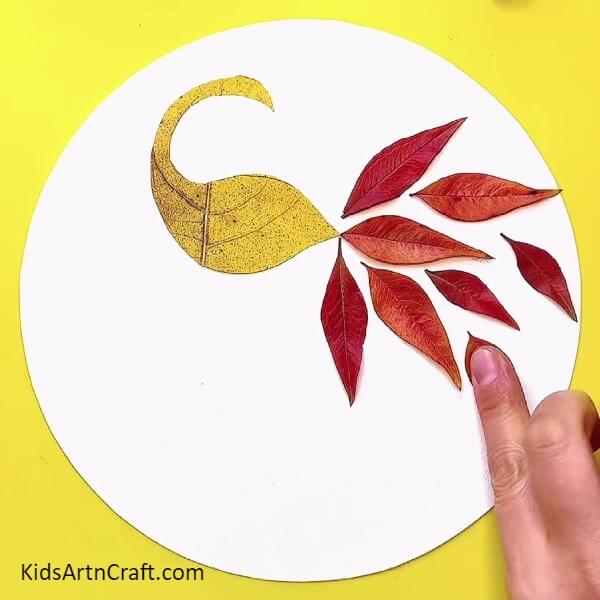
Take a few more red autumn leaves and paste them accordingly as given in the figure.
Step 4: Expansion Of Feathers (Making Of Train)
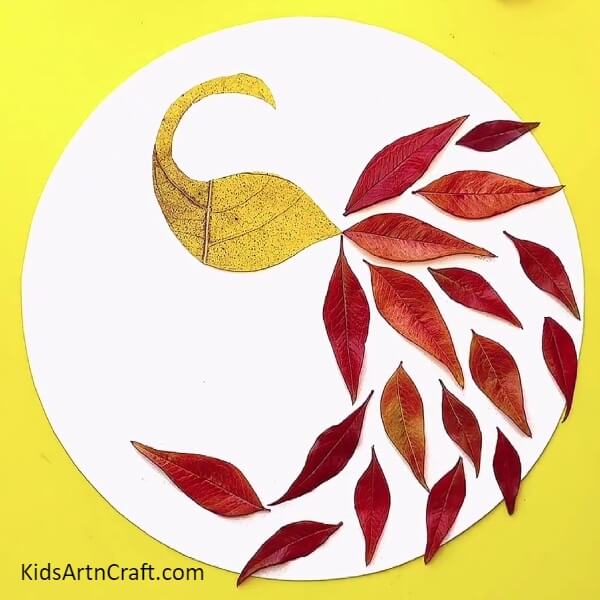
Take more red autumn leaves and split them and paste them as shown in the figure to expand the feathers and add the beauty to the train of peacock.
Step 5: Eyes And Crown
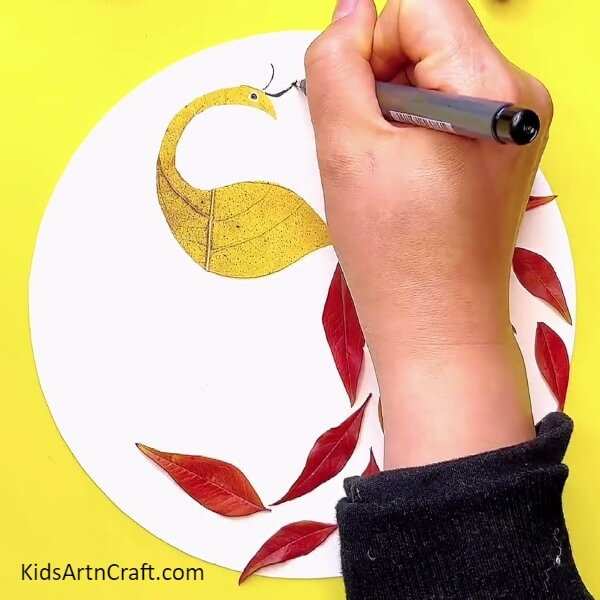
Take a black marker with a thin nib and draw its eyes and crown according to what is shown in the figure.
Step 6: Completing The Crown

Take small-sized circular leaflets and paste them on the crown lines as shown in the figure.
Step 7: Making Of Peacock Talons
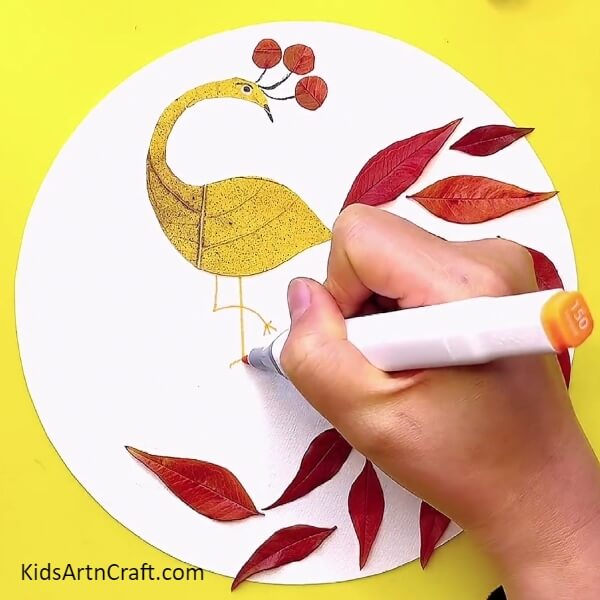
Take a mustard or dull yellow color sketch pen and draw its talons and claws as shown in the figure.
Step 8: Filling Of Peacock Feather
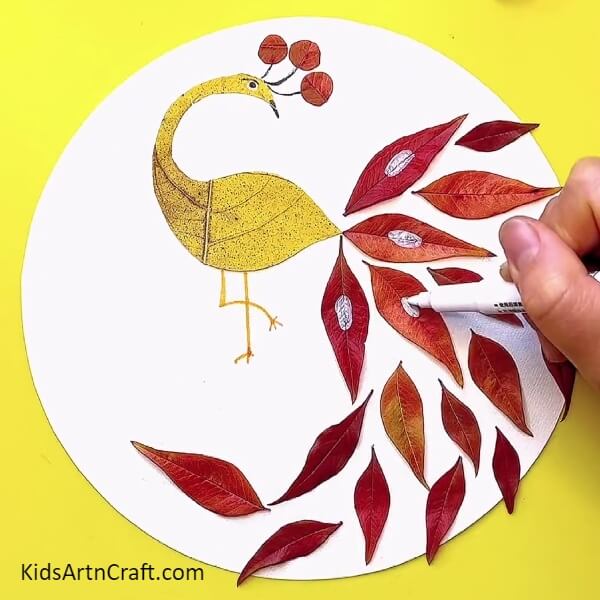
Take the white refill pen and draw the ellipse on each leaf and fill them completely as shown in the figure.
Step 9: Giving Finishing To The Feather
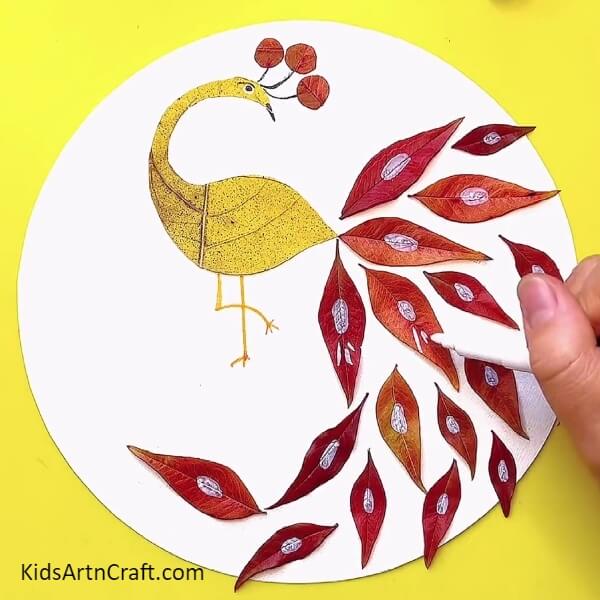
With the same white refill pen, draw three lines to make a hero. Follow the same for all the leaves in the feather part. Do as shown in the figure.
Step 10: Giving The Finishing By Adding Surroundings
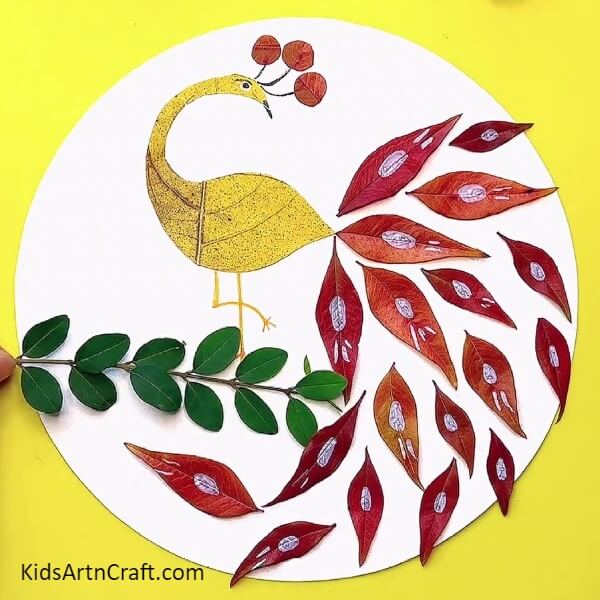
Take 2-3 Buxus textured leaf branches to add to the surroundings.
Completed The Beautiful Leaf Peacock Craft
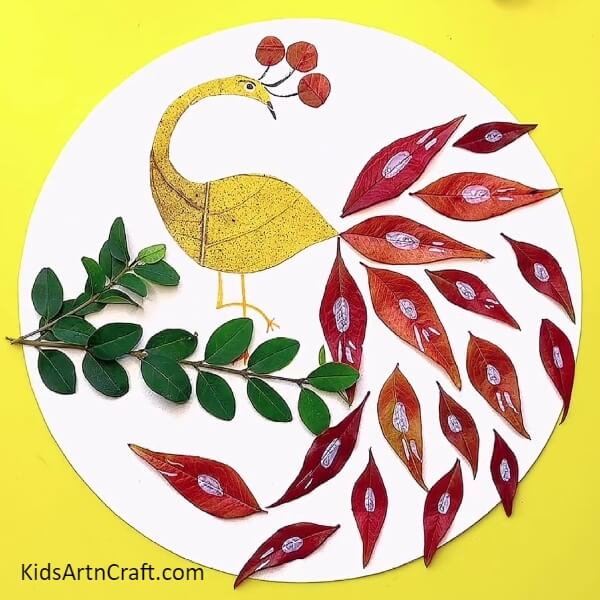
Paste the branches as given in the figure and this beautiful piece of art is finally completed!!
This beautiful Leaf Peacock Craft Step-by-step Tutorial is a great way to add a creative and unique touch to any craft project. With easy-to-follow instructions, you can easily make this beautiful craft to spruce up any room.This concludes the Leaf Peacock Craft Step-by-step Tutorial. With a little bit of creativity, you can now create a beautiful peacock craft with just a few simple supplies. Enjoy!
Some More Peacock Craft Tutorial
Easy To Create Peacock Craft Using Paper Strips

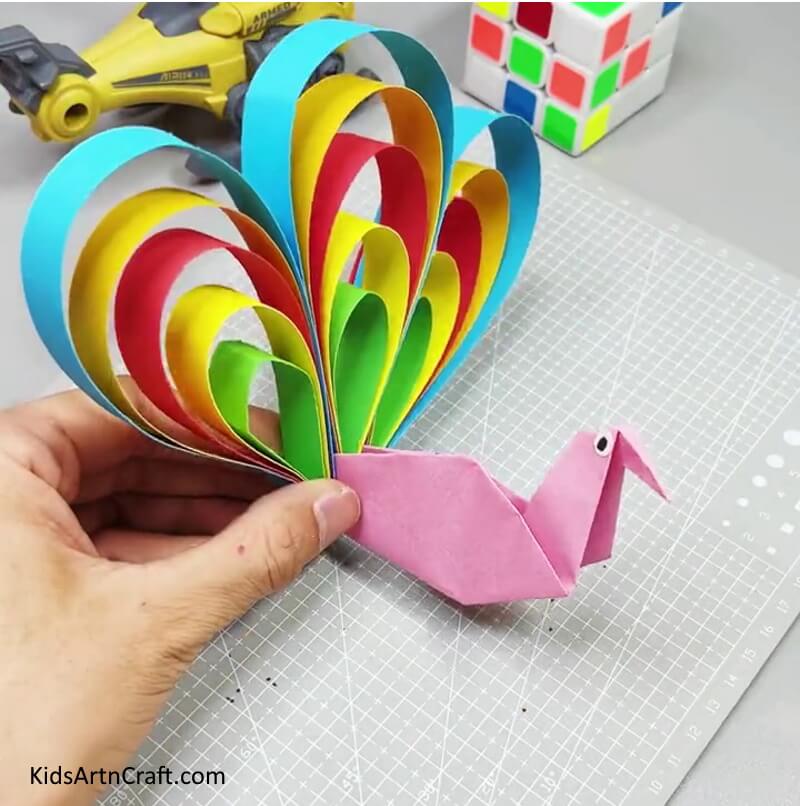
Image Source/Tutorial: Kids Art & Craft
Creating a peacock craft using paper strips is a fun and easy activity. It is a great way to unleash your creativity and make a unique decoration for your home. All you need are some colorful paper strips and a few other supplies.
Follow us on Youtube for art and craft tutorials and much more.
More Articles from Kids Art & Craft
- Easy Leaf Fall Artwork And Craft for Kids
- Easy Fall Leaf Artwork Tutorial For Kids
- Simple Fall Leaf Boy Craft Tutorial For Kids
- How To Make Easy Fall Tree Craft From Leaves
- How to Make a Paper Fall Leaf for Kids