Recycled Crafts
How To Make Mini Hat Using Paper Cup For Kids

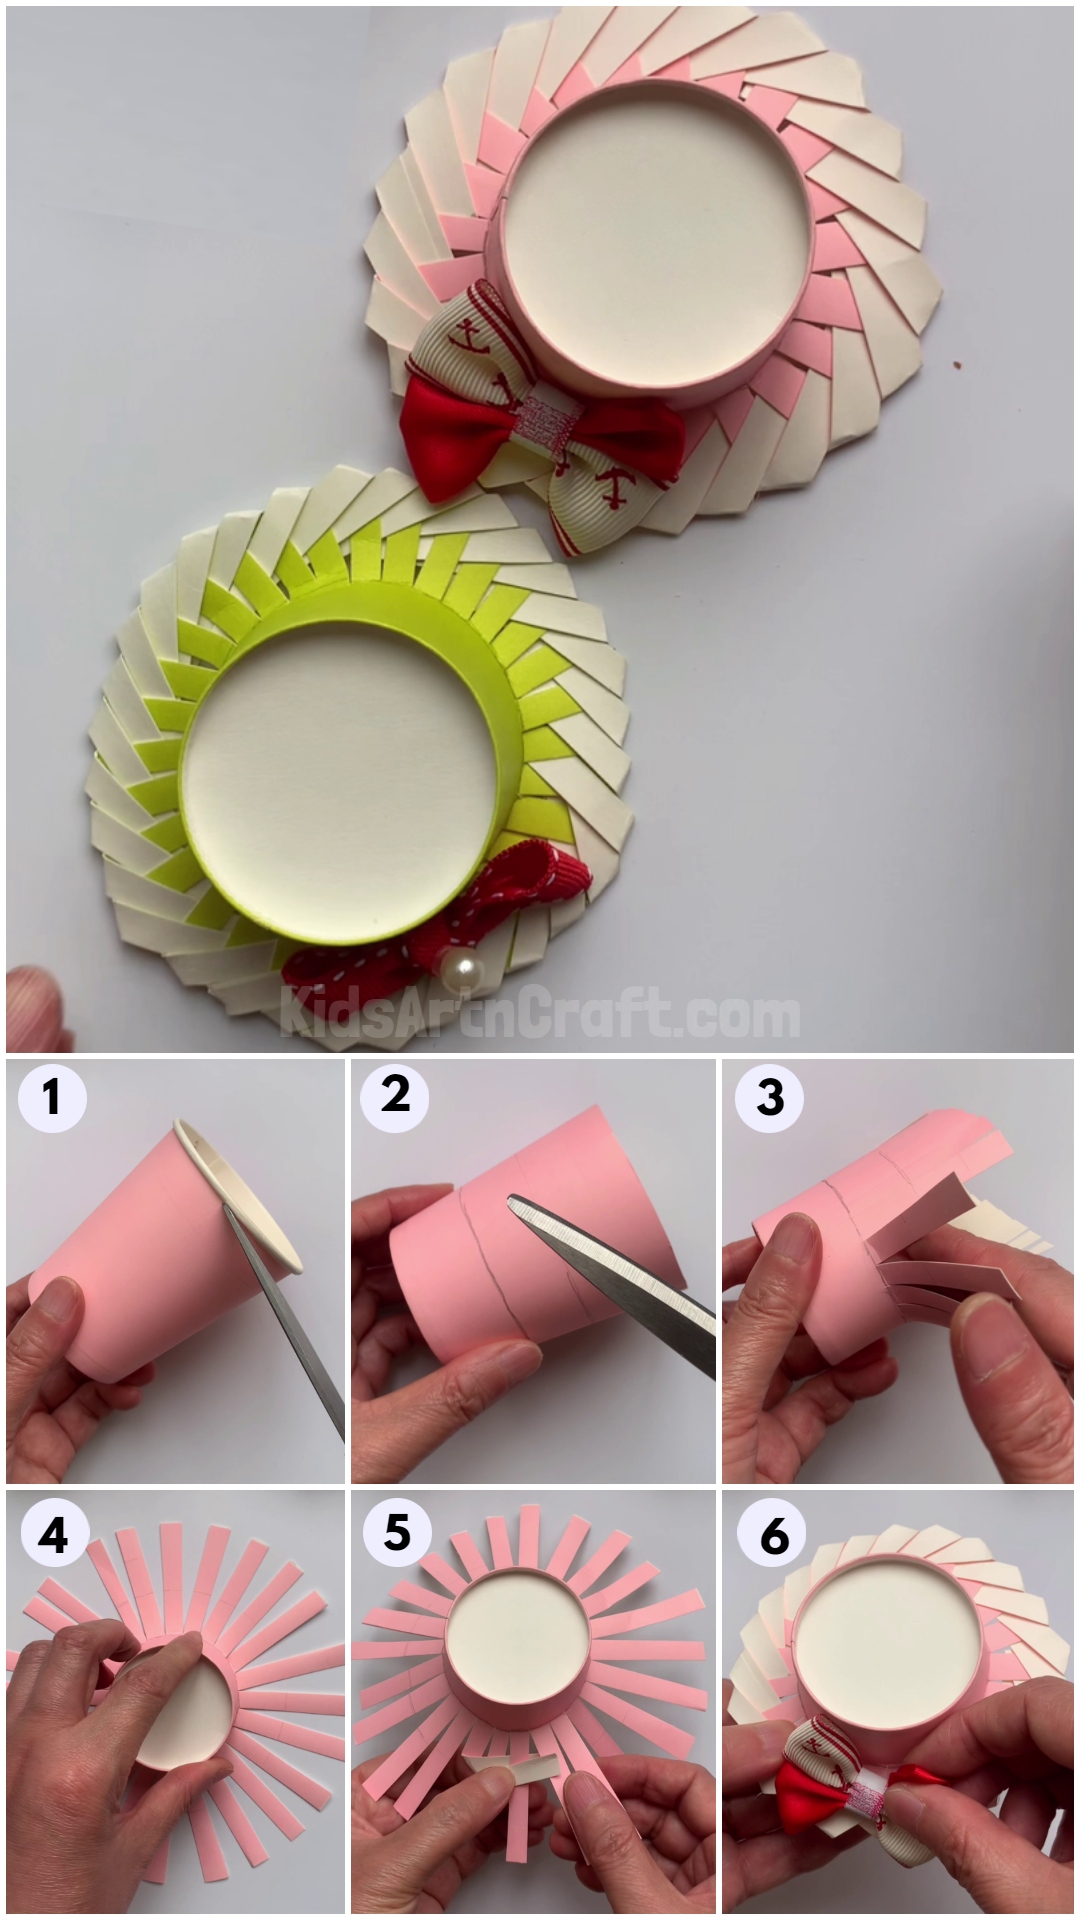
Learn how to make miniature hats with just a few supplies for your kids! This easy craft is a fun and creative way to keep your kids busy and entertained. With just a paper cup, ribbon, and some decorations, you can create these mini hats in no time!
Welcome to this tutorial on how to make a mini hat using paper cups! This is a fun and simple craft project that is perfect for kids and adults alike. With just a few materials, you can easily create a unique and stylish hat to wear or give as a gift. In this tutorial, we will show you how to make a mini hat using a paper cup in just a few simple steps. So grab your paper cup, and some materials, and let’s get started!
Make Cute Mini Hat Paper Cup Craft For Kids
Read More: Recycled Milk Carton Craft Ideas For Kids
Materials Required
- Colored Paper Cup
- Pencil
- Scissors
- Glue
- Bow
Procedure
Step 1: Cutting The Brim
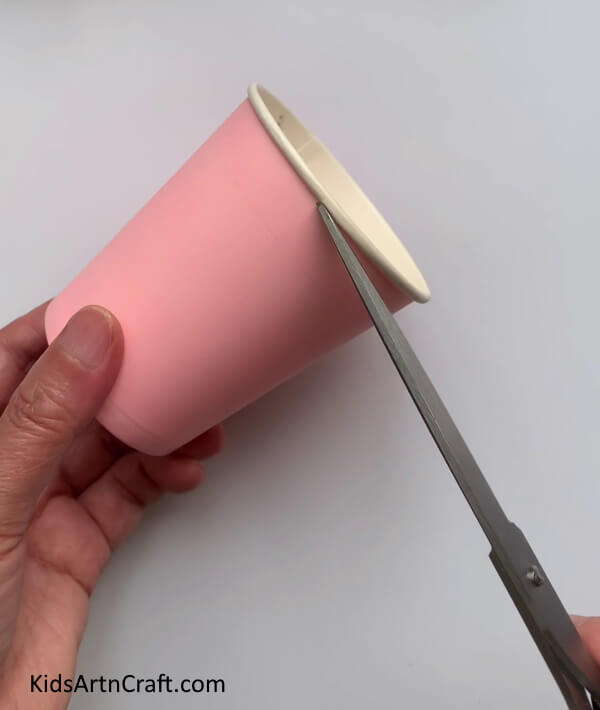
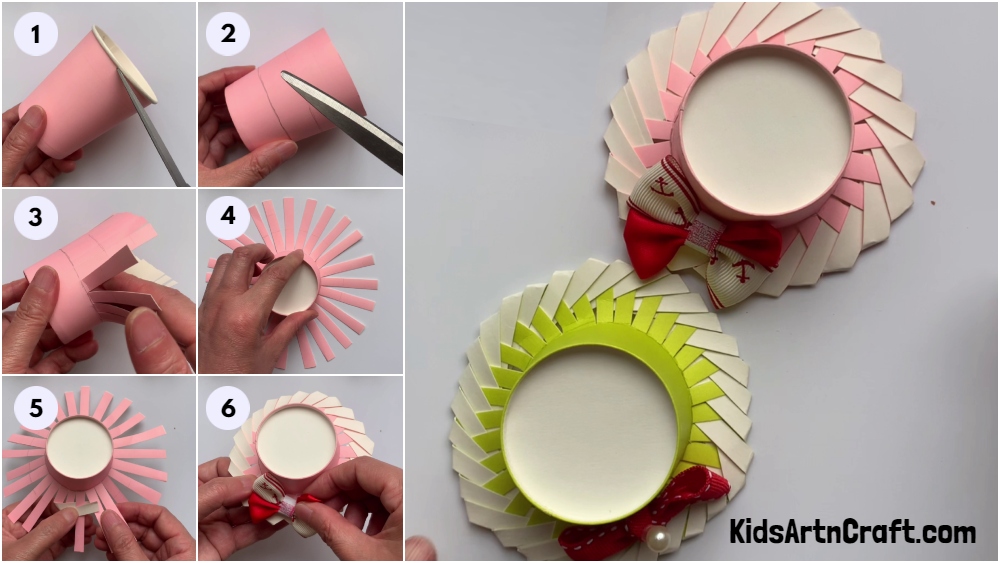
Let’s begin this tutorial by taking a paper cup and scissors. Cut the brim of the paper cup carefully.
Step 2: Drawing Circles On Paper Cup
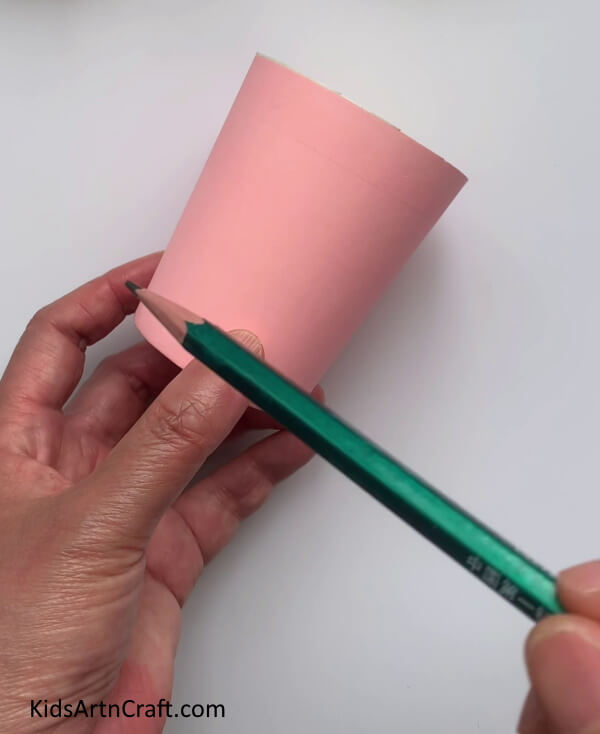
Take a pencil and draw a circle at the center of the paper cup. Next, draw a second circle in the center of the region below the first circle.
Step 3: Cutting Vertical Strips
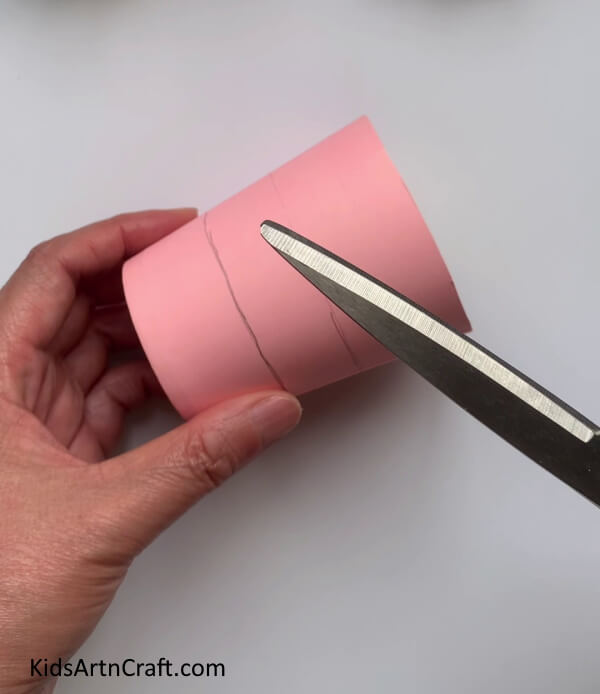
Now, cut vertical strips of equal width till the second circle. Don’t cut beyond the second circle.
Step 4: Folding The Vertical Strips
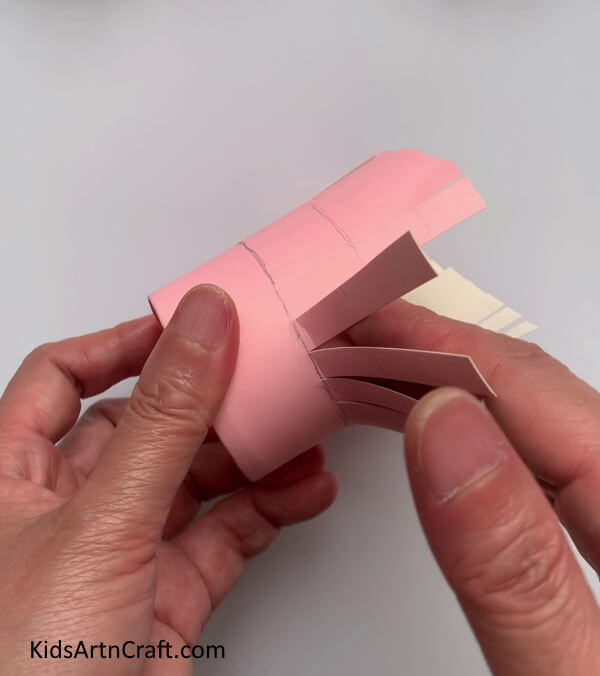
Now, after cutting all the rectangular strips, fold the strips outwards as shown in the image.
Step 5: The Vertical Paper Strips
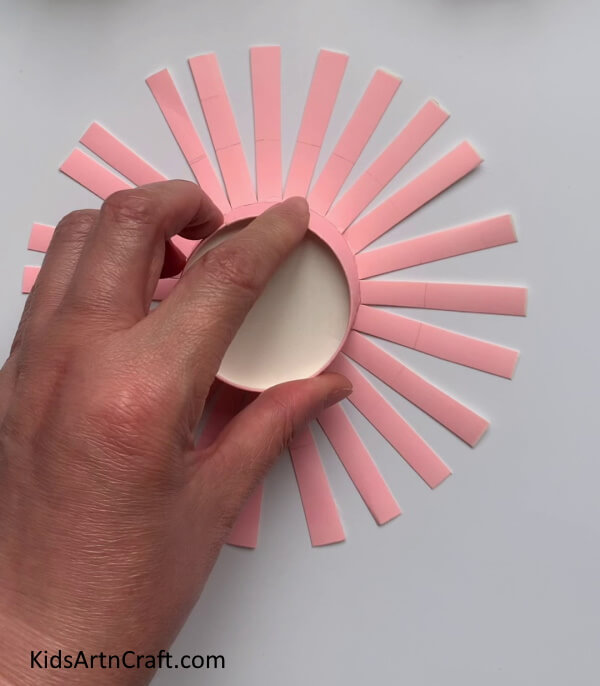
After folding all the strips, you will obtain the paper strips in the shown manner.
Step 6: Twisting A Paper Strip
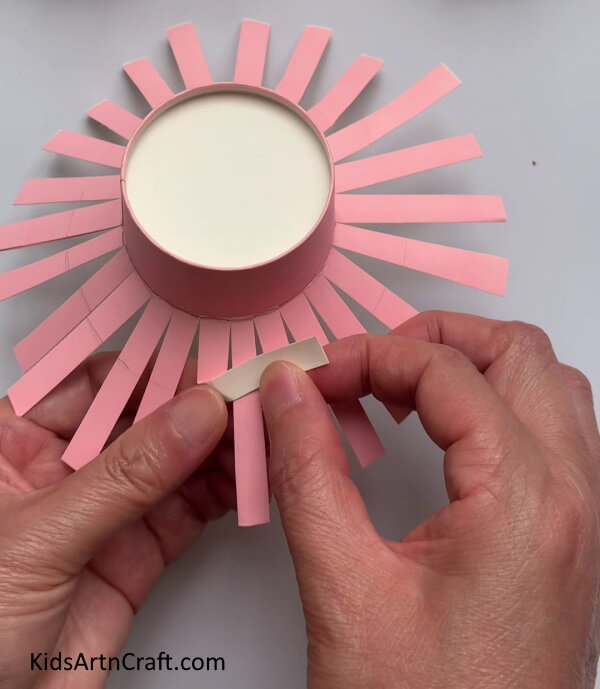
Next, take a paper strip and twist it on the right side.
Step 7: Weaving The Paper Strips
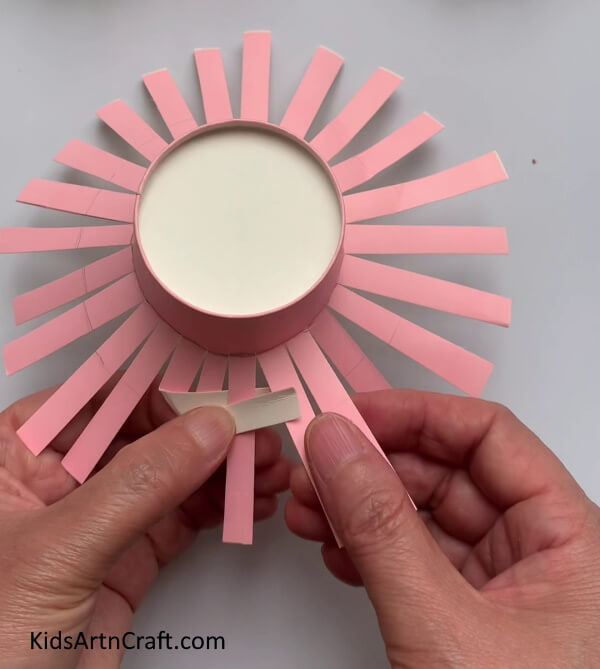
Pass the twisted strip above the second strip and below the third strip. Continue weaving in this alternate pattern. Repeat the same for the next strip.
Step 8: Completing The Weaving
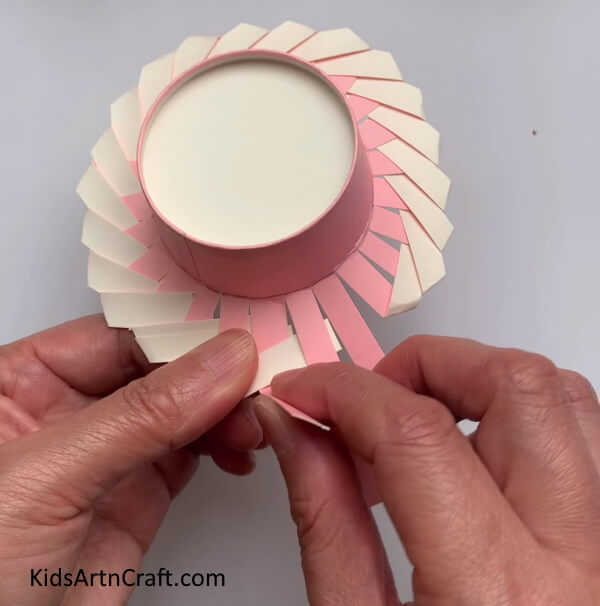
Now, repeating the above step, finish the weaving process of the paper hat.
Step 9: Securing The Ends
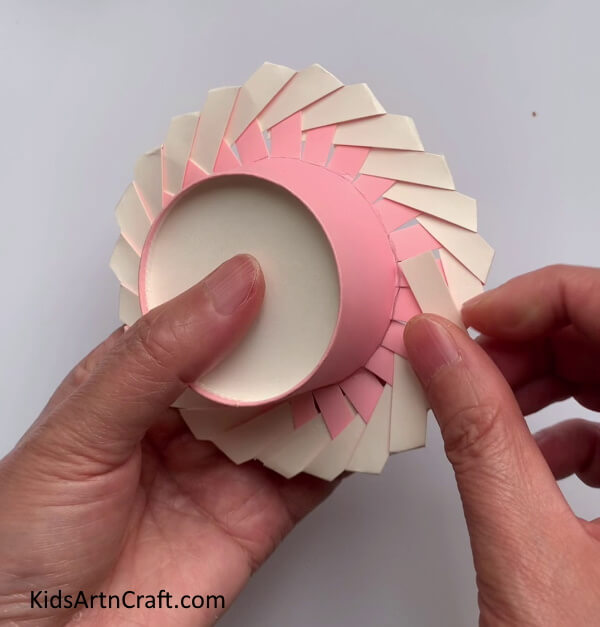
Now, secure the ends of the paper strips with glue.
Step 10: Adding Bow to The Paper Hat
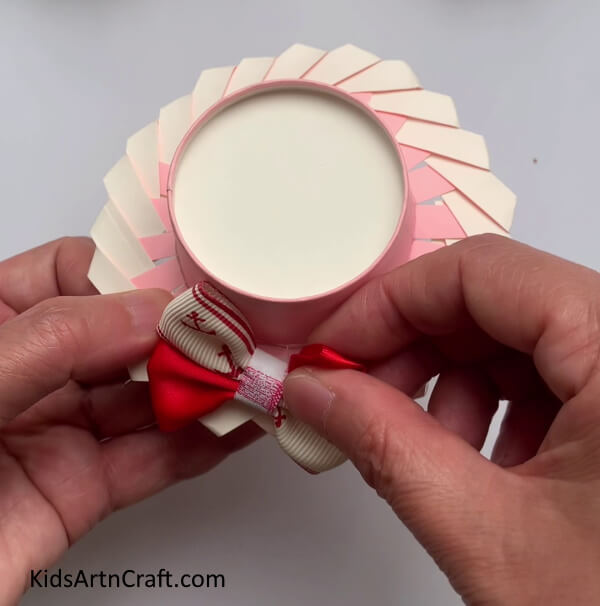
To enhance the beauty of the paper hat, paste a bow on one side of the hat as shown. You can make more such colorful hats.
This Is The Final Look Of Our Cute Mini Hat Paper Cup Craft!
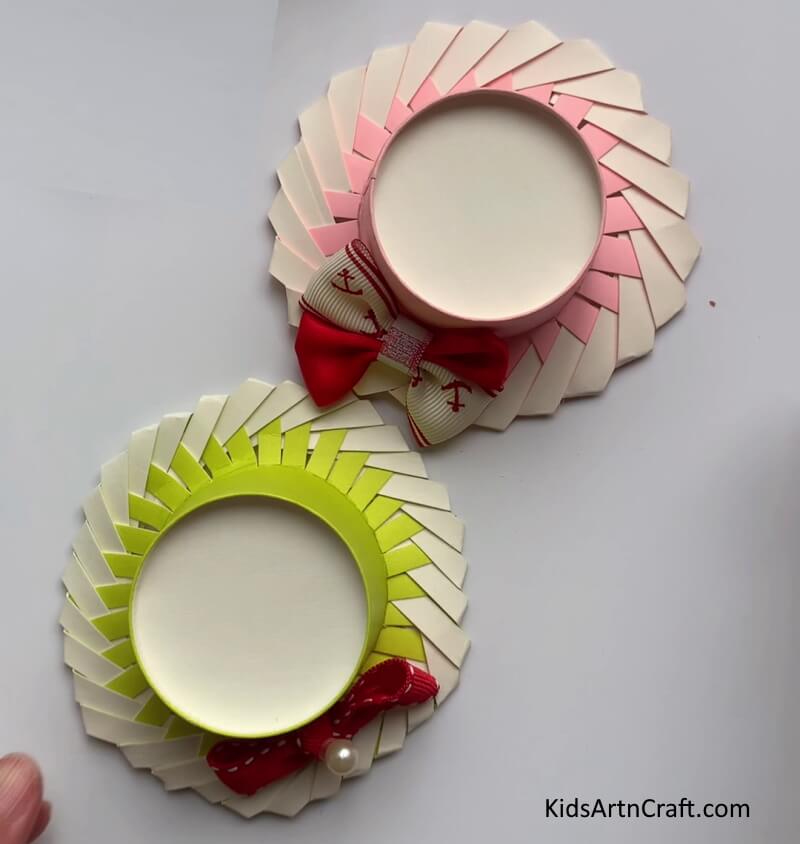
Congratulations on completing our cute mini hat paper cup craft!
Some More Hat Craft Tutorial
Simple Paper Cup And Jute Hat Craft For Kids
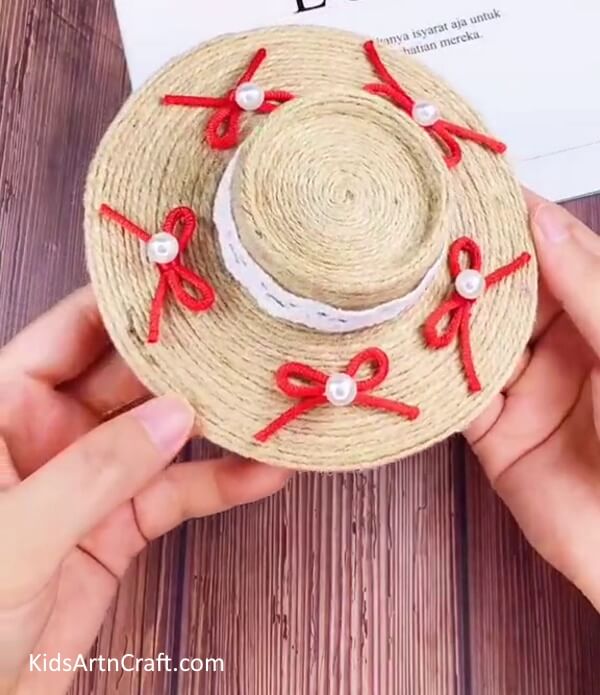
Image Source/Tutorial: Kids Art & Craft
This simple craft is perfect for kids because it uses paper cups and jute to make a fun hat. It’s an easy and fun project that the kids will love! They will have a great time creating something unique with their two hands.
Easy To Make Ladybug Craft With Colorful Paper
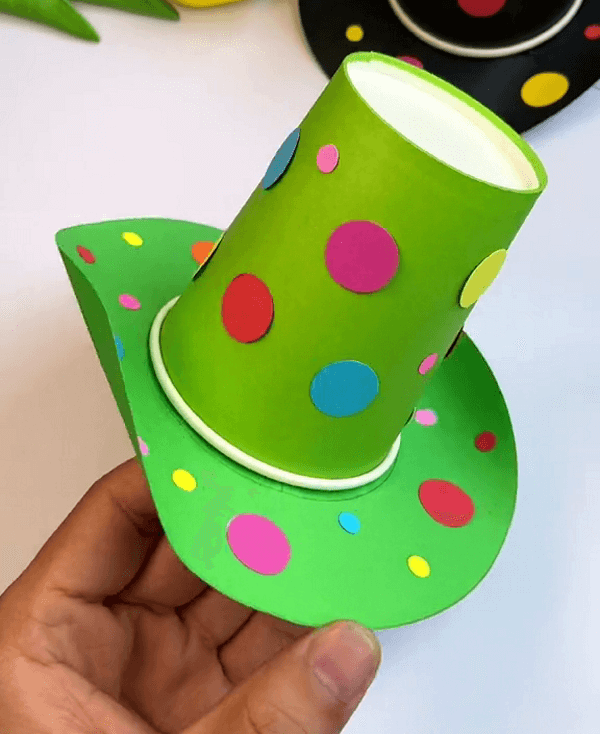
Image Source/Tutorial: Kids Art & Craft
This easy ladybug craft is a great way to spend time with your kids. With just a few supplies, colorful paper, and some creativity, you can create a fun and unique craft that your kids will love. It’s sure to bring a smile to everyone’s face!
FAQs Related To How To Make Mini Hats Using Paper Cup For Kids
1. What supplies do I need to make a mini hat using a paper cup?
You will need a paper cup, scissors, glue, a piece of thick paper or cardstock, markers, and other decorations of your choice.
2. What kind of decorations can I use?
You can use any decorations that you like such as ribbons, pom-poms, glitter, sequins, or any other craft supplies you have.
3. Do I need a special tool to make the mini hat?
No, you don’t need any special tools to make the mini hat. All you need is the supplies listed above and your own creativity.
4. Can I make the mini hat using a plastic cup instead of a paper cup?
Yes, you can make a mini hat using a plastic cup. The same instructions apply to the paper cup.
5. How do I attach the decorations to the mini hat?
You can attach decorations to the mini hat using hot glue, tape, or any other adhesive.
6. How do I make the hat look more realistic?
You can use markers or paint to draw details on the mini hat such as a brim, top, or band. You can also add any other decorations that you like.
7. Can I make the mini hat in different colors?
Yes, you can make the mini hat in different colors by using paint or markers to color the cardstock and cup. You can also add decorations in different colors to make the mini hat more unique.
Making a mini hat using paper cups is a quick and easy way to entertain kids! It requires very few materials and the end result is a fun and creative hat.
Follow us on Youtube for art and craft tutorials and much more.
More Articles from Kids Art & Craft
- Air Dry Clay Sculpture Ideas
- Decorative Mason Jar Washi Tape Crafts
- Recycled Egg Carton Bunny Tutorial for Kids
- Paper Crafts And Activities Video Tutorial for Kids
- Pineapple Pine Cone Step-by-Step Tutorial for Kids


