Kids Activities
Beautiful Flying House Balloon Craft Tutorial For Kids

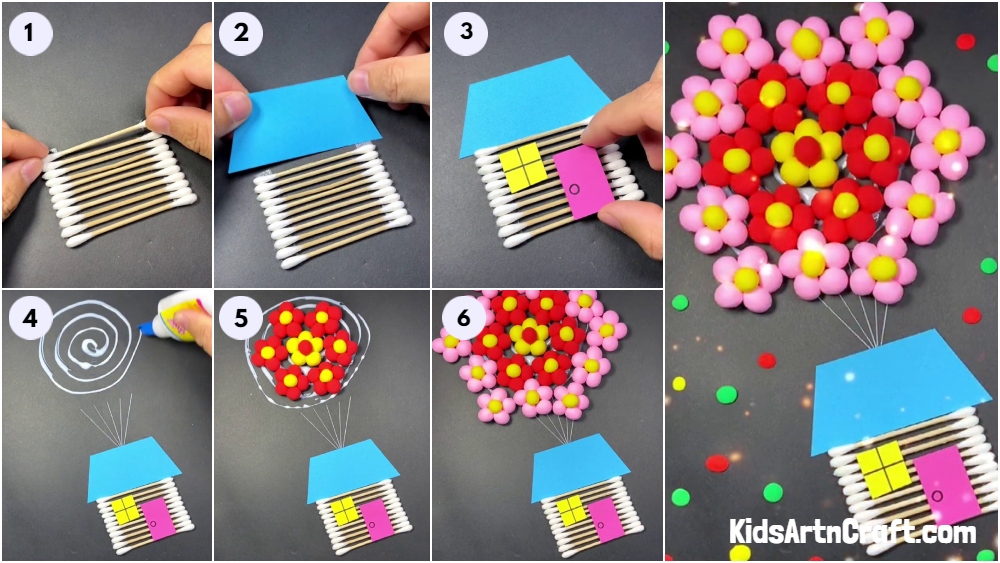
This tutorial is great for kids who like to be creative and explore! You can create a lovely Flying House Balloon Craft that can take your mind to the air. The easy-to-follow instructions make it the perfect project for any crafting ability.
I hope all of you have seen the movie,’Up’, in which the an old man decides to move to a secluded landscape with his house. Strange, isn’t it? But he succeeds in doing so with the help of a lot of balloons. Keeping the movie in mind, this tutorial will be recreating this exact scene through craft, a house floating in the air with the help of inflated balloons. So, collect all the material required, and let’s start making this unique craft.
Creative Flying House Balloon Craft For Kids

Read More: DIY Foam Net Home Craft For Kids
Material Required
- A black, a blue, a yellow and a pink sheet of chart paper
- Ear buds
- A pair of scissors
- Masking tape
- A glue stick
- Clay dough in different colours
- Tooth pick
- A black sketch pen
Procedure
Step 1: Taping the sheet of paper
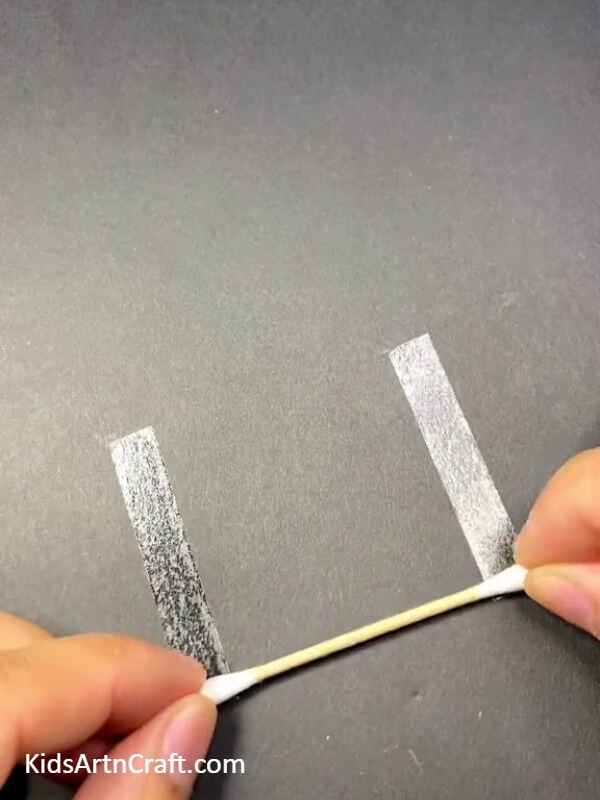
Take a big sheet of paper in colour black and place it on the table. Now, cut two pieces from the masking tape and stick them at a distance from the bottom right corner. They should be placed a little tilted, paralleled at a distance from each other as shown in the picture below. Peel the tapes off. Finally, take an ear bud and place it horizontally, on both the tape lines. Press it down to make it stick properly to the surface.
Step 2: Pasting all the earbuds
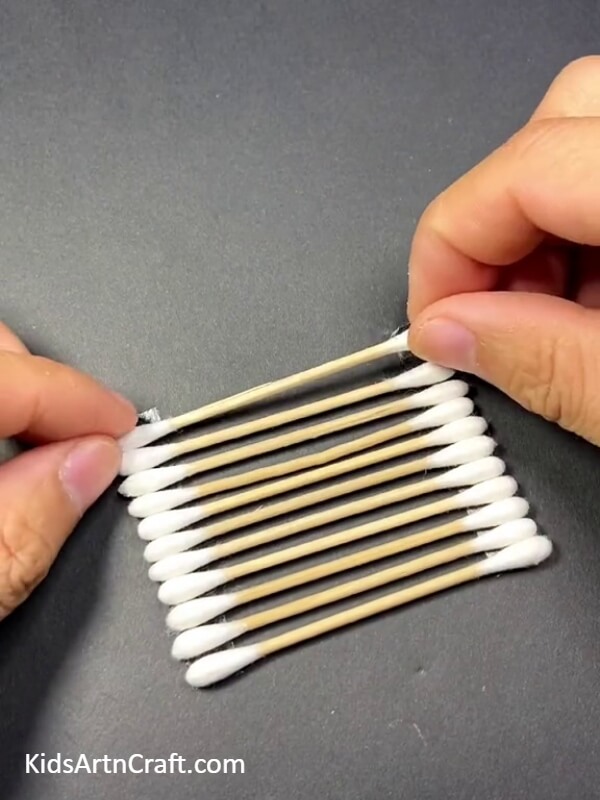
Take ten more earbuds and paste them horizontally, on the tape lines next to each other filling in the entire space between the paralleled tapes. See the picture below for reference.
Step 3: Pasting the blue sheet on the buds
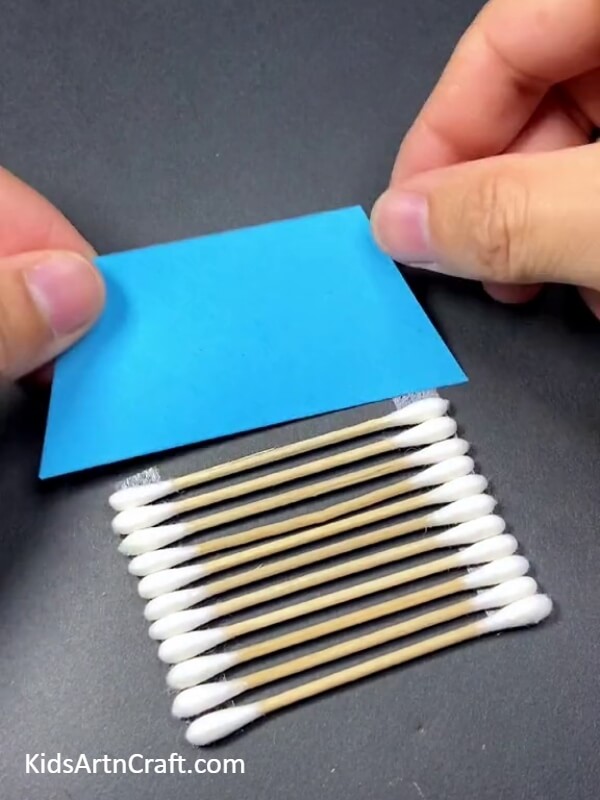
These buds will act as the basic structure of the house. Take a blue sheet of paper and cut a trapezium shape out of it. The size of the trapezium needs to be somewhat equal to the size of the ear buds. Paste the trapezium on above the ear buds, on the surface of the black sheet as shown in the picture below. This trapezium will serve as the roof of the house.
Step 4: Making a door and a window
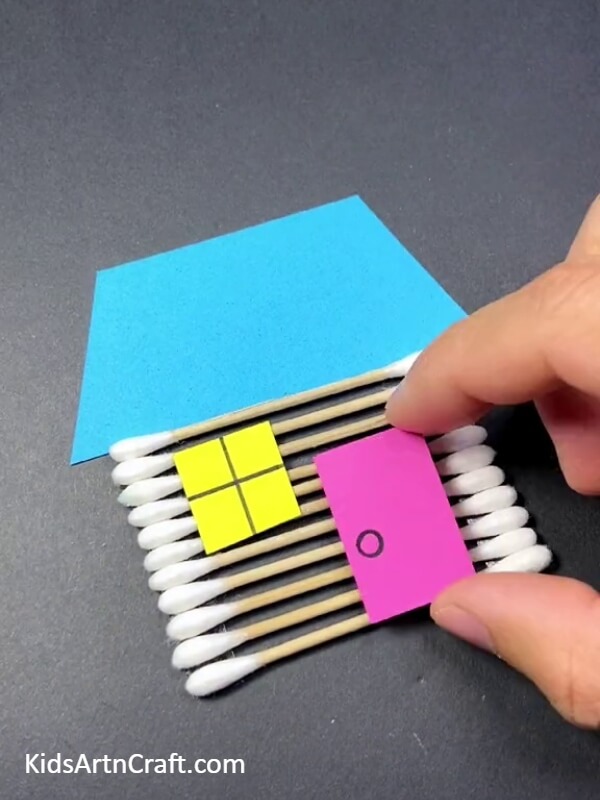
Take a pink sheet of paper and cut a rectangle out of it. Paste this rectangle, standing vertically on the bottom right side of the base structure of the house. Now, cut a smaller square out of a yellow sheet of paper. Paste this sheet on the top left side of the base structure of the house. See the picture below for reference. Finally, make a big cross on the yellow pasted square and draw a circle in the middle of the left side of the pasted pink rectangle. The square will serve as the window and the rectangle as the door of the house.
Step 5: Working with the clay dough
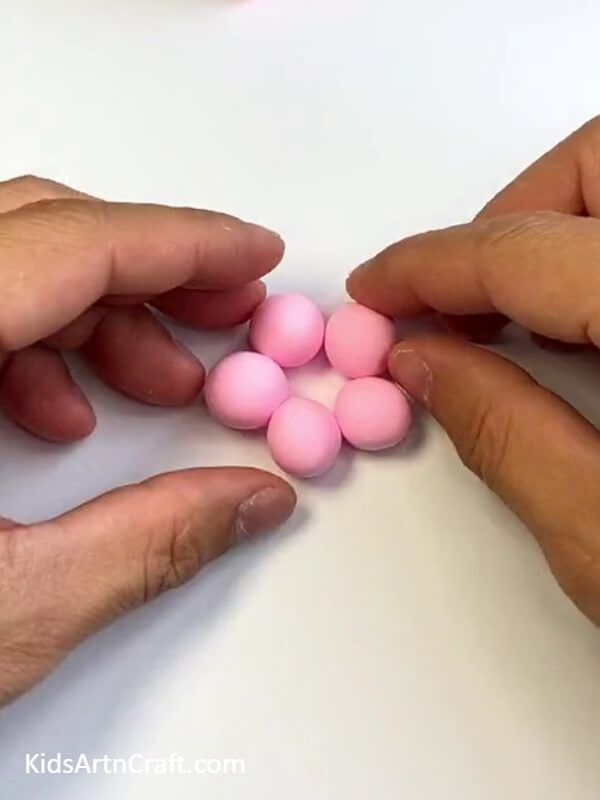
Take pink clay dough and start moulding it into small balls. Make five clay balls out of the dough and place them on the table, next to each other in a circle as shown in the picture below.
Step 6: Make marks in the middle of the clay balls
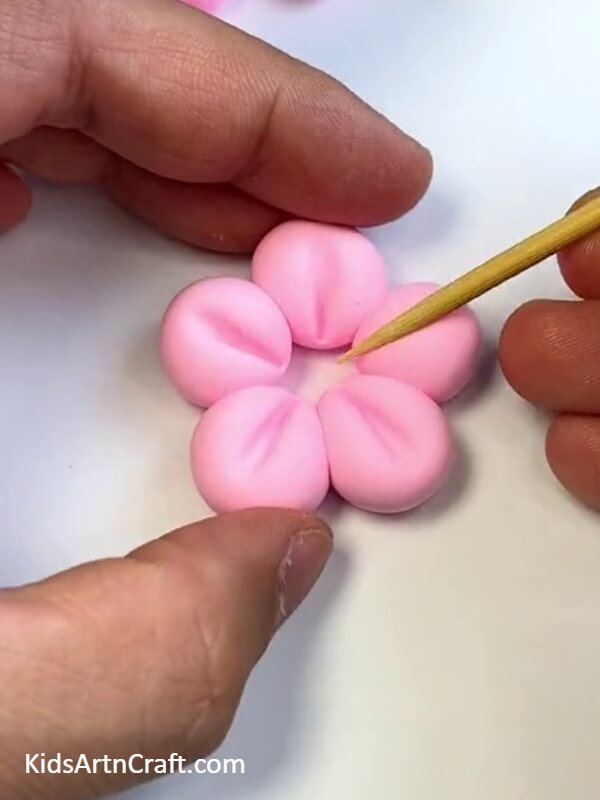
Take a tooth pick and place it in the middle of one of the clay balls and press it down to make a prominent mark. Repeat the process on rest of the clay balls. See the picture below for reference.
Step 7: Making a yellow clay ball
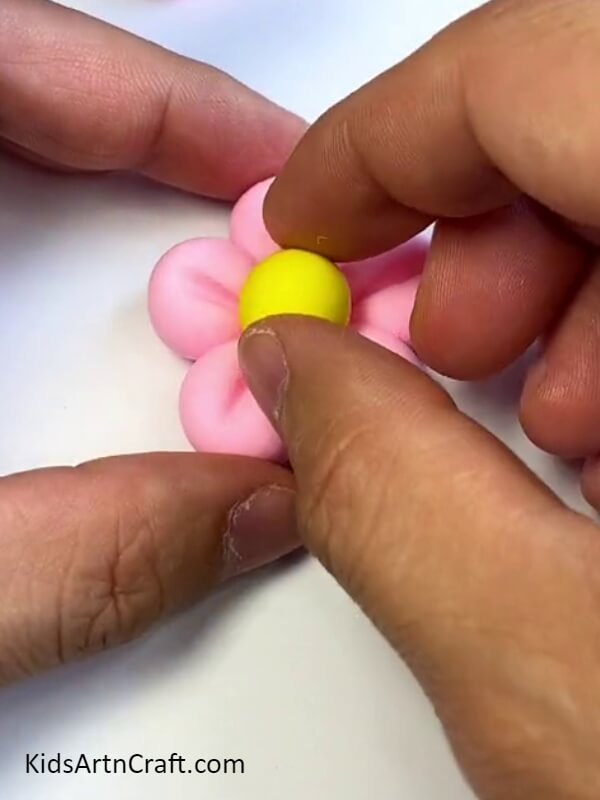
Take a yellow clay dough and mould a small ball out. Now place the yellow ball in the middle of the pink clay moulds. See the picture below for reference. These will serve as the floral shaped balloons making the house float in the air.
Step 8: Applying glue on the black sheet
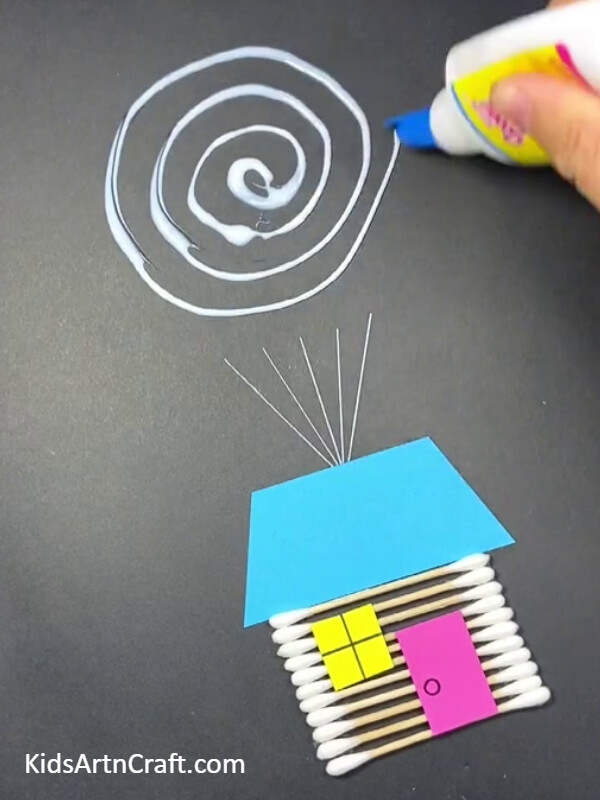
Take the black sheet containing the pasted house and make four lines above the blue roof . These lines need to be connected at the bottom as shown in the picture below. Now, apply liquid glue in a big spiral shape, a little above the four lines. See the picture below for reference.
Step 9: Making more floral clay balloons
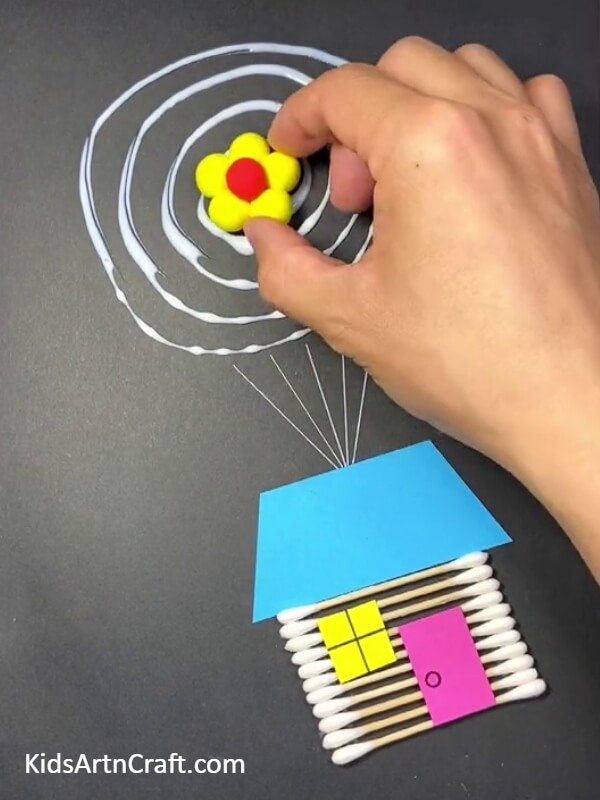
Take a yellow clay and repeat the steps you implemented on the pink clay and use red clay instead of the yellow clay ball in the middle of the pink flower. Remember to make this flower smaller than the pink one. Finally, paste this flower in the middle of the glue spiral on the black sheet as shown in the picture below.
Step 10: Make six more similar flowers with one slight difference
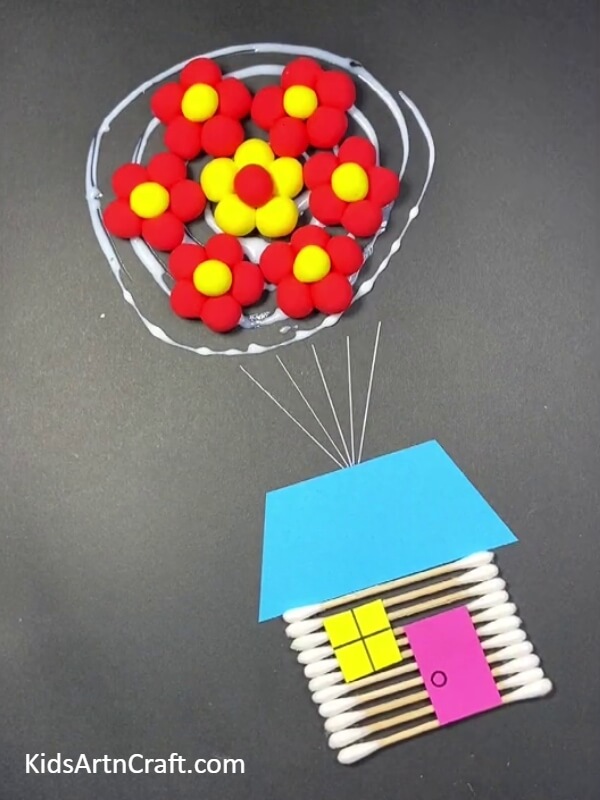
Make six more floral shapes as you did in the previous step, this time with ted petals and yellow centre. Paste all the six flowers around the flower you pasted in the previous step . See the picture below for reference.
Step 11: Making eleven more pink flowers
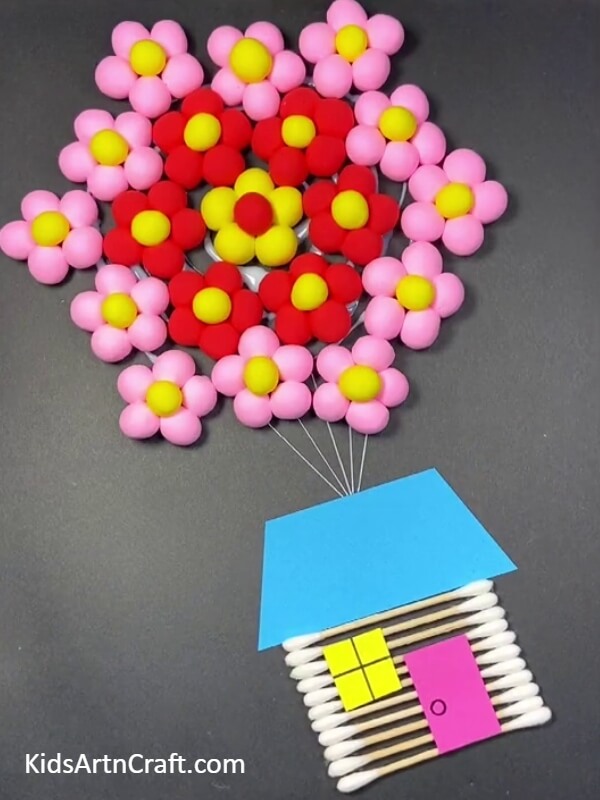
Follow the exact steps you implemented while making the pink floral shapes before. Make eleven more pink floral shapes from the clay dough. Finally, paste the clay flowers on the glue spiral, around the red flowers in the middle. See the picture below for reference. These flowers with serve as the inflated balloons carrying the house to the sky.
Step 12: Decorating the blank sheet around the house and the balloons
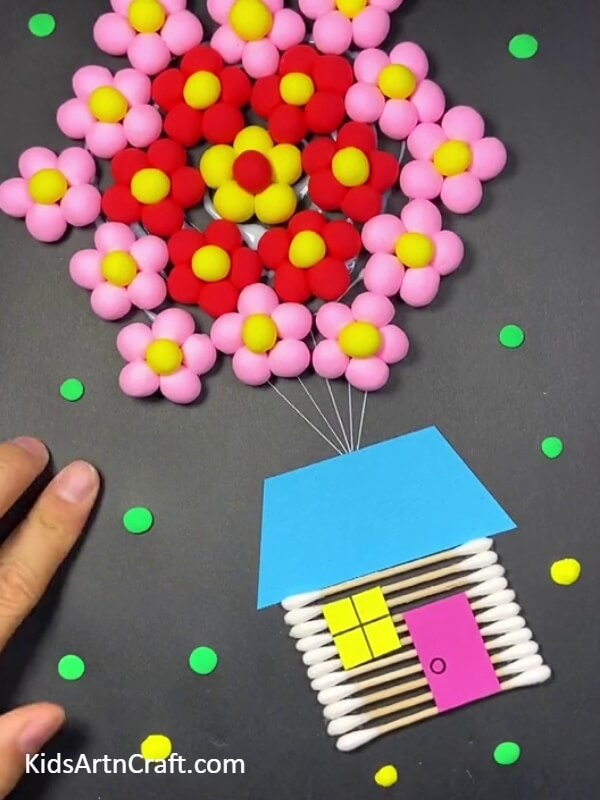
Take green clay and taking a small amounts of it between your fingers, press it to make a flat circular shape. Make plenty of these flat circles in both green and yellow clays and paste the all around the blank surface of the black sheet of surface as shown in the picture below.
Your Craft Is Ready!!
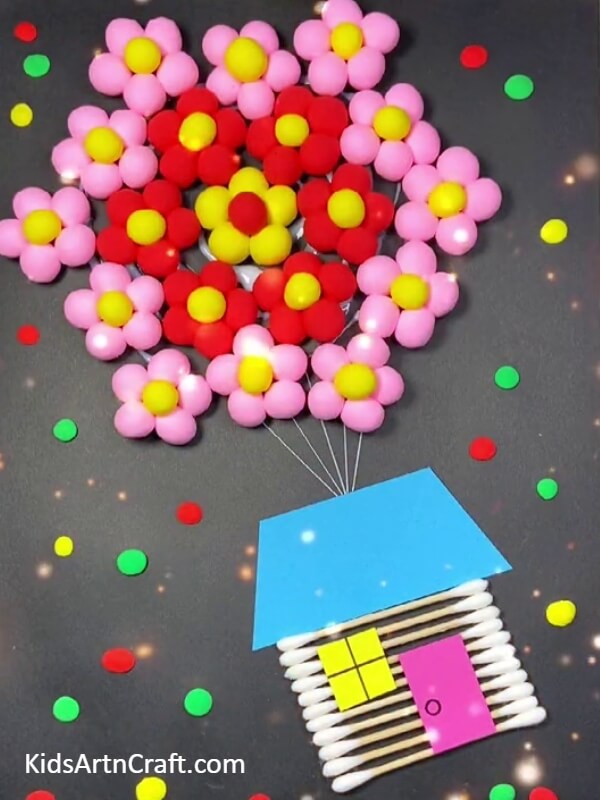
Repeat the process using a red clay this time and paste it around the blank surface of the black sheet as shown in the picture below.
This completes the process of making this flying house with its floral balloons ready to reach new destinations and float in the night sky. You can hang it on the walls of your room or paste it in your craft book.This tutorial taught you good clay moulding skills and and good pasting skills as well. You also learned to work with a new craft material,i.e, ear buds. Keep implementing these techniques on your own ideas to master your art and craft game. Good luck.
Some More Flying House Tutorial
Creating a flying home with leaves for children
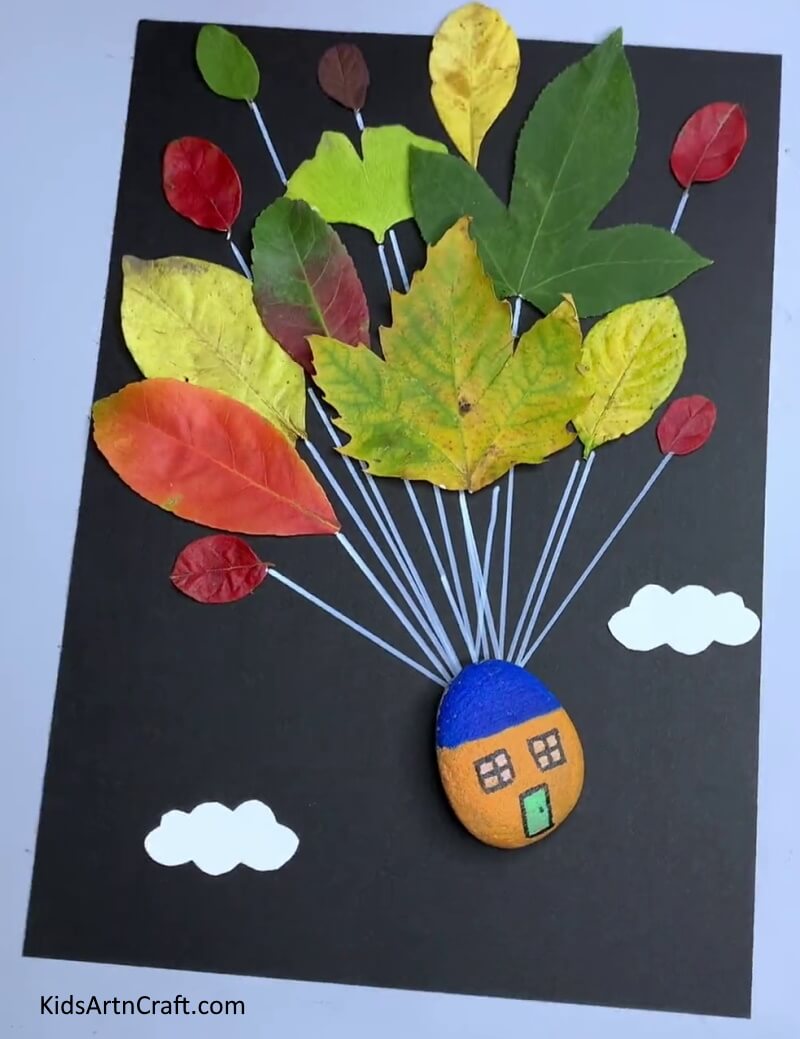
Image Source/Tutorial: Kids Art & Craft
This creative idea of creating a flying home with leaves for children is a great way to bring joy and wonder to their lives. It encourages their imagination and helps them explore their environment. With this idea, children can create their own magical world and have fun in the process.
Follow us on Youtube for art and craft tutorials and much more.
More Articles from Kids Art & Craft
- Pineapple Pine Cone Step-by-Step Tutorial for Kids
- Recycled Bookmark Ideas for Kids
- Recycled Egg Carton Bunny Tutorial for Kids
- Paper Crafts And Activities Video Tutorial for Kids
- How to Make Frog by Toilet Paper Roll Step-by-Step Tutorial
Related posts:
- Pineapple Pine Cone Step-by-Step Tutorial for Kids
- Recycled Bookmark Ideas for Kids
- Recycled Egg Carton Bunny Tutorial for Kids
- Paper Crafts And Activities Video Tutorial for Kids
- How to Make Frog by Toilet Paper Roll Step-by-Step Tutorial
- DIY Foam Net Home Craft For Kids
- Easy Balloon Face Art and Craft for Kids
- DIY Step by Step Finger Puppet Snowman Craft for Kids


