Kids Activities
Learn To Make Paper Origami Rabbit Craft Tutorial For Kids

This article provides detailed instructions on how to make a paper rabbit craft with children. It is a step-by-step guide with fun variations.
Origami is an ancient Japanese art form of paper folding that dates back to the 17th century. It can be a great way to teach children how to express their creativity through crafting. Making origami animals is a fun and easy way to create beautiful works of art. The origami rabbit is a great origami craft for kids to make.
Making origami rabbits is a great activity for kids of all ages. It can be a fun and creative way to spend time with your children. Plus, they will have a beautiful origami rabbit to show off to their friends and family. So, get your supplies ready and get crafting!
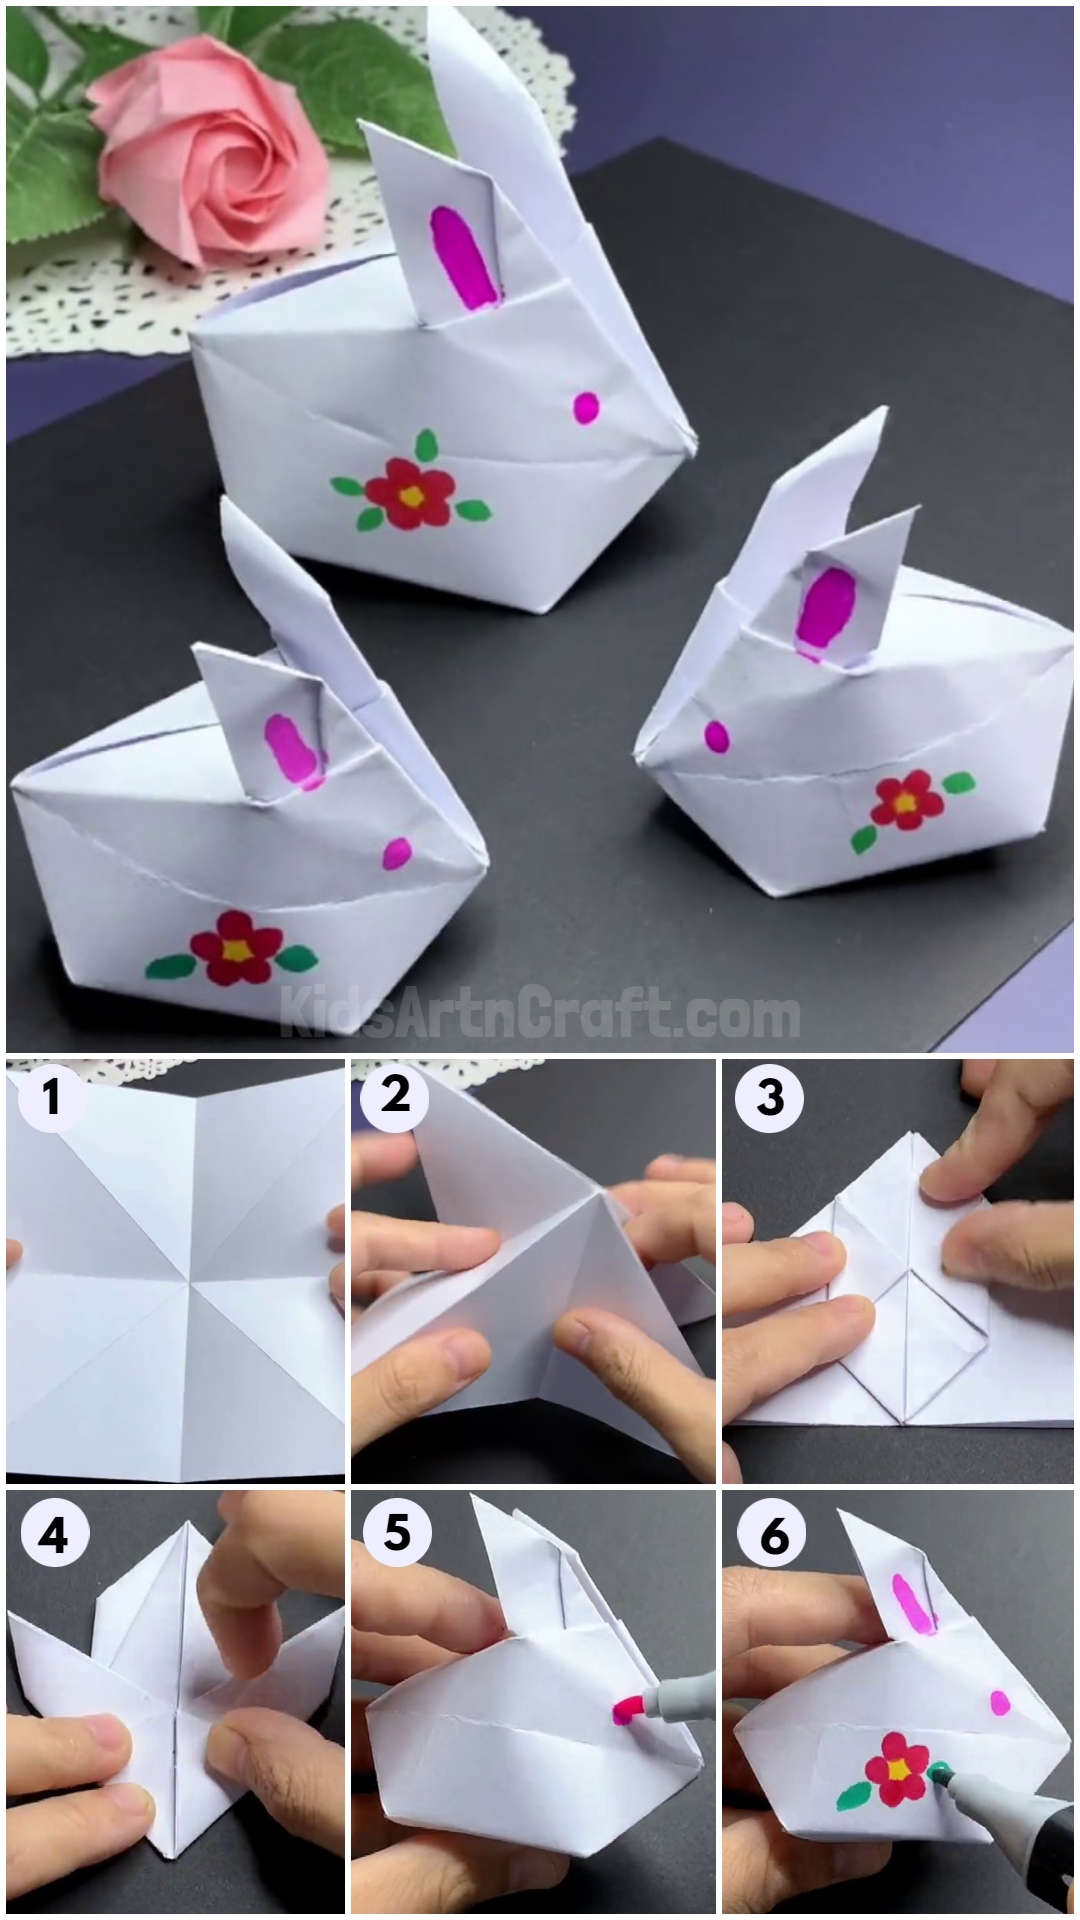
Homemade Rabbit Craft Made With Paper
 Read More: Simple Way To Make Paper Flower Tree Craft
Materials Required
- Origami White Paper
- Sketch Pens (Red, Pink, Green, And Yellow)
Procedure
Step 1: Making Creases
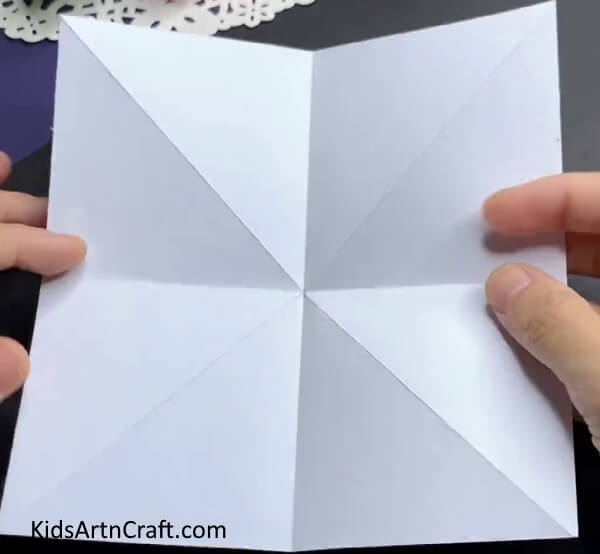
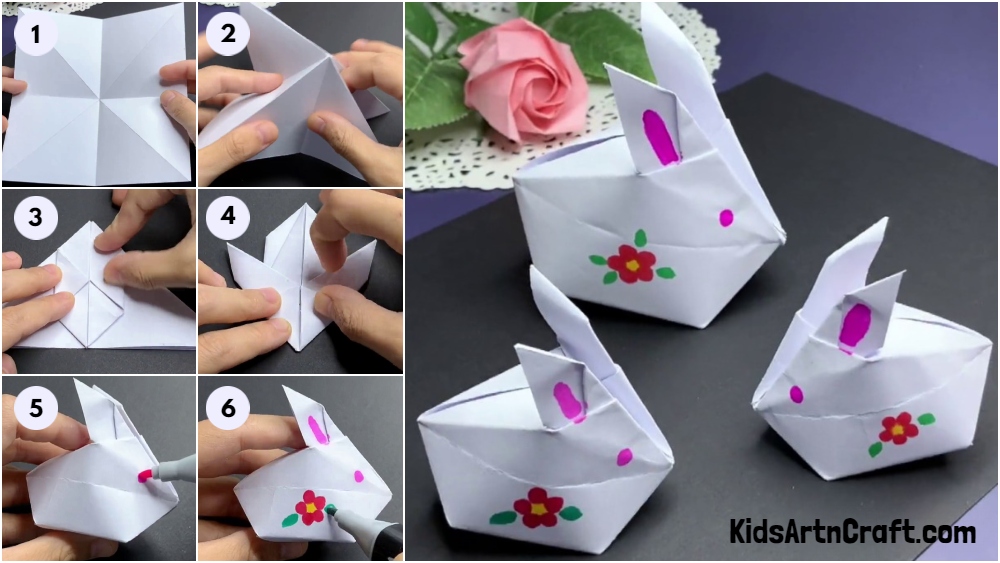
To begin with, the origami rabbit craft, take a white origami paper. Fold it half vertically and crease it well, then, unfold it. Repeat the same by folding the paper half horizontally and diagonally (both sides) to make creases.
Step 2: Forming A Triangle
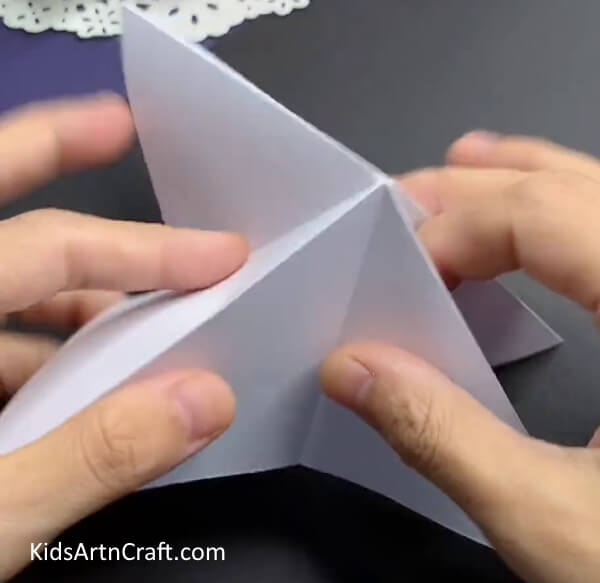
Now, fold the paper along the horizontal crease and hold your paper from the center. Now, push in the ends of the horizontal crease and let paper out along the diagonal ones to form triangles, and then fold the triangles along the middle crease you will see over them, to overlap them. Finally, you will see a single triangle with folded sides.
Step 3: Folding Triangle Edges Upwards
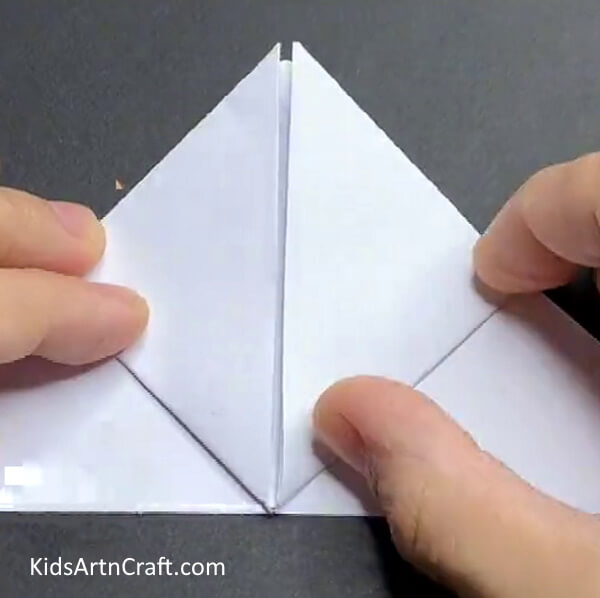
Once the triangle is formed, fold the edges of the upper layer of the triangle in the upward direction and bring it to the middle. You will see a diamond shape with a partition.
Step 4: Folding Diamond Corners
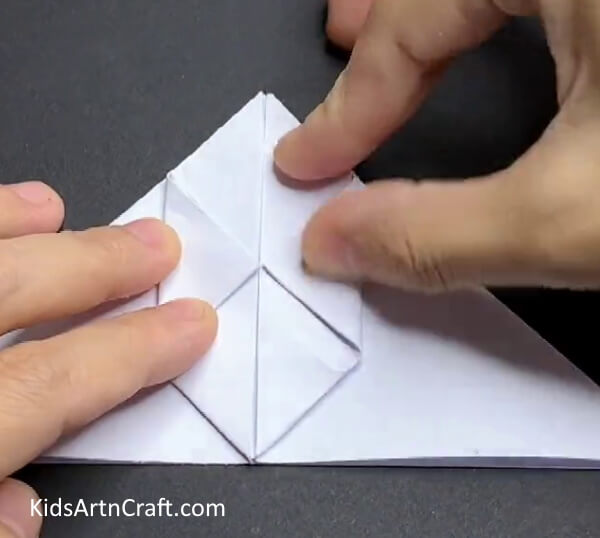
Fold the left and right corners of the diamond to the middle partition. These will act as pockets for the next step.
Step 5: Inserting Upper Corners In The Pockets
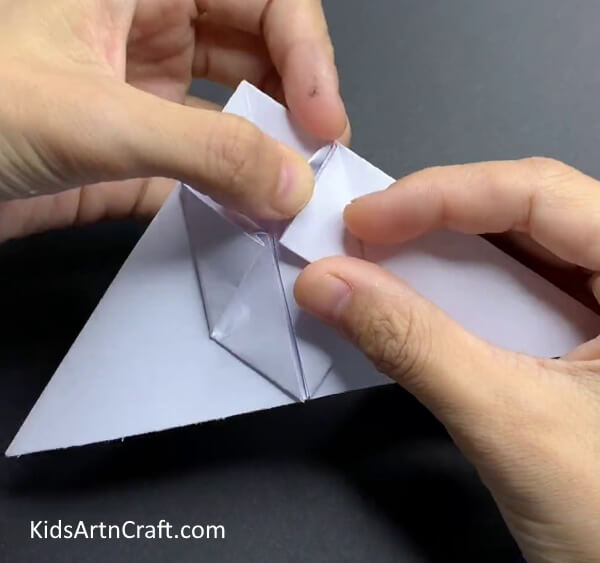
Insert the upper corners of the diamond in the left and right pockets you made in the previous step.
Step 6: Inserting By Leaving Some Part
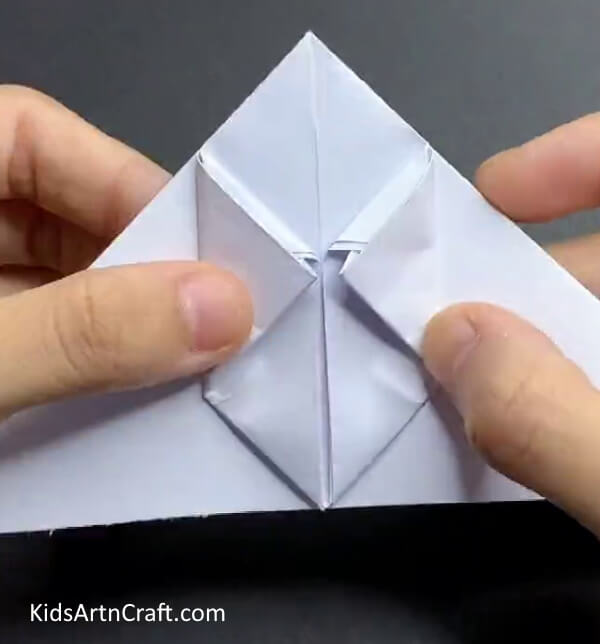
Make sure to insert the corners into the pockets by leaving some parts out and crease these folds as you can see in the image.
Step 7: Flipping The Paper
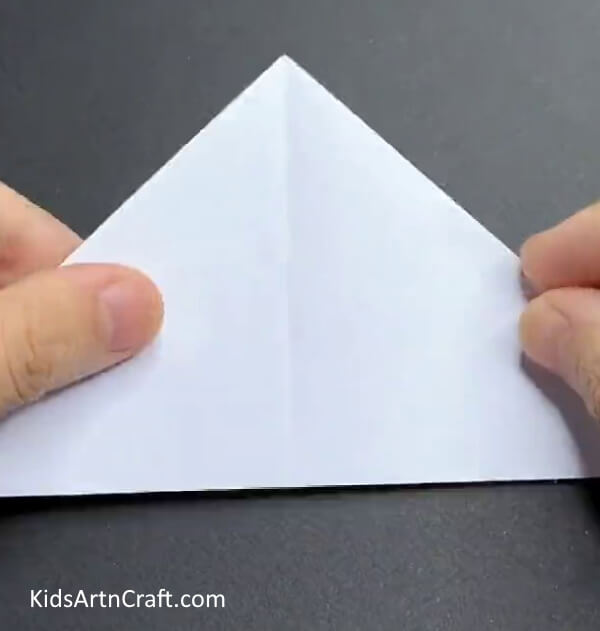
Now, flip the craft back.
Step 8: Folding Sides Along The Middle Crease
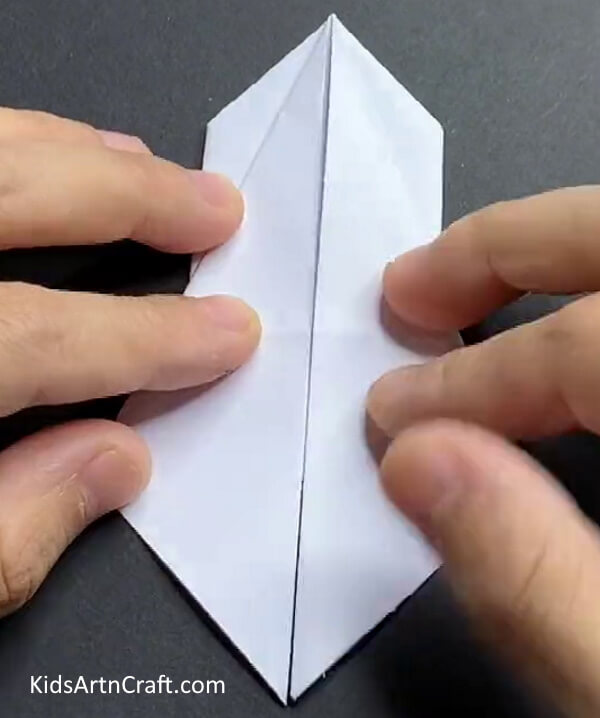
Take the corners of the triangle and fold the sides along the middle crease over the triangle. You will see a kite shape.
Step 9: Folding Bottom Corners
Fold the bottom corners of the kite shape in the upward opposite diagonal direction from the middle half.
Step 10: Folding The Sides Along The Back Sides Of Paper
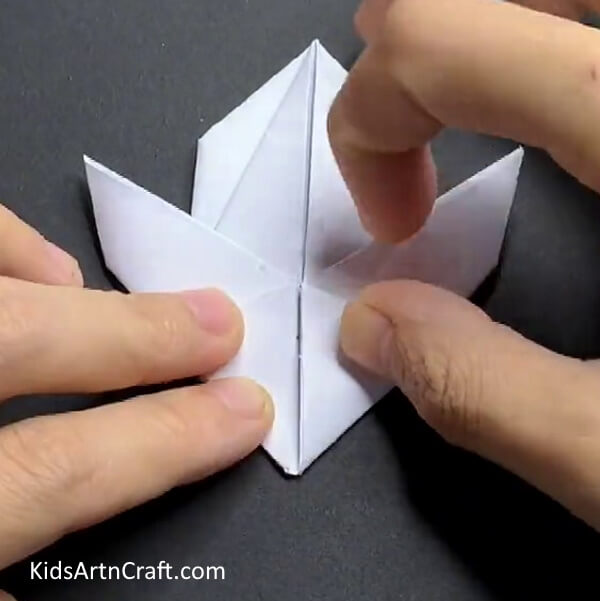
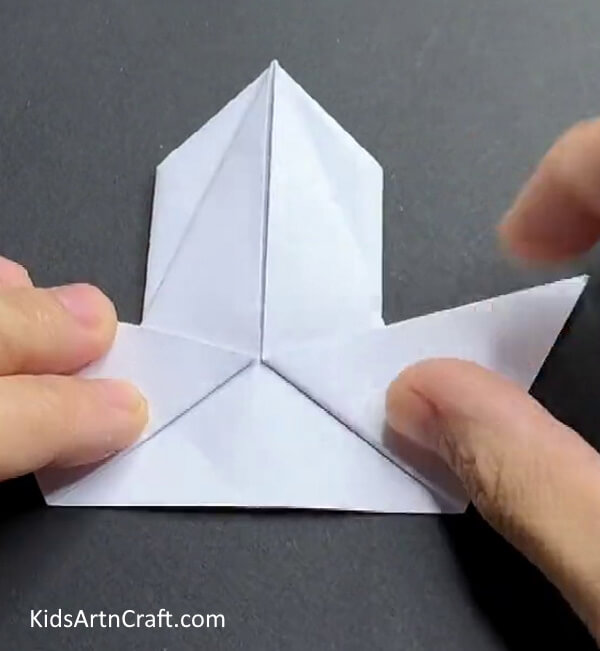
Fold the bottom side of the paper diagonally to make a printed shape in the bottom mid-end and also align with the back paper. These folds will look like an arrow with a partition.
Step 11: Making A Rabbit
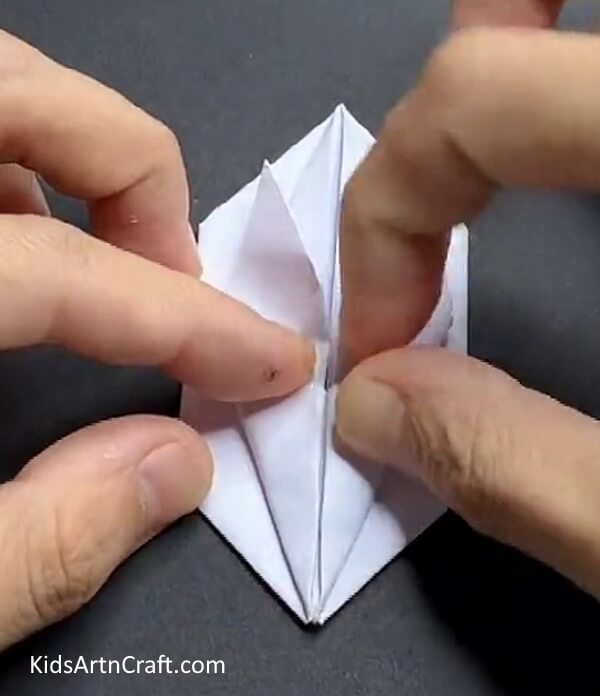
Fold the outward left and right slanting sides of the arrow to the middle partition to make creases. Unfold these folds to make to coming flaps of these folds. These will be the ears of your rabbit.
Now, from the back side of the paper, hold it from the side and try to fold it in half along the middle crease over it. Make sure to not fold it entirely, just to give it a slanting look. This will be your rabbit. Now, blow in your rabbit to give it a 3D shape.
Step 12: Making An Eye
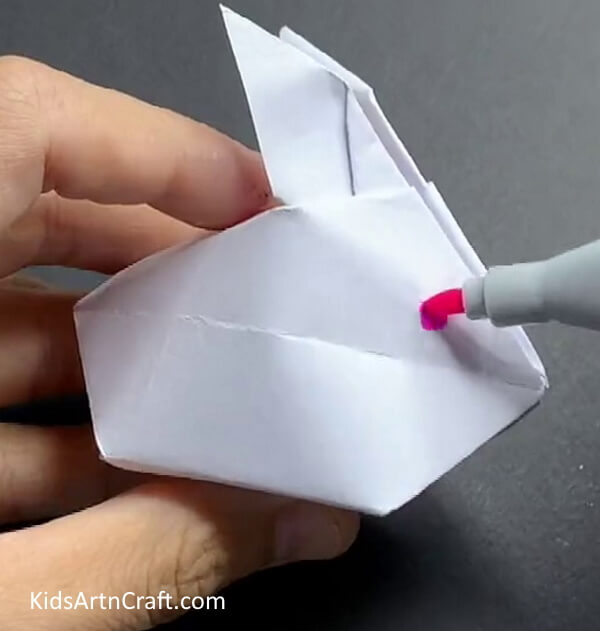
Using a pink sketch pen, make a dotted eye over the rabbit as shown in the image.
Step 13: Detailing The Rabbit
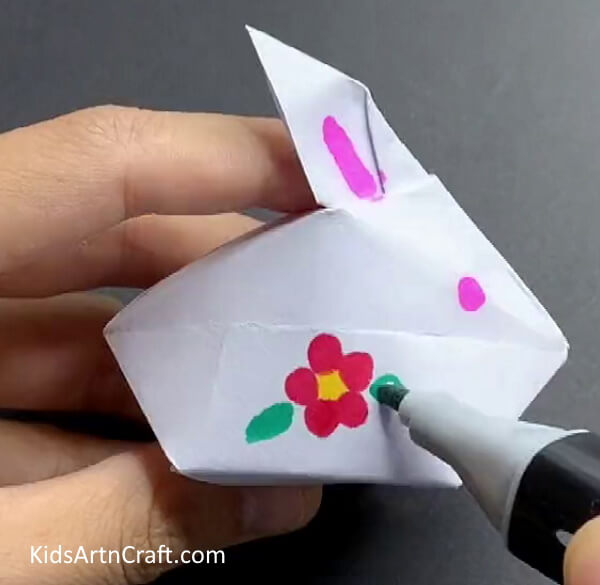
Now, using green, red, and yellow sketch pens make a flower with yellow center and red petals and also leaves around it randomly. Also, using the pink sketch pen, make a line in the ears to detail them as shown in the image.
Your Origami Paper Rabbit Is Ready!
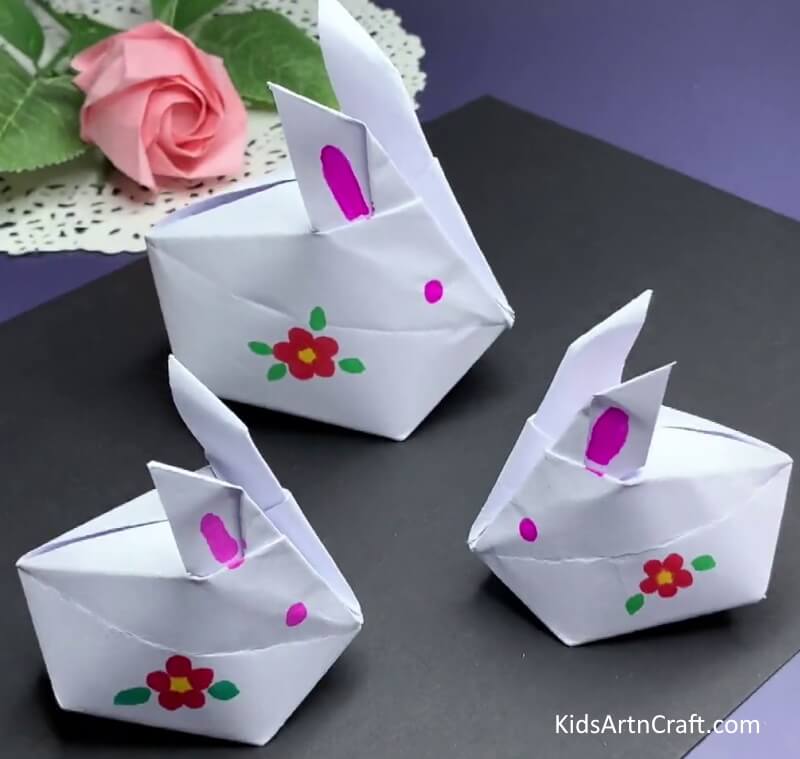
Yay! Your amazing paper origami bunny craft is ready in no time!
This paper rabbit craft tutorial is a great way to get your kids excited about crafting and help them develop their creative skills! It is a fun project that they can take pride in creating! This craft is a fun and creative way for kids to explore their artistic side! Let them unleash their creativity and encourage them to customize it in their own way to make it as unique as they are!
We hope you like the article and share it with your buddies! Also, do leave your feedback in the comments section below! We would love to hear from you!
Some More Bunny Craft Tutorial
Crafting A Paper Cup Bunny Craft For School Project
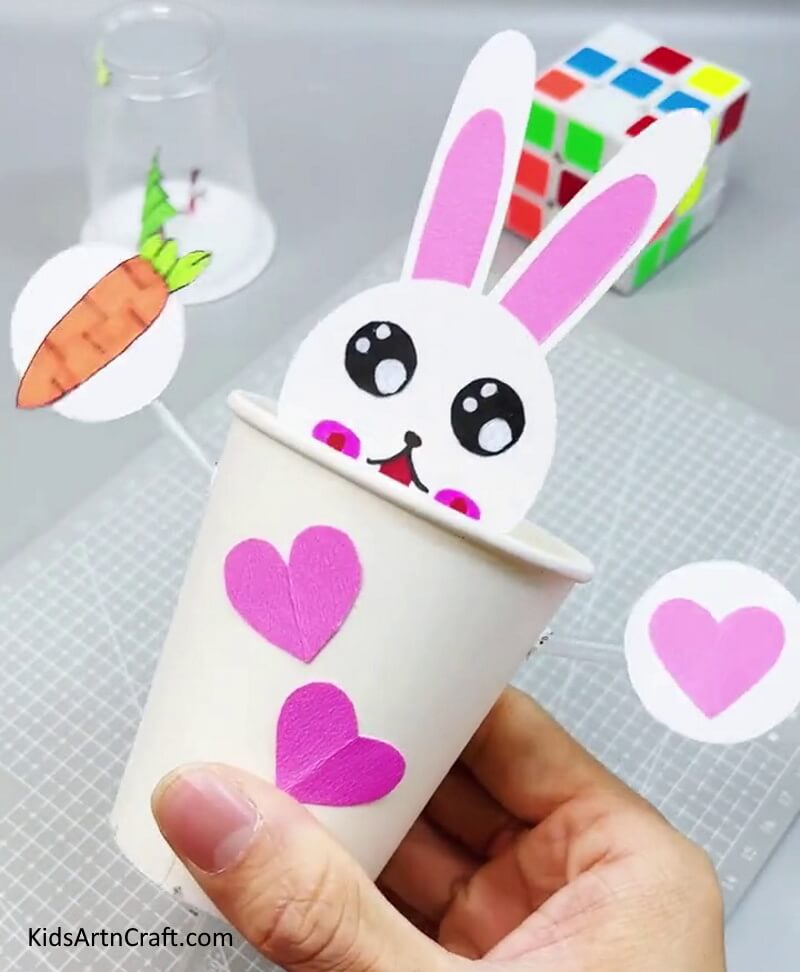
Image Source/Tutorial: Kids Art & Craft
This craft is perfect for a school project or a fun activity with your kids! With just a few simple materials, you can easily make a cute bunny out of a paper cup. This craft is sure to be a hit with both teachers and students alike!
Follow us on YouTube for art and craft tutorials and much more.
More Articles from Kids Art & Craft
- How To Make Sunflower Clock Craft Using Paper
- 3D Cactus Paper Craft Tutorial for Kids
- Paper Cutting Shapes Crafts
- Paper Designs for Kids
- Easy Crafts for 2nd Graders


