


Painting
Realistic Peacock Painting Idea Step-by-step Instructions

Want to make a stunning and realistic peacock painting?! Your search ends right here! Create this beautiful peacock with just some easy tips and tricks to make it like a pro!
A warm welcome to you our art and craft lover! This peacock painting tutorial will leave you stunned by the results! Peacocks are the prettiest birds in nature and kids admire them too! This artwork will the kids entertained in a fun learning activity! This tutorial involves some easy steps to create this realistic peacock like a pro! This will also include some tips and tricks to make this artwork easier and more detailed even for a kid to make! This can also be a unique and colorful piece of artwork to showcase in your drawing room! I’m sure everybody will admire your creation!
Realistic Peacock Painting Craft Idea For Kids
Read More: Easy Paper Strips Peacock Craft Tutorial for kids
Materials Required
- White Circular Paper Sheet
- Circle Stamps
- Paint Colors
- Paintbrush
- Toothbrush
- Cotton Earbud
Procedure
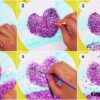
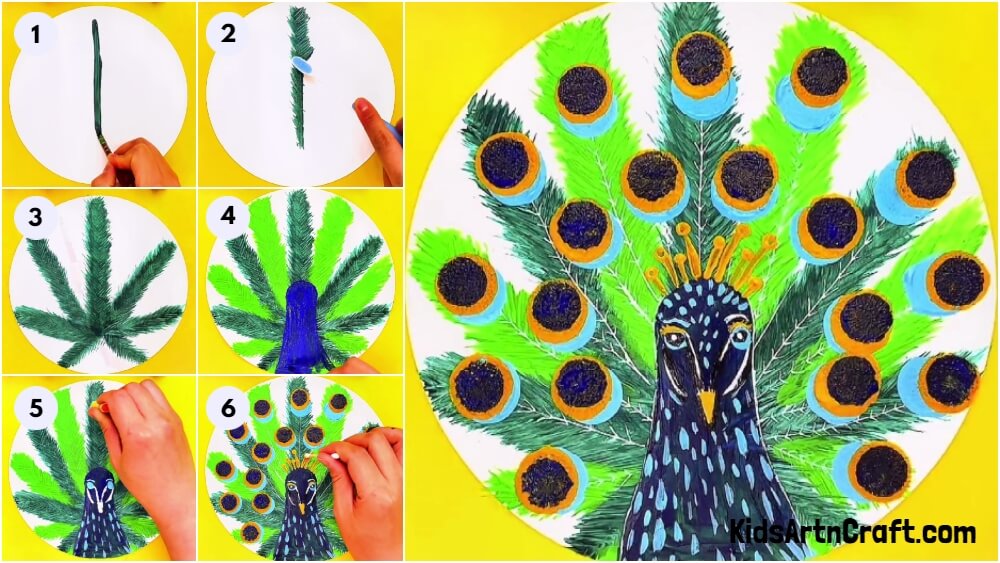
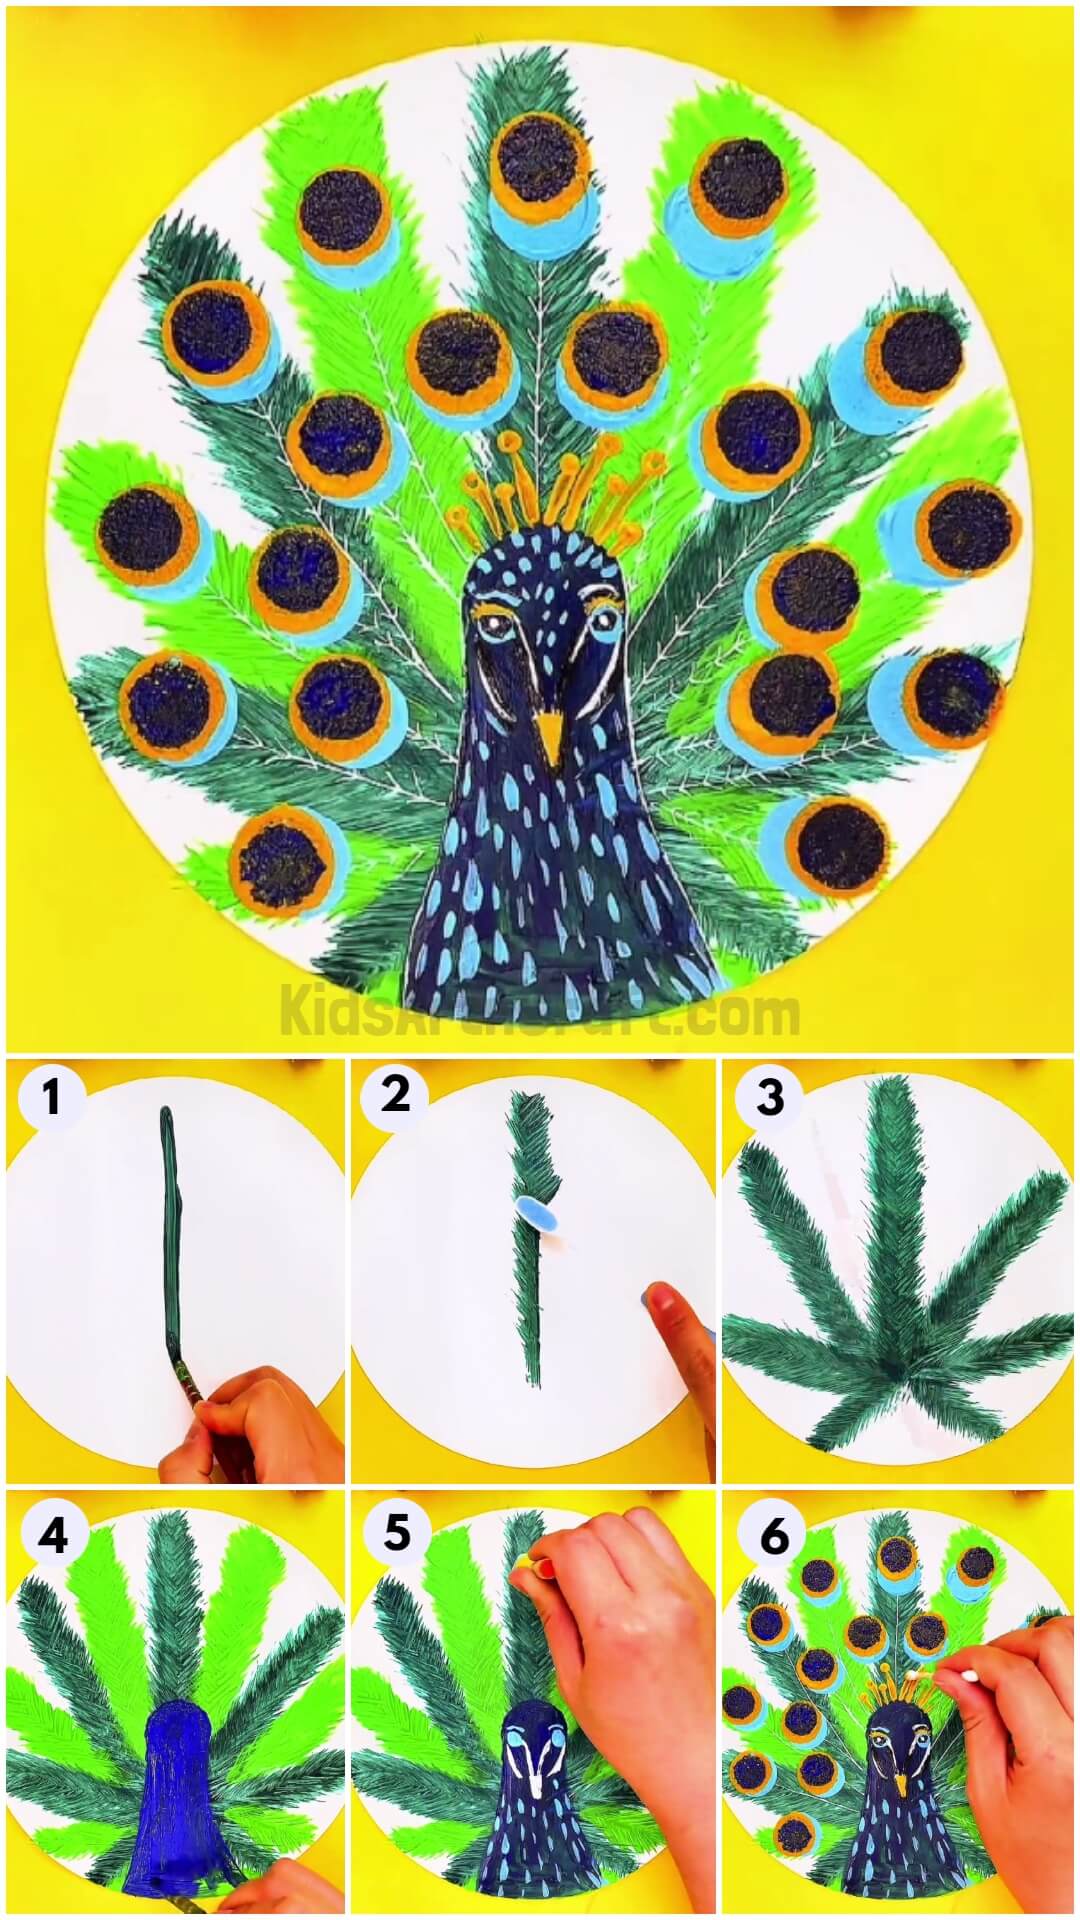
Step 1: Making A Straight Line
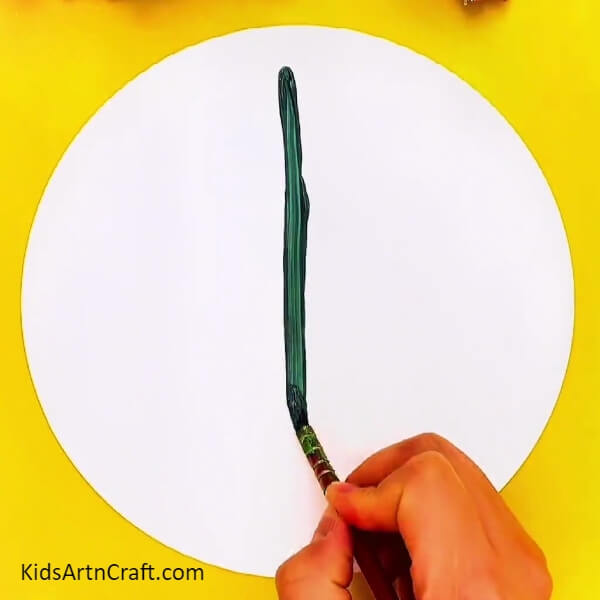
Let’s make this artwork by taking a white circular paper sheet and a paintbrush. Dip the paintbrush into dark green paint and make a straight line in the middle of the paper using it.
Step 2: Making A Feather

Grab a toothbrush and make slanting strokes on both sides of the line to form a feather.
Step 3: Making More Dark Green Feathers
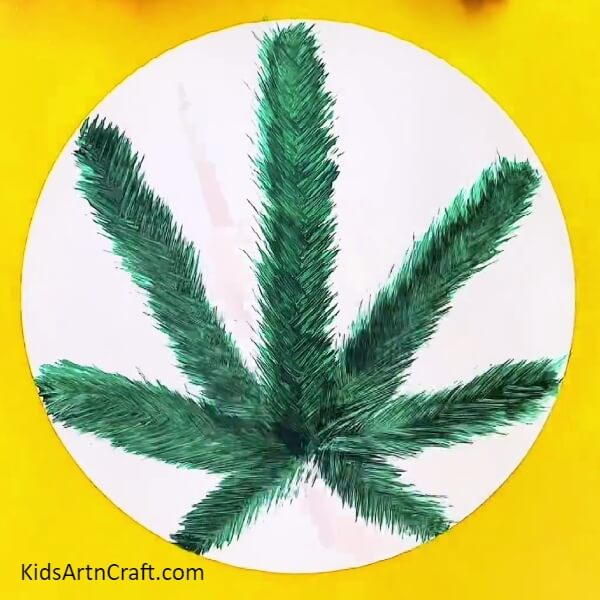
Following the same steps mentioned above, make 5 more feathers of the peacock in a star shape over the whole sheet as shown.
Step 4: Making A Light Green Paint Line

Dip the paintbrush into light green paint and between the 2 dark green feathers, make a line using it.
Step 5: Making Light Green Feather

Using the toothbrush, make slanting strokes from both sides of the light green line to form a feather.
Step 6: Making More Light Green Colored Feathers

Following the same, between each and every dark green feather, make a light green feather. Also, normally paint the bottom region between the dark green feathers with light green paint.
Step 7: Stamping A Peacock Neck
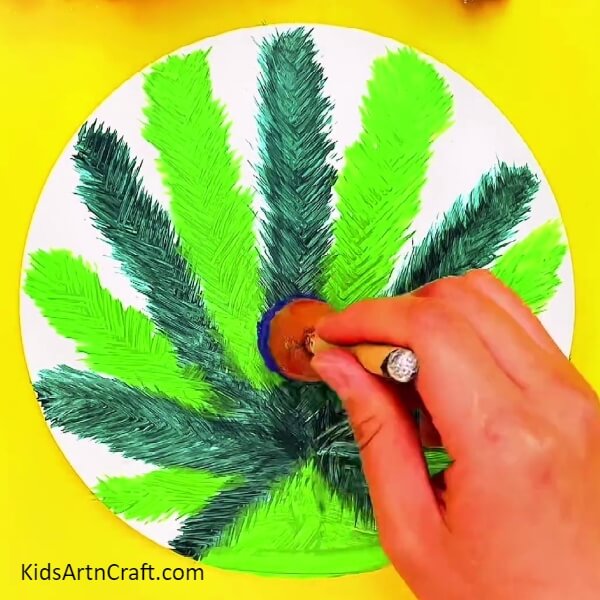
Dip a circle stamp into the dark blue paint and dab it in the center of the paper now drag it to the bottom of the paper to make a peacock neck.
Step 8: Shaping The Neck And Face Of Peacock
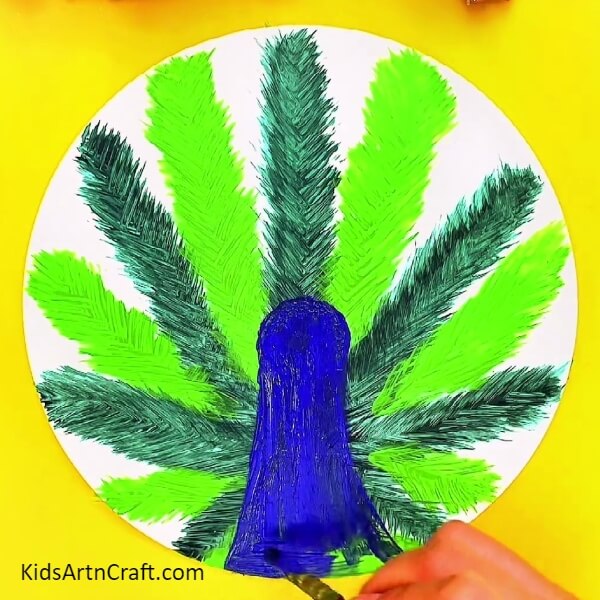
Dip the paintbrush into the dark blue paint and make curvy lines from the top of the circle stamp line to the bottom and paint the gap to broaden the bottom region of the neck.
Step 9: Detailing The Face And Neck Of The Peacock
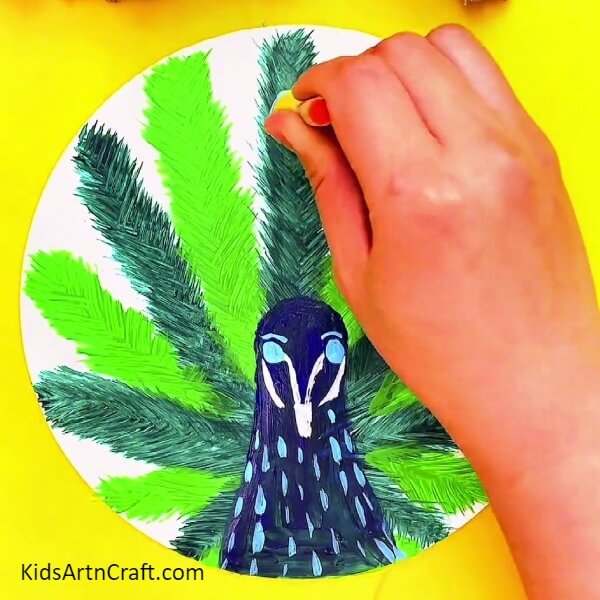
Dip the paintbrush into the light blue paint and make 2 eyebrows and round eyes over the face of the peacock and also make dashed lines over its neck. Now for the nose and beak, dip the paintbrush into white paint and make a rounded triangular beak below-between the eyes and connect it with the eyes by making curve lines coming from both eyes.
Step 10: Stamping Light Blue Circles
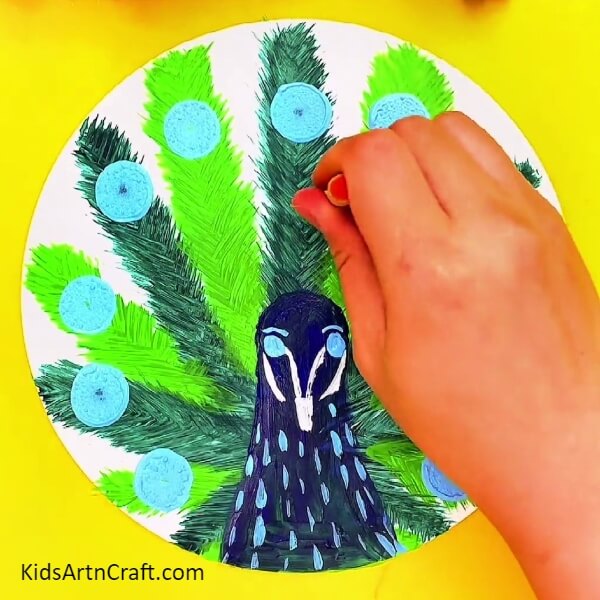
Dip the circle stamp into the light blue paint and dab it over the top of each feather and also below and between each already stamped circle.
Step 11: Stamping Yellow Circles
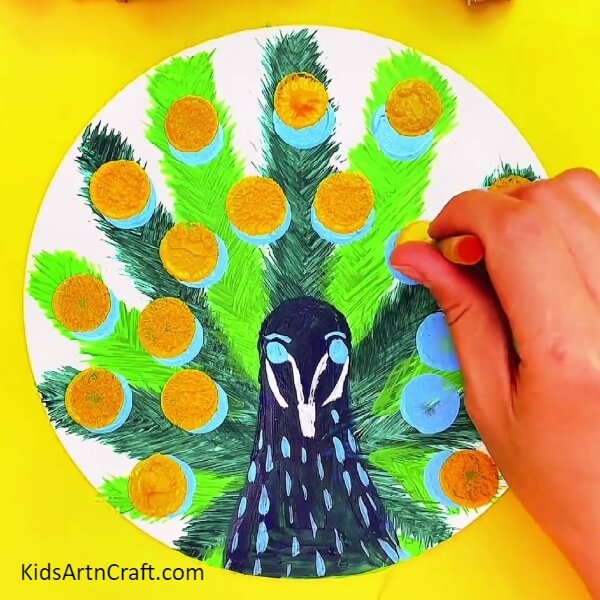
Dip the circle stamp into yellow paint and dab it over the blue circle by leaving some gaps over it.
Step 12: Forming Eye Feathers
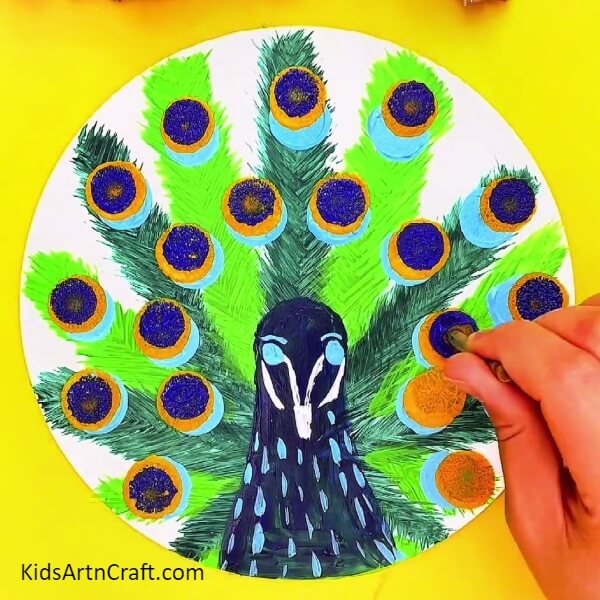
At last, dab a relatively small dark blue circle stamp over each yellow circle to form the eye feathers of the peacock.
Step 13: Detailing The Facial Features And Feathers
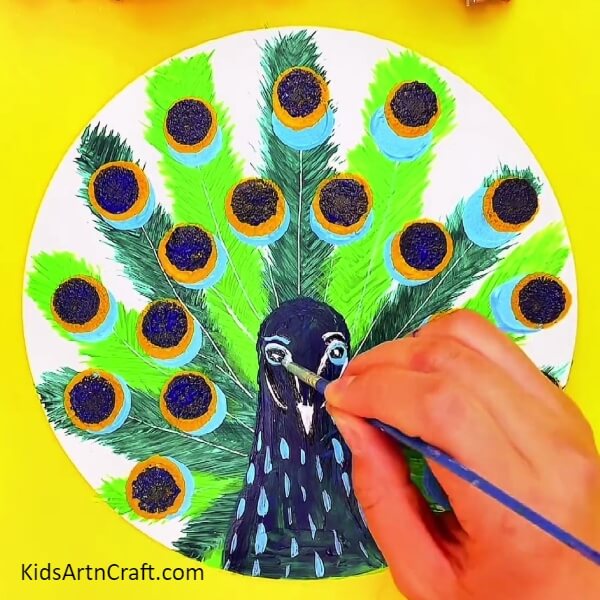
Using a paintbrush, make white thin lines in the middle of the feathers to detail them. Also, make white eyeballs in the eyes using white and dark blue paint.
Step 14: Making Peacock Crest
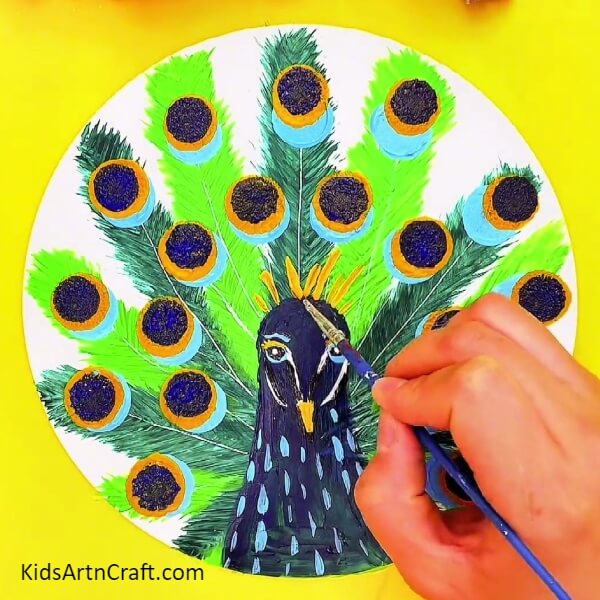
Dip your paintbrush into yellow paint and make the eyelashes and beak of the peacock and then make lines over the peacock to make its crest over the head.
Step 15: Detailing The Crest
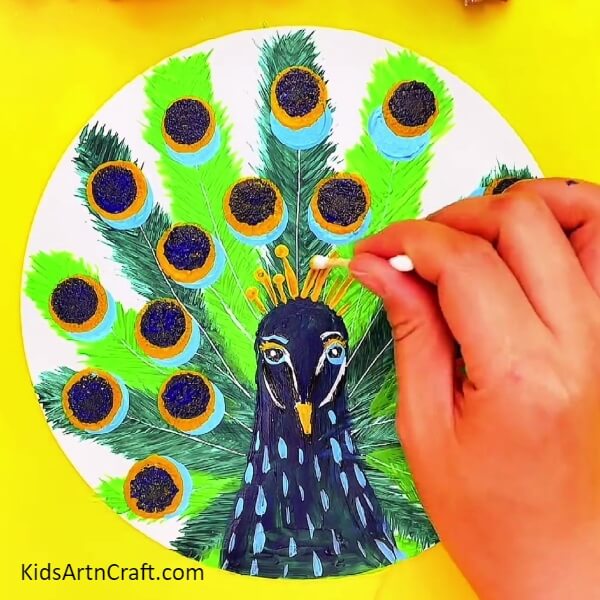
Dip a cotton earbud into the yellow paint and dab it over the end of the crest to give them details.
Step 16: Making Peacock Pattern Over Face
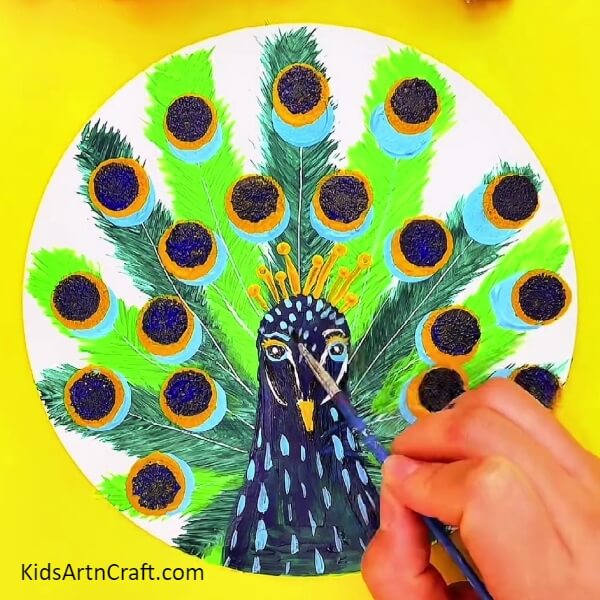
Make small dashes lines over the head of the peacock to make its body pattern.
Now, The Final Look Of Your Peacock Painting!
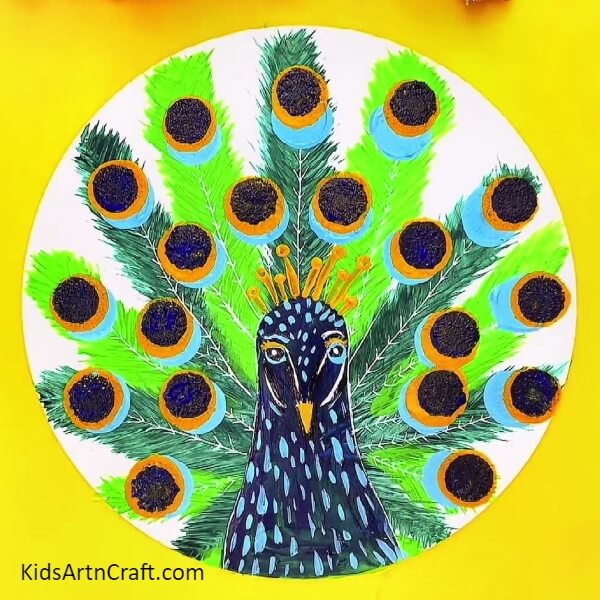
I’m literally stunned by the results! They look astonishing!
This peacock painting looks extremely hard but this step-by-step easy tutorial made it easier! The tips and tricks for painting the feathers using a toothbrush, stamping eye feathers and neck, etc. turned out to be very useful in making this masterpiece! This looks as if a peacock is standing right in front of me! Showoff your creation to everyone!
Some More Peacock Craft Tutorial
Beautiful Paper Strips Peacock Craft For Kids
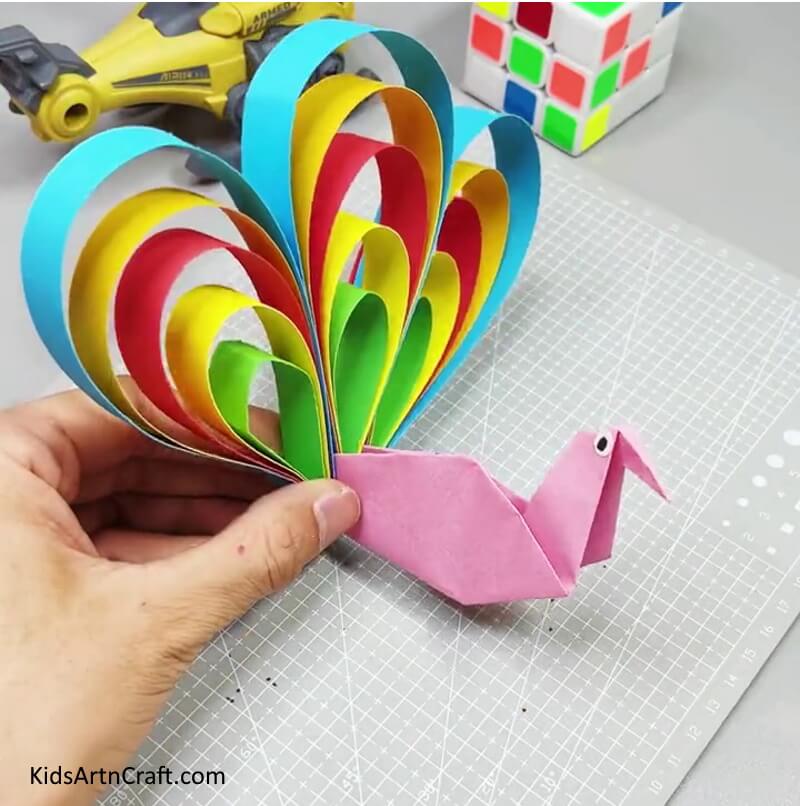
Image Source/Tutorial: Kids Art & Craft
This paper strips peacock craft is a fun and creative activity for kids. It uses colorful paper strips to make a beautiful peacock picture. It’s a great way to teach children about colors and shapes while they have fun with crafting.
Follow us on Youtube for art and craft tutorials and much more.
More Articles from Kids Art & Craft
- DIY Bird Nest Paper Craft For Kids
- Easy Paper Robot Craft Step-By-Step Tutorial
- DIY Easy Paper Strawberry Tutorial For Kids
- Easy Dragon Boat Craft Step-by-Step Tutorials For Kids
- DIY Simple Paper Toy Craft For Kids To Play