Painting
Pretty Peacock Finger Impression Painting Idea For Kids

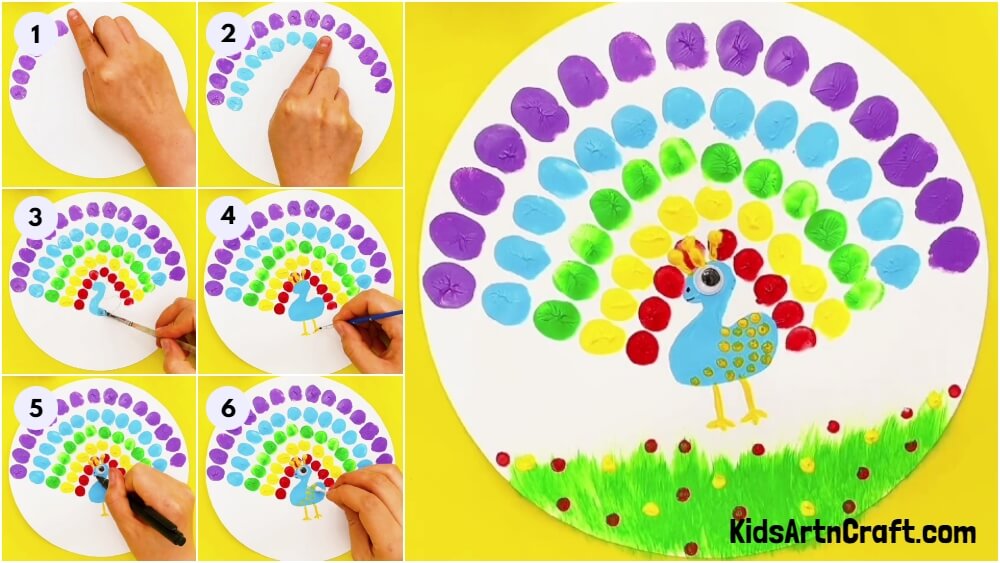
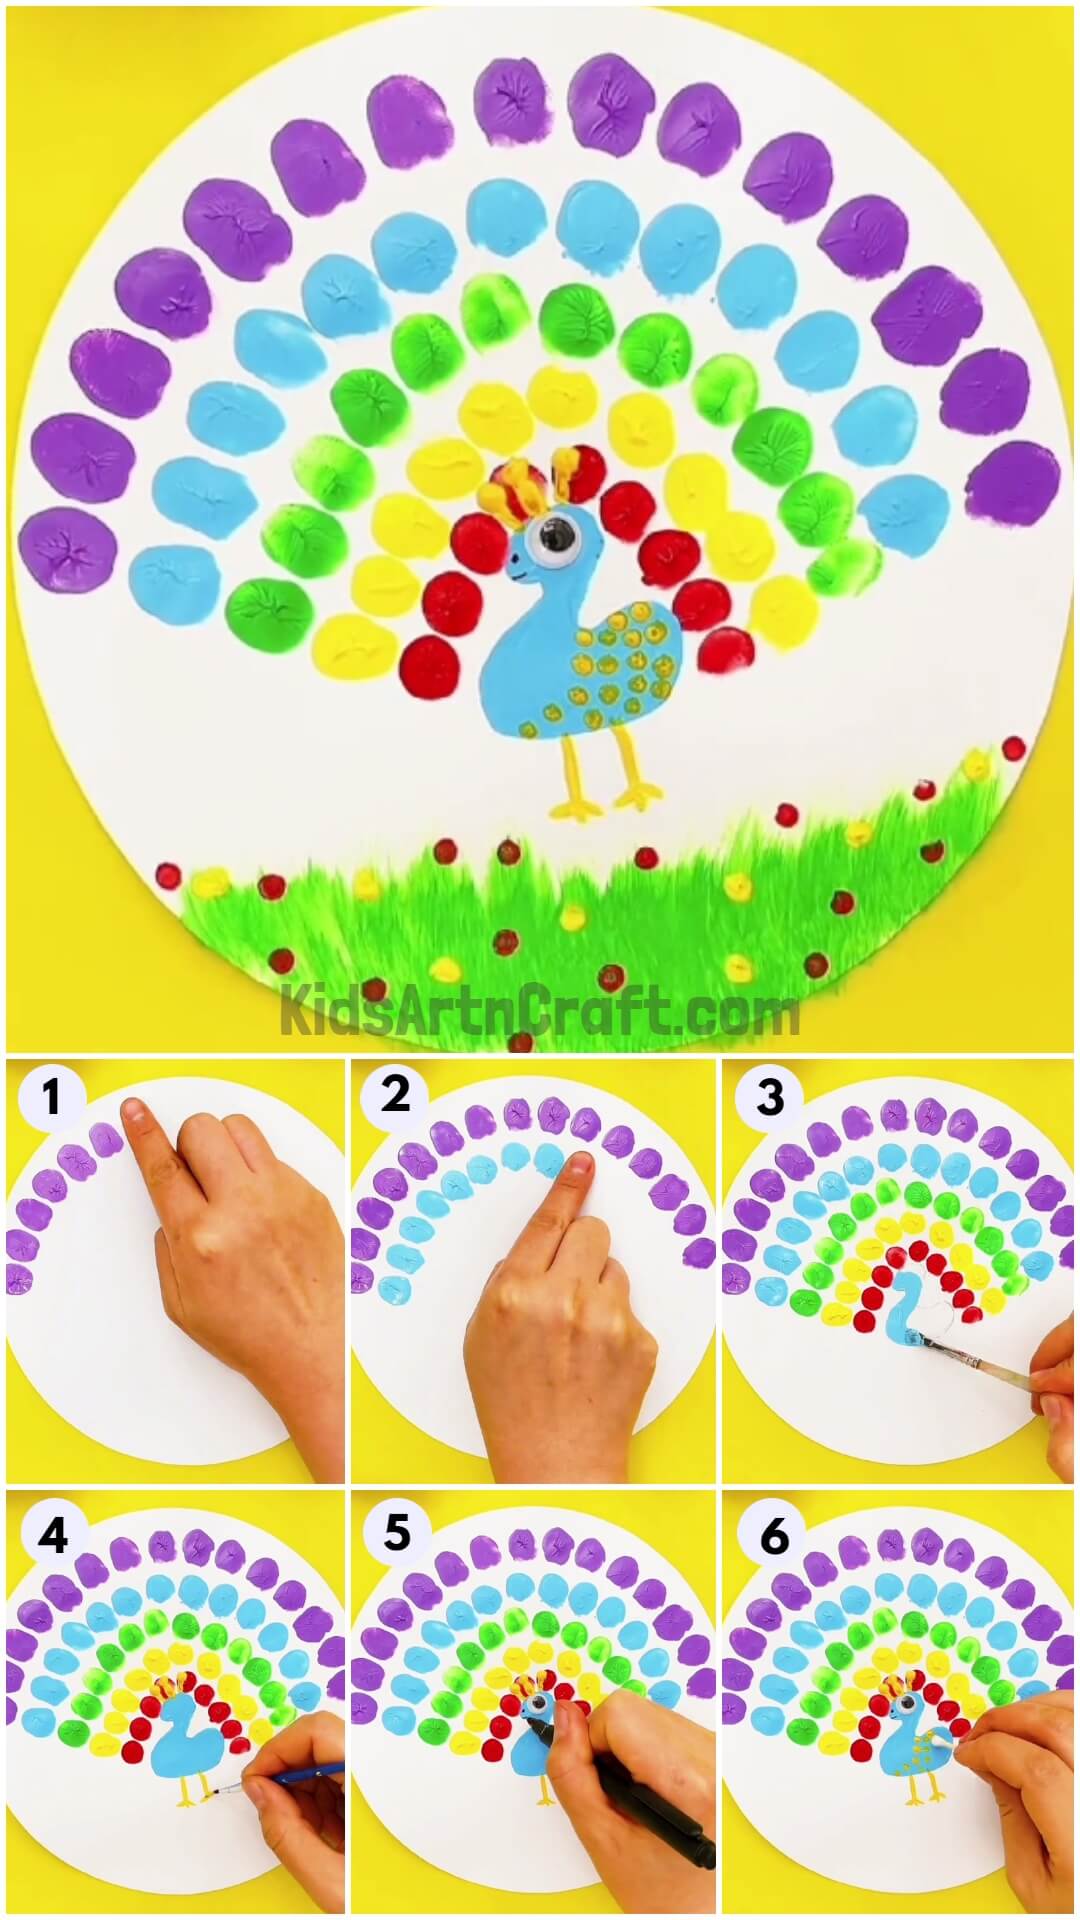
This activity is a great way for kids to express themselves and use their imagination! All they need are a few basic supplies to make their own special finger painting of a beautiful peacock.
The peacock is the national bird of India. And making a peacock finger impression painting is a super fun and easy task. If drawing, painting and creating new crafts are your hobbies, you have unknowingly promoted positive health while outcasting your creativity. The art materials used are primarily water-based, non-toxic and harmless but it should be done with adequate supervision and guidance. Also, it is necessary for the holistic development of a child. So, follow this simple step-by-step tutorial and embrace your inner artist with fun and sophistication.
Easy To Make Peacock Finger Impression Painting
Read More: How To Make Ant Painting Step-by-step Tutorial
Materials Required
- Acrylic Paints Of Different Colours
- An eye
- A Plain Sheet Of Paper
- A Pencil
- A Paintbrush
- A Marker
- Cotton Bud
- Glue
- Toothbrush
Procedure
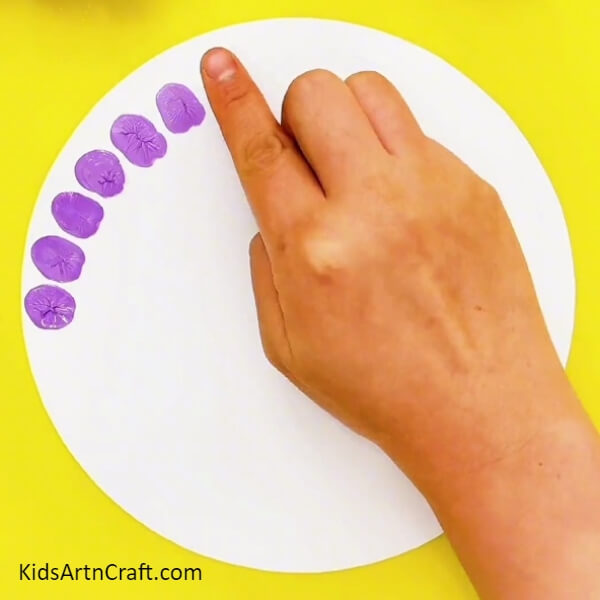
Step 1: Dip Your Index Finger In Purple Paint And Form Impressions
On a white sheet of paper design impressions by dipping your index finger in purple acrylic paint. Form the same pattern as shown in the image above.
Step 2: Make A Semi-Circular Pattern With The Finger Impressions
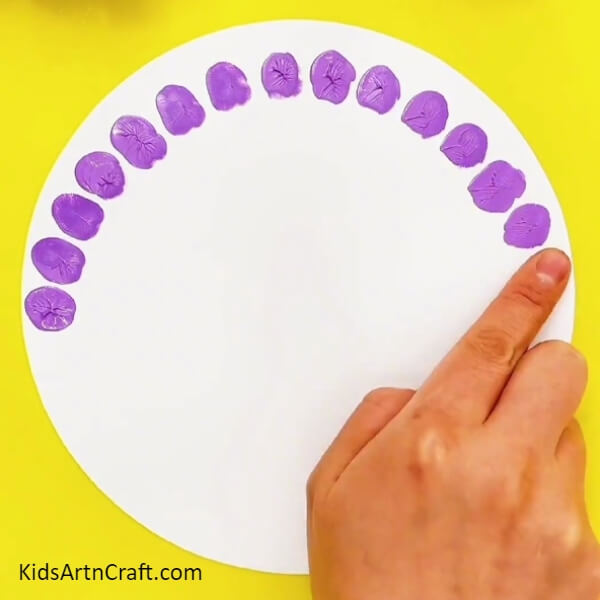
Create finger impressions with the purple acrylic paint until it makes a semi-circular pattern.
Step 3: Make Finger Impressions for Light Blue Paint
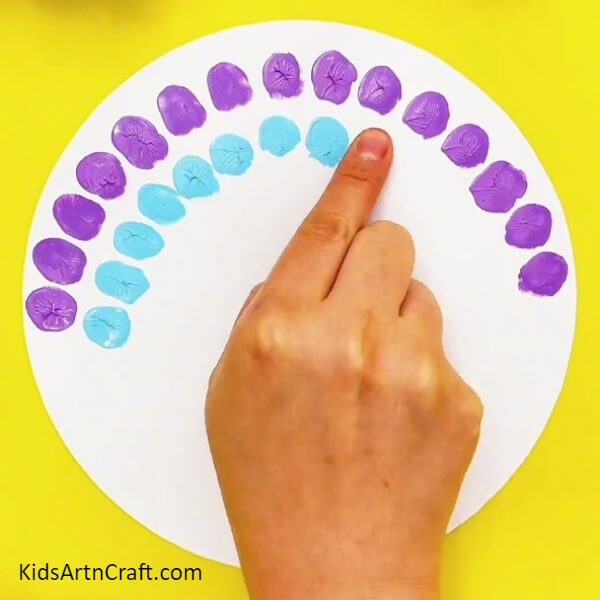
Dip your index finger in sky-blue acrylic paint and make impressions with your finger to create a semi-circular pattern below the purple design as shown in the image above.
Step 4: Make Similar Finger Impressions of Smaller Size for Green Paint
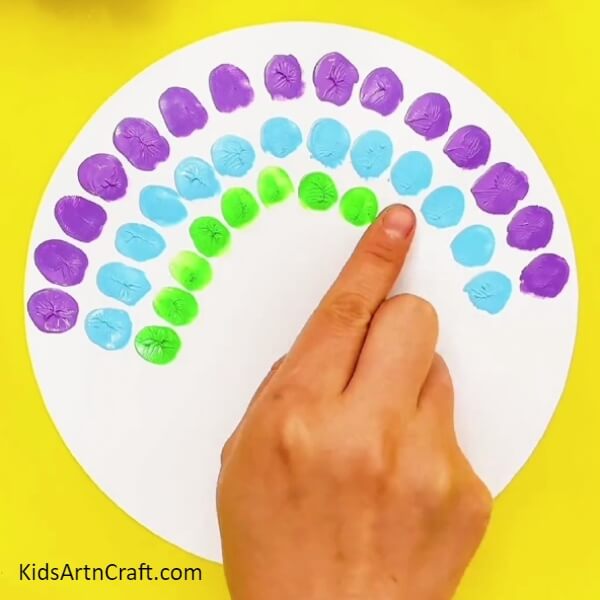
Dip your index finger in a green acrylic pattern and create the same design below the sky-blue one. Remember to reduce the size of the pattern.
Step 5: Make Similar Yellow Impressions
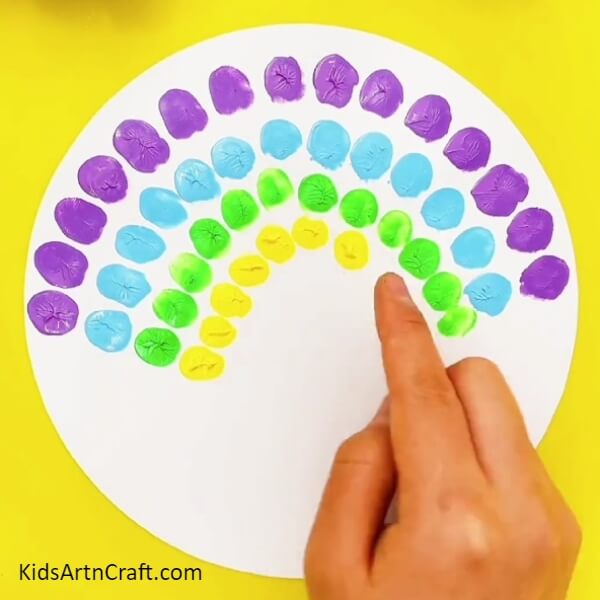
Next, dip your index finger in yellow acrylic paint and make impressions below the green pattern in a semi-circular manner.
Step 6: Dip The Tip Of Your Index Finger And Make Circles
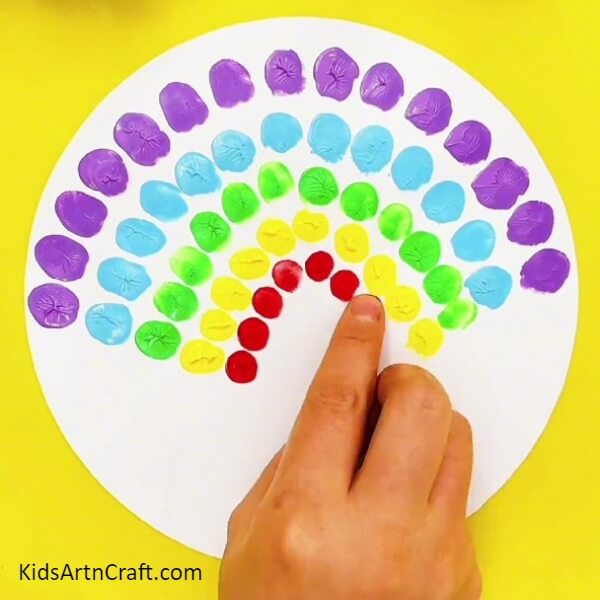
Dip the tip of your index finger in red acrylic paint and make small circles in a semi-circular direction below the yellow pattern.
Step 7: Draw The Body Of The Peacock And Paint With Sky-blue Acrylic Paint
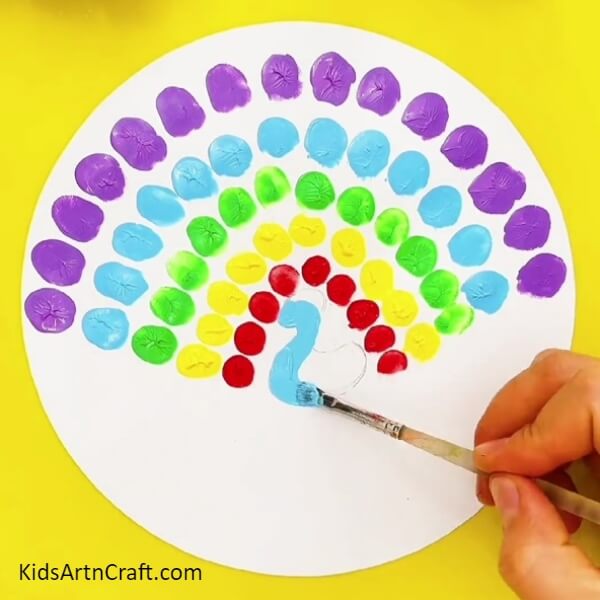
Take a pencil and draw the body of the peacock neatly. Paint the body with blue acrylic paint with the help of a paintbrush carefully.
Step 8: Make Crest Of The Peacock Above Its Head
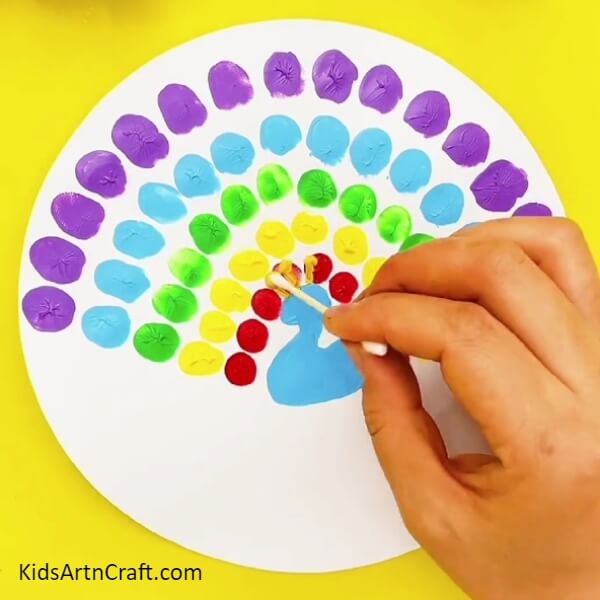
Take a cotton bud and dip it in yellow acrylic paint, design the crest of the peacock above its head as displayed in the image.
Step 9: Make The Legs Of The Peacock And Colour Them In Yellow
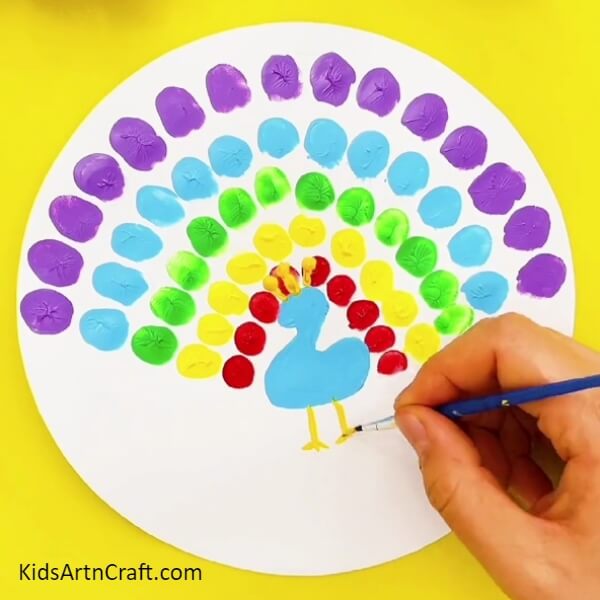
Take a pencil and draw the legs of the peacock, paint the peacock with yellow acrylic paint using a paintbrush.
Step 10: Design The Features Of The Peacock Using A Marker
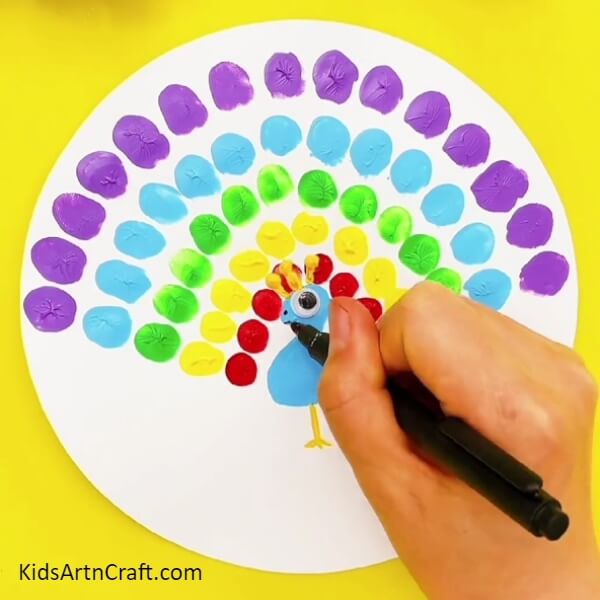
Stick the eye of the peacock using glue. Draw the features of the peacock i.e. nose, mouth etc. with the help of a black marker.
Step 11: Dip A Cotton Bud In Yellow Paint And Make A Design
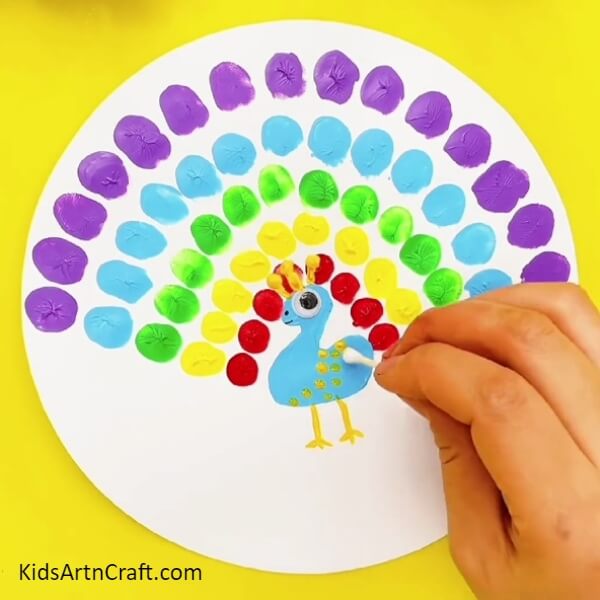
Dip a cotton bud in yellow acrylic paint and make a design on the peacock with the cotton bud.
Step 12: Take A Toothbrush And Dip It In Green Paint To Make Grasses
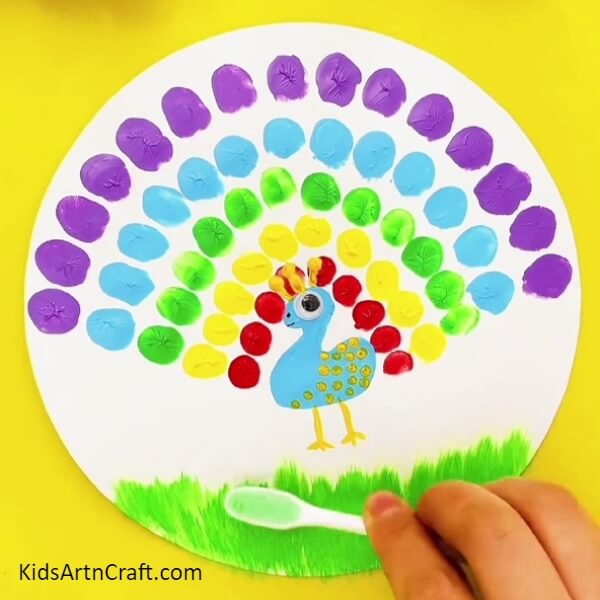
Dip a toothbrush in green acrylic paint and paint grasses by softly scratching the toothbrush back and forth.
Finally! Your Pretty Peacock Painting Is Ready!
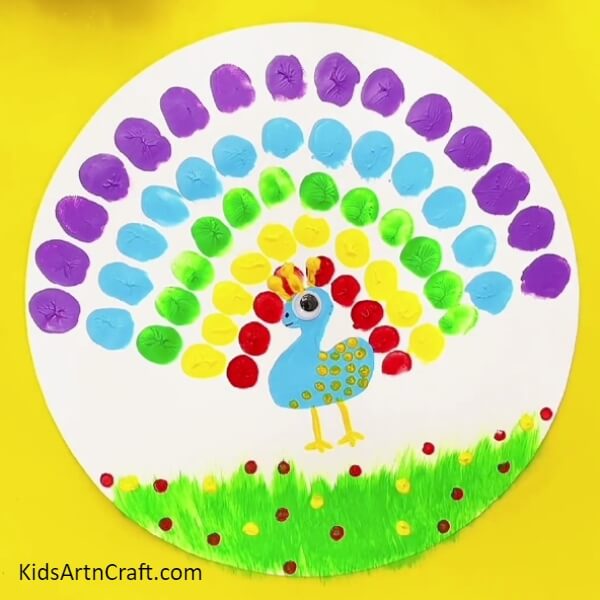
Dip a cotton bud in yellow paint and make flowers on the grasses with it. Make more flowers on the grasses by dipping the cotton bud in red paint.
I hope you’ve enjoyed it a lot and made some long-lasting memories while creating this beautiful peacock finger impression painting. Share your opinions and experiences with us in the comments section. For more such easy-peasy and fun arts and crafts tutorials check out our website.
Have a great day ahead!
Some More Peacock Craft Tutorial
Fun To Make Peacock Crafts Using Paper Strips For Kids
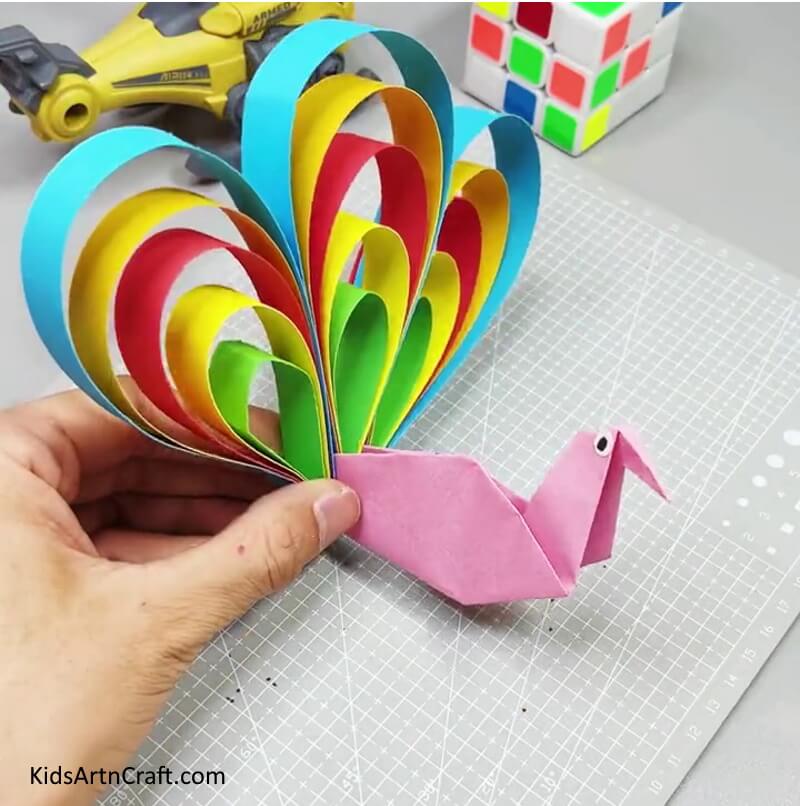
Image Source/Tutorial: Kids Art & Craft
Making peacock crafts with paper strips is an exciting and fun activity for kids. It is an easy and creative way to engage children in arts and crafts. The end result is a beautiful peacock that the kids can be proud of!
Follow us on Youtube for art and craft tutorials and much more.
More Articles from Kids Art & Craft
- Easy Painting Video Tutorial for Beginners
- Art & Craft Activities At Home Video Tutorial for Kids
- Easy to Make Handmade Bee Craft Tutorial for Kids
- DIY Step by Step Finger Puppet Craft for Kids
- Colorful Easter Egg Craft easy Tutorial For Kids


