DIY and Crafts
Origami Star Flower Easy Step-by-Step Tutorial

Learn how to make a beautiful origami star flower with this easy step-by-step tutorial. Get creative and have fun folding a unique paper flower for any occasion!
Origami is a traditional Japanese craft of folding paper into decorative shapes and figures. Today, this craft is enjoyed by people of all ages and it is an excellent way to explore your creative side.
Welcome to the article How to Make an Origami Star Tutorial. In this article, we will discuss a step-by-step tutorial that will show you how to make an origami star flower in just a few easy steps as well as some tips and tricks that will help them get the most out of their creations. Kids can create beautiful and intricate paper star flowers that will surely be a source of delight and pride. It is a fun craft activity that will help them develop their motor skills and creativity. So, GET, SET, and CRAFT!
Easy Origami Star Flower Step-by-Step Tutorial For Kids

Read More: DIY Star Wand Ideas for Kids
Material Required
- Origami Paper
- Scissors
Procedure
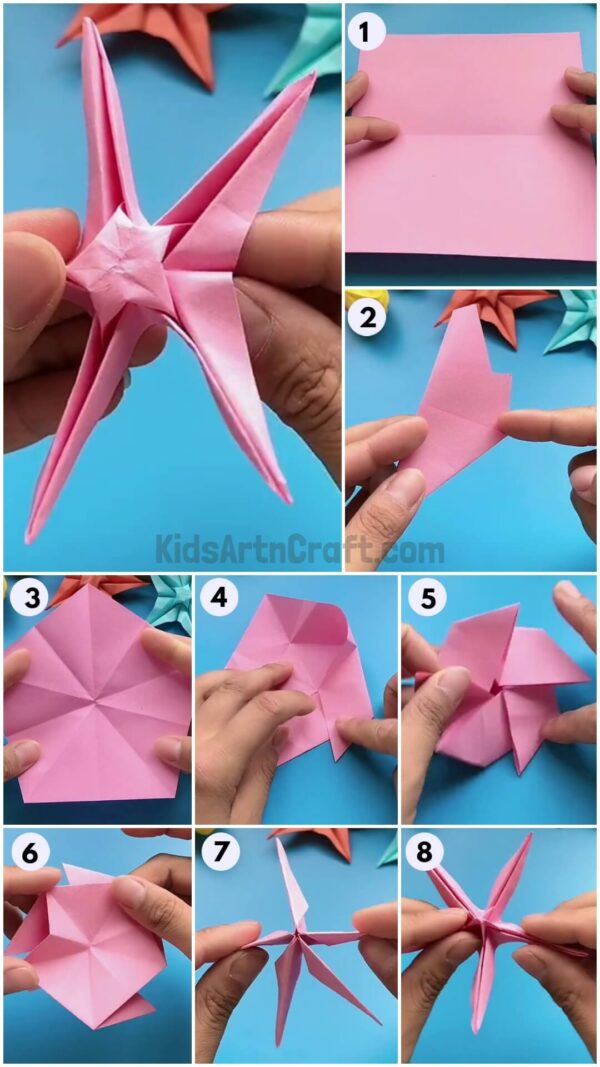
Step 1: Folding Paper In Half
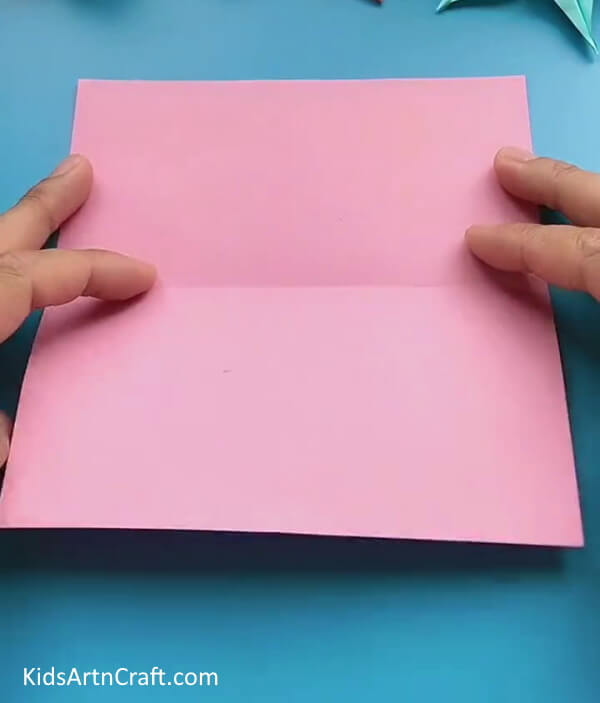

To make this origami star flower craft, grab pink square paper or pink origami paper. fold the paper in half horizontally to get a rectangle shape.
Step 2: Folding Bottom Right Corner To Form A Triangle
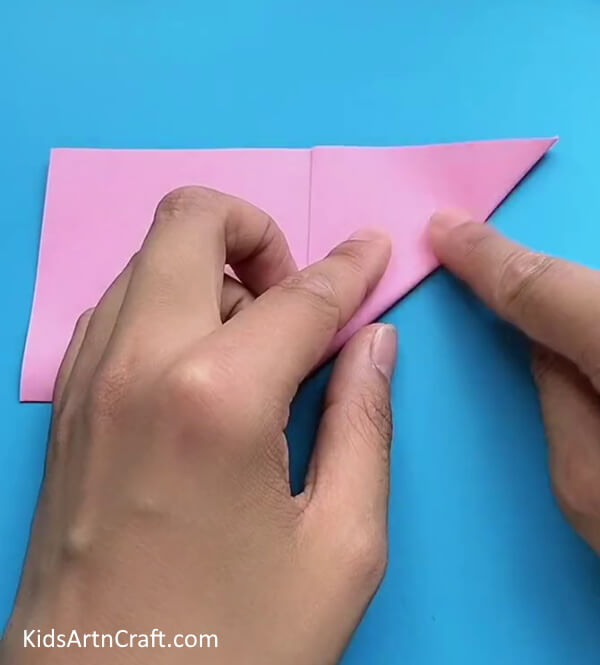

Take the bottom right corner of the paper and bring it to the top edge of the rectangle to form a triangle shape. Crease it well and unfold it.
Step 3: Folding Top Right Corner
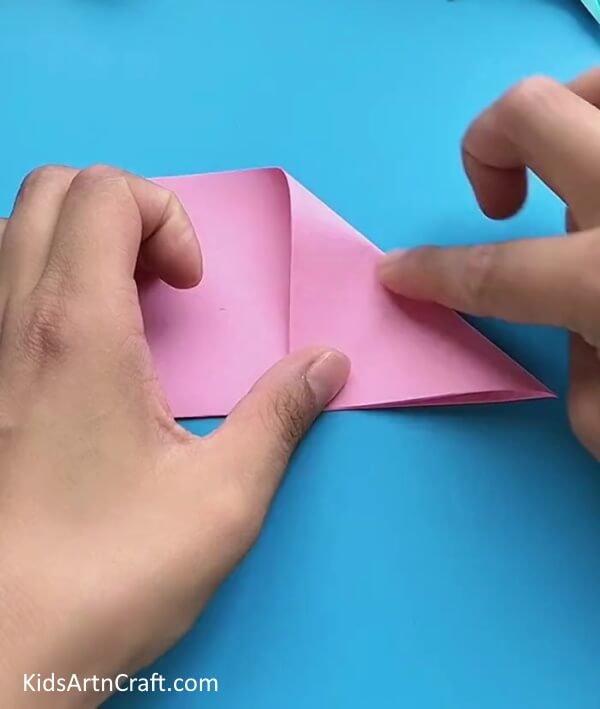

Similarly, fold the top right corner of the paper and bring it to the bottom edge to form a triangle. Crease it well and unfold the paper.
Step 4: Bringing Bottom Left Corner To The Cross

Now, you should get a cross on the right side of the rectangle. Bring the bottom left corner of the paper to the cross point.
Step 5: Folding Corner To Its Edge Itself

Next, bring the corner in such a way that its diagonal side overlaps the other side of the paper itself.
Step 6: Folding Bottom Edge To The Diagonal Side

Now, fold the bottom edge of the rectangle to the diagonal edge as shown in the above image.
Step 7: Folding In Half Outwards
Using the reference of the previous fold, fold the paper in half outwards.
Step 8: Cutting Paper
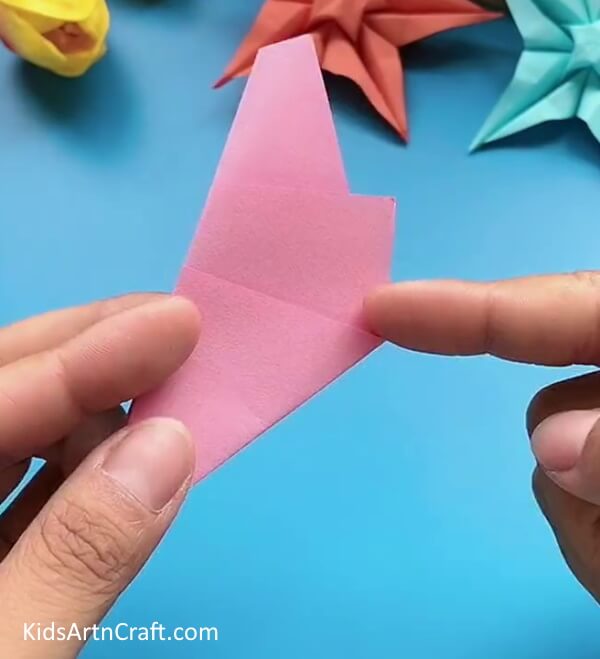

Using scissors, cut the paper along with the horizontal crease. Take the bottom part of the paper for further crafting.
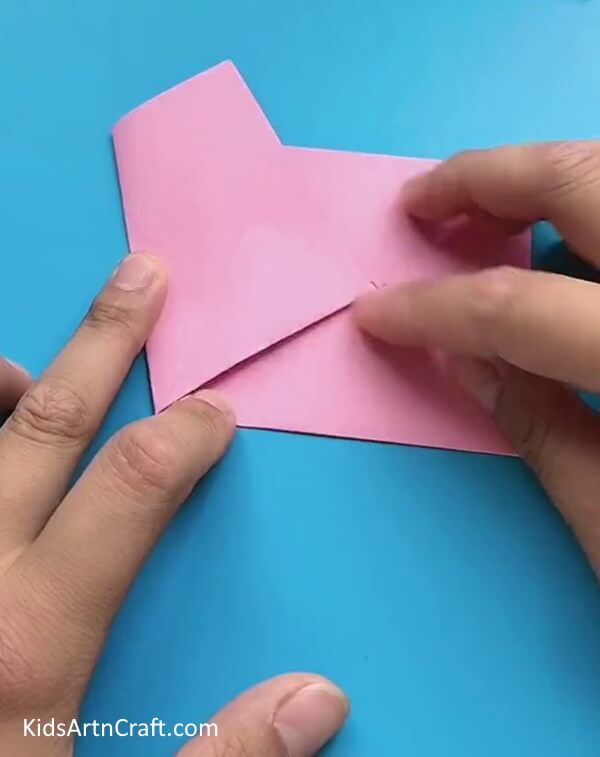
Step 9: Unfolding Paper And Making Creases
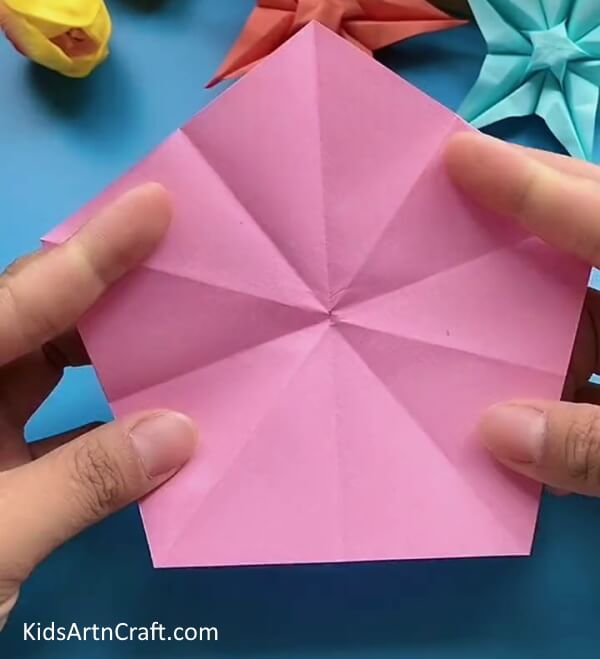
Unfold the paper and you should get a pentagon shape with some creases. Flip the paper around and now you need to make a triangle by folding all the five corners of the pentagon along the creases.
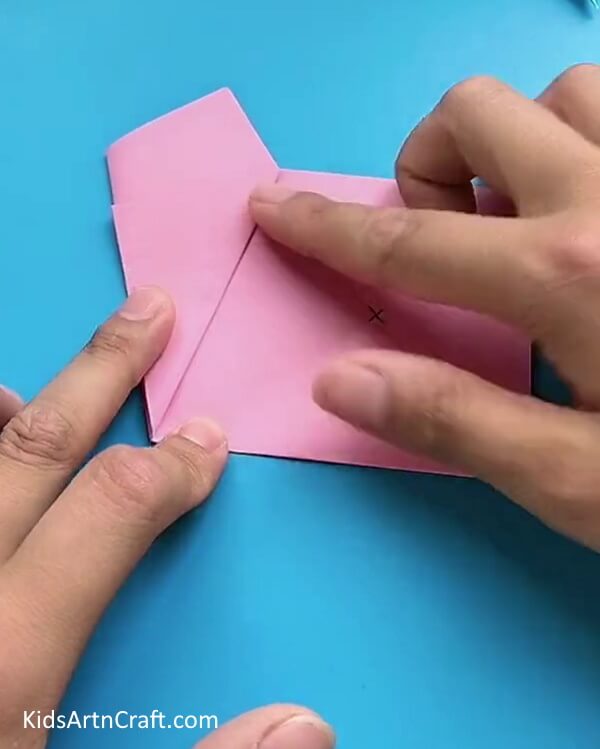
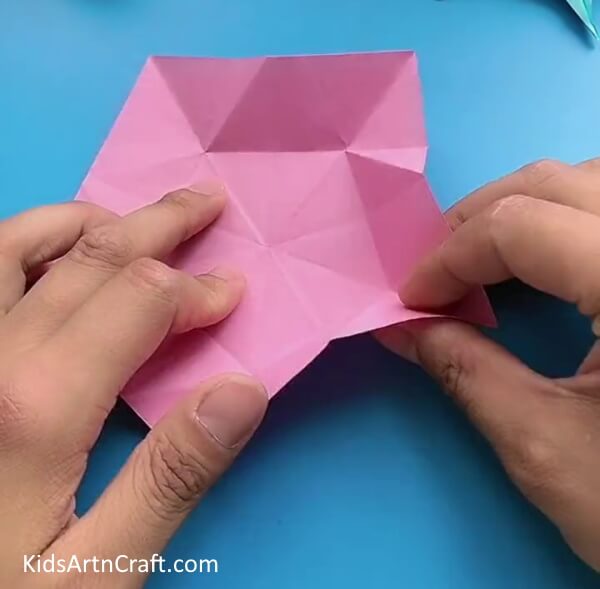
To make a triangle, hold the bottom right corner of the pentagon and fold it along the upper right crease to hold the upper corner of the pentagon. Fold the triangle on the left side to hold the adjacent side. Again, repeat the same to fold the last side of the pentagon. Crease the triangles well by flipping the layers of the triangle.
Now, bring the top corner of the triangle to the middle of its base. Crease it well and unfold all the folds of this step.
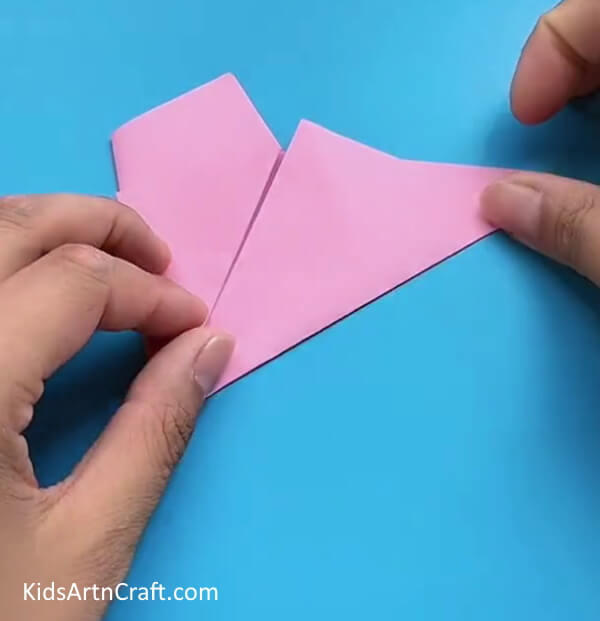
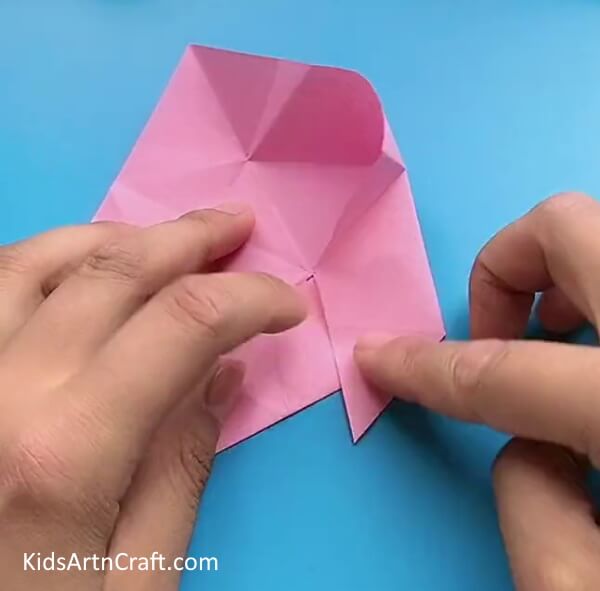
Step 10: Folding Paper Along Small Pentagon Creases

After unfolding the paper, you should get a small pentagon in the middle center of the paper pentagon. Take the base of the paper and fold it upwards along the center pentagon base crease to the center point of the paper.
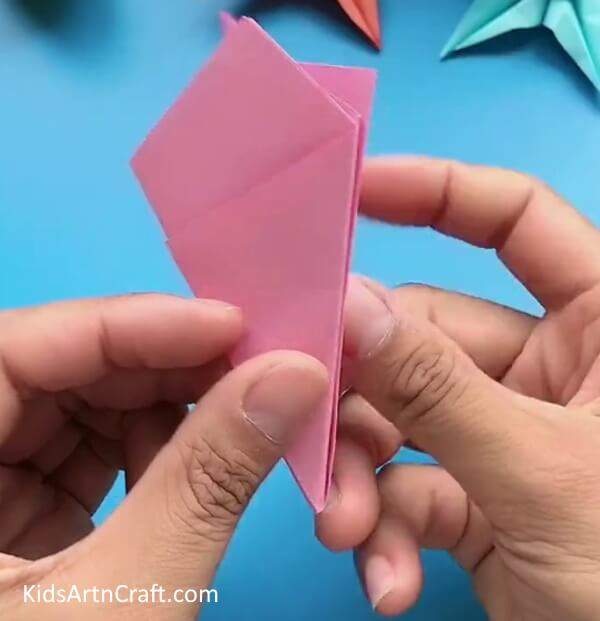
Now, create a diagonal connecting the center point and the diagonal on the bottom right by folding it using your fingertips, crease it well, and unfold it.
Step 11: Closing The Corner

Close the right corner of the pentagon using the crease of the small pentagon.
Step 12: Repeating The Folds On The Right Side

Repeat the same steps on the right side you performed in the last two previous steps.
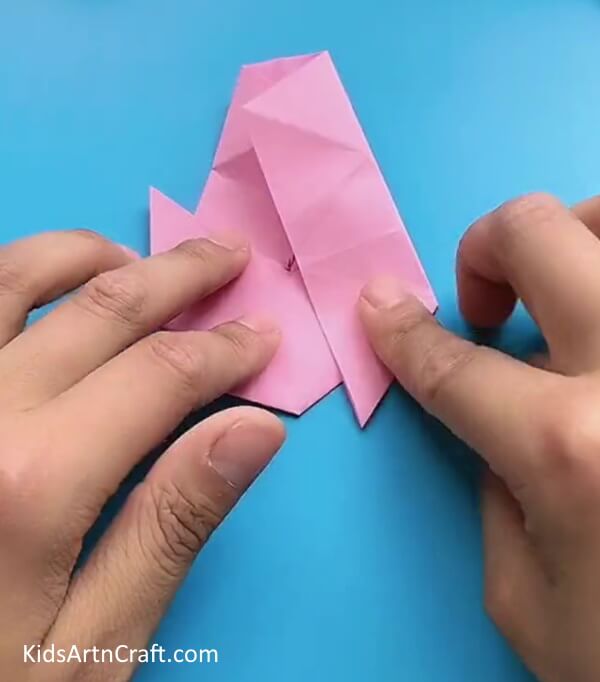
Step 13: Repeating Folds On All Sides

Repeat these steps on all sides to form a flower shape. But this time, close both ends at the same time and turn down the last flap of the paper.
Step 14: Flipping Paper And Closing Flaps

Next, flip the paper model and close the left flap with reference to the crease by pushing it inward.
Step 15: Folding Next Flap Along With The First Flap

Fold the next flap of the paper with the reference of the crease along with the first flap to close the second flap of the paper.
Step 16: Repeating The Same With Other Flaps

Using the same process, close all five flaps of the paper. Crease it well from the top and sides.
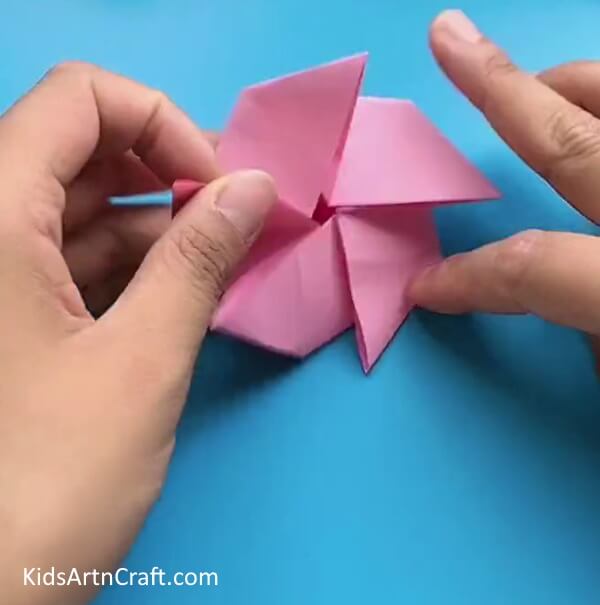
Step 17: Folding Diagonal On Right Flap

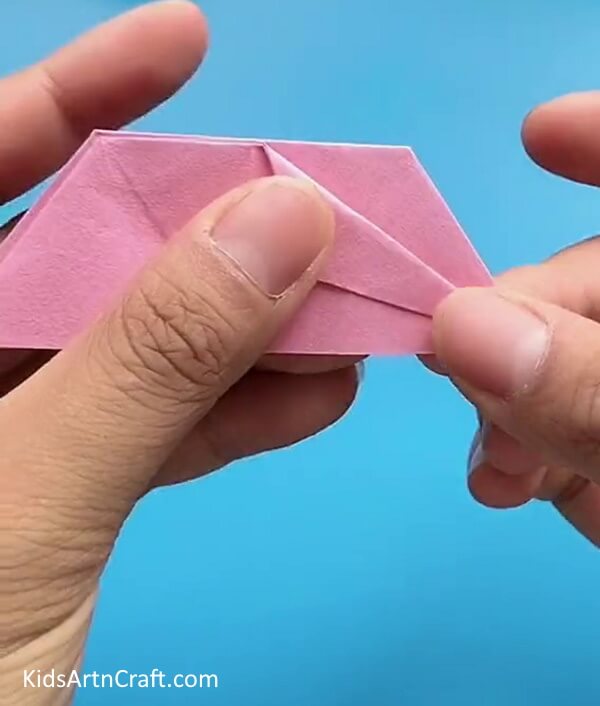
Once the flaps are folded, you should get a trapezium shape. Fold a diagonal on the upper layer of the right flap.
Step 18: Repeating The Previous Step

Bring the left flap to the right and again fold the same diagonal as the previous one. Repeat the same by flipping the left flaps to the right and folding diagonals till the last flap of the paper.
Step 19: Folding Paper To Form a ‘V’ Shape On Top

Fold the top edge of the right flap to the bottom edge of the diagonal formed previously. Repeat the same on the left flap of the paper but there is no diagonal on the left flap. This will form a ‘V’ shape between the top of both flaps. Close the paper connecting both flaps. Repeating the same with the other four flaps.
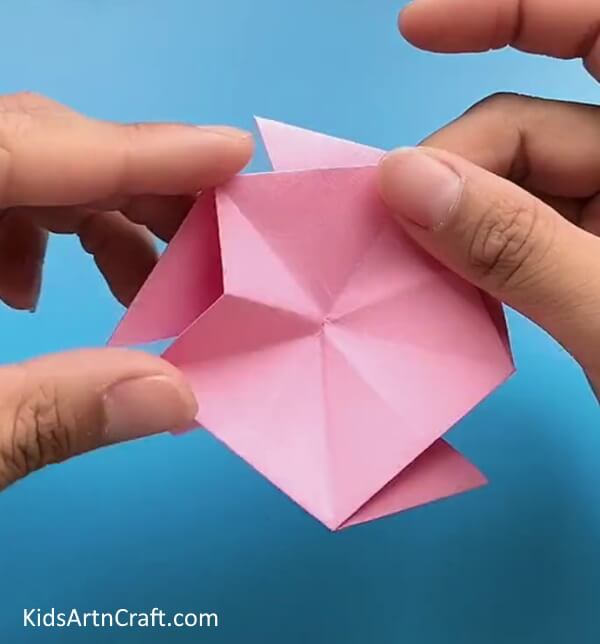
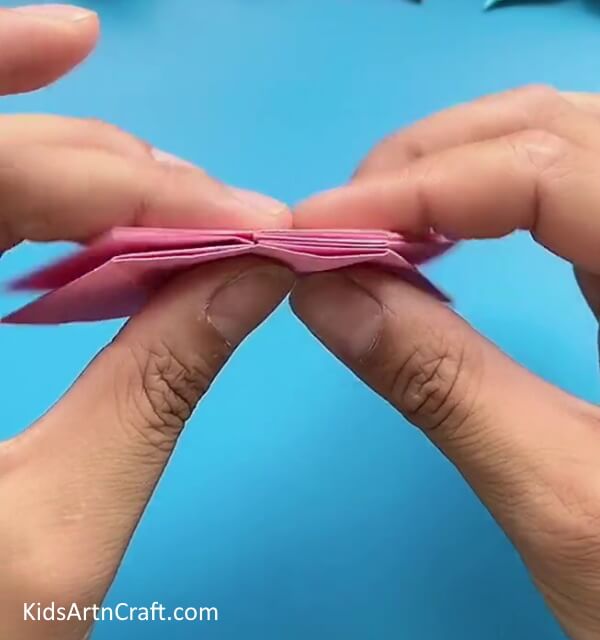
Step 20: Creating Locks Between Flaps

Now, flip the paper and there should be a vertical crease line in the middle of the two flaps of the star shape. Bring that vertical line to the left side to meet it with the diagonal fold. Repeat the same on the other four sides. Next, fold these folds made to the right to lock them. Repeat them on all five sides. Turn over the star again.
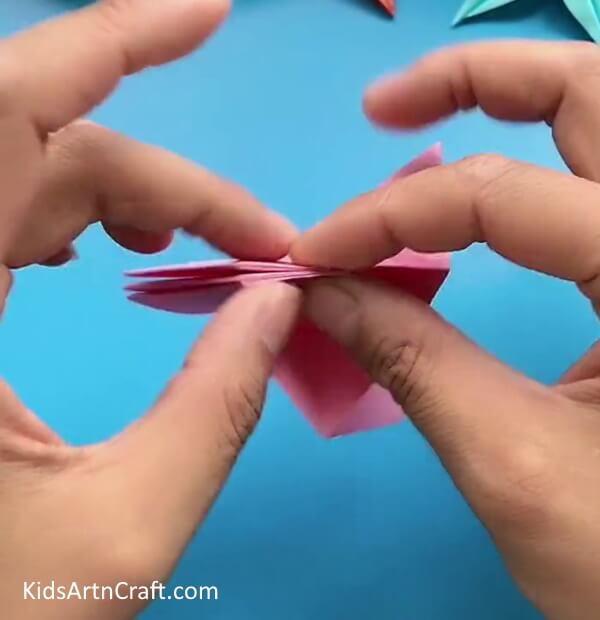
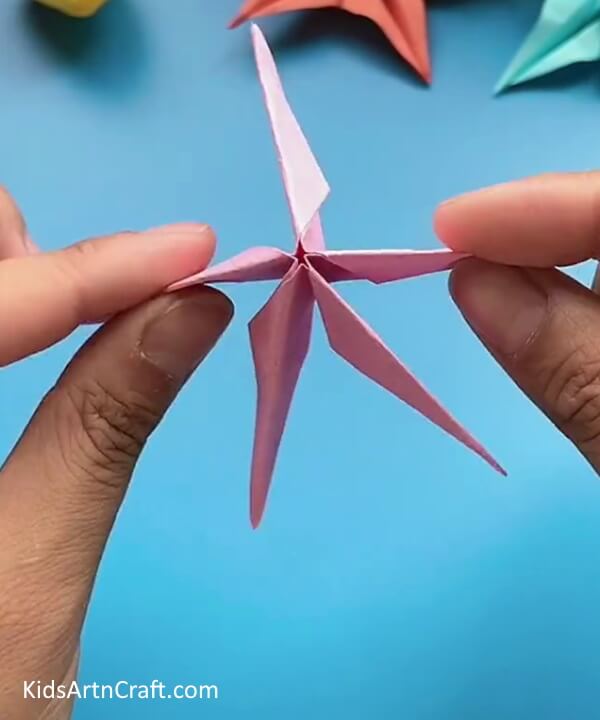
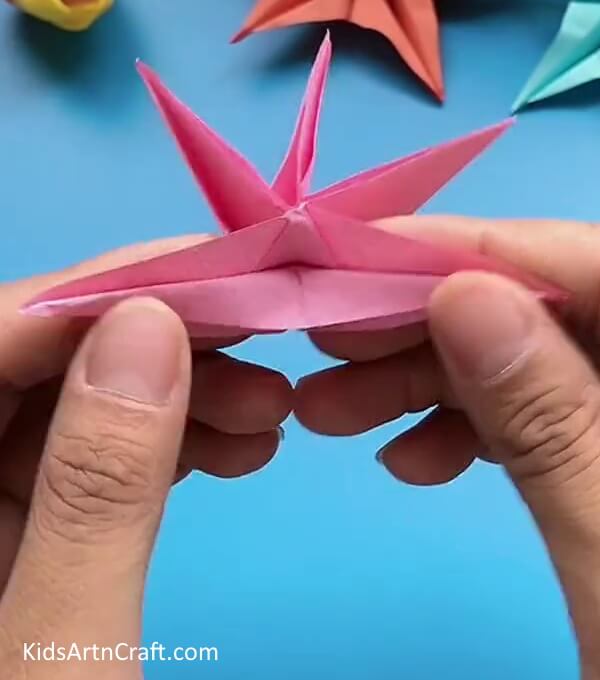
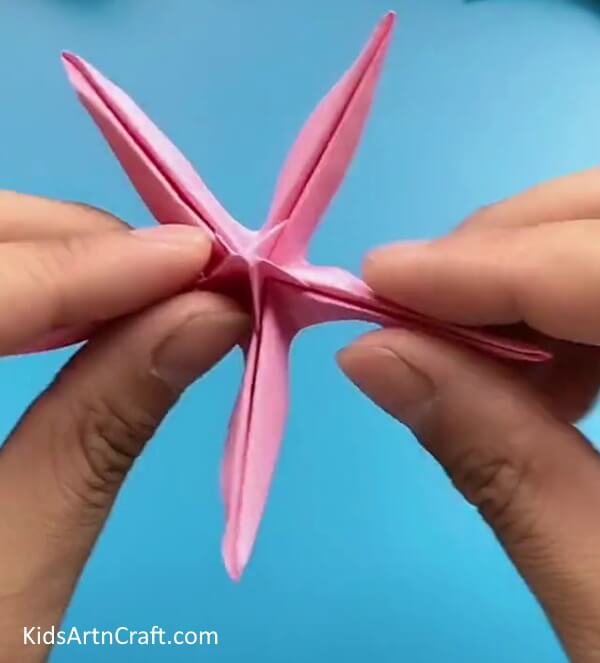
Origami Paper Star Flower Craft Is Completed!


Finally, pull the paper from the middle of the star a little to make a star in the middle as shown in the above image. And, It’s Done! Your Paper Origami Star Flower is ready!
This guide is perfect for everyone wanting to explore the art of origami! With the steps outlined above, you can make an impressive and eye-catching piece of art that will bring life to any room. You can further personalize your star flower by using paper of different colors. You can show off your masterpiece or even give it away as a gift. All your hard work and dedication will be worth it! So why not give it a go? Happy folding!
Some More Star Craft Tutorial
Simple To Make Paper Star Craft For Kindergarteners

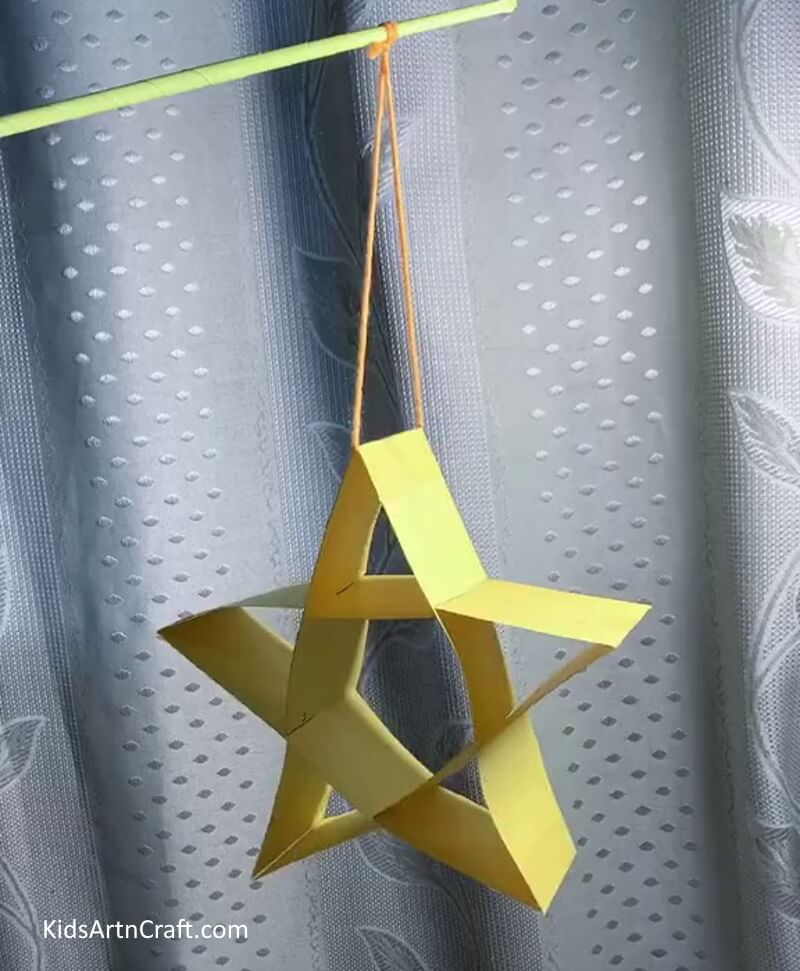
Image Source/Tutorial: Kids Art & Craft
This paper star craft is perfect for kindergarteners, as it is easy to make and requires minimal materials. Children will have lots of fun creating their own unique paper stars, and can even be used to decorate their classrooms!
Follow us on Youtube for art and craft tutorials and much more.
More Articles from Kids Art & Craft
- Colorful Fish Paper Craft To Make With Kids
- Origami Heart Craft To Make At Home – Simple Tutorial
- Rainy Day Umbrella Craft Tutorial For Kids
- Easy Paper Folding Crafts Video Tutorial for Kids
- How to Make Origami Flower Easy Tutorial For Kids