
DIY and Crafts
DIY Paper Flower Bouquet – Step by Step Tutorial


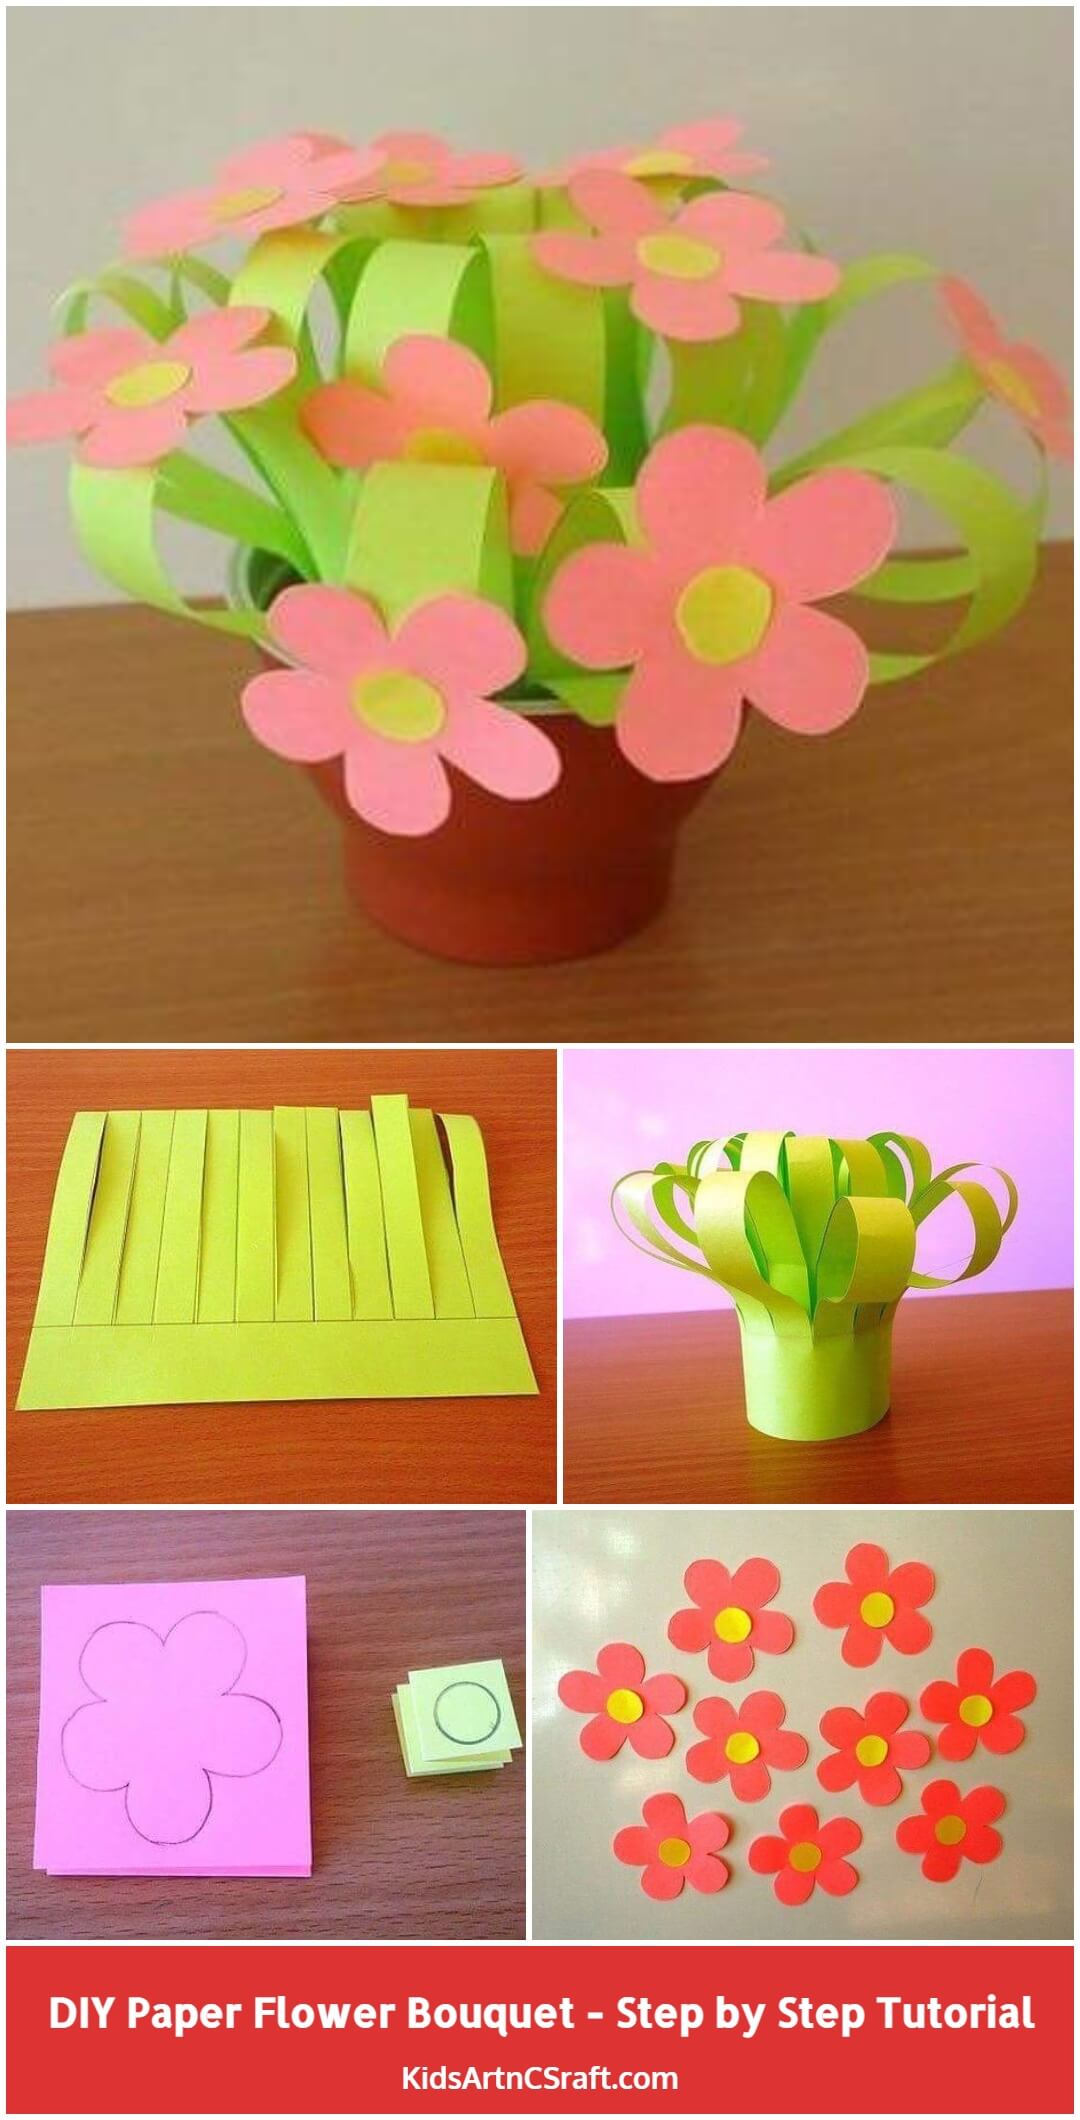
Time to fill the house with a DIY paper flower bouquet.
It is not always necessary to buy ready-made antique flower vases of certain materials from retailers. There are times when we lose track of watering the flowers, which leads to their death. So, instead of that, why not make a flower vase with flowers at home? One can always unlock the creativity skill he or she possesses, and with little effort and the needed supplies, can rule the world of art.
Today, we will be providing you with the procedure on how to make a flower vase out of simple chart paper with minimal supplies, so that you don’t have to spend a huge amount of money on buying one from shops.
DIY Paper Flower Bouquet – Step by Step Tutorial
Read More: DIY How to Make A Palm Tree Art and Craft for Kids Step-by-Step Tutorial
1. Make A Paper Flower Bouquet
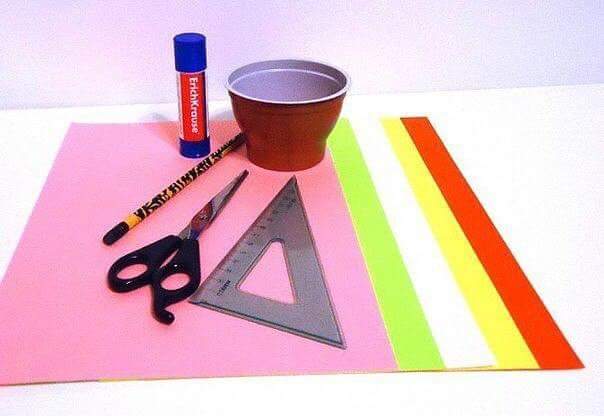
Material Required
- Colored Chart Papers Of Pink, Green, White, Yellow & Red
- A Glue Stick
- A Small Bowl
- A Set Square
- A Pair Of Scissors
- A Pencil
Procedure
Step 1
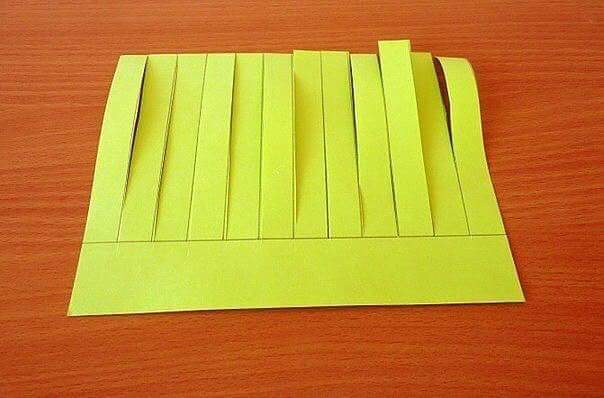
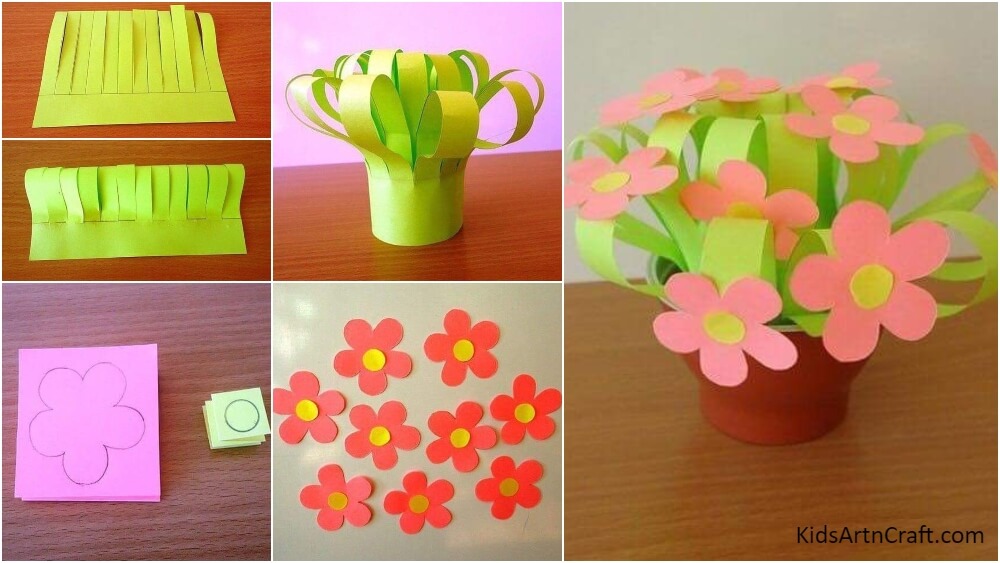
- Cut out a rectangular shape from green chart paper and draw a margin.
- Beside the margin, draw a few straight lines with a pencil
- With the help of scissors, cut the lined margins as shown above
Step 2
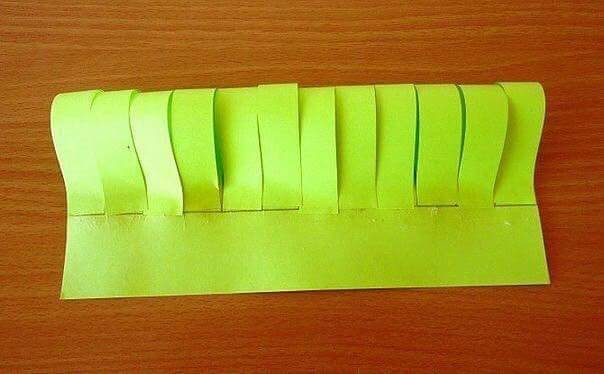
- Fold the paper to the middle of the chart paper so that the cut part of the paper bulges like the one in the image above.
Step 3
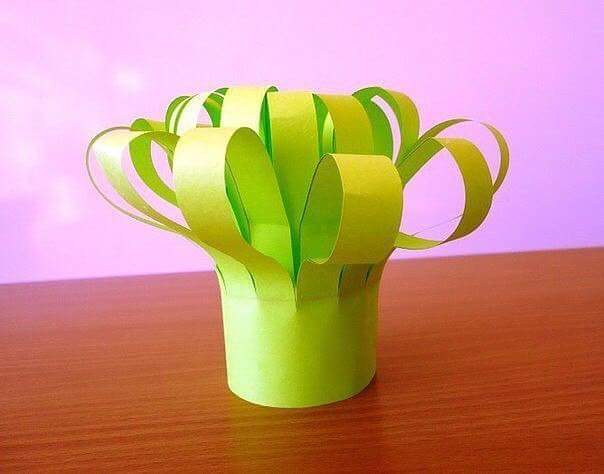
- With the help of a glue stick, fold the paper so that both ends of the paper touch each other.
- Follow the same procedure with another green chart paper and mount it on top of the former craft with the help of glue, but make the letter a size smaller than the previous one.
Step 4
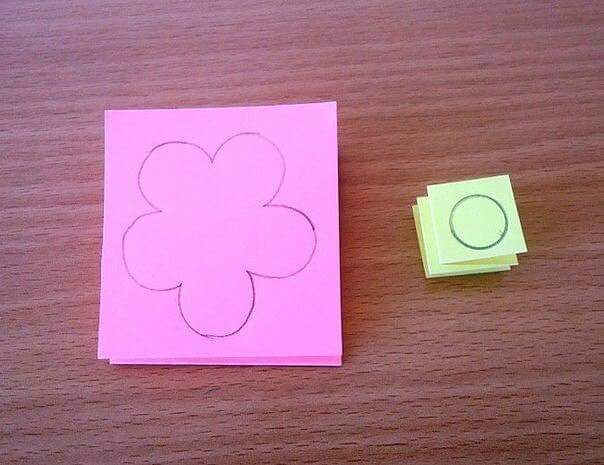
- Cut out some medium-sized square-shaped paper from the pink-colored chart paper.r
- With the help of a pencil, outline the shape of the flower on each square-shaped piece of paper.
- Cut out a small square-shaped piece of yellow-colored chart paper
- With the help of a pencil, outline the shape of a small yet not-so-small circle on each yellow-colored chart paper
Step 5
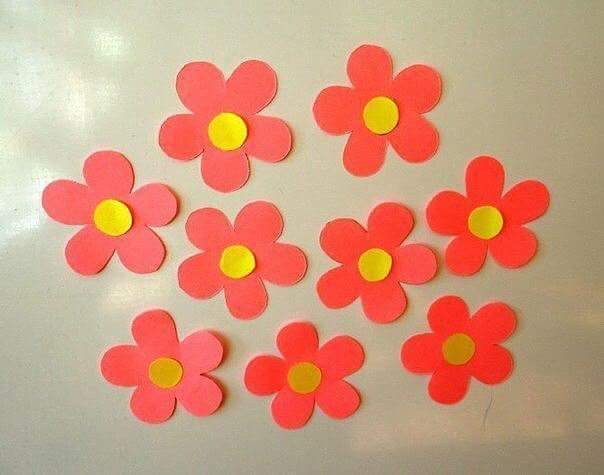
- Cut the paper respecting the outline of the drawing made
- After you are done, mount those small circle-shaped yellow-colored chart papers in the center of the flower carved out of the pink chart paper with the help of a glue stick.
Step 6
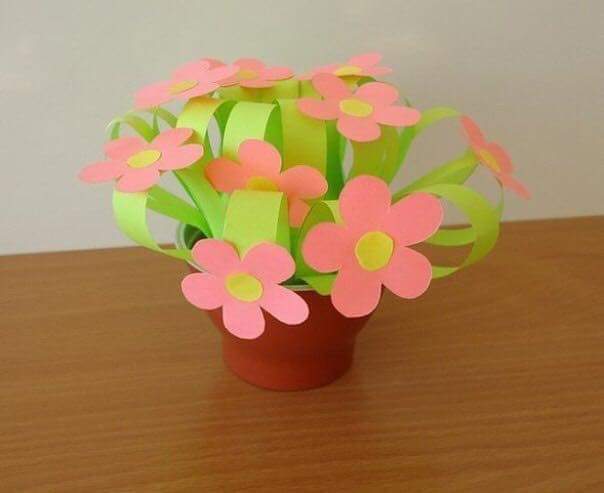
- Take a small bowl and attach the green-colored vase made earlier in Step 1 with some glue.
- After a flower is formed out of those papers, stick them to the bulging part of that green chart paper with a glue stick, as shown in the above picture.
- Your DIY paper flower vase is ready
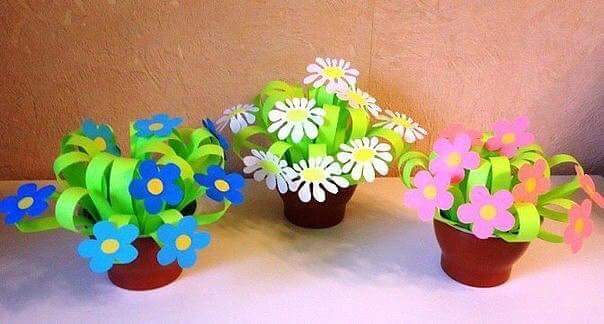
2. Make Another Flower Vase By Altering The Colors
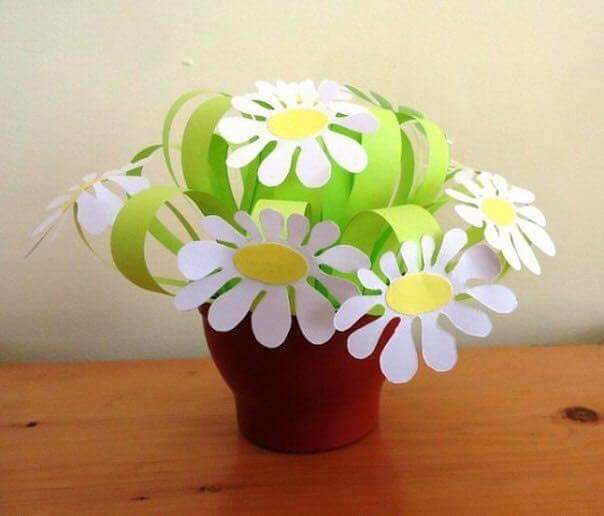
Make another fun yet beautiful flower vase. For some detail variation, you can change the color of the chart paper and create your own version of a flower vase.
Make some more of these flower vases and fill your house with them. These are the steps by which you can make an attractive flower vase. No advanced skills are required; just the accessible tools, and you will be good to go. So, all the best in performing extraordinary crafting, creating, and doing magic with those ordinary hands.
If you liked this article, check out the other articles on the website.
Don’t forget to leave your valuable feedback in the comment box provided below.
DIY Paper Flower Bouquet | Easy Step-by-Step Paper Flower Craft Tutorial for Kids & Beginners
Make Your Paper Flower Bouquet Extra Special
A handmade paper flower bouquet is more than just a craft—it is a thoughtful keepsake that children can proudly display or give as a gift. By combining different flower shapes, bright colors, and creative decorations, kids can design a unique bouquet while learning about color coordination, balance, and artistic expression. Unlike real flowers, paper bouquets stay beautiful for years and become meaningful handmade memories.
Great Occasions for Paper Flower Bouquet Crafts
- Mother’s Day gifts
- Teacher Appreciation Day
- Birthday celebrations
- Spring-themed classroom activities
- School art projects and exhibitions
- Home decoration ideas
- Friendship Day and thank-you gifts
Creative Decoration Ideas
- Add ribbons or colorful bows around the bouquet.
- Use patterned or glitter paper for vibrant flowers.
- Decorate with paper butterflies, bees, or leaves.
- Attach a handmade gift tag with a special message.
- Mix flowers of different sizes to create a fuller arrangement.
Crafting Tips for a Beautiful Bouquet
Fold each flower carefully and apply glue neatly for a polished finish. Let every piece dry before assembling the bouquet to keep the flowers secure. Encourage children to experiment with different color combinations and flower styles to make their creations unique. Wrapping the finished bouquet in decorative paper or placing it in a handmade paper vase adds an attractive finishing touch.
FAQs
Q1. What age is suitable for making a paper flower bouquet?
Answer: This craft is suitable for children aged 5 years and older, with adult supervision for cutting and gluing when needed.
Q2. Can recycled paper be used for paper flowers?
Answer: Yes. Colored paper scraps, old magazines, wrapping paper, and scrapbook paper can all be reused to create beautiful paper flowers.
Q3. How can I make my bouquet look more realistic?
Answer: Combine flowers of different sizes, add paper leaves, and arrange the stems at different heights for a natural-looking bouquet.
Q4. Is this craft suitable for classroom activities?
Answer: Yes. It is an enjoyable classroom project that promotes creativity, teamwork, and fine motor skill development.
Q5. Can a paper flower bouquet be used as a handmade gift?
Answer: Absolutely. Paper flower bouquets make thoughtful gifts for family members, teachers, friends, and special celebrations.
A paper flower bouquet is a fun and meaningful craft that encourages creativity and artistic expression. Children can create colorful handmade flowers to decorate their space or share as heartfelt gifts for any occasion. Help kids learn, create, and explore with fun crafts and activities. Follow us on YouTube, Telegram & Facebook.
Reviewed By Jatin
More Articles from Kids’ Art & Craft
- Newspaper Crafts – Step-by-Step Image Tutorials
- DIY Handmade Paper Sun Crown Craft for Kids – Step-by-Step Tutorial
- DIY How to Make Paper Heart Bouquet – Art and Craft for Kids Step-by-Step Tutorial
- DIY Painting Hacks for Kids – Flower Making Step-by-Step Tutorial
- DIY Umbrella Craft with Beach View – Step-by-Step Tutorial