


Paper Crafts
How To Make Paper Neck-tie easy tutorial for kids

Are you searching for something creative and unique craft for kids? If yes, no need to search anywhere as we have a step-by-step guide on How To Make Paper Necktie. The paper necktie craft will bring creativity and imagination which is resourceful for kids. Also, it will teach kids to use their imagination to create something unique from minimal supplies. You can use these as decorations at themed parties, or walls to add splash of colors to your room. Follow the following steps to make paper necktie crafts!
Creative Paper Neck Tie Craft Tutorial With Step By Step Instructions
Read More: Step-by-Step Pencil Animal Drawing Video Tutorial for Kids
Materials Required
- Construction paper(Pink, Yellow, Blue)
- Colored Clay
- Glue
- Scissors
- Clay Shaping Tool
- Clay Cutter
Procedure
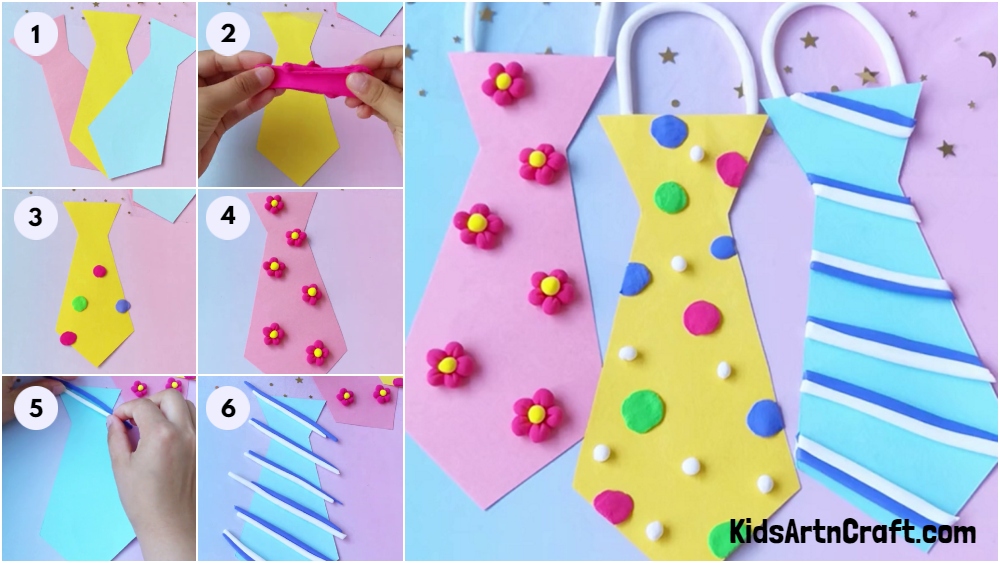
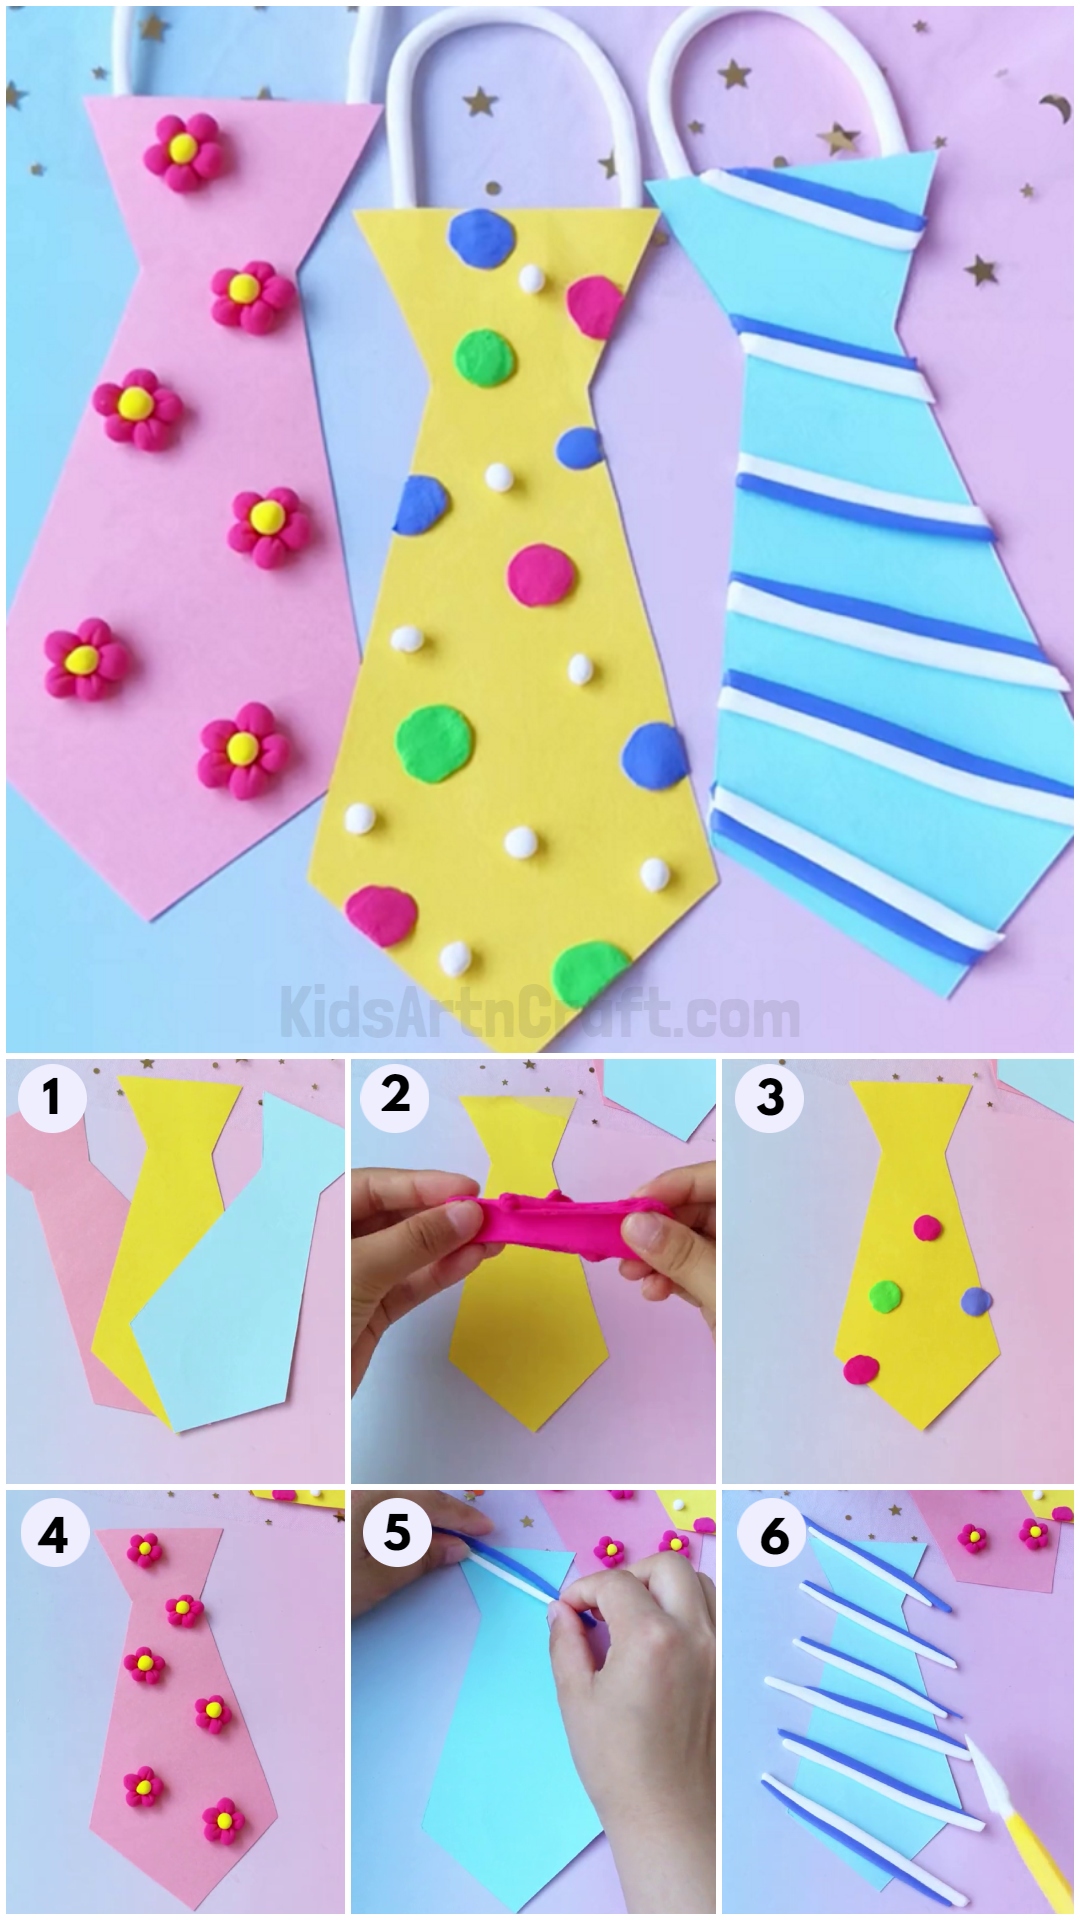
Step 1: Cutting The Neck-Tie Shape
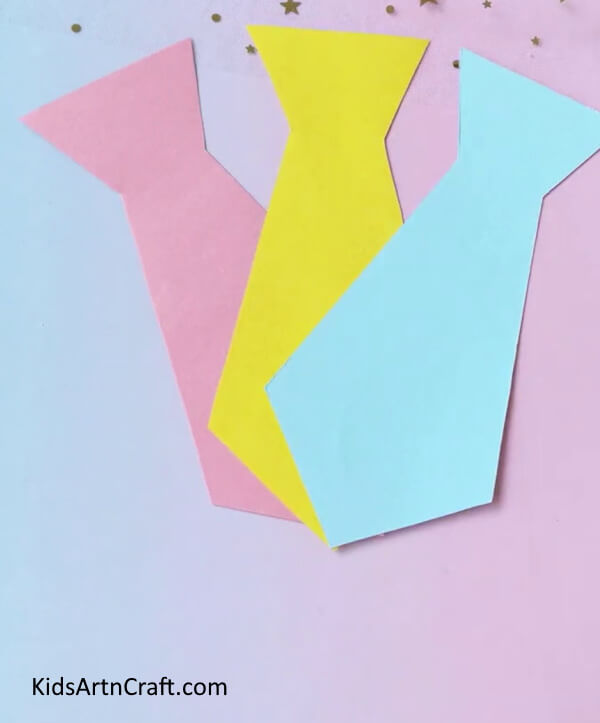
Let’s begin this amazing craft by taking pink, yellow, and blue colored papers. Cut neck-tie shapes out of them as shown.
Step 2: Getting Colored Clay
Take colored clay for decorating the neck-tie. Let’s begin with a yellow necktie.
Step 3: Making Colored Clay Circles

Take different colored clay and make small clay circles out of it. Paste them on the yellow neck-tie as shown.
Step 4: Making White Clay Balls
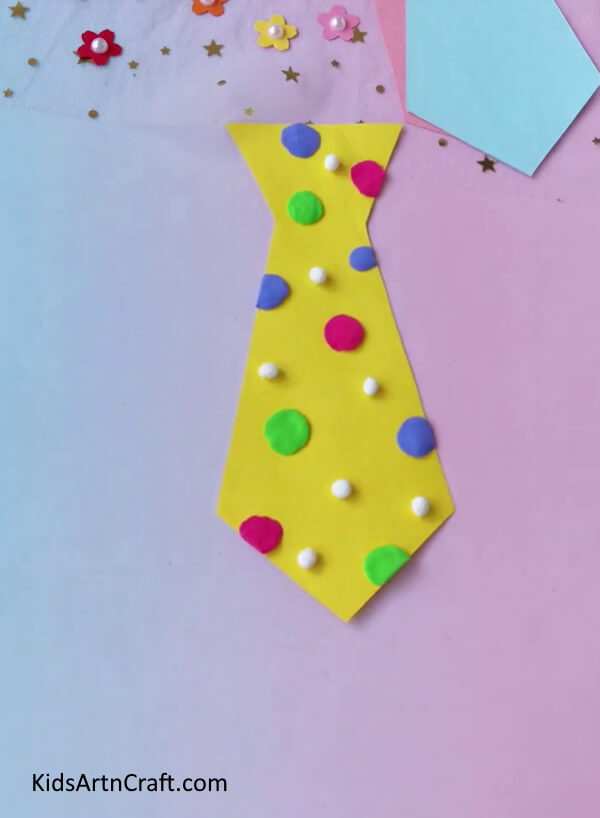
Take white clay and make small balls out of it. Paste them all over the neck-tie.
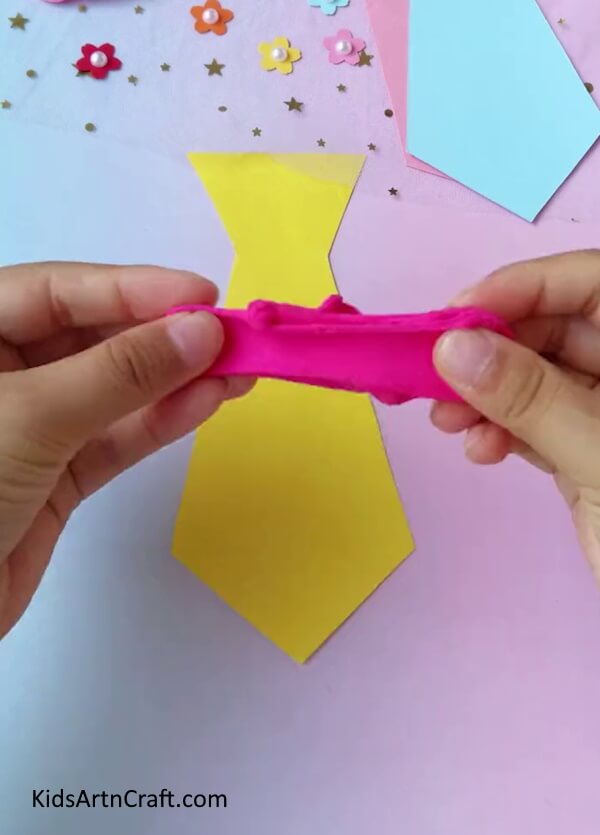
Step 5: Making A White Clay Loop For The Tie
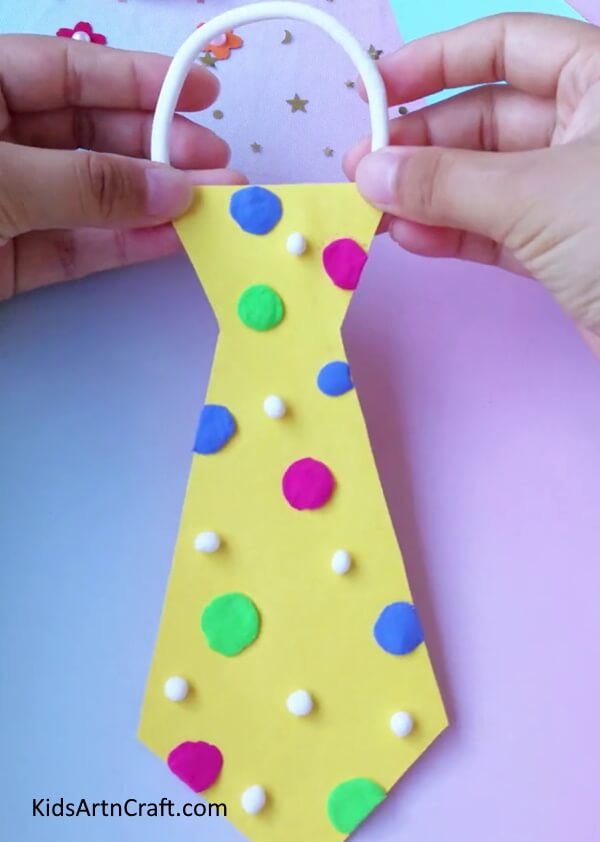
Take white clay and make a semi-circular tie loop knot. Paste it on top of the yellow neck-tie.
Step 6: Making A Pink Clay Flower
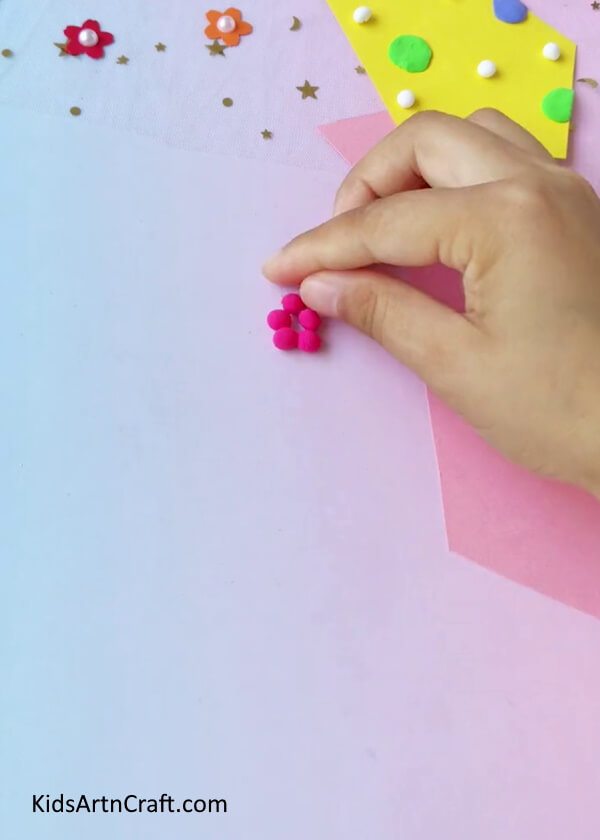
Take pink clay and make five small clay balls. Paste them together to make a flower shape as shown.
Step7: Adding The Details
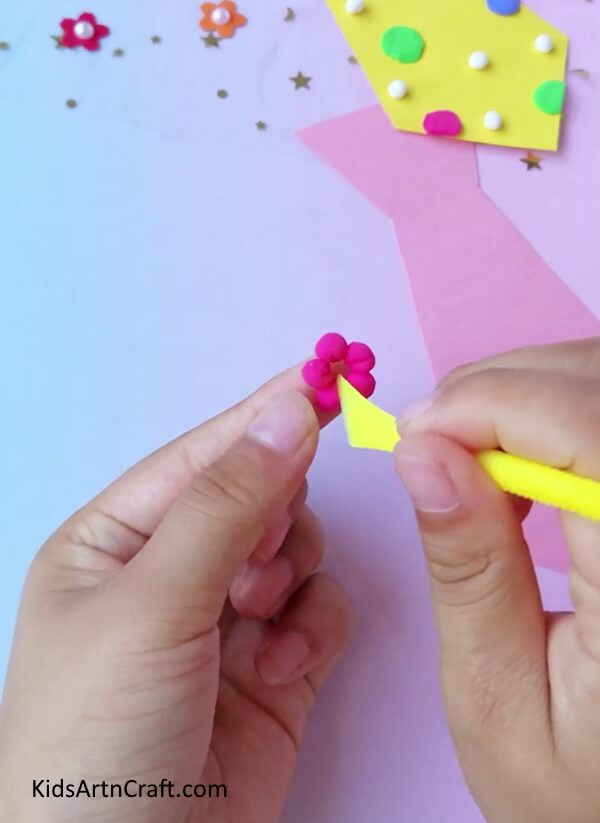
Using a clay shaping tool, make a slight cut in the middle of each ball.
Step8: Making A Yellow Clay Ball
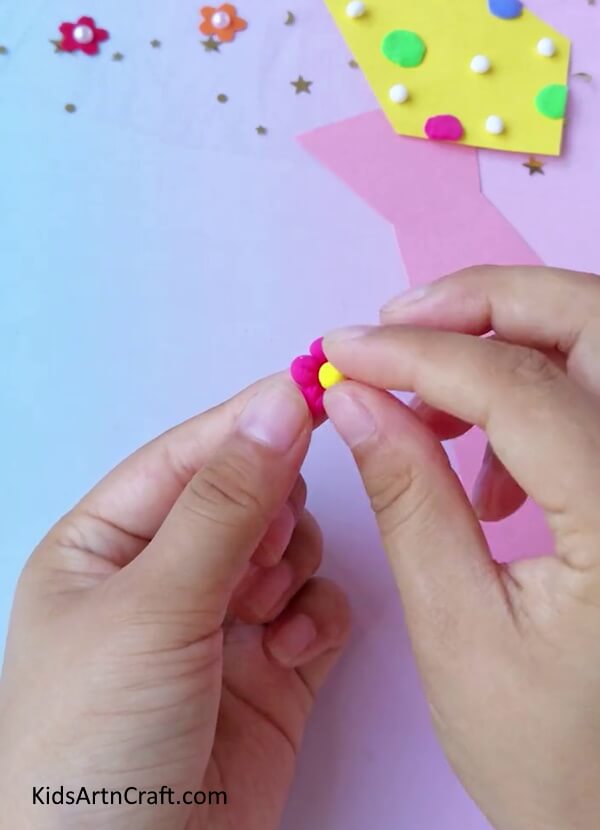 Take yellow clay and make a ball. Paste it in the center of the flower.
Step 9: Applying Glue on The Pink Flower
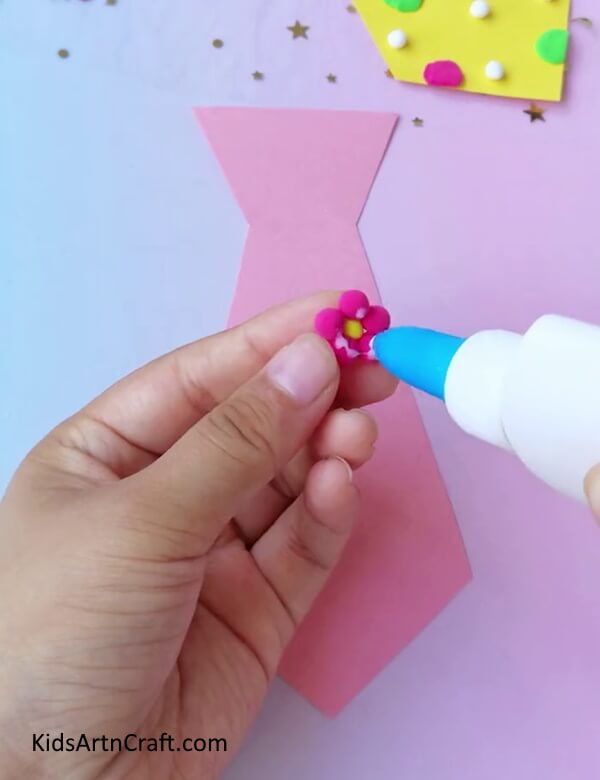
Apply glue on the back of the flower.
Step 10: Pasting The Clay Flowers On The Pink Neck-Tie
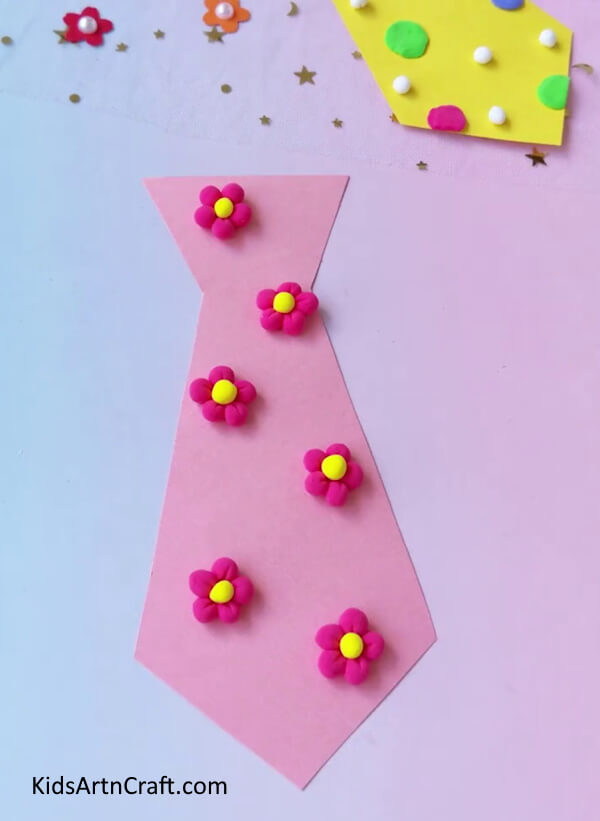
Repeating the above steps, make more such clay flowers. Apply glue and paste them on the pink neck-tie.
Step 11: Attaching The Tie Loop
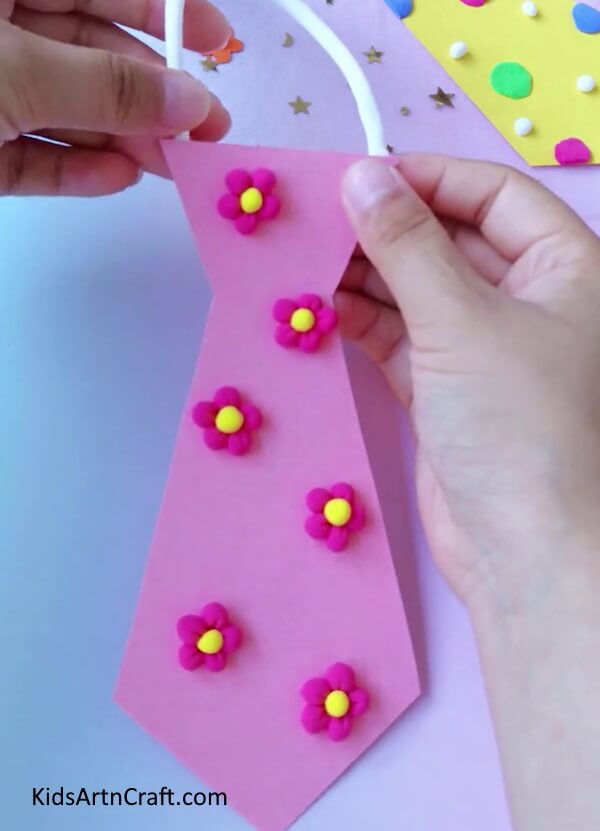
Take white clay and make a semi-circular tie loop out of it. Paste it on top of the neck-tie as shown.
Step 12: Making Rectangular Clay Strips
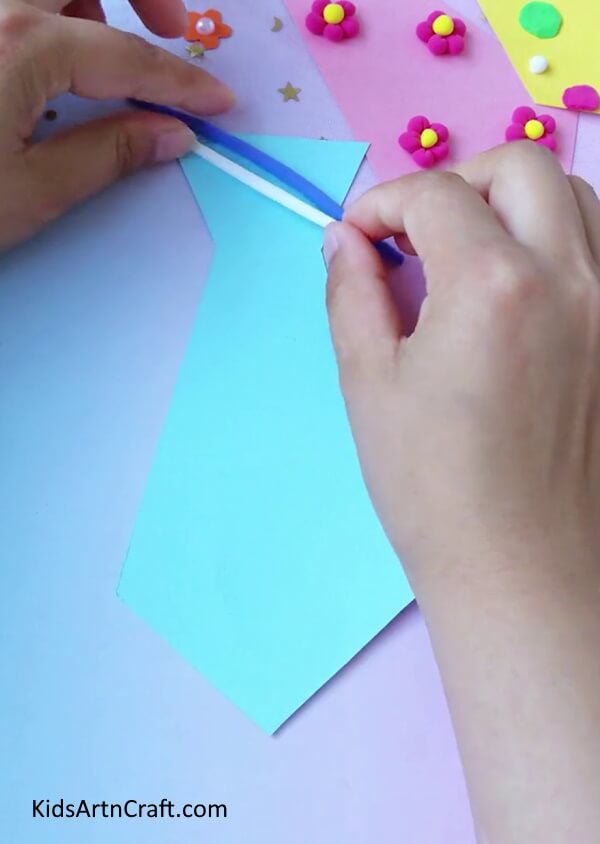
Take blue and white clay. Make rectangular strips out of them. Place the white clay strip below the blue clay strip. Paste them on the blue neck-tie as shown.
Step 13: Making More Clay Strips
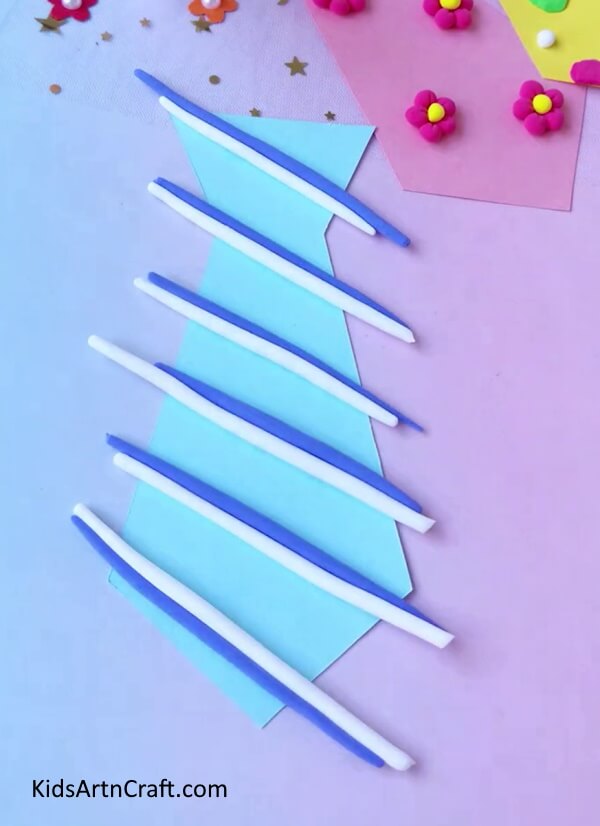
Repeat the above steps, and paste more such strips on the blue neck-tie.
Step 14: Flattening The Strips
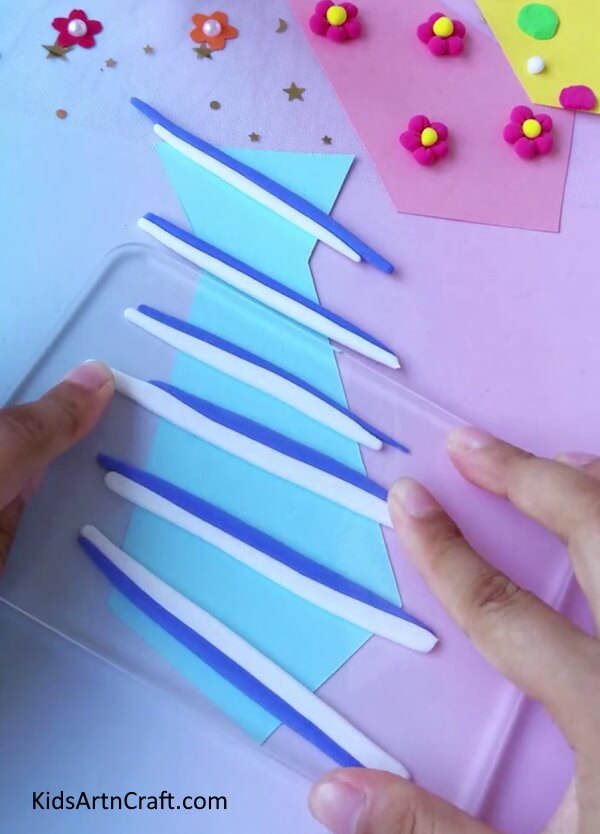
Using a flat surface, flatten all the clay strips.
Step 15: Removing The Excess Clay

Using a clay cutter, cut the excess ends of the clay strips.
Step 16: Attaching A Tie Loop
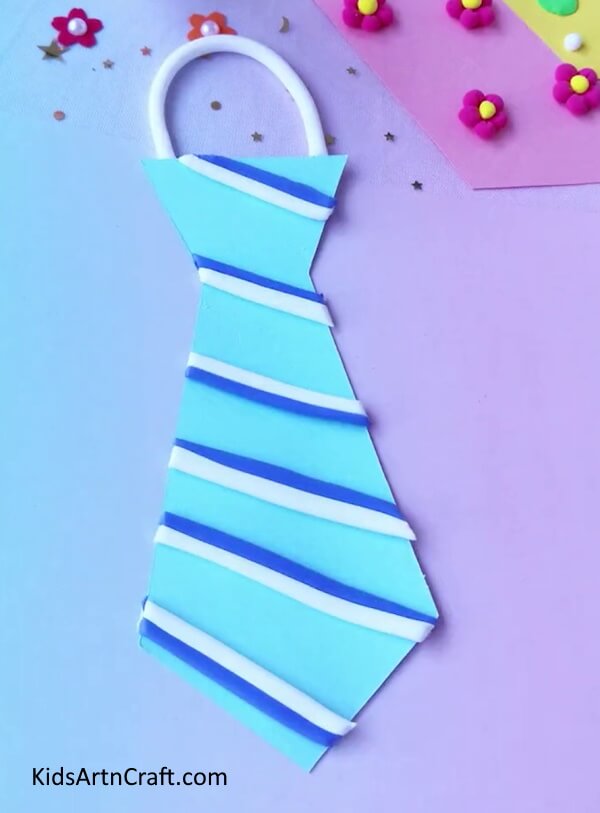
Using white clay, make a semicircular loop and attach it on top of the blue neck-tie.
This Is The Final Look Of Our Paper Neck-Tie Craft!
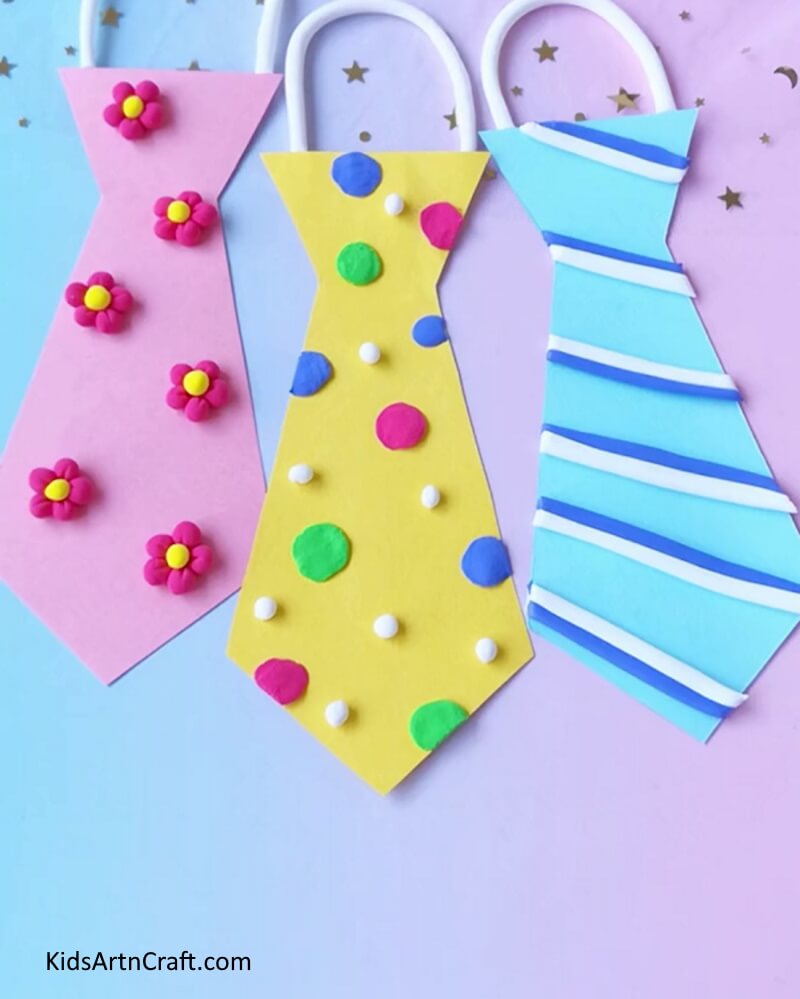
Congratulations! You have finished your paper neck-tie craft.
We hope you enjoyed this craft and that your paper necktie looks great. This is the perfect way to add a unique and stylish touch to your craft wardrobe. It will make your child’s brain work while crafting this and can be created in no time. Kids can proudly show off these to their friends and family. Enjoy Crafting!
Some More Paper Craft Tutorial
Easy Paper Bow Craft For Kids
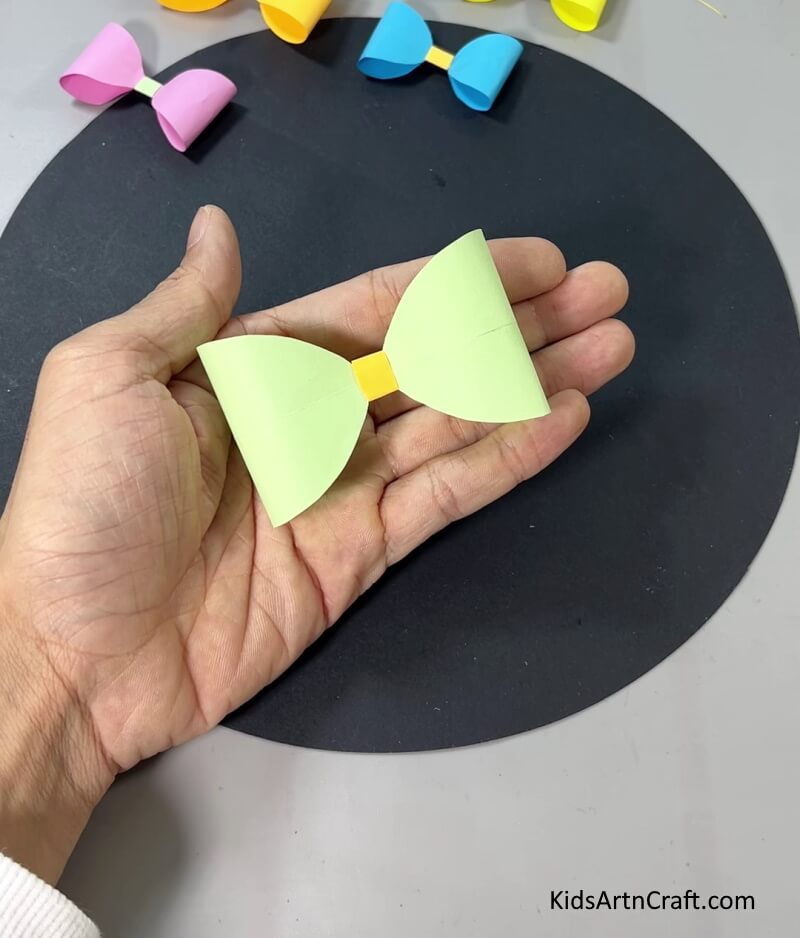
Image Source/Tutorial: Kids Art & Craft
This easy paper bow craft is perfect for kids! All you need is a few supplies and a few minutes to make a beautiful bow to decorate any gift. It’s an easy and fun way for kids to get creative and make something special.
Follow us on Youtube for art and craft tutorials and much more.
More Articles from Kids Art & Craft
- Paper Craft Idea to Make Video Tutorial for All
- Paper Rainbow Cloud Craft step by-step Tutorial
- Easy Paper Folding Crafts Video Tutorial for Kids
- Easy to Make Paper Crafts Video Tutorial for Kids
- How To Make Cardboard Tube Swan Craft Tutorial For Kids


