Paper Crafts
Mini Skirt Dress Origami Paper Craft Tutorial

This step-by-step tutorial will help you to make a cute mini frock dress from origami folds and turns with clear instructions!
If you love to buy new pretty dresses then this craft is just right for you! This craft includes a cute mini dress that will definitely catch your eyes and everyone else’s too! This dress craft is made easily using up a single sheet of paper as it is origami! Origami is the perfect way to engage the kids in a fun learning activity that will help them drive their motor skills and creativity! This step-by-step tutorial involved very easy and clear instructions on each and every step of this origami dress craft! So, what are you waiting for? Let’s begin!
How To Make Mini Skirt Dress Origami Paper

Read More: Cute Mini Paper Origami Bags Craft Step by Step Tutorial For kids
Material Required
- Flower-print Origami Paper
Procedure
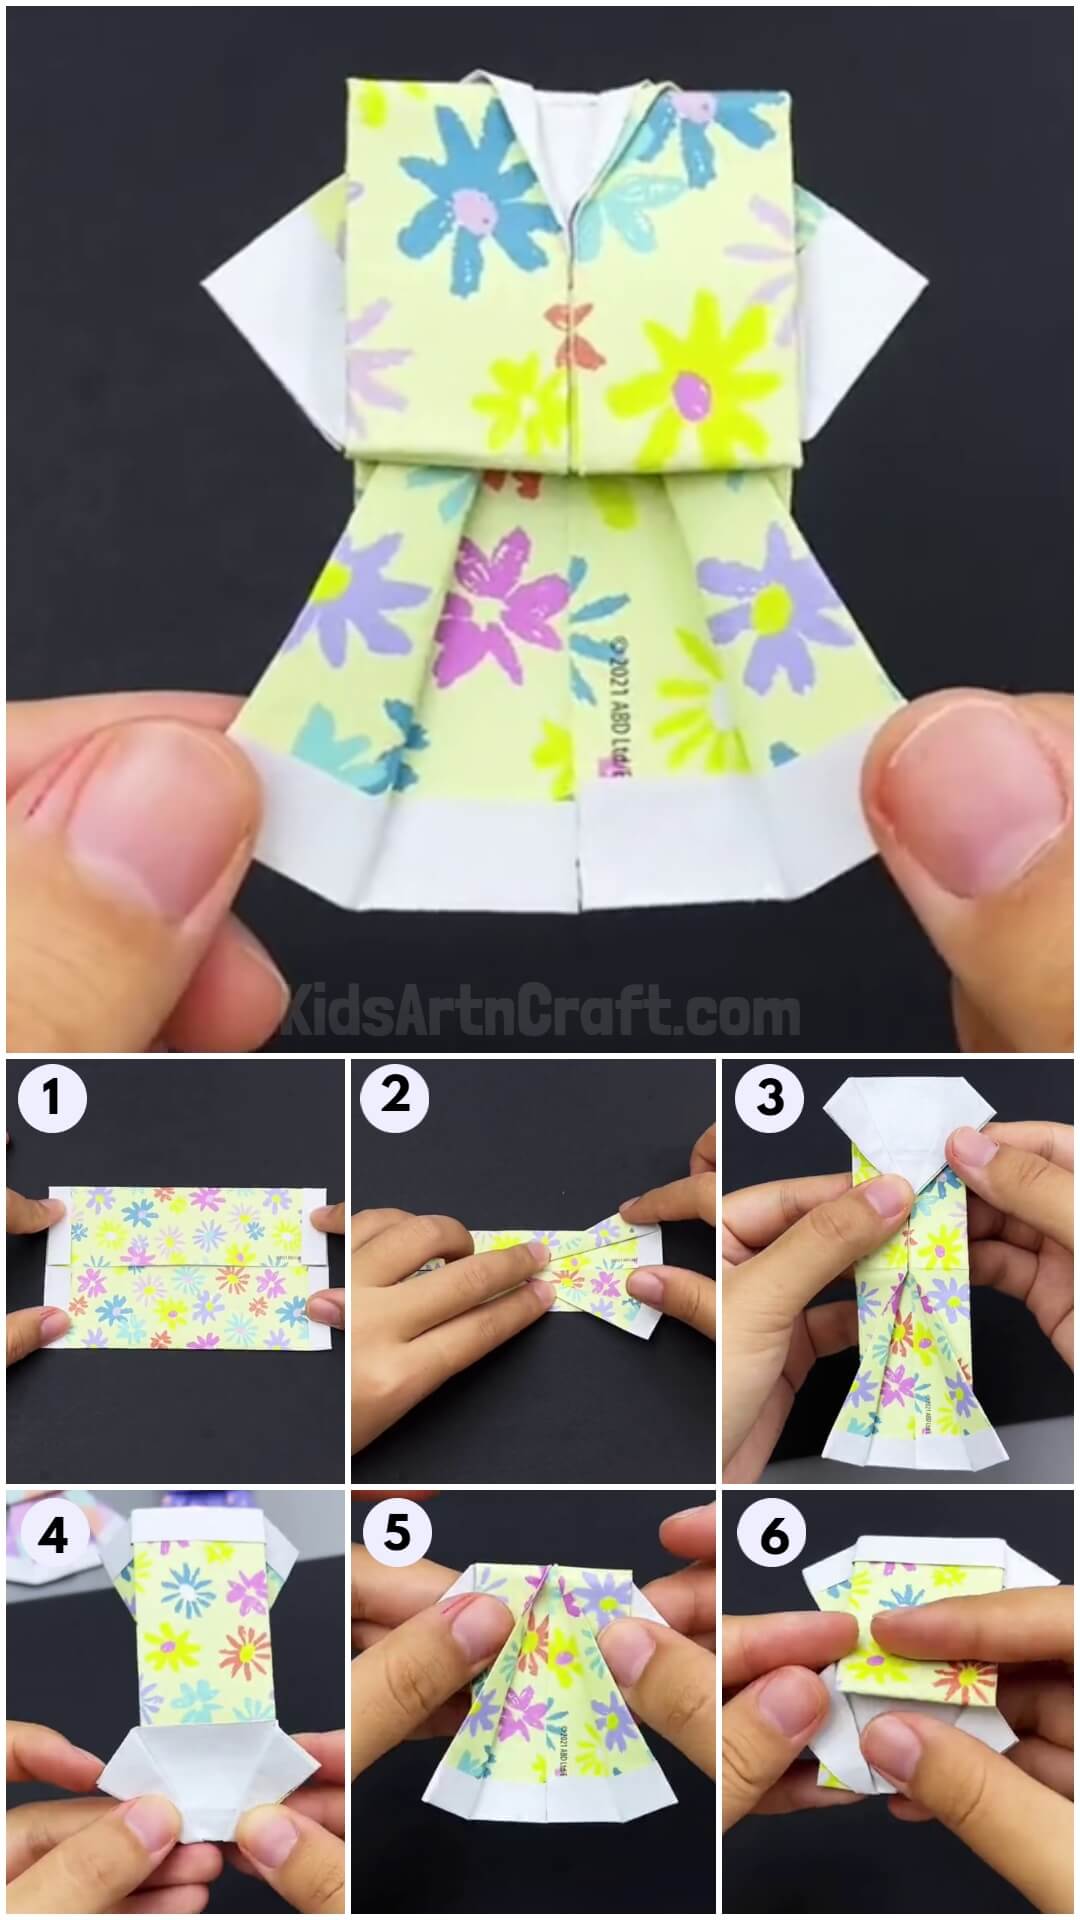
Step 1: Folding One Side Of The Paper
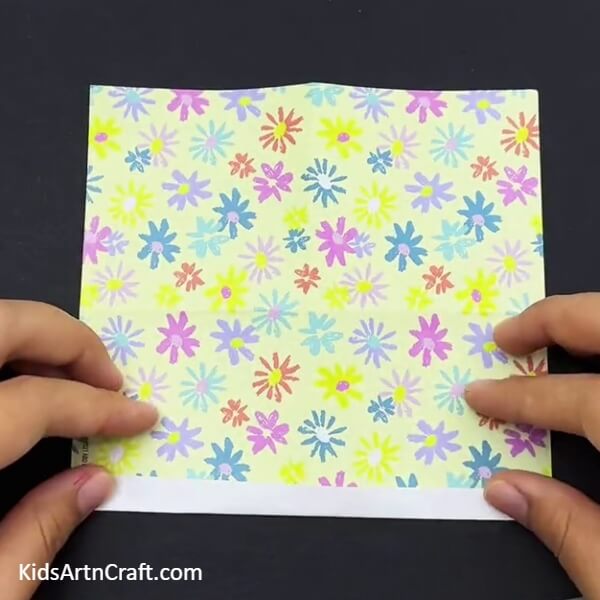

To begin this craft, take a flower-print origami sheet that has a plain white base on the other side. Now, fold one side of the paper to see a white strip.
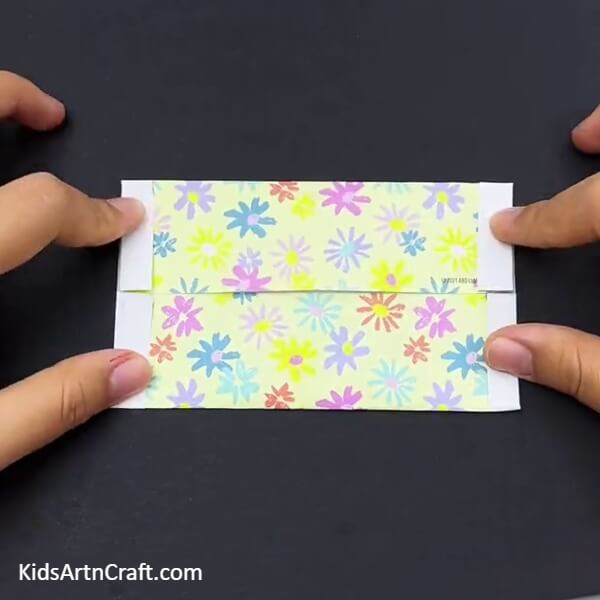
Step 2: Folding The Opposite Side Of The Paper
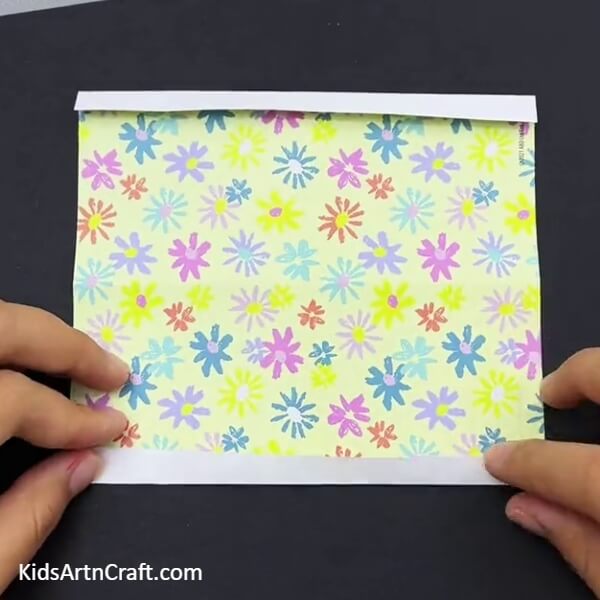
Fold the opposite side of the paper again to see a white strip on the other side.
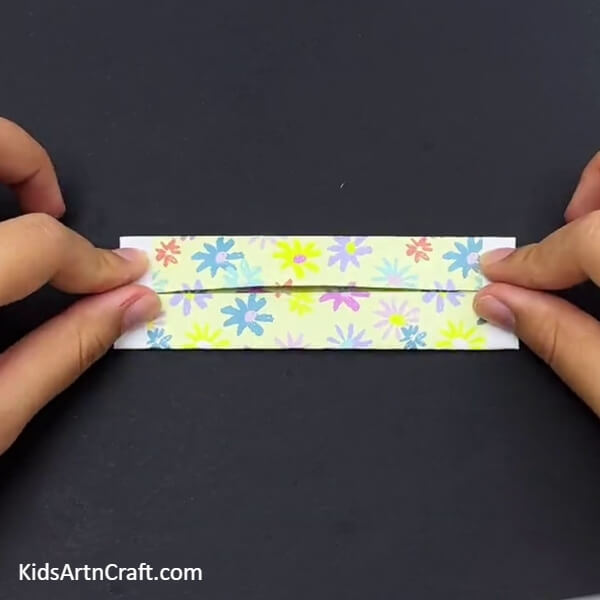
Step 3: Flipping And Folding To The Middle
Flip the paper to the white plain side and fold the unfolded sides to the middle of the paper to make a partition in the middle as shown in the image.
Step 4: Folding Again To The Partition
Again fold the sides to the partition.
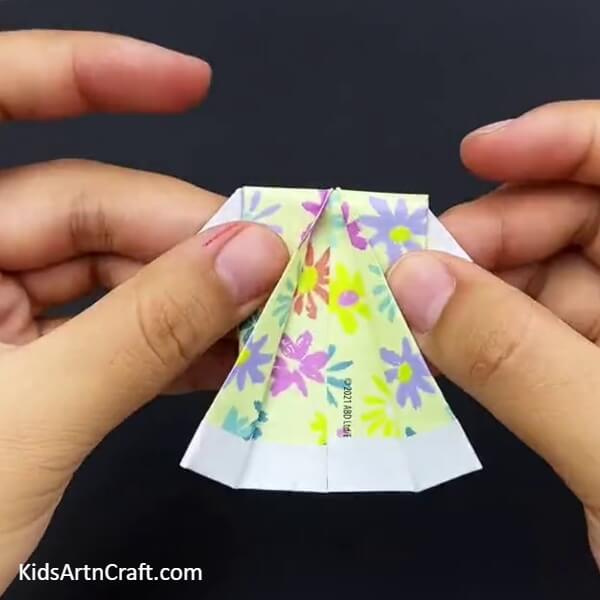
Step 5: Making Inside Reverse Fold
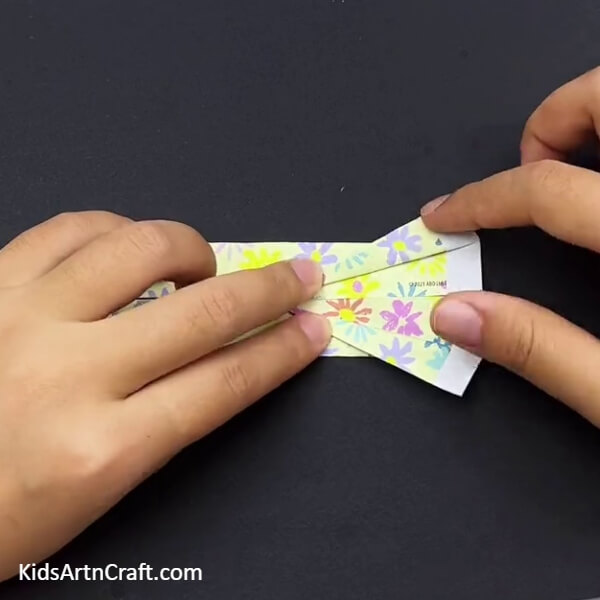
Hold your figure from the middle of the partition and from the right side of it open the first layer of the partition to make an inside reverse fold over it. This will be the skirt of your dress.
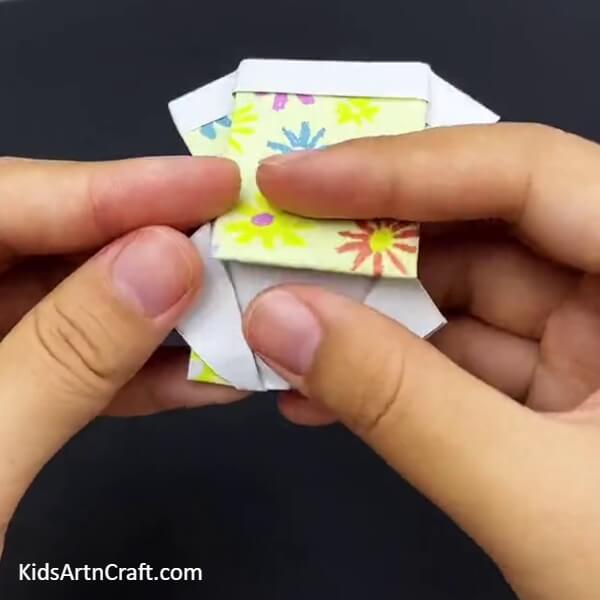
Step 6: Making A Collar
From the other side of the skirt again fold the paper to make the inside reverse fold on the other side too but this time it has to be both the layers of the partition and not from the middle of the partition.
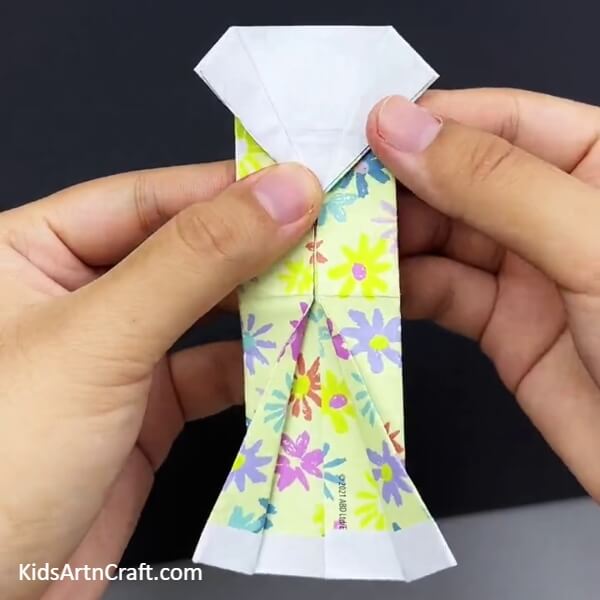
Step 7: Folding The Collar
Fold the collar to the other side of the paper as shown in the image.
Step 8: Flipping Over
Flip over the paper to see your skirt side.
Step 9: Folding The Skirt To The Other Side
Now, fold over the skirt to the other side where the collar was folded.
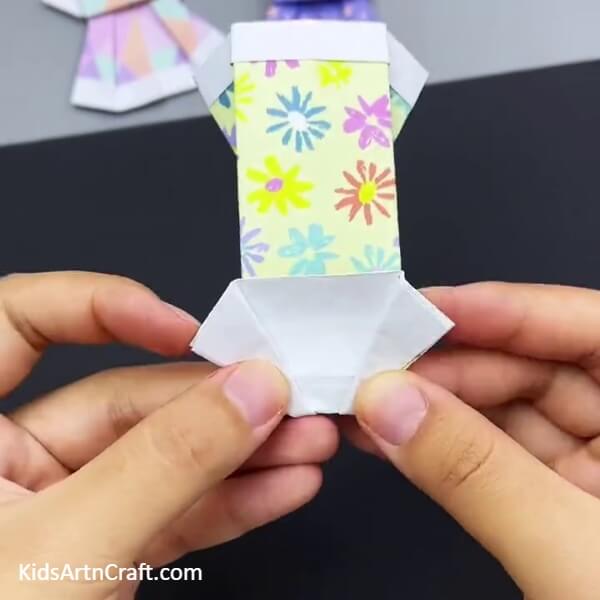
Step 10: Inserting The Part In The Collar
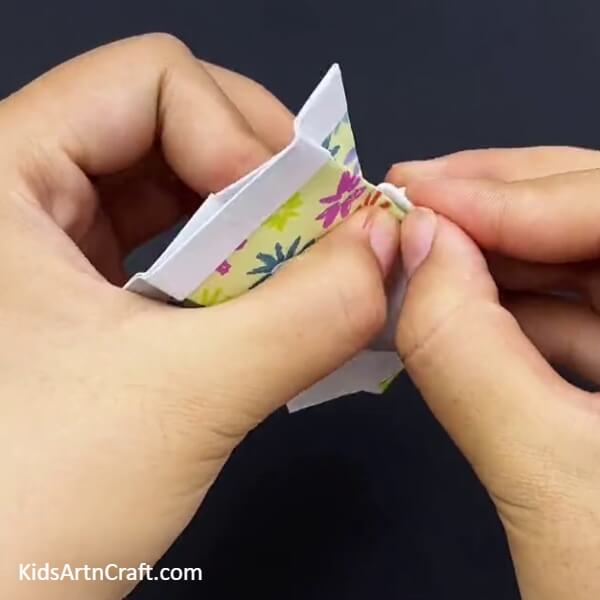
Insert the corners of your back rectangular skirt in the collar.
Step 11: Flipping Over The Figure
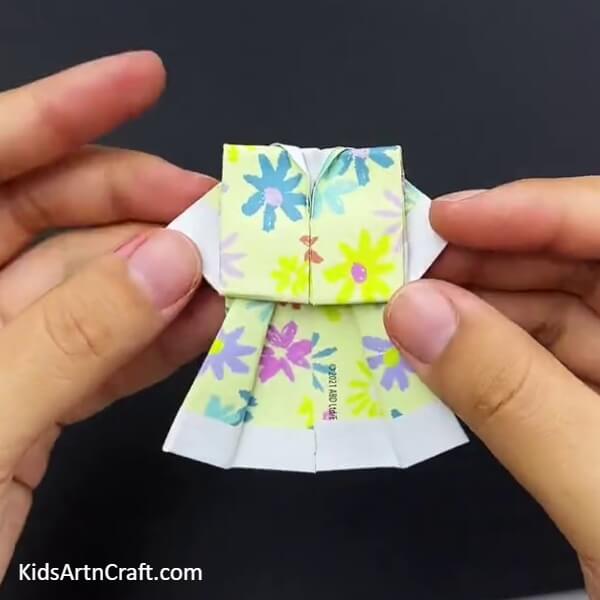
Flip over your figure to see a dress ready. Make sure to crease the folds perfectly to make the dress up to perfection.
This Is The Final Look Of Your Mini Skirt Dress!
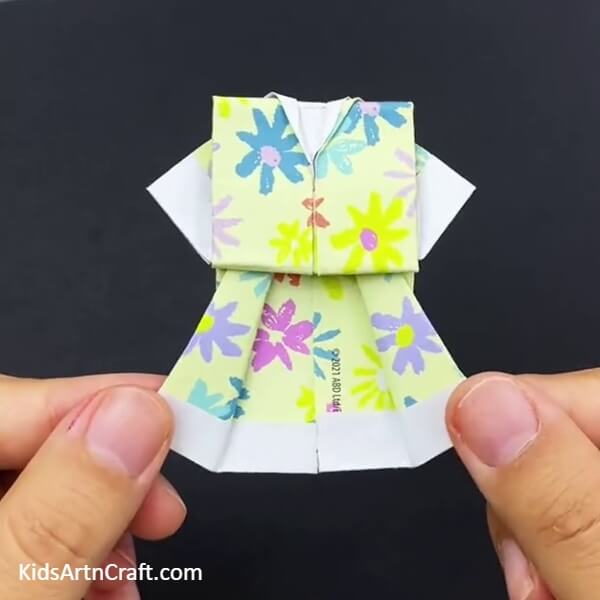
Voila! Your cutest mini dress is finally completed!
Everyone will adore this cutest dress and surely the small girls will want to have a dress like this! You can also make a number of different-different dresses using this tutorial with different prints and textures! Create a whole wardrobe! How cool is that?! Show off your paper wardrobe collection to your friends and family and let them admire your creativity and innovation! You and your friends will surely love to play with these dresses! Try them on!
Follow us on Youtube for art and craft tutorials and much more.
More Articles from Kids Art & Craft
- Yummy Lollipop Paper Origami Idea For Beginners
- Love Paper Envelop Origami Step by Step Tutorial
- DIY Origami Fruit Using Craft Paper For Kids
- Easy Origami Paper Paku Paku Step by Step Tutorial for kids
- Pretty Origami Umbrella Creative Craft Tutorial For Kids