Paper Crafts
3D Swamp With Ducks Easy Craft Tutorial For Kids

Are you looking for some crafty decor, but not the usual ones? We got you covered through this step-by-step tutorial, make a Swamp!
Welcome craft lover! We exclusively brought a unique craft today for you! Could you even think of a realistic small swamp? Well, whatever the answer may be, this craft is inspired by that thought! With this step-by-step tutorial, you will easily make a swamp model with pretty cute ducks which will look real! In just the blink of an eye, your craft will be completed and with full proficiency as well! Read the article carefully and whole to get yourself a tiny swamp with ducks! With no further delay, let’s begin!
Simple 3D Swamp With Ducks Easy Craft

Read More: Pretty Paper Flying Birds Craft Step-by-step Tutorial For Kids
Materials Required
- Blue Paper Sheet
- Sketch pens (Pink, Yellow, Dark, And Light Green)
- Markers (White And Blue)
- Super Clay (Yellow And Orange)
- Googly Eyes
- Scissors
- Glue
Procedure
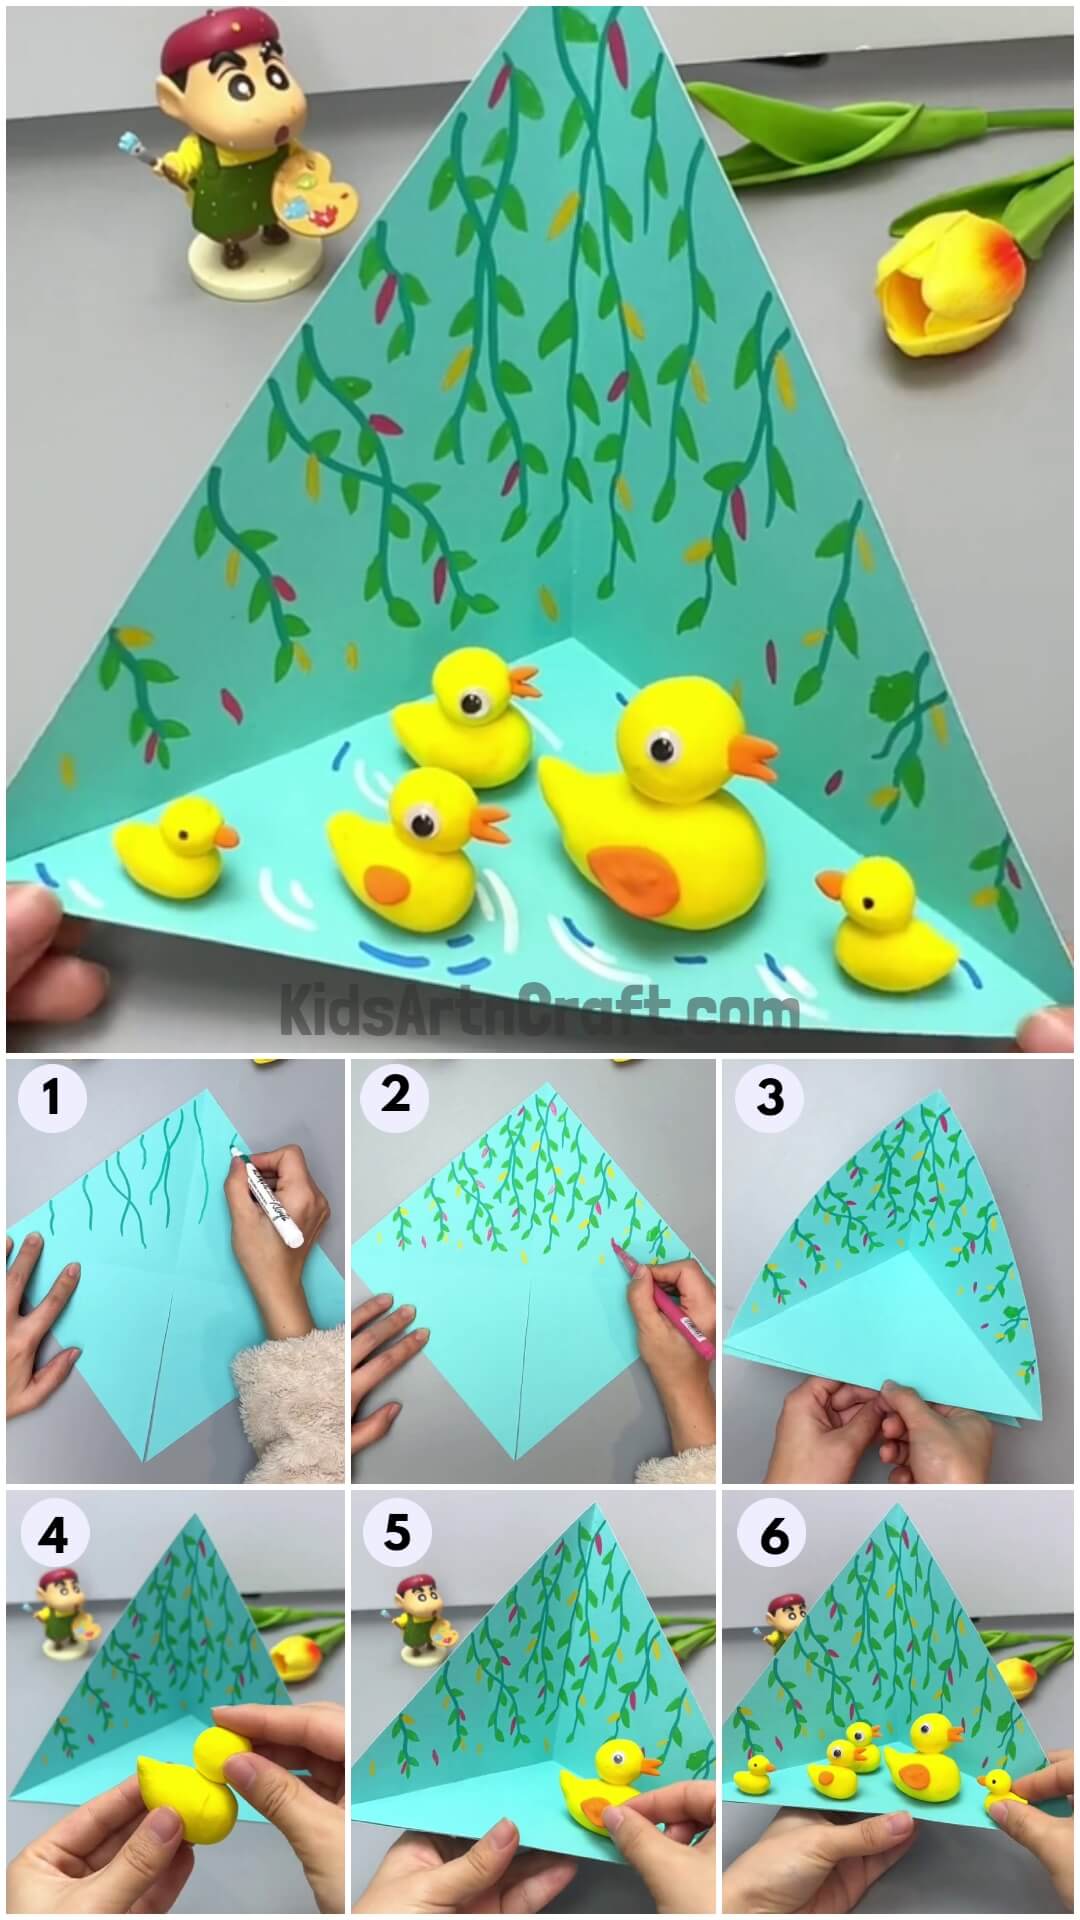
Step 1: Making ‘+’ Creases On A Paper Sheet


To begin this craft, take a blue square sheet and turn it into a diamond shape, fold the corners of this sheet over the opposite ones to make a ‘+’ crease over the diamond paper.
Step 2: Cutting The Below Half Vertical Crease
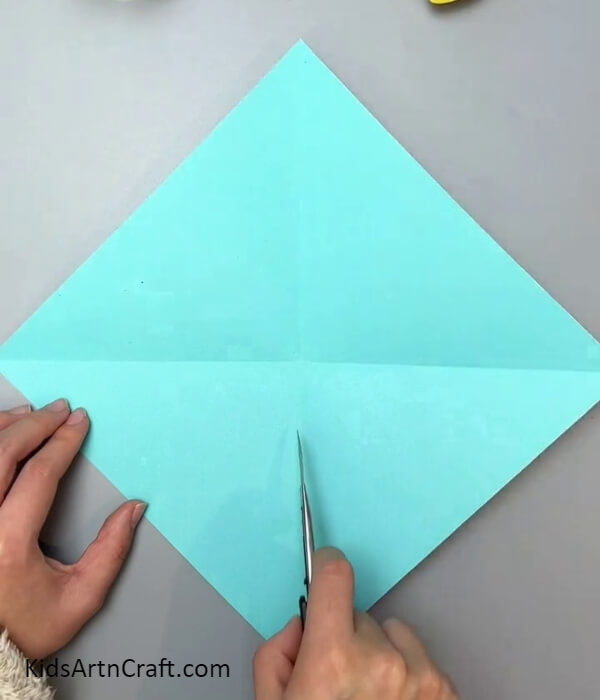
Using a craft cutter, make the cut on the below half vertical ‘+’ crease.
Step 3: Drawing Swamp Plant Stems
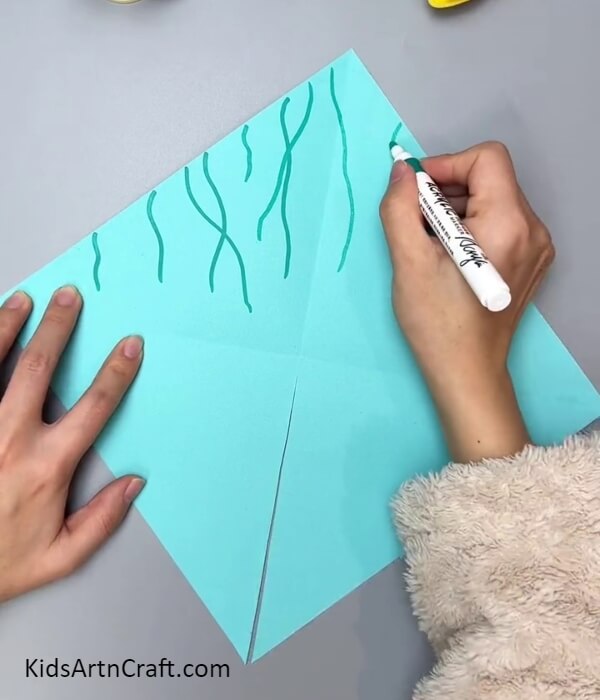
Using a dark green sketch pen, draw swamp-falling plant stems on the upper half of the horizontal ‘+’ crease from the top.
Step 4: Drawing Leaves On The Stems
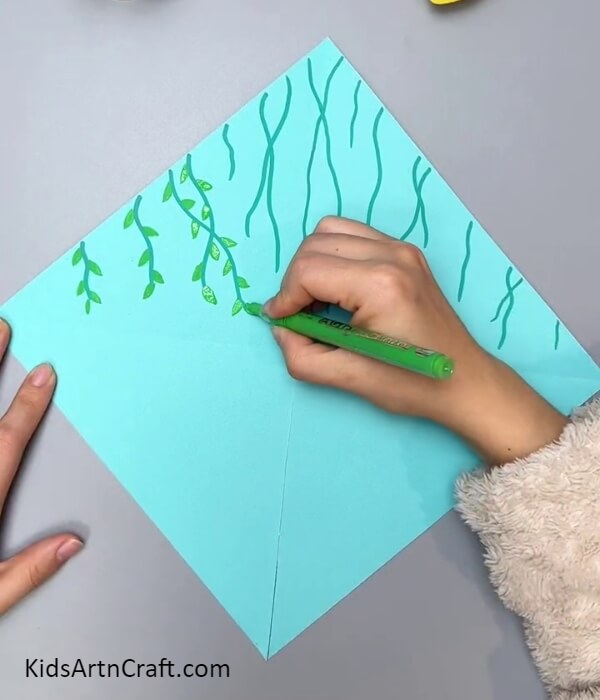
Using a light green sketch pen, draw leaves to the wavy stems.
Step 5: Making More Colorful Leaves
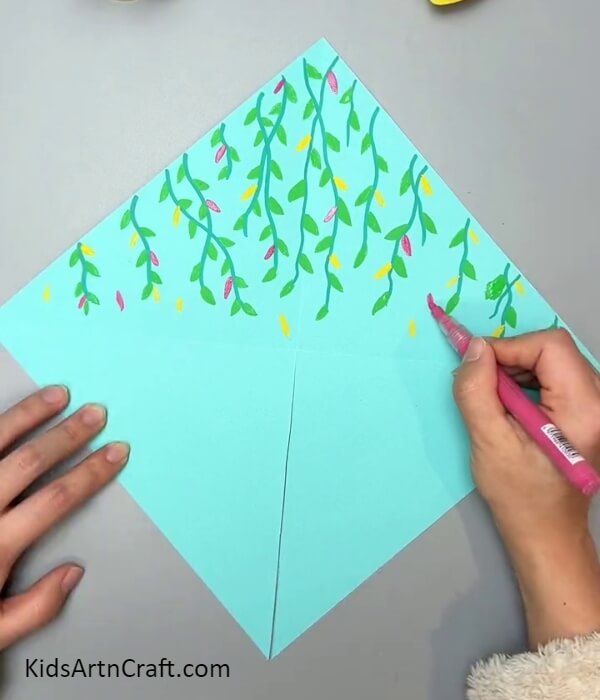
Using yellow and pink sketch pens, make more leaves to the stems and even between them randomly.
Step 6: Making A 3D Base
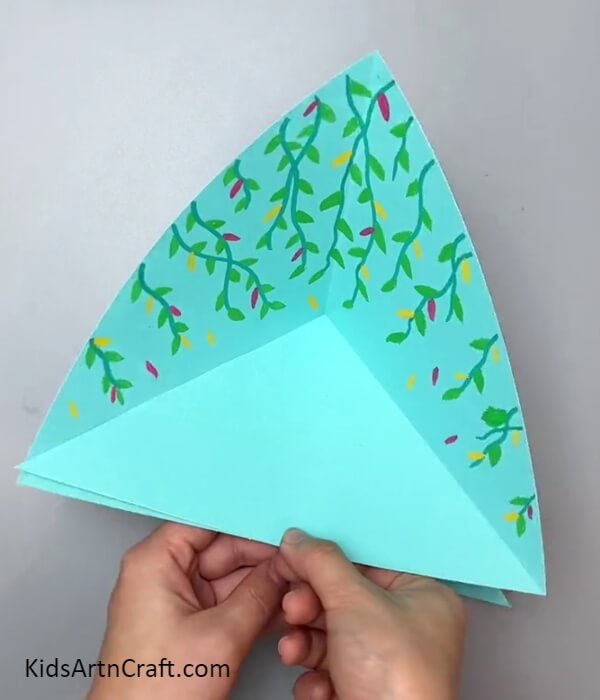
From the cut, place the parts, one over the other, and secure it with glue to make a 3D swamp base as shown in the image.
Step 7: Making A Duck
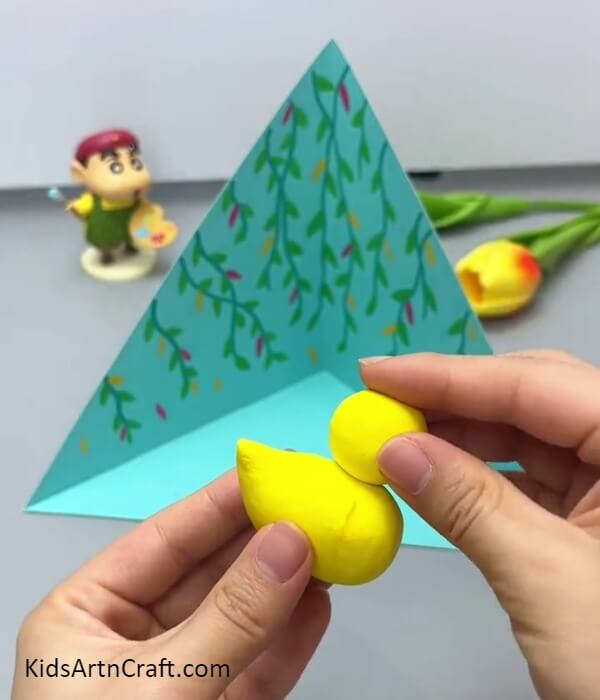
Using yellow-colored super clay, dough a drop-shape for the duck’s body and a ball for its face. Stick this ball over the body to form a duck model.
Step 8: Adding A Beak And Eyes
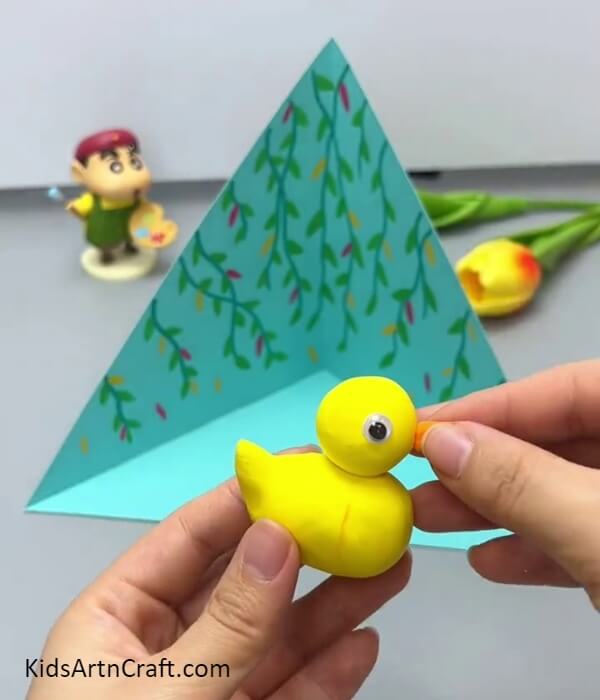
Stick 2 googly eyes on each side of the face and make a beak from orange-colored clay, stick this beak in front of the face below the eyes.
Step 9: Adding Wings Of The Duck
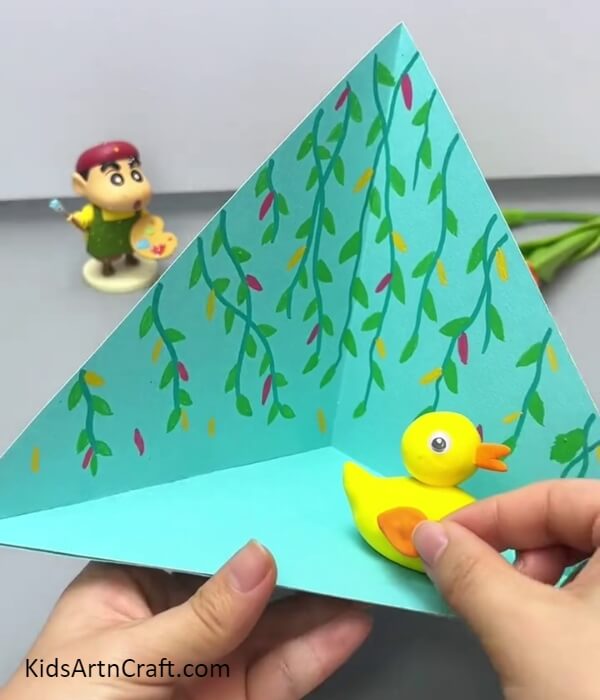
Make a flat drop shape from the orange clay and stick it over the body on the sides. Now, place your duck on the swamp base as shown in the image.
Step 10: Adding Another Duck To The Base
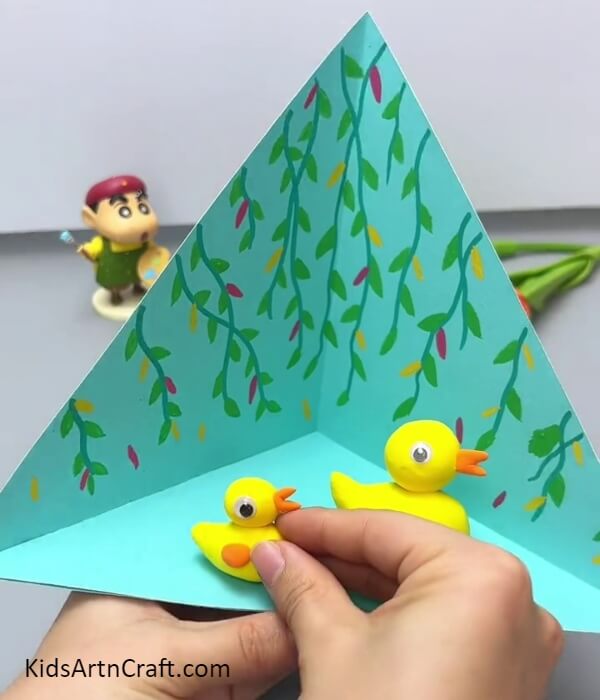
Following the same previous steps, make another duck but this time a little smaller and place it on the swamp base behind the first duck.
Step 11: Adding More Ducks To The Swamp Base
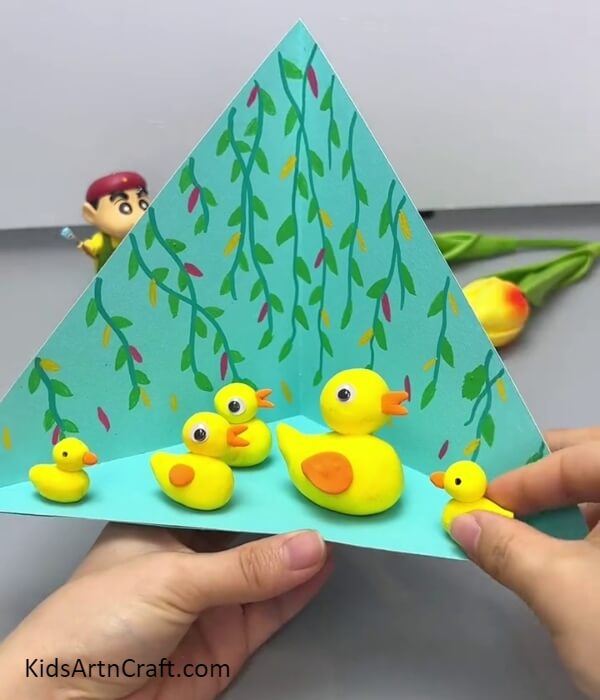
Make more ducks and place them over the swamp base of various sizes as shown in the image.
Step 12: Adding Waves In The Water
Using a white marker, draw curved lines on the swamp base beside the ducks to make waves in the water.
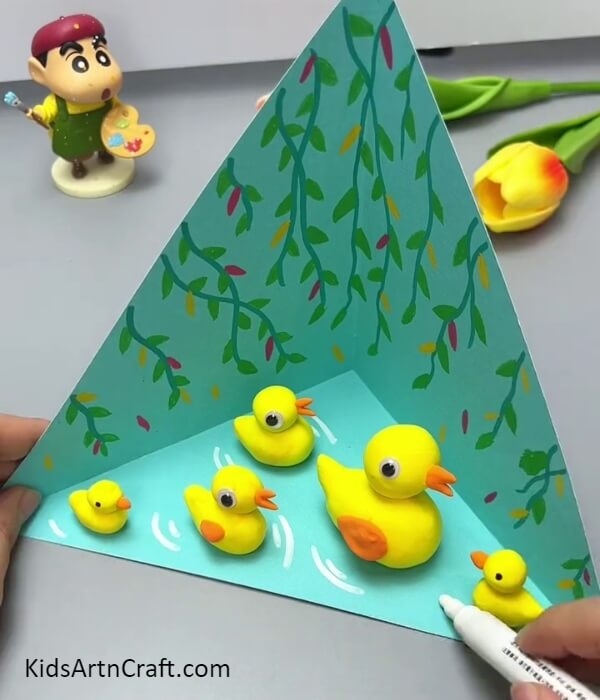
This Is The Final Look Of Your Ducks In Swamp Craft!

For the last step, make more water waves using the blue marker along and over the white waves.
Congratulations! You have finally completed your craftwork of Ducks in the Swamp!
Well, well, what a fun craft! Wasn’t it? I know you agree! To brighten it up, you can now decorate this amazing piece pond with some cute little ducks in your craft collection! Place it in any corner to make that place even more creative and beautiful! Customize it as you want and there is a catch! You will not spend a single penny on them, as they will be made of the craft materials you already have with you, just the paper, colors, and clay! If not made till now, try it out!
Follow us on Youtube for art and craft tutorials and much more.
More Articles from Kids Art & Craft
- Easy Paper Flower Toy Craft Tutorial For Kids
- Learn To Make Easy Heart Shaped Paper Mouse Craft
- How to Make a Paper Fall Leaf for Kids
- How to Make Paper Butterfly Easy Tutorial For Kids
- DIY Easy Origami Paper Shark Toy Tutorial For Kids