Fall & Autumn
Beautiful Swan In Pond Leaf Craft Tutorial For Beginners

Make a beautiful Swan in Pond craft using Leaves. Follow this step-by-step tutorial for beginners to transform this lovely, creativity-exercising idea into reality!
Breathe new life into ordinary dry leaves with this creative Beautiful Swan in Pond craft idea for Beginners. Capture the dreamy sight of Swans swimming in ponds in the sunset on paper by following this step-by-step tutorial to bring the craft idea to life.
DIY Beautiful Swan In Pond Leaf Craft

Read More: Unique Leaves Fox Craft Making Tutorial For Beginners
Materials Required
- White A4 size sheet
- Red paper
- Dry leaves and flowers
- Glue
- Scissors
- Sketch pens (Black, Blue, and Orange color)
Procedure
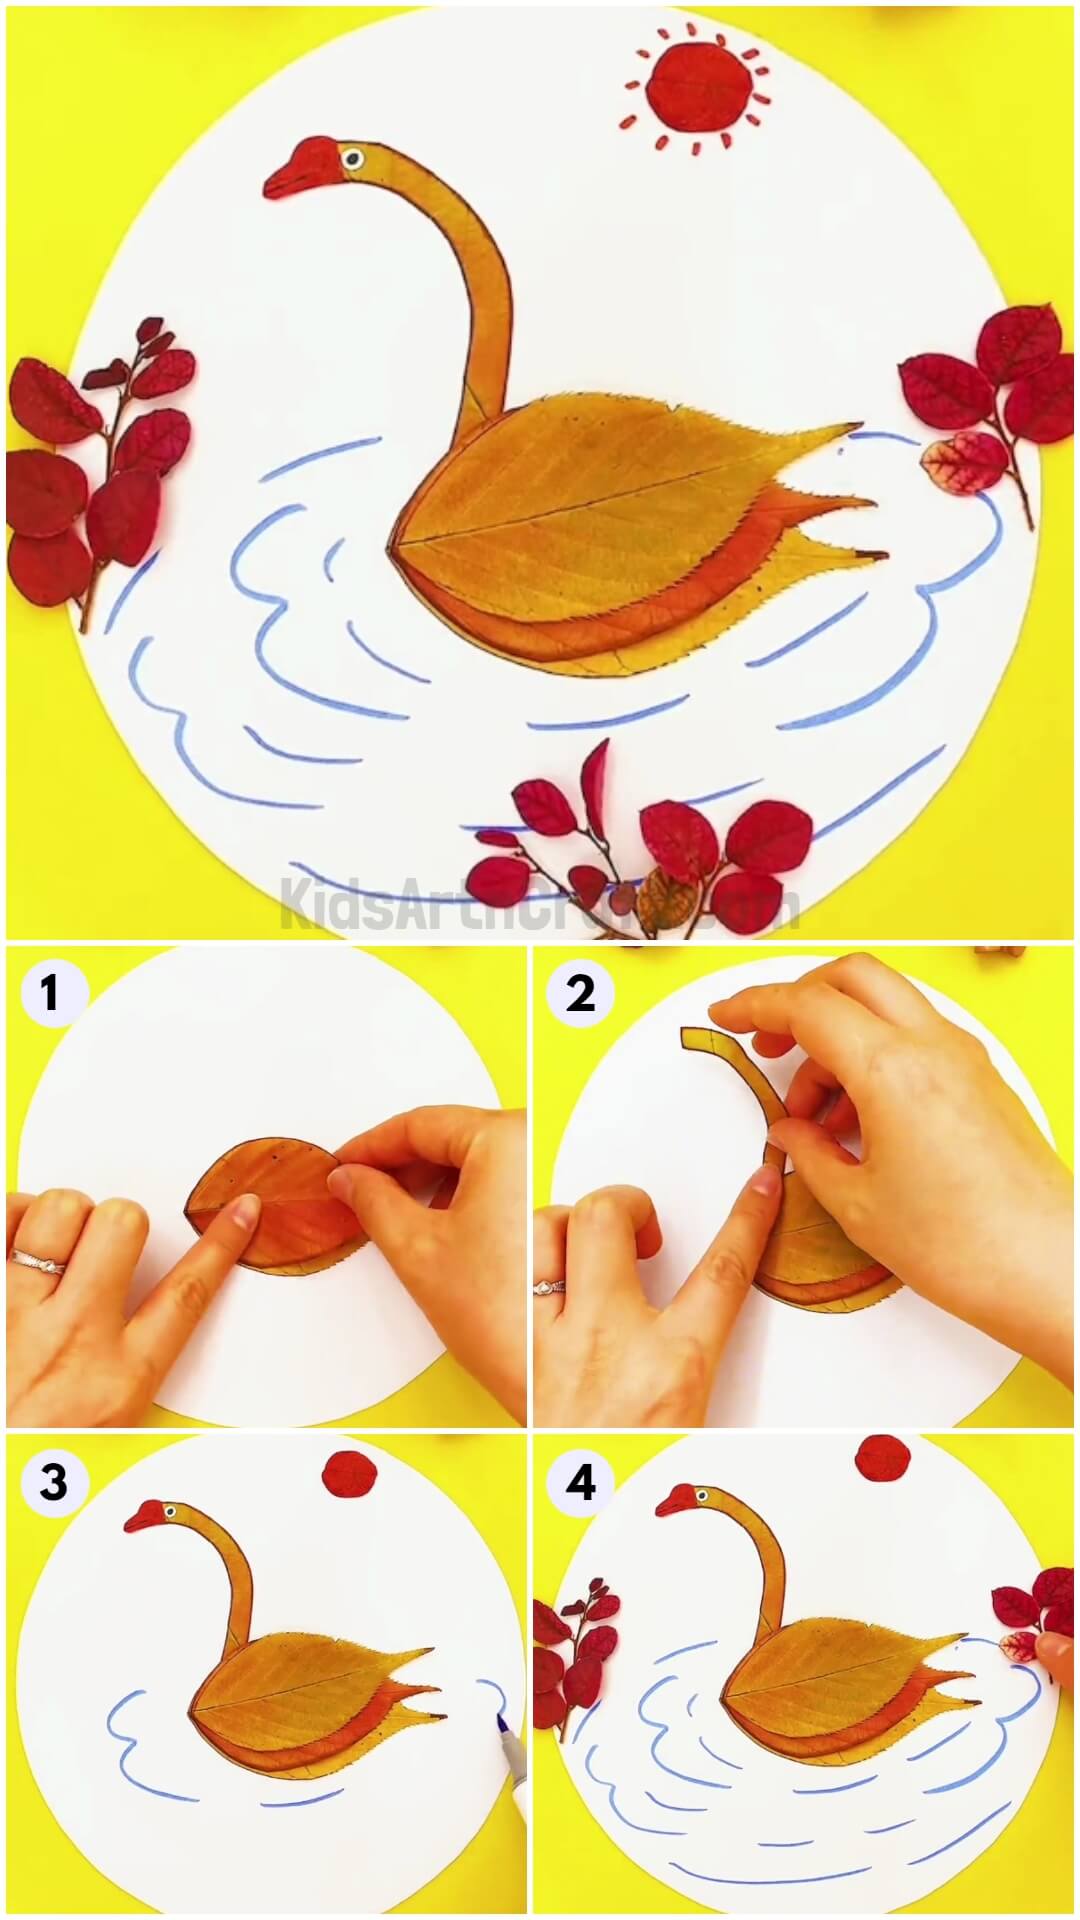
Step 1: Pasting A Leaf Horizontally On Paper
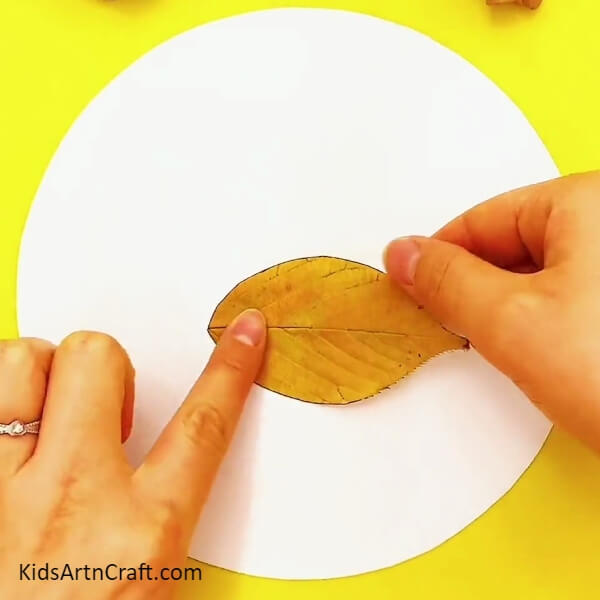

Cut a large circle out of the white A4 size sheet to form the base of the craft. Take one leaf and paste it horizontally in the center of the circle. Let the node end of the leaf be pointed outward, i.e. opposite to the direction of the swan’s head.
Step 2: Adding The Second Layer Of Leaf

Paste this second layer directly on top of the first leaf in the center of the paper, but its node end be pointed slightly higher than its predecessor.
Step 3: Adding A Third Layer Of Leaf
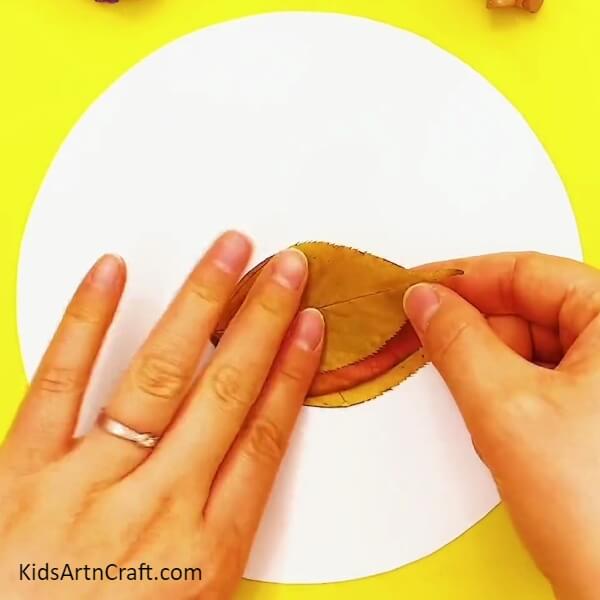
Paste this leaf a little higher than the previous one, but make sure the tip coincides with that of the leaves below it. This forms the body of the Swan.
Step 4: Pasting The Long Curved Neck Of The Swan
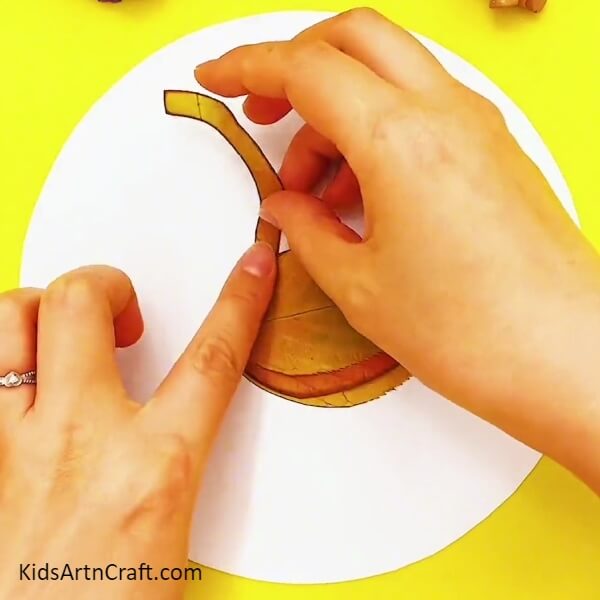
Take another leaf and outline the shape of a thin, curved neck on it. Cut it out and ensure the size is proportional to the existing body. After that, fix the Swan’s neck onto its body, connecting the bottom part of the neck to the feathered body and letting the upper part form an inverse C-shape.
Step 5: Attaching The Eye And Beak Of The Swan
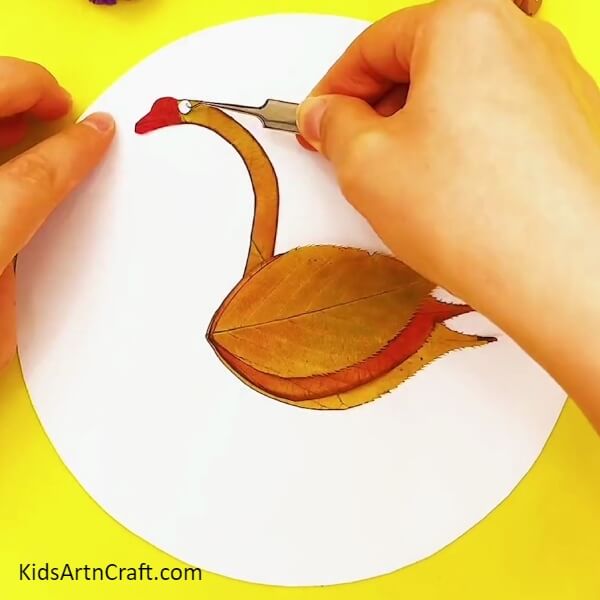
With red paper, cut a proportional-sized beak for the swan. On the upper area where the neck ends, attach the red-colored beak with glue. After this, cut a tiny circle from the white sheet. Glue the circle on the top curve of the neck, just before the beak, using tweezers for the Swan’s eye.
Step 6: Drawing In The Details Of The Eye
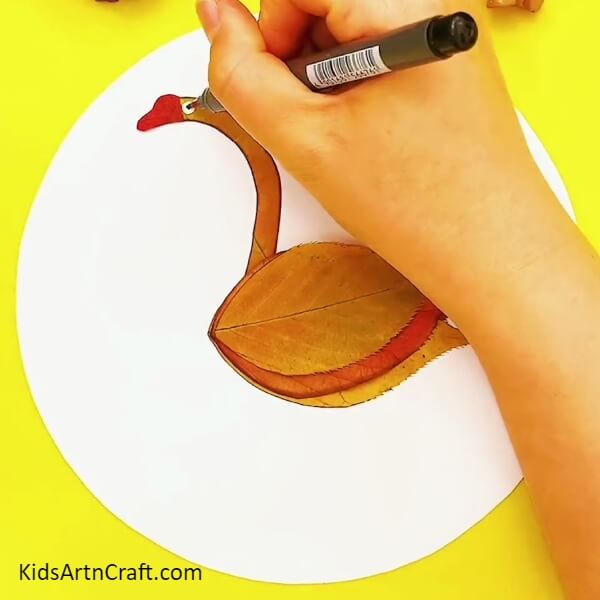
With a black marker pen, add a dot in the center of the white, circular eye. This is the pupil of the Swan’s eye.
Step 7: Illustrating The Background Scenery
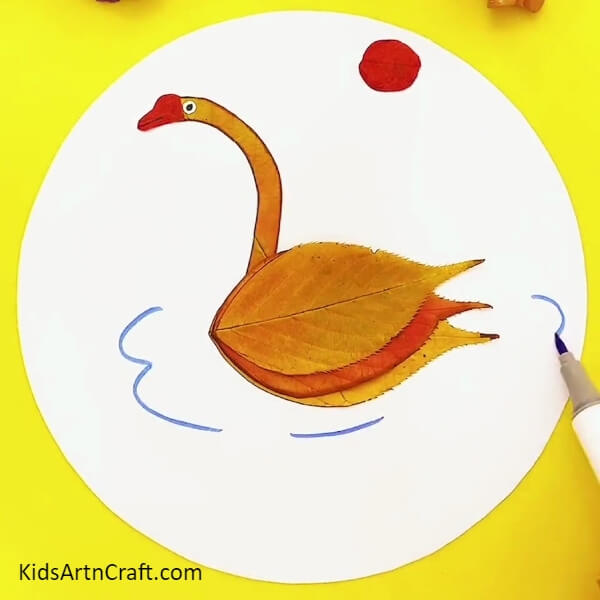
Let the sunshine be in the background of this beautiful scenery. Cut out a circle from the red craft paper. Then glue it on the top right corner of the paper. Use a blue sketch pen to draw the ripples of the pond water that the Swan is sitting in.
Step 8: Adding Details To The Background

Use leftover leaves, branches, or flowers to enhance the beauty of the scenery. Paste them on the sides of the paper, or anywhere you like. Flex your creative muscles to give the picture your unique touch.
Step 9: Making The Sun Shine Brightly
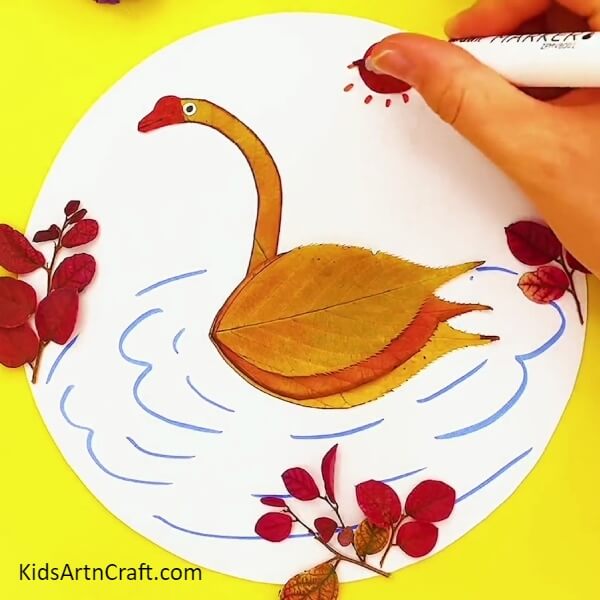
Add the final touch to your craft by sketching sun rays around the sun with an orange sketch pen.
Flaunting Your Finished Craft
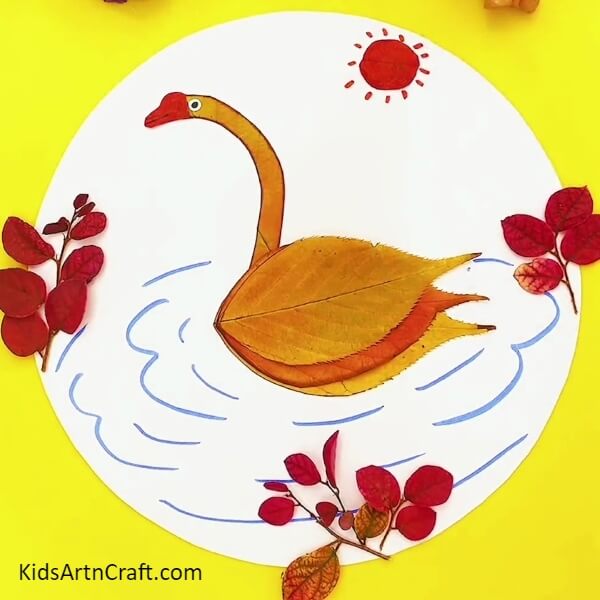
The Beautiful Swan in Pond craft is complete! This craft captures a glimpse of nature’s beauty, especially through the process of repurposing the dead leaves that would have otherwise been tossed and blown away in the wind. Flaunt your beautiful handiwork and share this meaningful activity with your friends to multiply the satisfaction.
We hope you enjoyed this step-by-step tutorial on creating a beautiful Swan in Pond craft. Your feedback is important to us, so please share your thoughts in the comment section below. Don’t forget to explore our other articles for more creative inspiration!
Thank you for stopping by our website.
Follow us on Youtube for art and craft tutorials and much more.
More Articles from Kids Art & Craft
- Beautiful Leaf Peacock Craft Step-by-step Tutorial
- Pretty Birds Singing Leaf Craft Tutorial For Kids
- Easy To Make Fall Leaves Bird Craft Step-by-step Tutorial For Kids
- Realistic Tree Craft Using Fall Leaves Step-by-step Tutorial
- Creative Fall Leaf Lotus Craft Tutorial For Kids