DIY and Crafts
Fun To Make Arrow-Bow Craft Step-by-step Tutorial For Kids

This fun and easy craft tutorial is perfect for kids of all ages! Learn how to make an arrow bow with simple supplies found around the house. Step-by-step instructions make this a quick and easy craft for kids to make and enjoy.
Looking for an activity to help your little one combine creativity and practical use of the craft? Look no more, today we are here with this step-by-step guide and simple tutorial for a fun and easy-to-create arrow – bow for children. This idea is suitable for kids of five to eight years of age who are always looking for things to keep them busy and occupied. This idea allows kids to use their creativity and put it to better use. So collect the materials required and let’s get started with this amazing idea !!
Arrow-Bow Craft Step-by-step Tutorial For Kids
Read More: Dr. Seuss Math Activities & Games For Classroom
Materials Required
- A cutter
- A wooden stick or a toothpick
- Three Q tips or earbuds
- A jute rope
- A pair of scissors
- A red coloured marker
- A blue coloured marker
- A green coloured marker
Procedure
Step 1: Shape The Stick
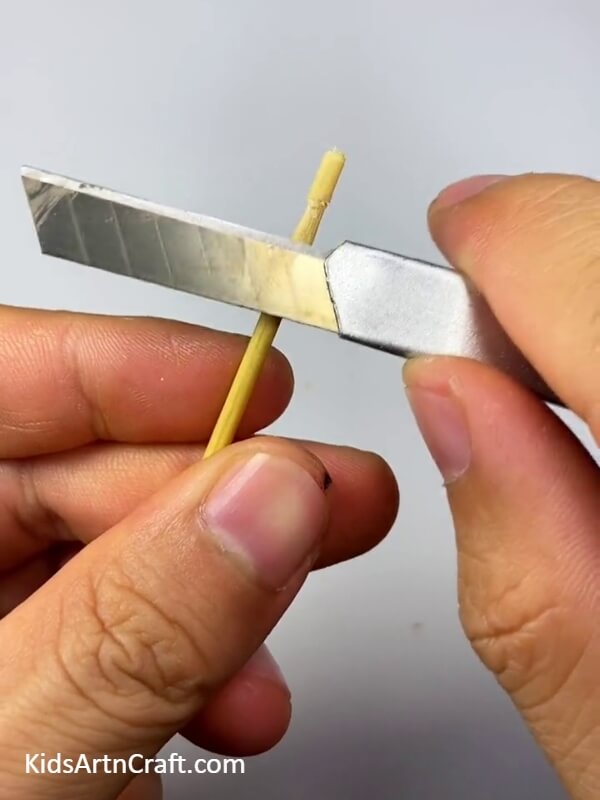
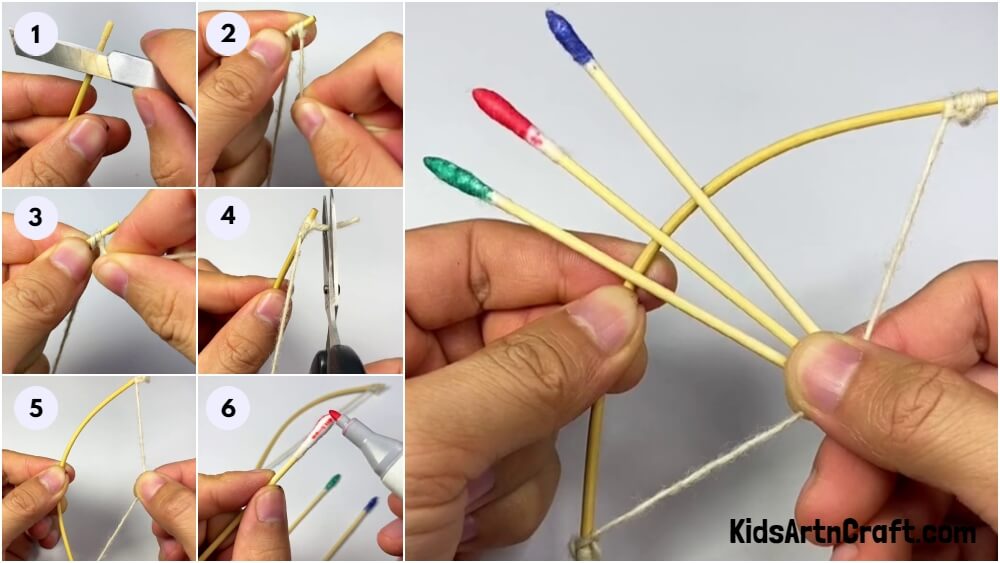
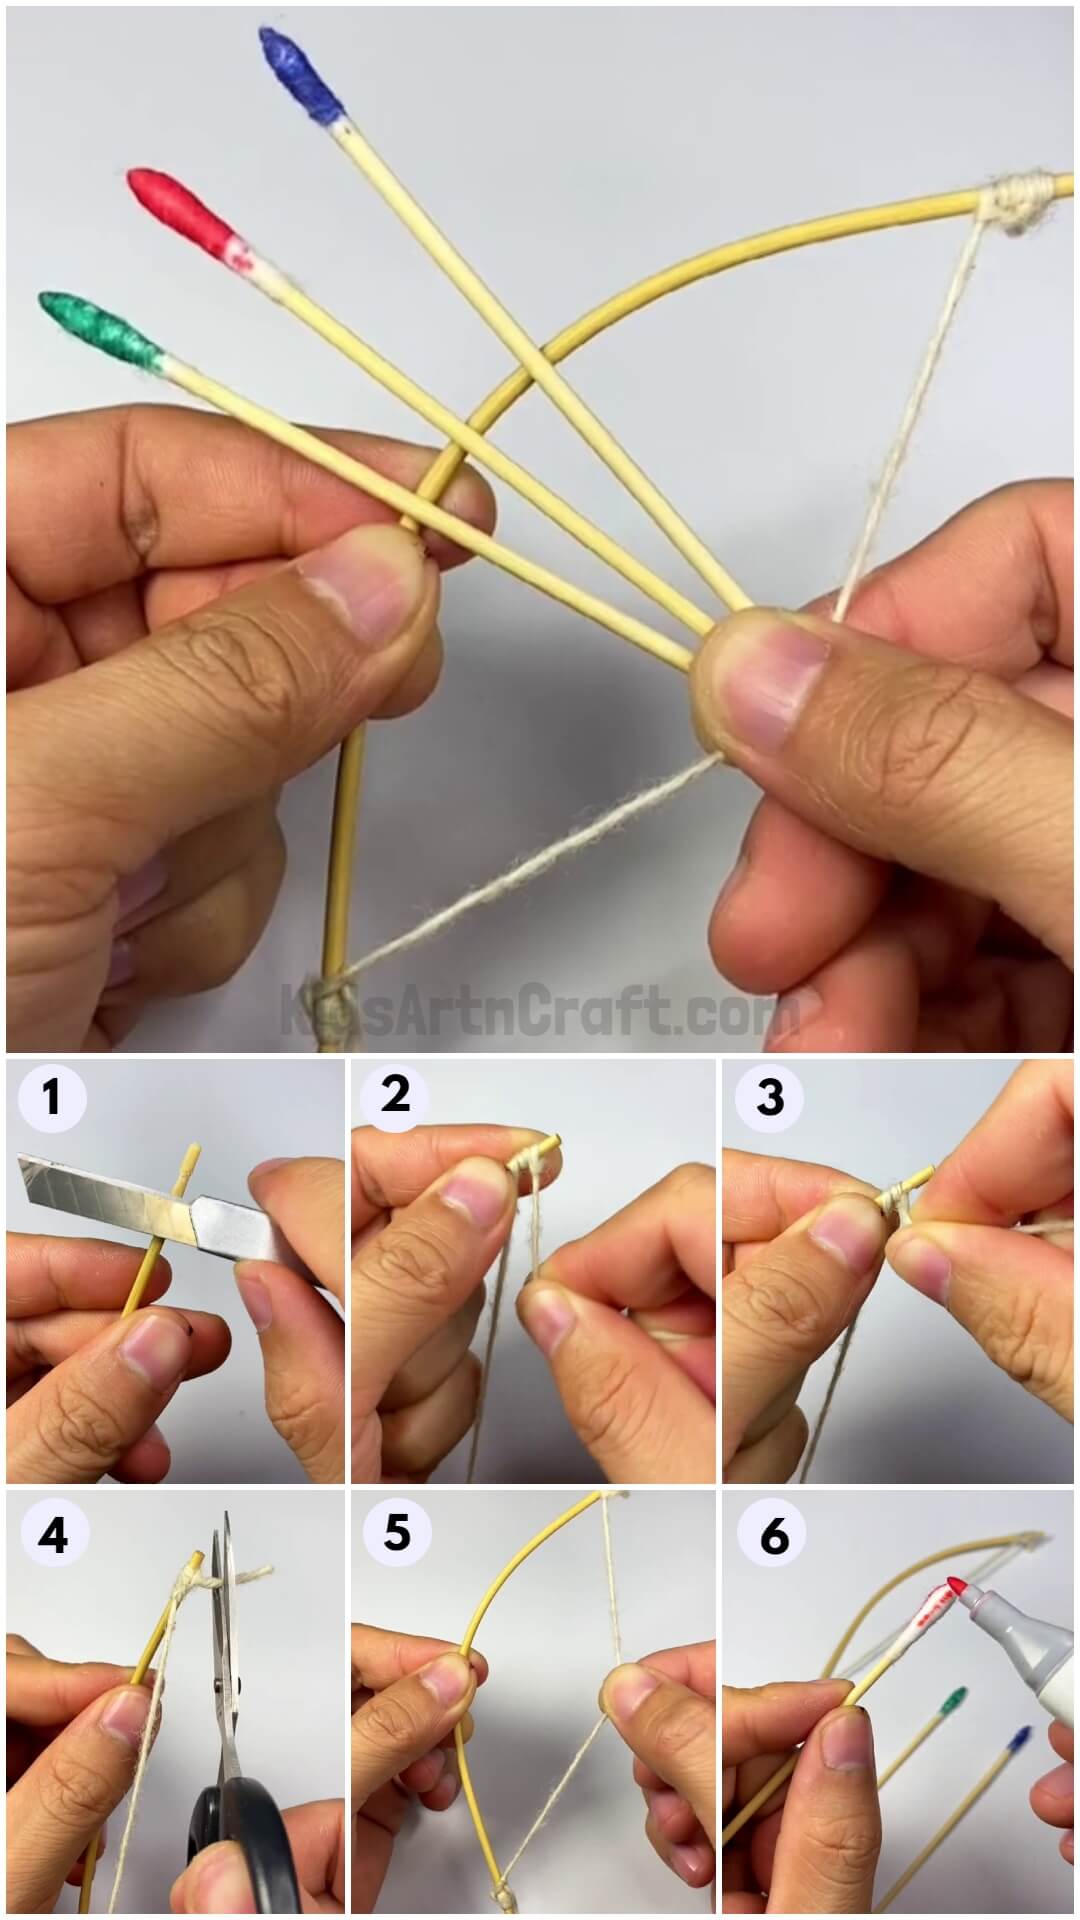
Firstly, take the wooden stick and using the cutter shape the stick.
Step 2: Roll The Jute Around The Stick
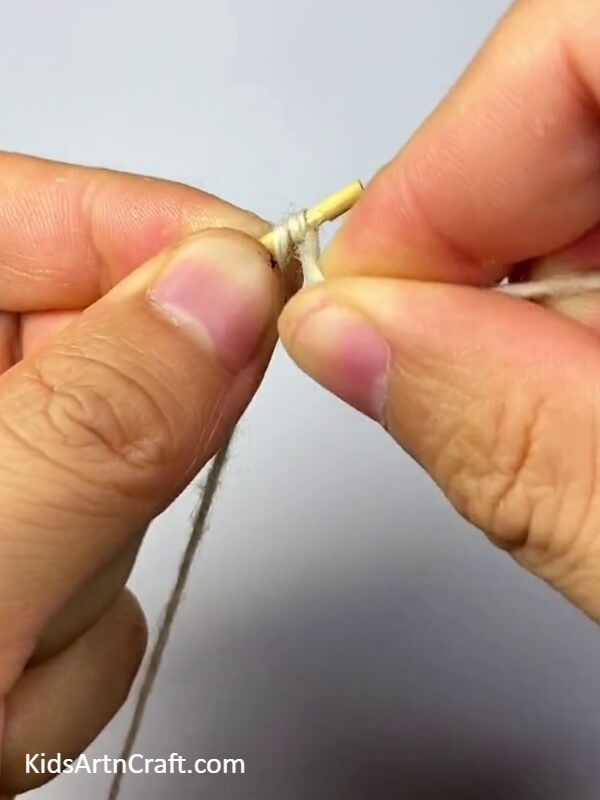
Now, roll the jute around the stick.
Step 3: Secure The Jute By Tying It
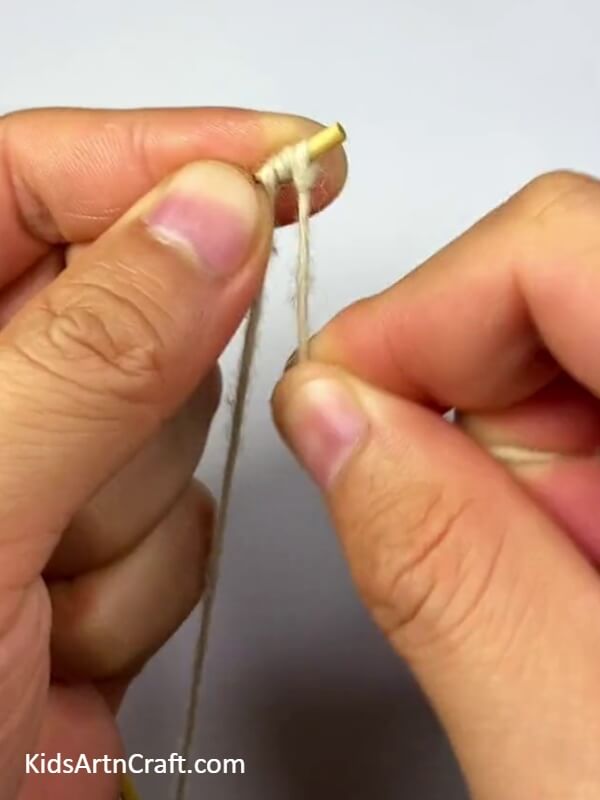
Next, secure the jute by tying it to the stick.
Step 4: Cut The Extra Portion
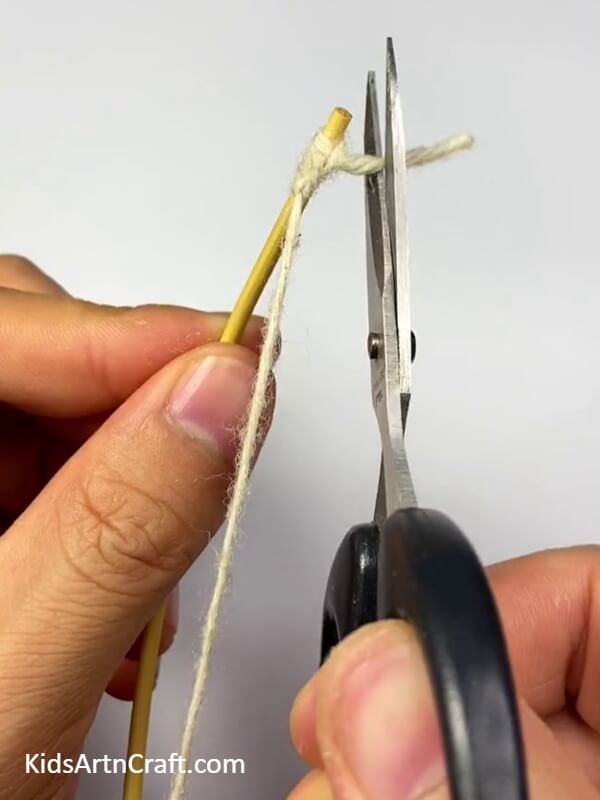
Now, cut the excess portion of the jute rope using a pair of scissors.
Step 5: Tie The Other End As Well
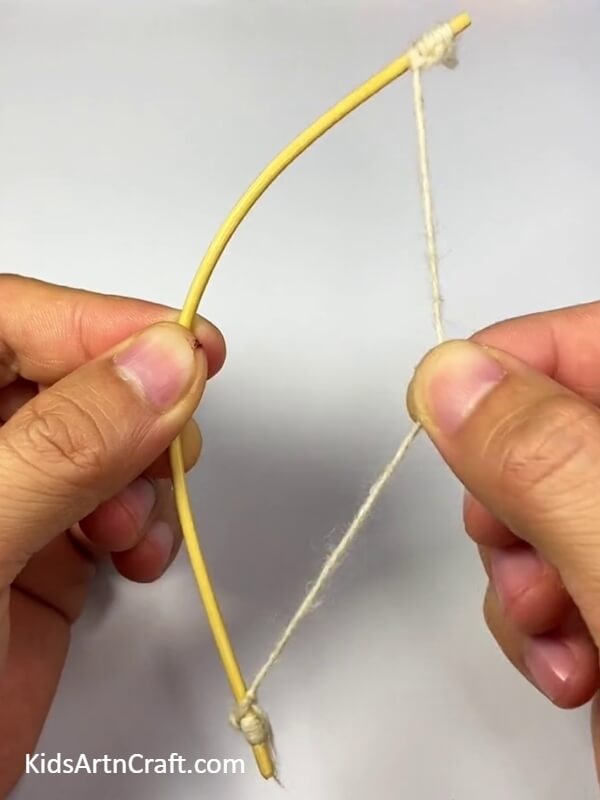
Next, tie the other end of the stick with the jute as well. Next, shape the wooden stick by bending it into the shape of the bow.
Step 6: Paint The Ends Of The Earbuds
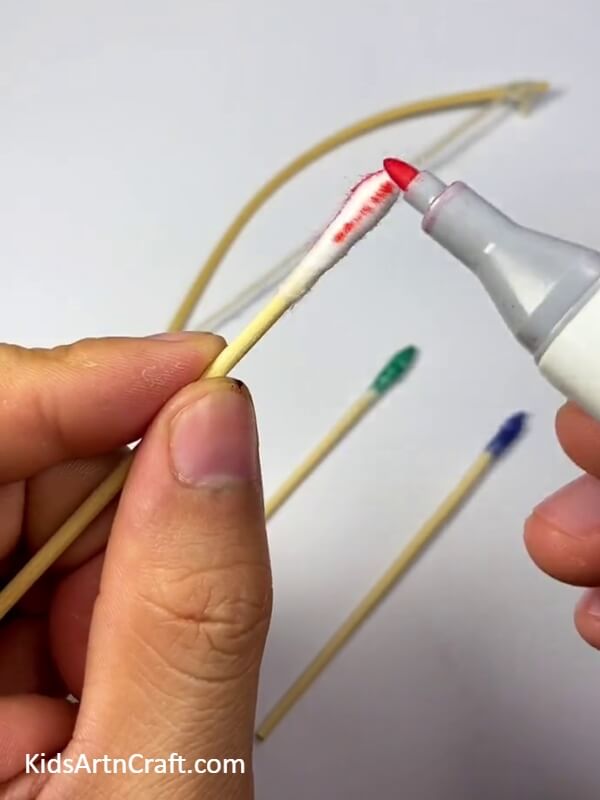
Next, take the Q tips or earbuds and paint the ends of the of three arrows using the red, blue and green coloured markers respectively.
Shoot Your Shot With This Arrow And Bow!
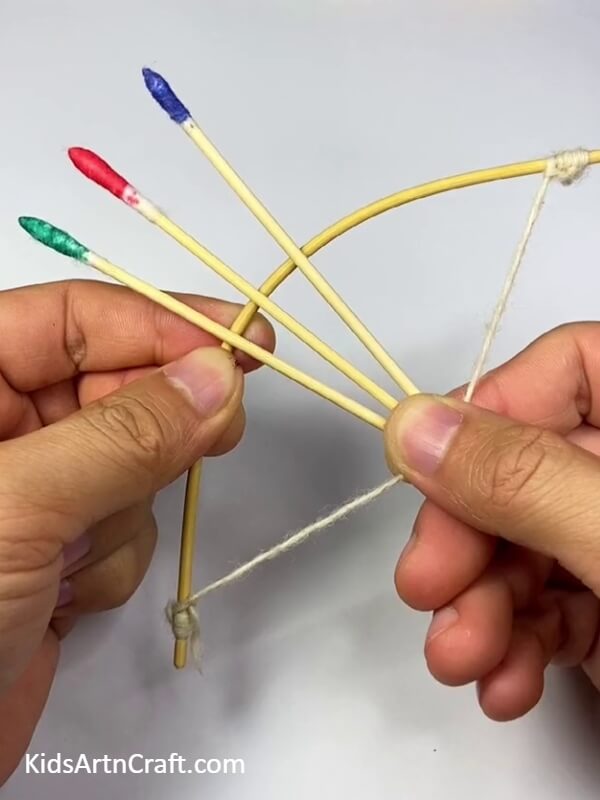
And finally, you are done with this fun and easy craft idea, this one allows little artists to use simple everyday objects to create a craft with practical work. Suitable for art classes, events and workshops, this one will be at the top of the to-do lists of all the kids! It could also be a great idea for parent-kid bonding activity as it is fun and easy for both kids and adults alike !! grab your arrows and shoot your shot!
Do let us know what you think about the idea in the comment section below, and check out our other posts for more such amazing and easy ideas for kids. Until then, happy crafting!
Follow us on Youtube for art and craft tutorials and much more.
More Articles from Kids Art & Craft
- Snake Paper Plate Crafts for Kids
- Burlap decor ideas
- Beautiful Button Turtle Crafts for Kids
- July Month Coloring Pages for Kids
- Easy Balloon Face Art and Craft for Kids


