


Kids Activities
Easy Balloon Face Art Activity Tutorial For Kids

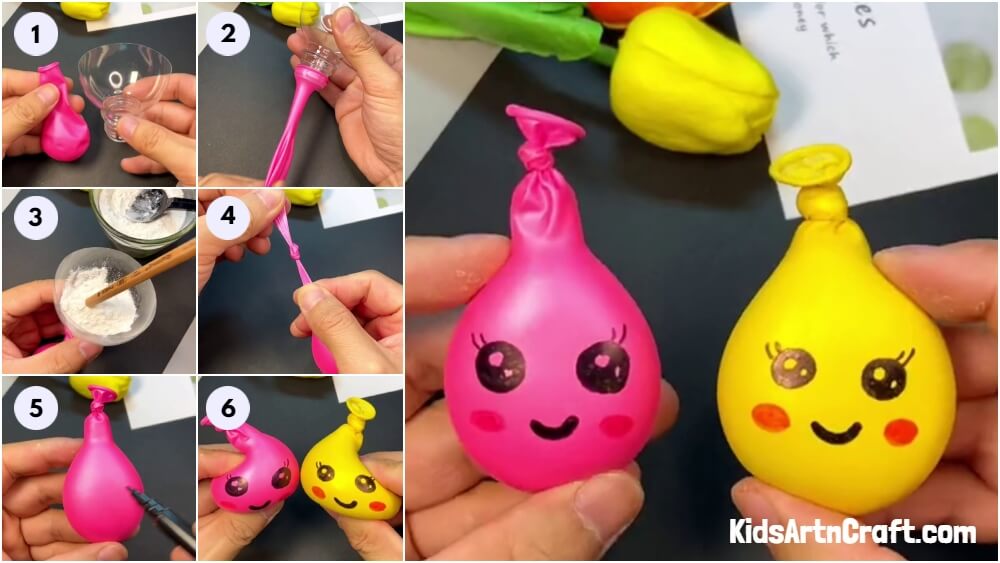
This guide will help you and your kids make fun and easy balloon face art! All you need are some materials you can find at home, and your kids will have a great time creating their own unique art.
Balloons are a fun object used as toys, party props, a craft material and even in science projects. Today, we will be using it as a craft material to make a simple and easy to make craft. This tutorial will teach you to make a face using this balloon with a slight improvisation, instead of inflating it with air, we will use flour. The same flour you use to make bread everyday. So, go to the kitchen and collect some flour and all the other material required and let’s get started.
Easy Balloon Face Art Activity For Kids
Read More: Fresh Leaf Hedgehog Craft Tutorial For Kids
Material Required
- Balloons
- Wheat Flour
- A plastic bottle
- A pair of scissors
- A black and a red sketch pen
- A spoon
- A pencil
Procedure
Step 1: Working On The Plastic Water Bottle
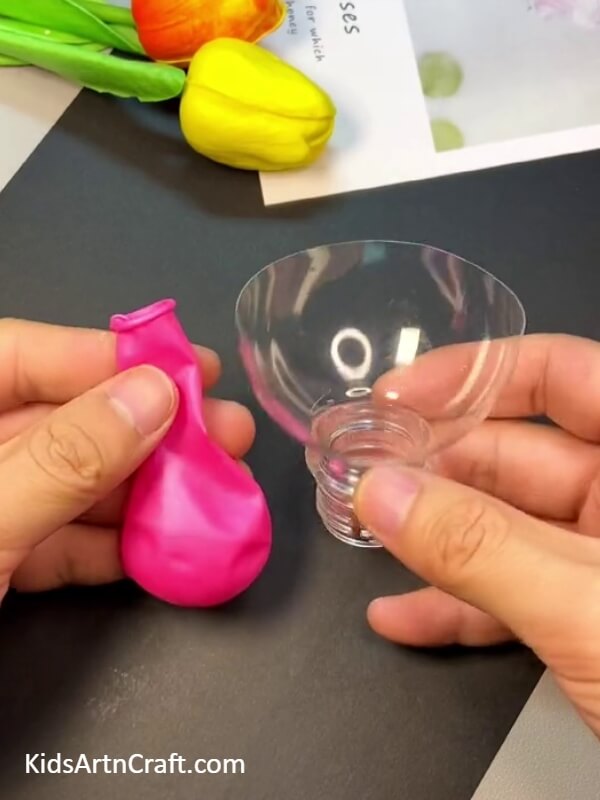
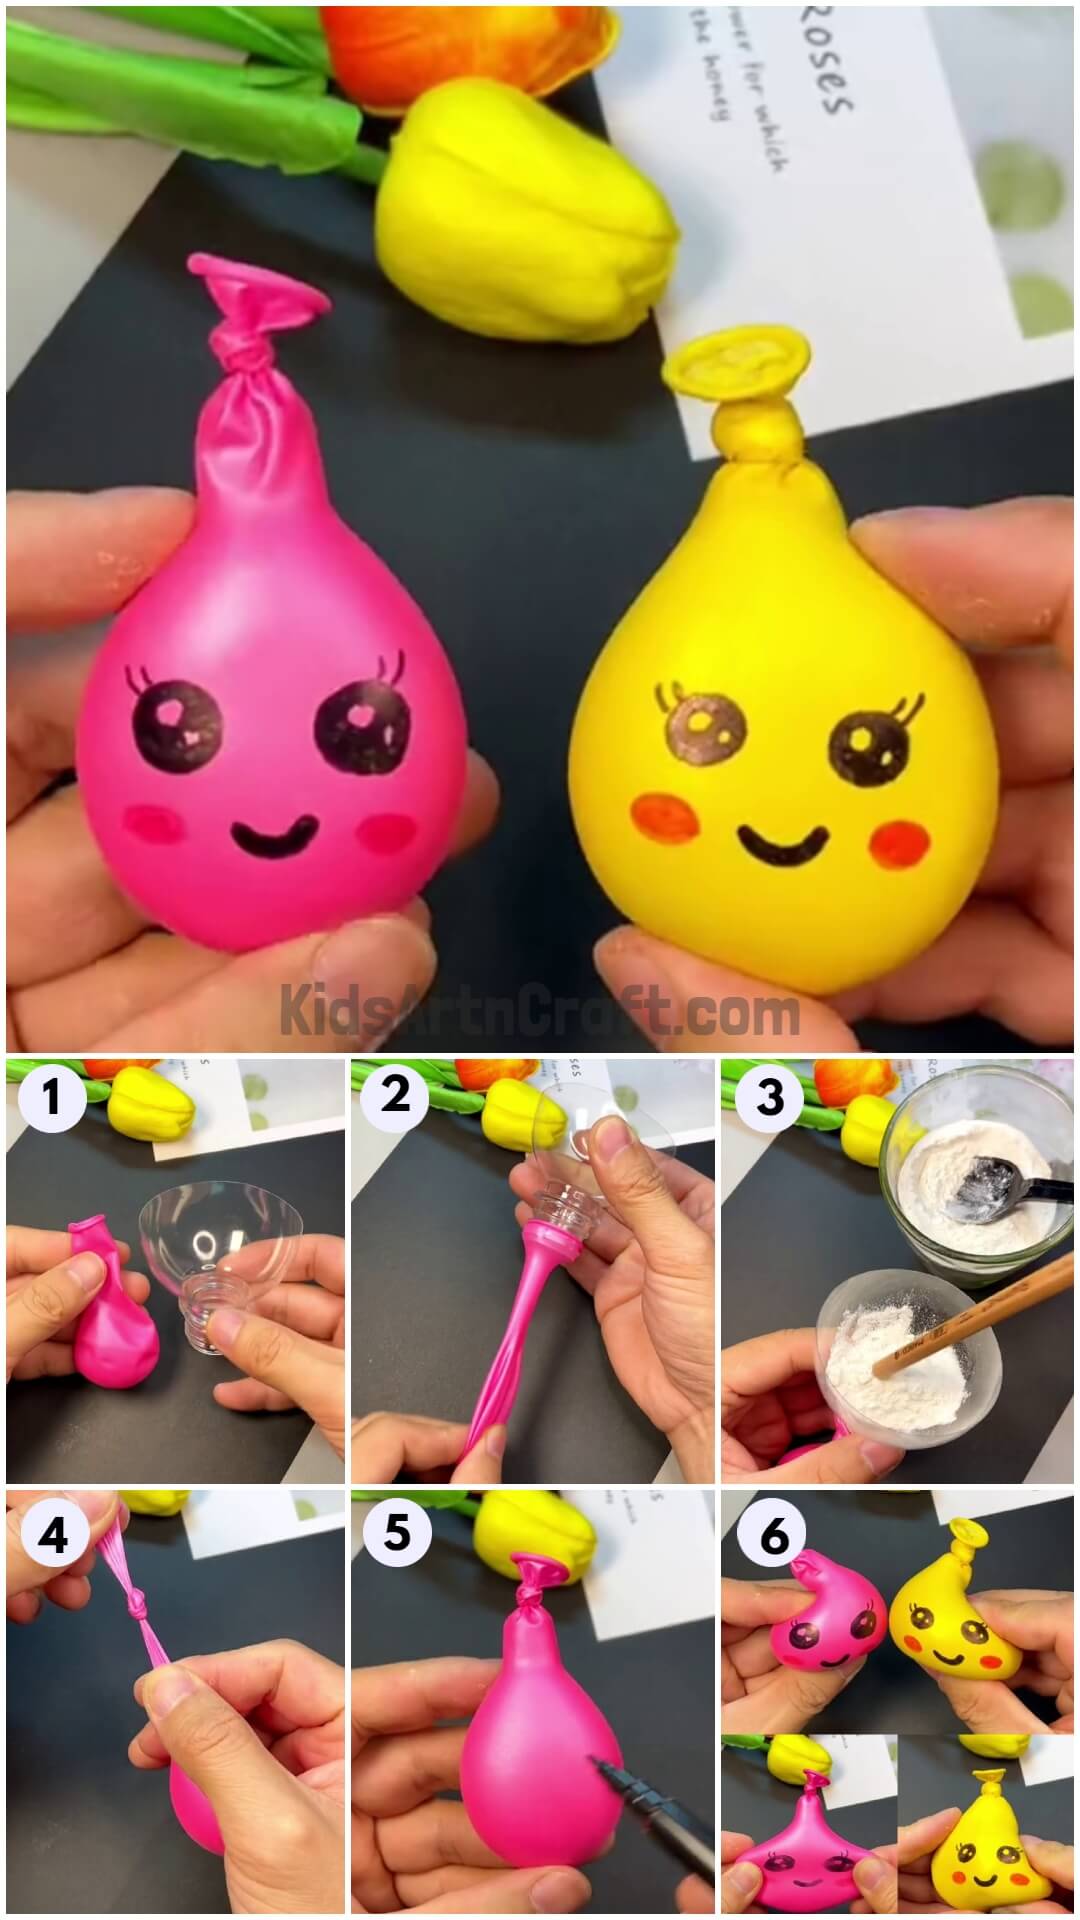
Take a used plastic bottle and draw a circle around the bulged neck of the bottle. Now, using a pair of scissors and cut on the lines of the circle you drew on the bottle. This mouth and the cut neck of the bottle will act as a funnel to fill the balloon with flour later. See the picture below for reference.
Step 2: Connecting The Balloon And The Funnel
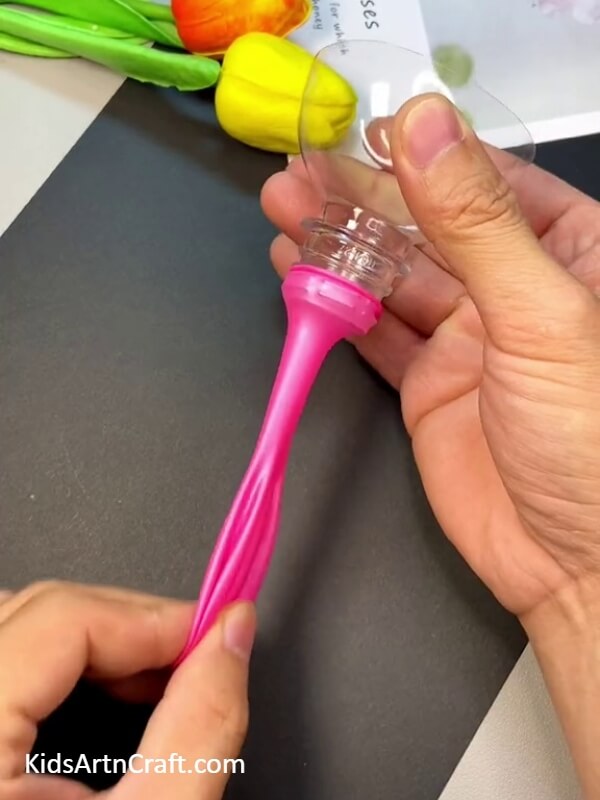
Take a balloon and insert the funnel you just made in the mouth of this balloon. Wrap the balloon around the bottle properly to secure the mouth of the bottle in. See the picture below for reference.
Step 3: Filling The Balloon With Wheat Flour
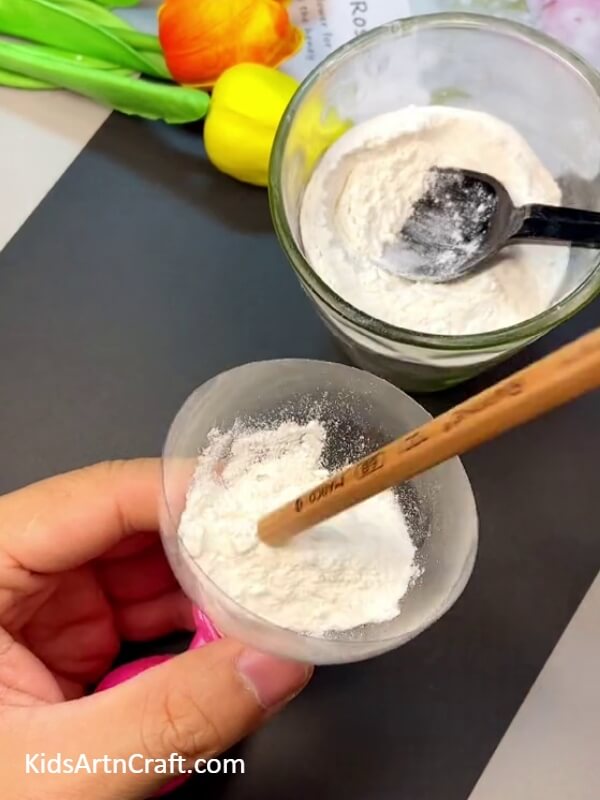
Collect some wheat flour in a cup and with a tea spoon, put this flour in the funnel. Fill the funnel with the flour. Now, with the back of a pencil, push this flour in the balloon through the mouth of the funnel. Pass the pencil through the mouth to help the flour pass the intersection between both the objects smoothly. See the picture below for reference.
Step 4: Tying The Mouth Of The Balloon
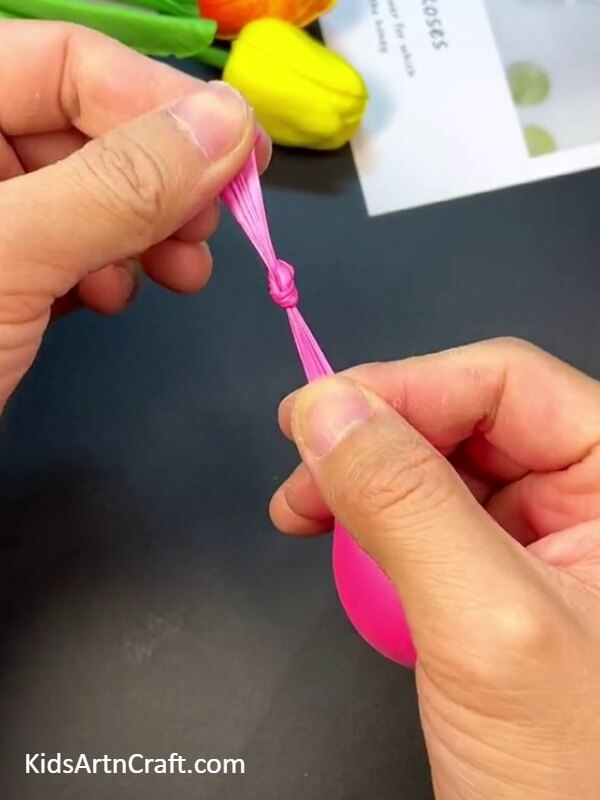
Do not fill the balloon entirely, leave enough space to tie the mouth of the balloon. Take the funnel out and set it aside. Now, tie a tight, air tight knot on the mouth of the balloon to seal the ends giving the desired shape to the balloon. The balloon now looks like a small sack as seen in the picture below.
Step 5: Working With The Sketch Pen
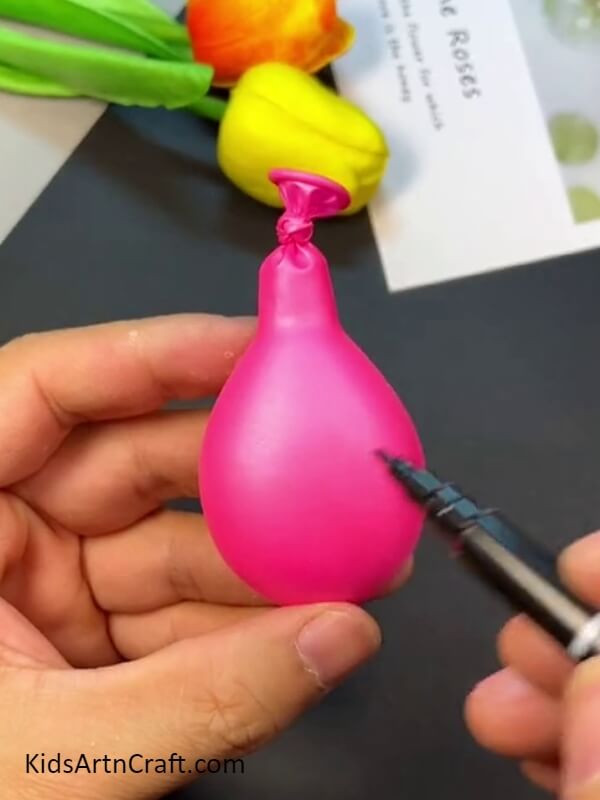
Hold the filled balloon in your hand vertically and pick a sketch pen to make some drawings on it. See the picture below for reference.
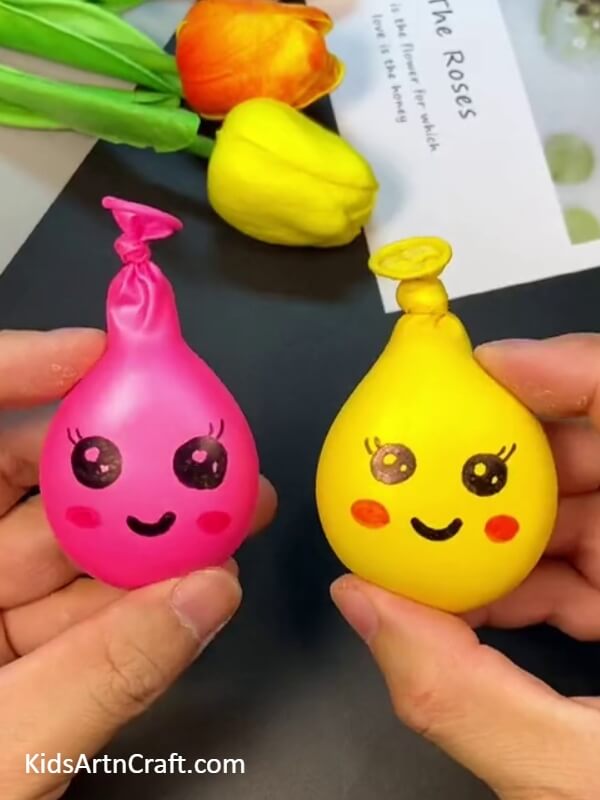
Step 6: Making Faces On The Balloon

Draw two circles next to each other at the top of the balloon. Now, draw two very small circles in each of the two circles. Colour the big circles excluding the smaller circles drawn inside as shown in the picture below. Draw two line at the top of each big circle. The circles with act as the eyes of the face and the lines on top as their eyelashes. Then, draw a curved line at the bottom of the filled balloon with the same sketch pen. This shall act as the mouth of the face. Draw two big dots on the sides of the mouth using a red sketch pen to add some blush to the face. Finally, take a yellow balloon and repeat the entire procedure, right from the first step up to this one, on it. See the picture below for reference. We now have two balloon faces which can be molded to any shape desired because of the flour present inside.
Shaping The Balloons
Flatten the balloons to make the face look round and features accentuated. See the picture below for reference.
Today, you learned a very easy craft which is fun to make and beginner friendly as well. You can use it as a toy and play with it as stress busters. You can hang it in you room right next to your window or in your car. This tutorial taught you a great way of working with balloons and turning them into mouldable craft. You also learned to make a funnel which you can put to use in day to day life. Keep practicing the techniques you learn in these tutorials and keep inventing such new and unique ideas to implement these skills on. See you in many more tutorials to come, till then, good luck and good bye.
Have a great day ahead!
Follow us on Youtube for art and craft tutorials and much more.
More Articles from Kids Art & Craft
- Easy Balloon Face Art and Craft for Kids
- DIY Balloon Chick Craft Tutorial For Kids
- DIY Car With Balloon and Straw Easy Tutorial
- Easy Emoji Crafts with Balloons For Kids To Play
- Easy Paper Butterfly Craft For Kids


