


DIY and Crafts
DIY Bottle and Stick Launcher Craft Tutorial For kids

This DIY Bottle and Stick Launcher is a fun and easy project for kids to build and have loads of fun! With just a few supplies, you can use this launcher to send plastic bottles soaring into the air. Follow the step-by-step instructions to get started now!
I believe we all, once in our lifetime have thought of learning or practicing archery but were condemned from doing it due to its harmful nature or simply some other reason got in our way of pursuing the sport. But today, we have bought you a very safe and easy-to-make launcher craft that will give you the feeling of being an ace archer. It’s inexpensive and requires spare items in order to be created. So, collect all the material required, and let’s start making it.
Simple Bottle And Stick Launcher Craft
Read More: Pigeon Drawing & Sketches For Kids
Materials Required
- An empty plastic bottle
- A pair of scissors
- Hole puncher
- Big elastic rubber band
- A thin wooden stick
- A yellow and a red sheet of paper small in size
- Glue gun
- Paper cups
Procedure
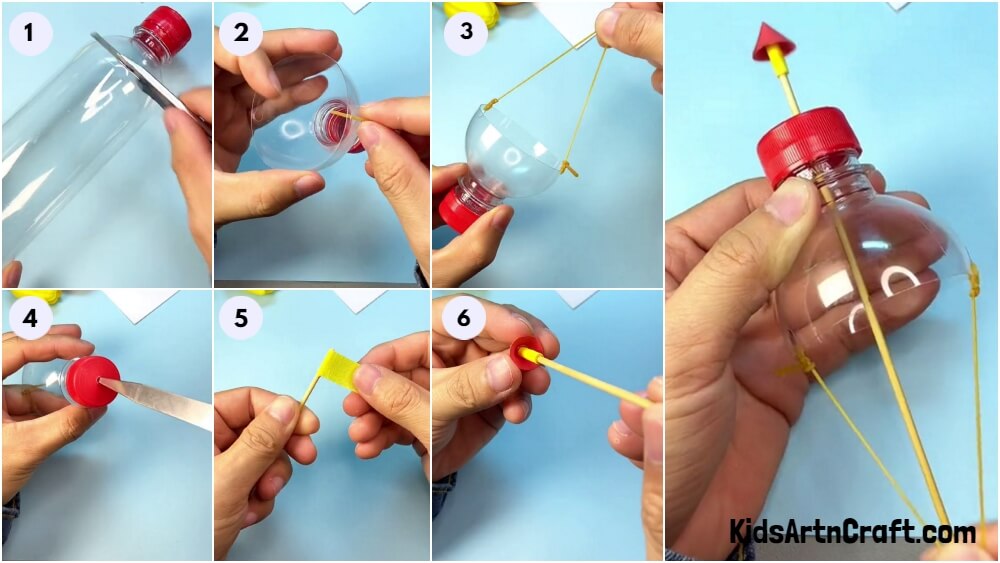
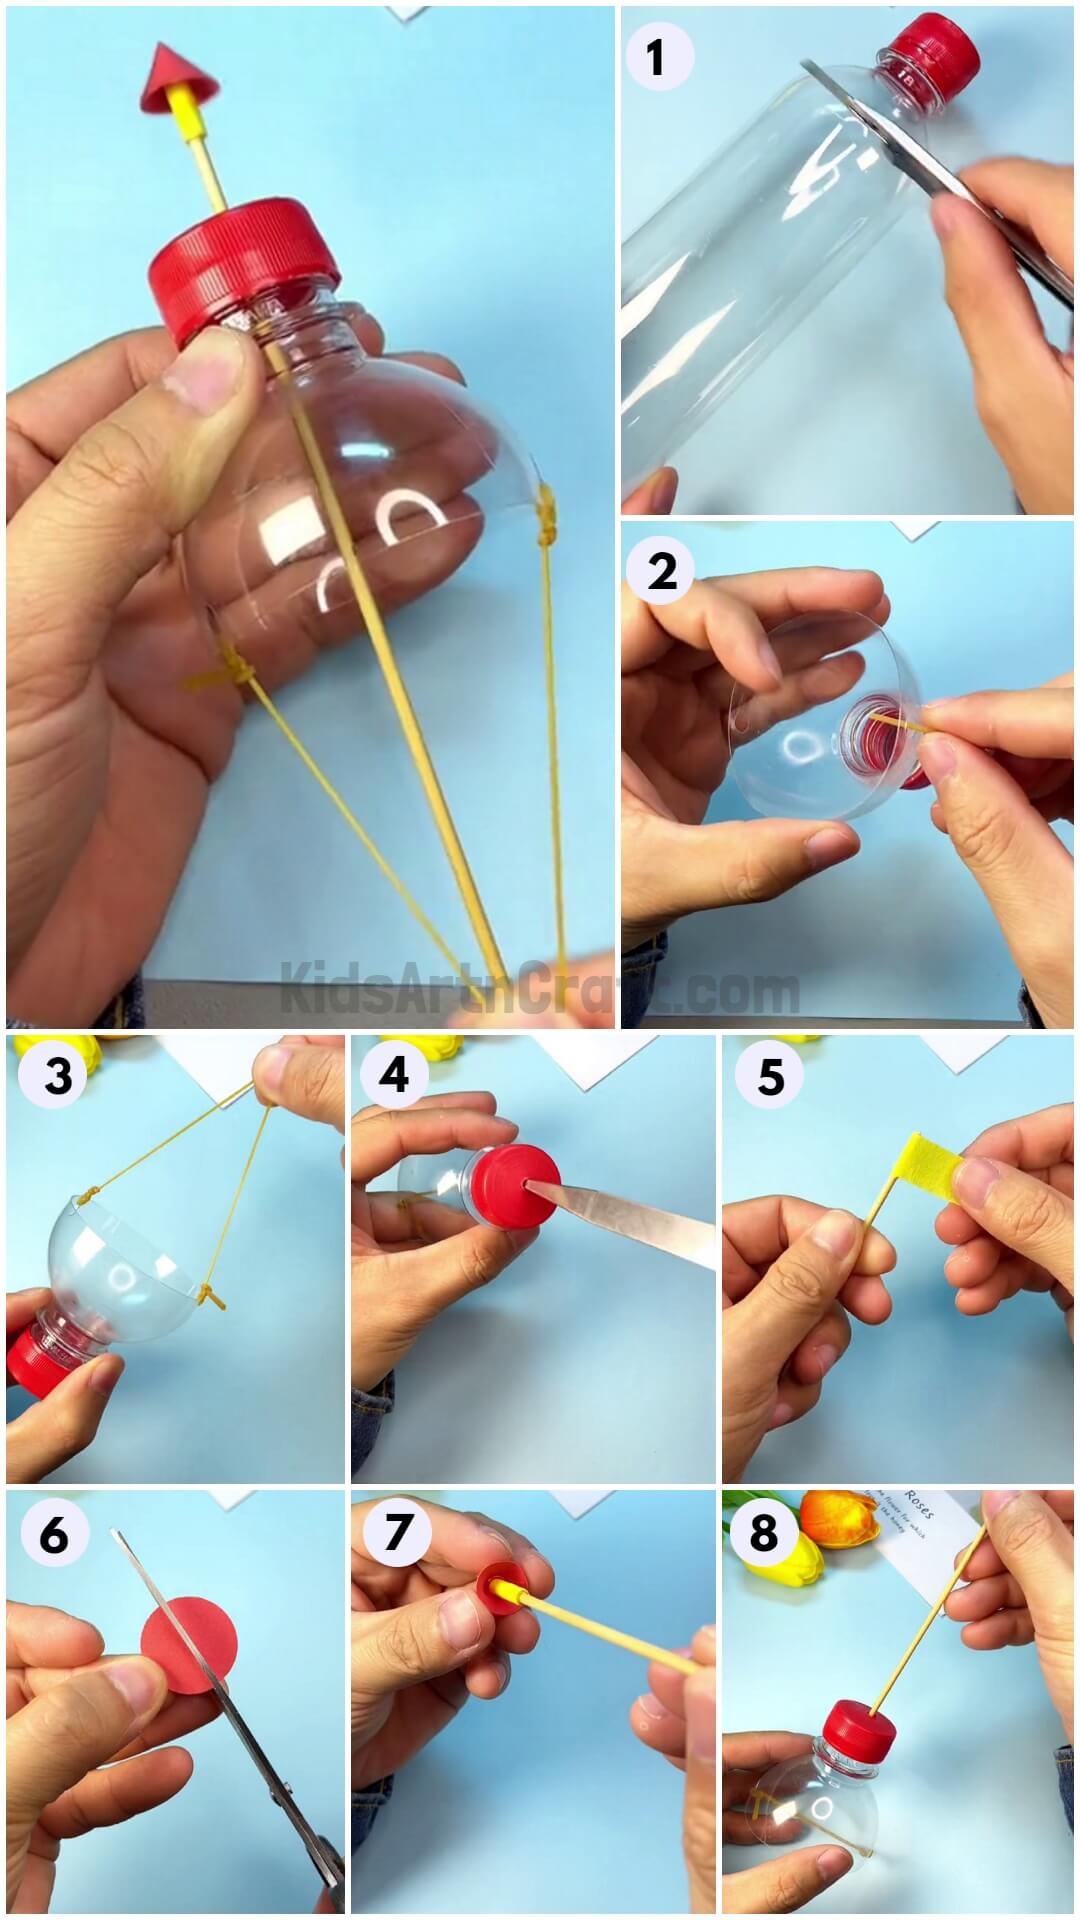
Step 1: Start With The Plastic Bottle
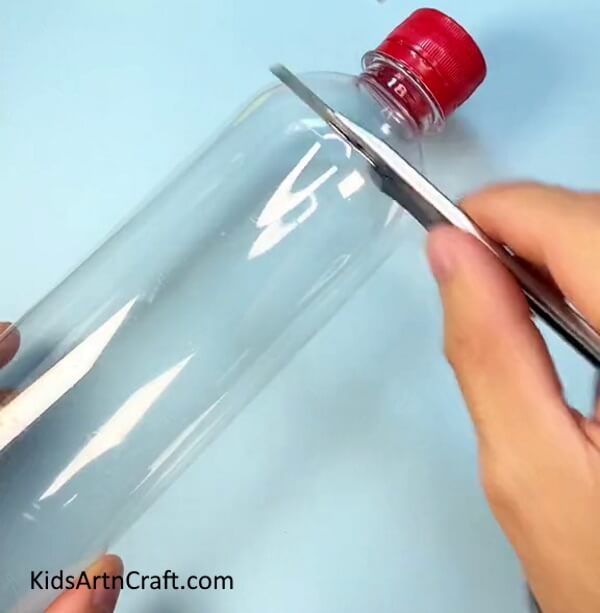
Take an empty plastic bottle and with a pair of scissors, cut right on the point where the neck starts as shown in the picture below. This cut piece should now look somewhat like a funnel.
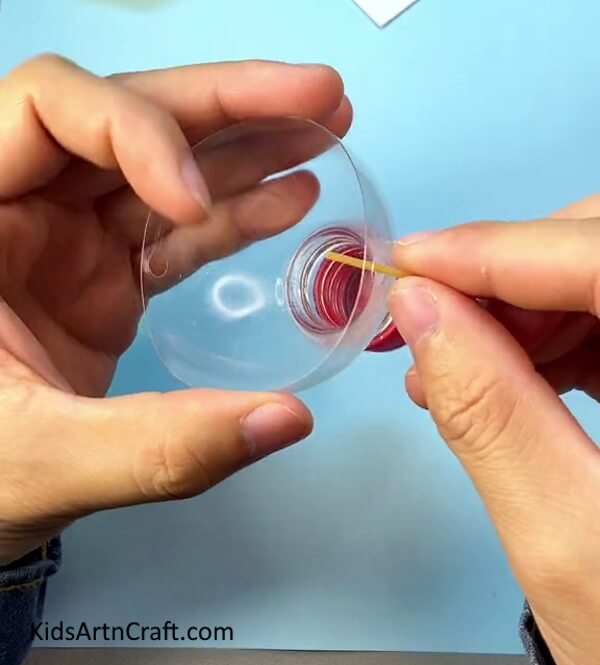
Step 2: Punch Holes In The Bottle

Take a hole puncher and punch a hole in the sides of the bottle. Now, find the point on the side exactly opposite to this hole and mark it. Finally, punch a hole on this marked side as well. See the picture below for reference.
Step 3: Using The Rubber Band
Take a big rubber band and make a single cut on it with a pair of scissors. This shall convert the round rubber tie into a long straight line with two ends. Now, pass one of the rubber ends through one of the holes and tie two strong knots on the rubber to lock it in the hole. See the picture below for reference.
Step 4: Passing The Elastic Through The Other Hole
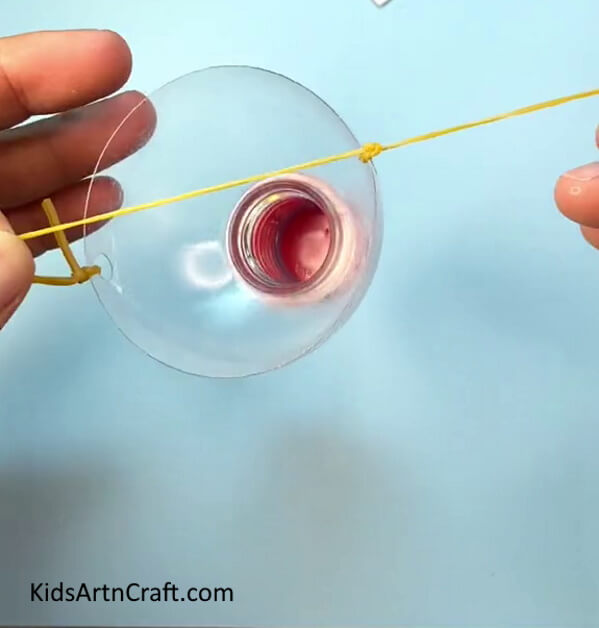
Pass this rubber through the other hole and tie two knots on it as well. See the picture below for reference.
Step 5: Trimming Off The Excesses
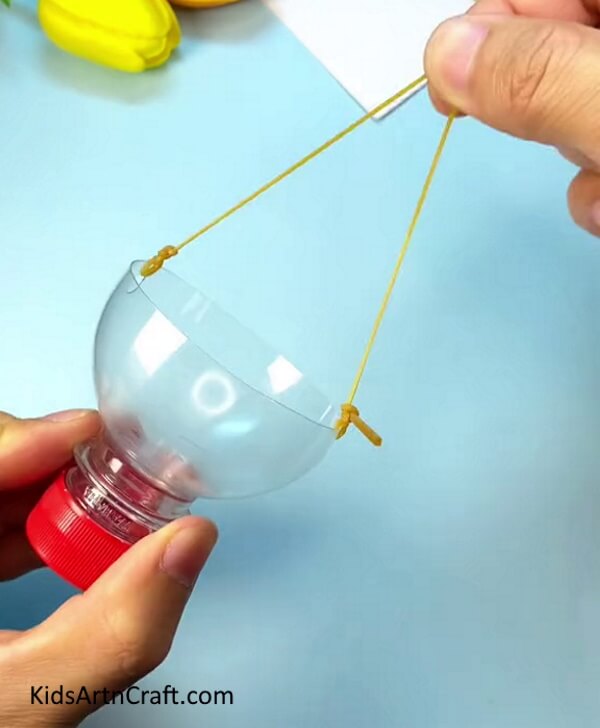
Trim off the excess rubber and stretch it to check the elasticity of the rubber as shown in the picture below.
Step 6: Making A Hole In The Lid
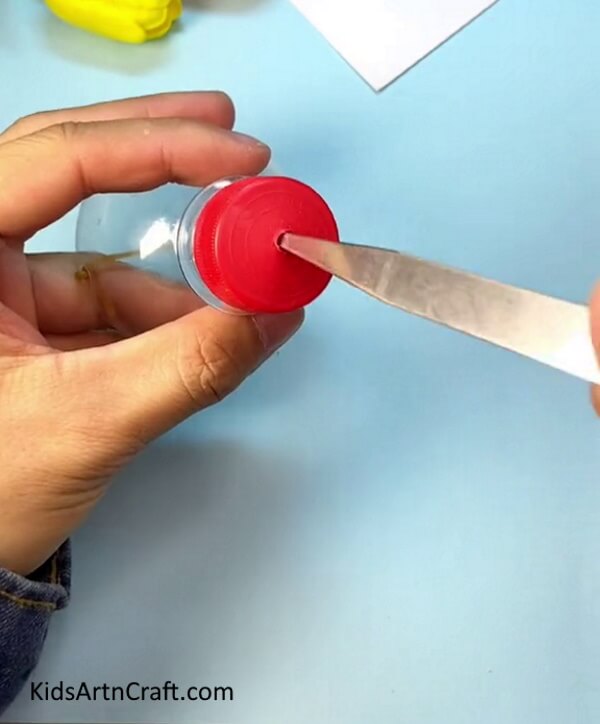
Take a sharp object and make a hole in the middle of the lid .The hole should be big enough for a thin wooden stick to pass through. See the picture below for reference.
Step 7: Working On The Arrow
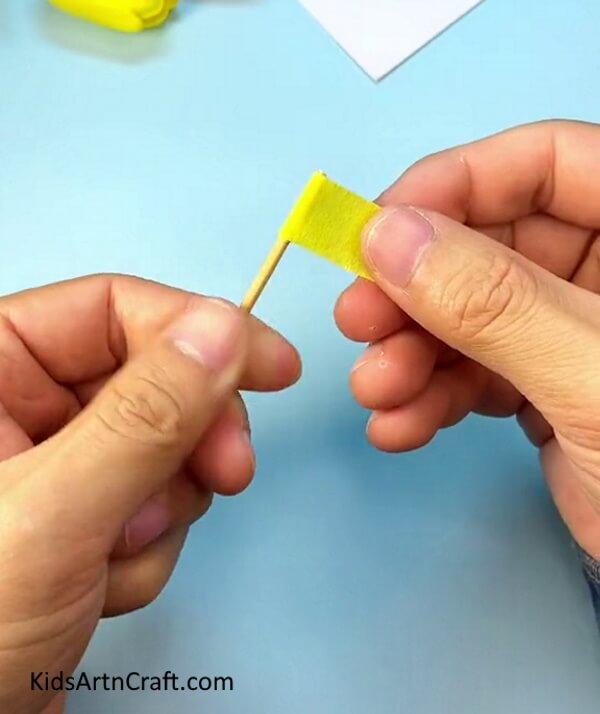
Take a yellow sheet of paper and cut a long strip out of it. Now, take a thin wooden stick and roll this yellow strip on one of its ends as shown in the picture below. Finally, using a glue gun, seal the end of the strip with the sheet below.
Step 8: Working On The Red Sheet Of Paper

Take a red sheet of paper and cut a small circle out. Now, make a cut on the circle starting from the circumference up to the center of the circle as shown in the picture below.
Step 9: Make A Cone Out Of The Circle
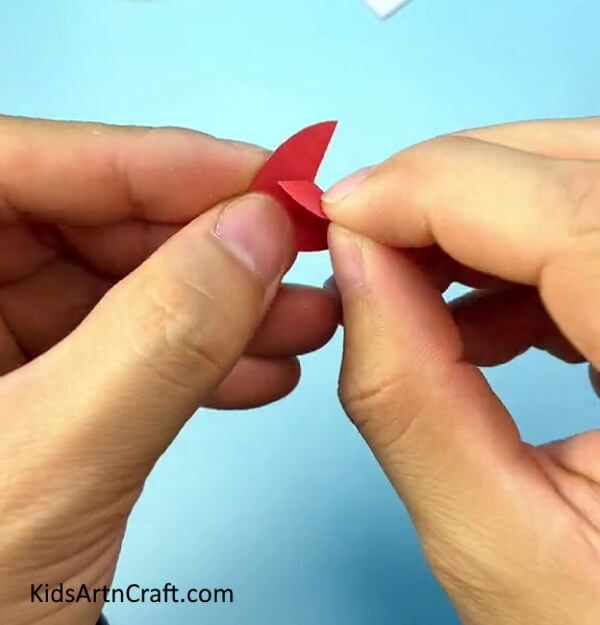
With the help of the cut you just made, shape the circle into a small cone and paste the sides of both ends using a glue gun. See the picture below for reference.
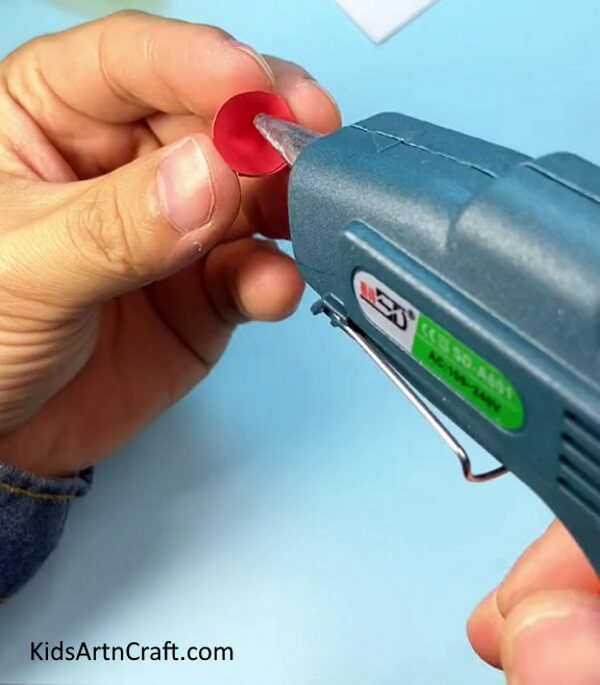
Step 10: Applying Glue On The Cone
Using a glue gun, apply some glue in the center of the insides of the cone as shown in the picture below.
Step 11: Pasting The Stick On The Cone

Take the wooden stick with the yellow strip attached to it and paste the end containing the rolled sheet to the glue applied to the cone in the previous step. See the picture below for reference. This completes the process of making the arrow.
Step 12: Inserting The Arrow In The Bottle
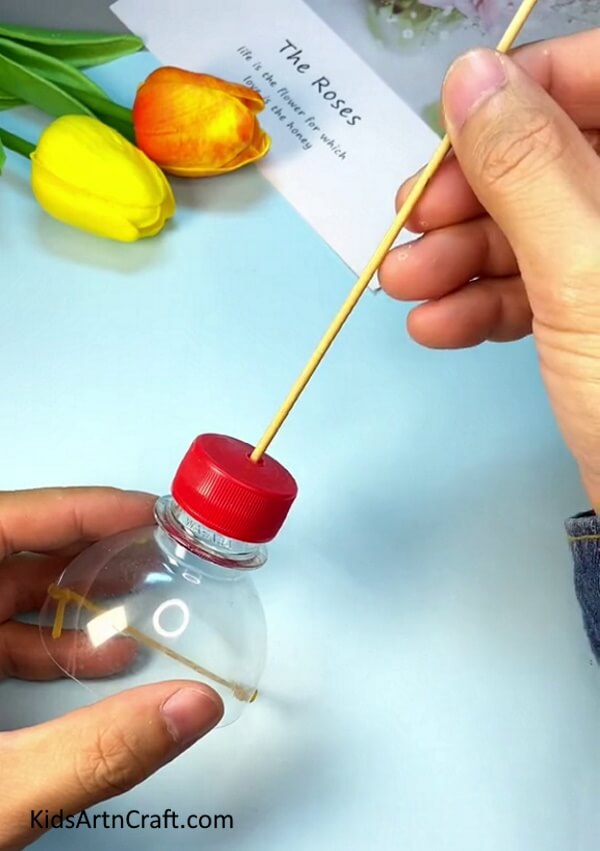
Take the arrow and insert it through the hole at the top of the bottle cap. See the picture below for reference.
Step 13: Making The Arrow Work With The Elastic
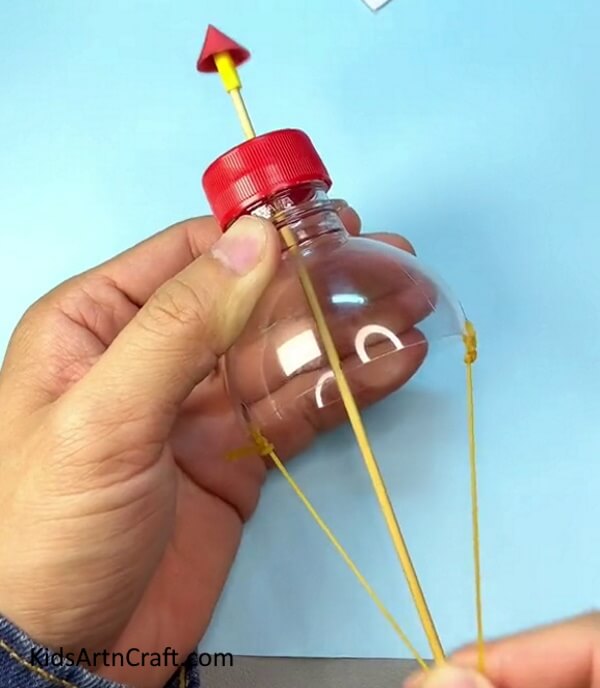
Insert the arrow all the way in until it reaches the stretched elastic as shown in the picture below.
Finally! Shooting The Arrow
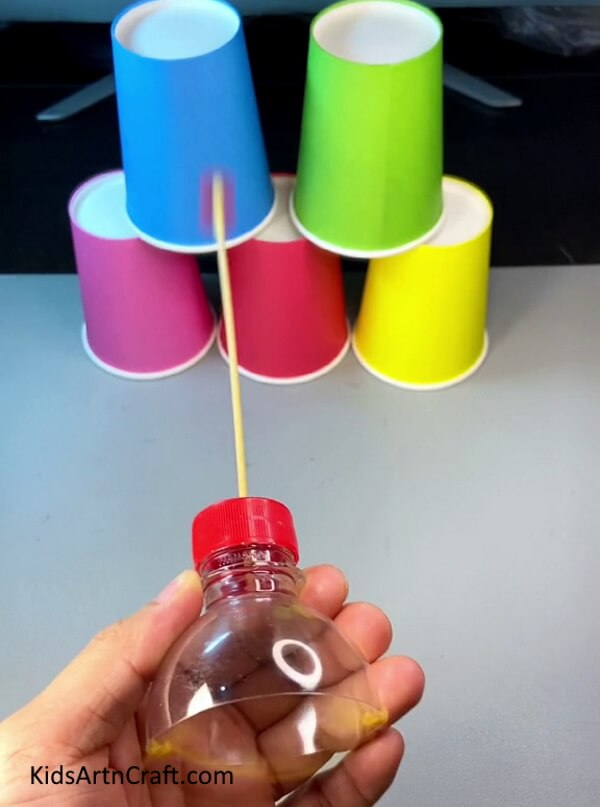
Place some paper cups on top of each other on a table and release the arrow in order to shoot it aiming at the cups. See the picture below for reference.
This brushes an end to this tutorial and we are left with an arrow launcher made out of a plastic bottle. You can make as many arrows as you wish and even have an archery competition with your friends or class fellows. You learned to work with spare plastic bottles and converted them into a launcher and a simple wooden stick into an arrow. Improve your archery skills with this craft. Keep following the tutorials to learn more skills and crafts. Good luck.
Follow us on Youtube for art and craft tutorials and much more.
More Articles from Kids Art & Craft
- Fairies in Jar Craft Ideas for Kids
- DIY Christmas Yarn Wreath Ideas
- Farm Animal Crafts for 3-Year-Olds
- Advent Calendar Crafts for 2023 – Easy Homemade DIYs
- Nativity Crafts for Kids


