Drawing
Easy Bunny & Carrot drawing Idea for kids

This article will show your kids how to make a cute bunny and carrot. It includes simple steps and pictures to help them draw these characters quickly!
This article gives a straightforward and enjoyable way for kids to draw a bunny and a carrot. Who doesn’t like bunnies? They are literally so cute and adorable. But do you know what bunnies like? Carrots, right? So today we are going to make a drawing of bunnies and what they like, that is carrots.
Just grab these materials and let’s feed our bunnies their favorite carrots.
Beautiful Bunny & Carrot Drawing Art Ideas For Kids
Read more: Easy to Learn Father’s Day Drawing Video Tutorial For All
Materials Required
- Craft Paper (White, Pink, Blue)
- Black Sketch Pen
- Colors
- Googly Eyes (4 Pairs)
- Green Clay
- Photo Frame
Procedure
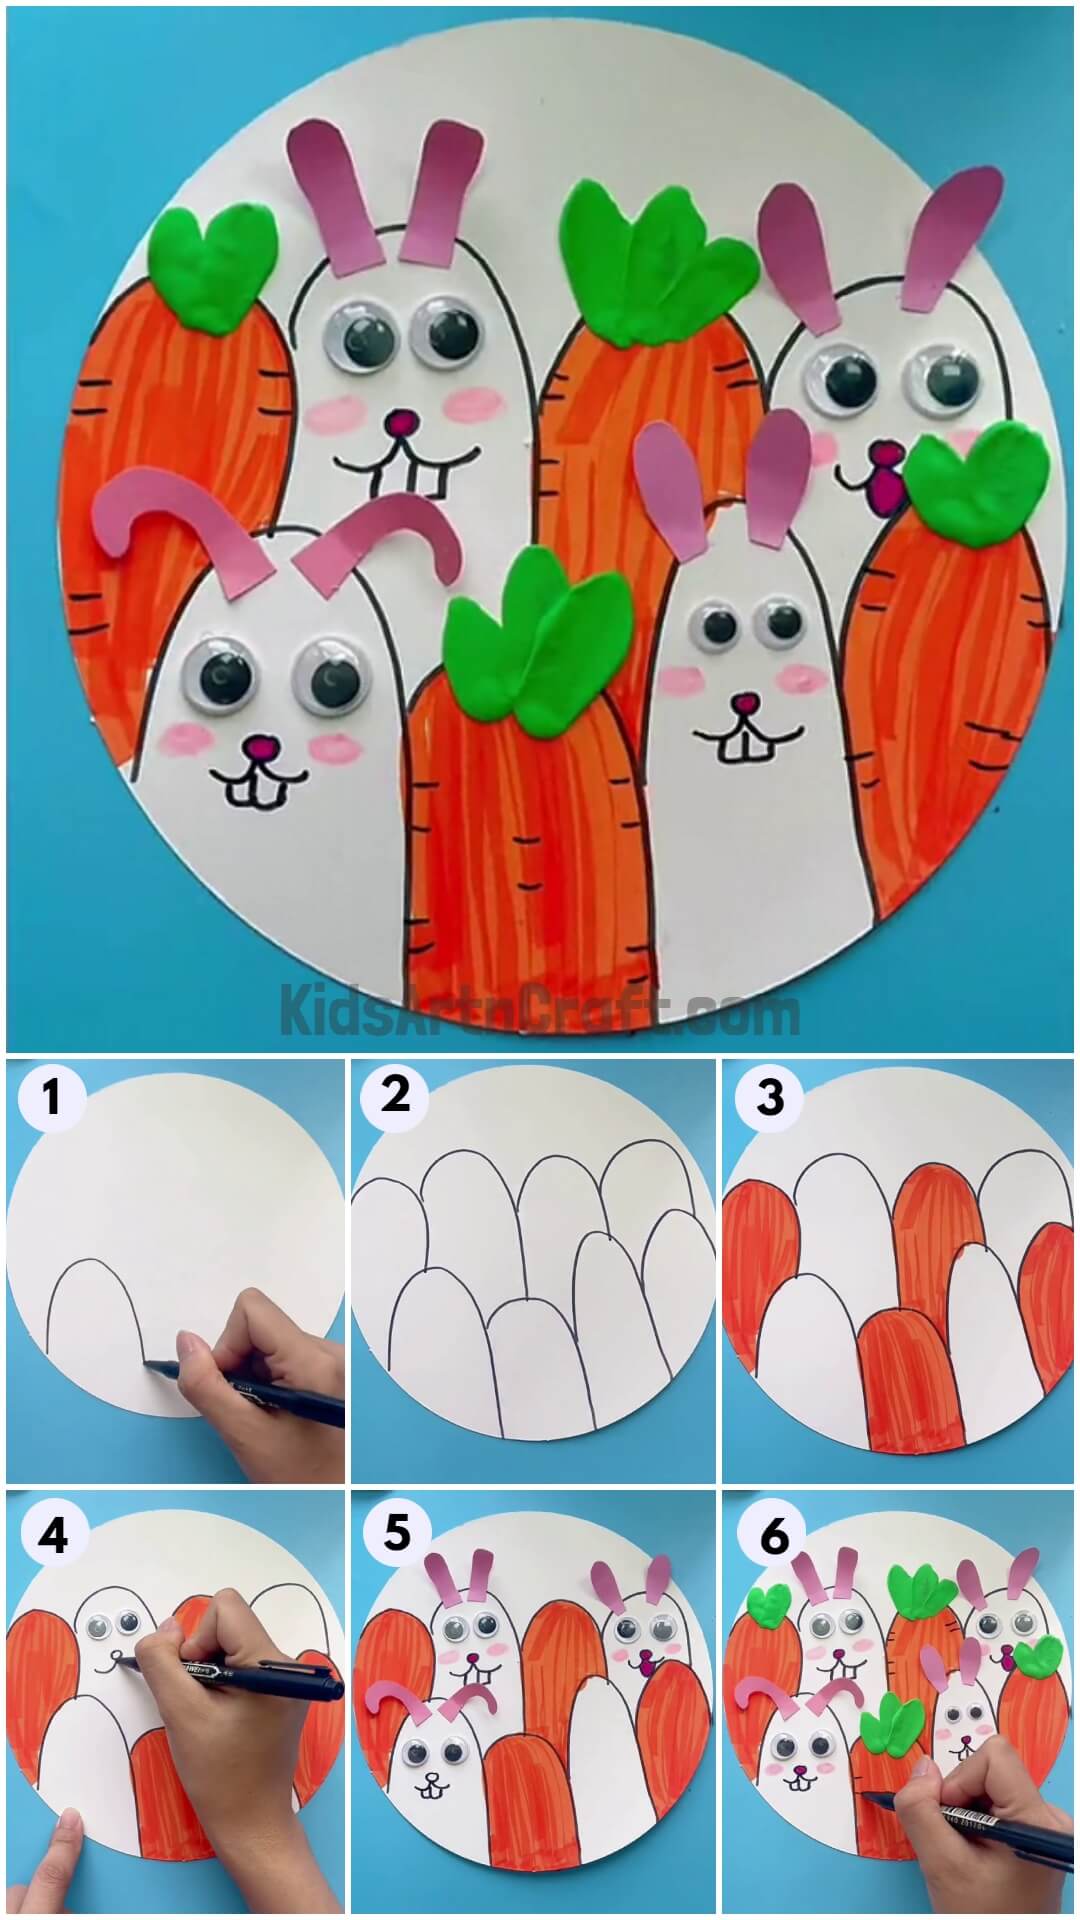
Step 1: Cutting The White Craft Paper Into a Circle
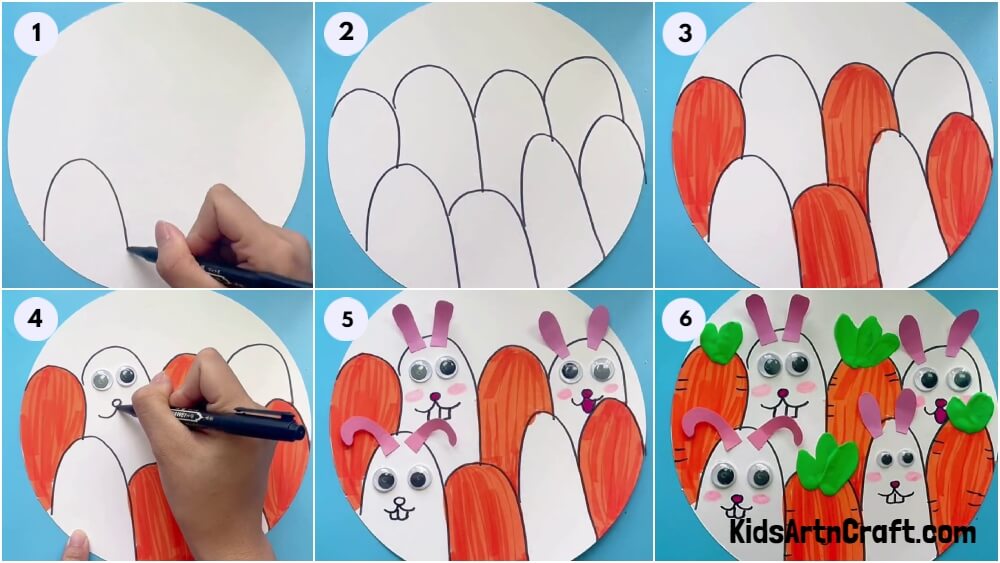
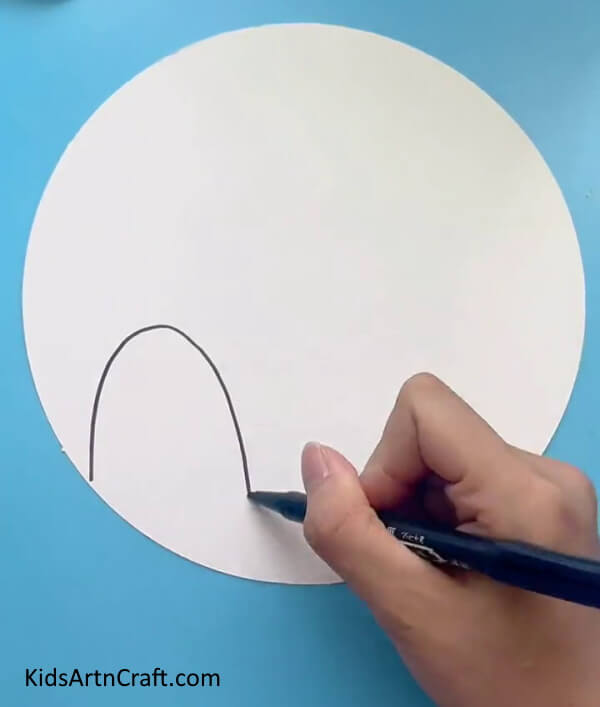
Take a white colored craft paper. Cut the craft paper in a big circle shape as shown with the help of scissors. Now, with the use of a black sketch pen start making curves as shown in the picture.
Step 2: Repeating The Steps And Make Seven Curves
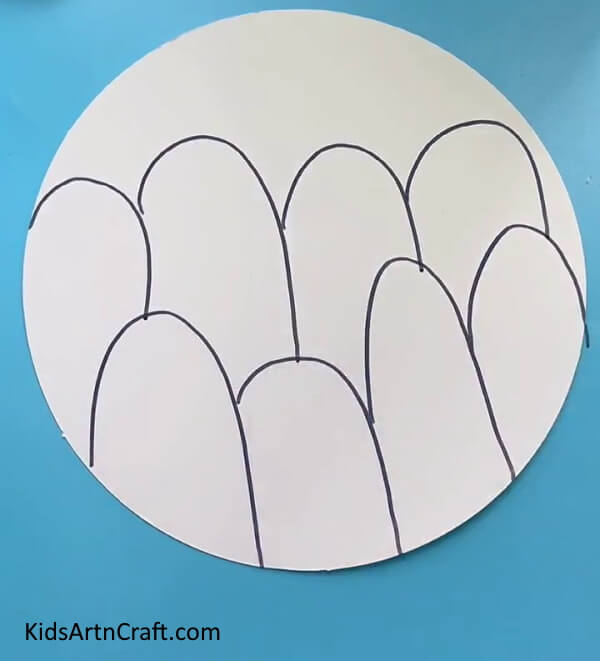
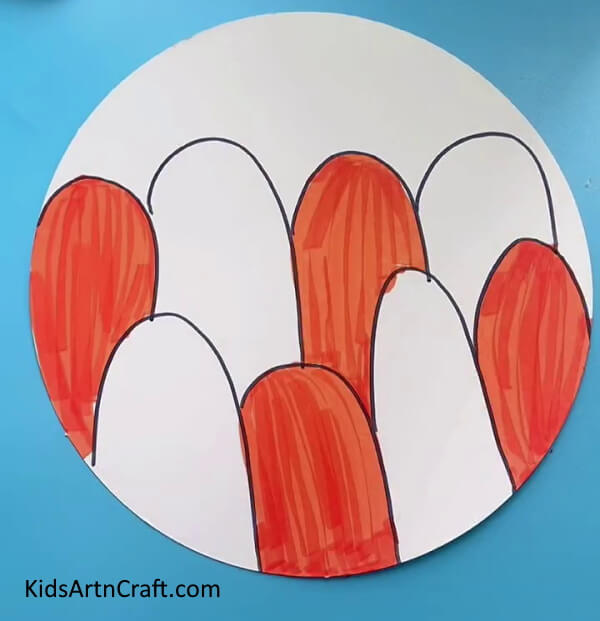
Keep repeating the same step to make a curve with the help of a black sketch pen and make seven similar curves.
Step 3: Filling The Colour With Orange Colour
Now, take out light orange/skin color from your color box and fill the curves alternatively with it. Now, take the orange colour and give a shade to the light orange/skin colour curves as shown.
Step 4: Sticking The Googly Eyes
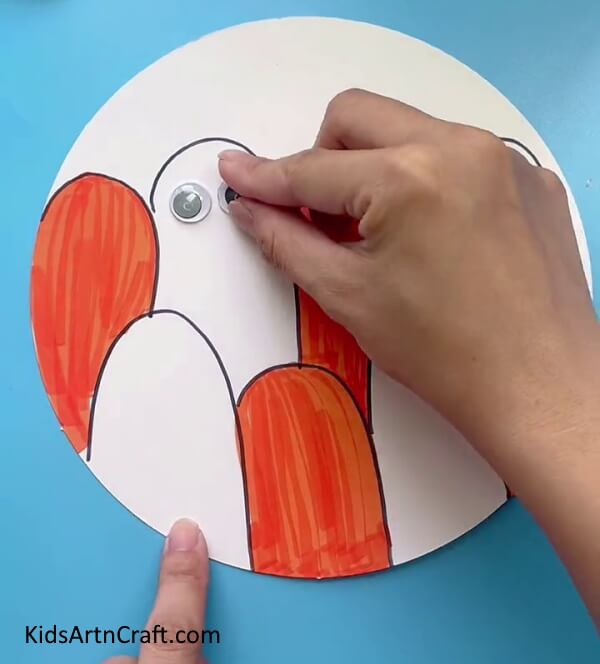
With the help of glue, stick the googly eyes on the uncolored/white part of the curve to give a cute essence to the bunnies.
Step 5: Drawing Bunny Features With a Black Sketch Pen

Now, again with the help of a black sketch pen, draw the bunnies’ facial features (nose and teeth) on the white part of the curve. Fill colour in the bunnies feature as shown in the below step to give it an effect.
Step 6: Making Ears With Pink Craft Paper
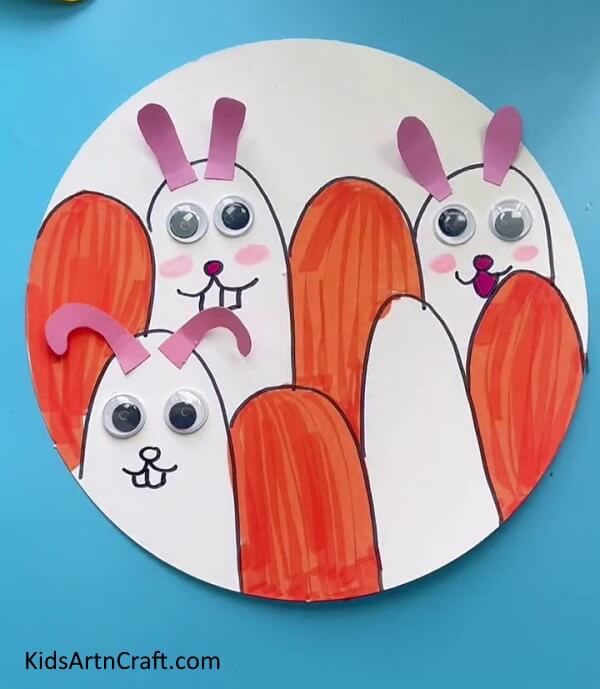
Now, take pink colored craft paper and make ears, and cut them in the shape as shown above. With the help of the glue, stick the ears over bunnies head on the white part of the curve.
Step 7: Making Carrot’s Leaf With Green Clay

Now, take green clay and make it into the shape of a leaf for the carrot. Stick the clay at the top of the orange part of the curve as shown. Make two or three leaves for each carrot.
Step 8: Giving Effect To The Carrot With a Black Sketch Pen
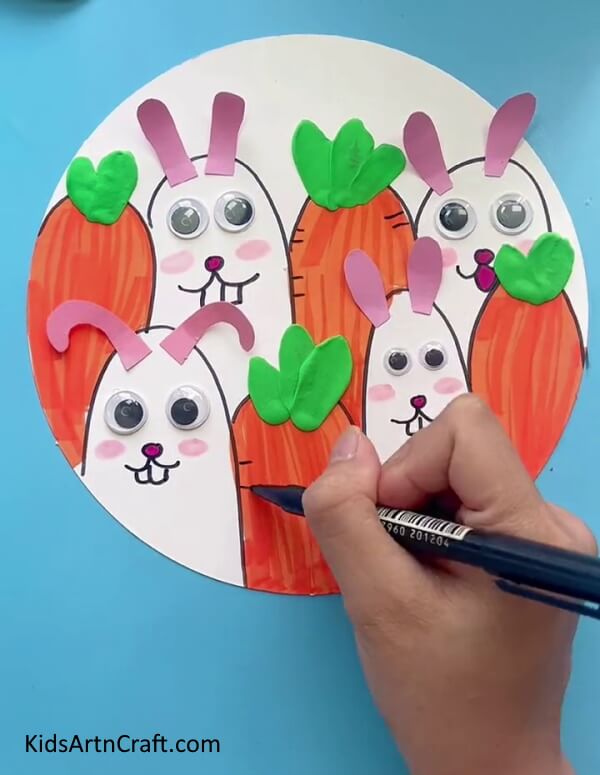
Take a black sketch pen and make small horizontal lines (sleeping lines) on a carrot as shown to give real effect to it.
Finally, Bunny And Carrot Drawing Art Is Ready!!
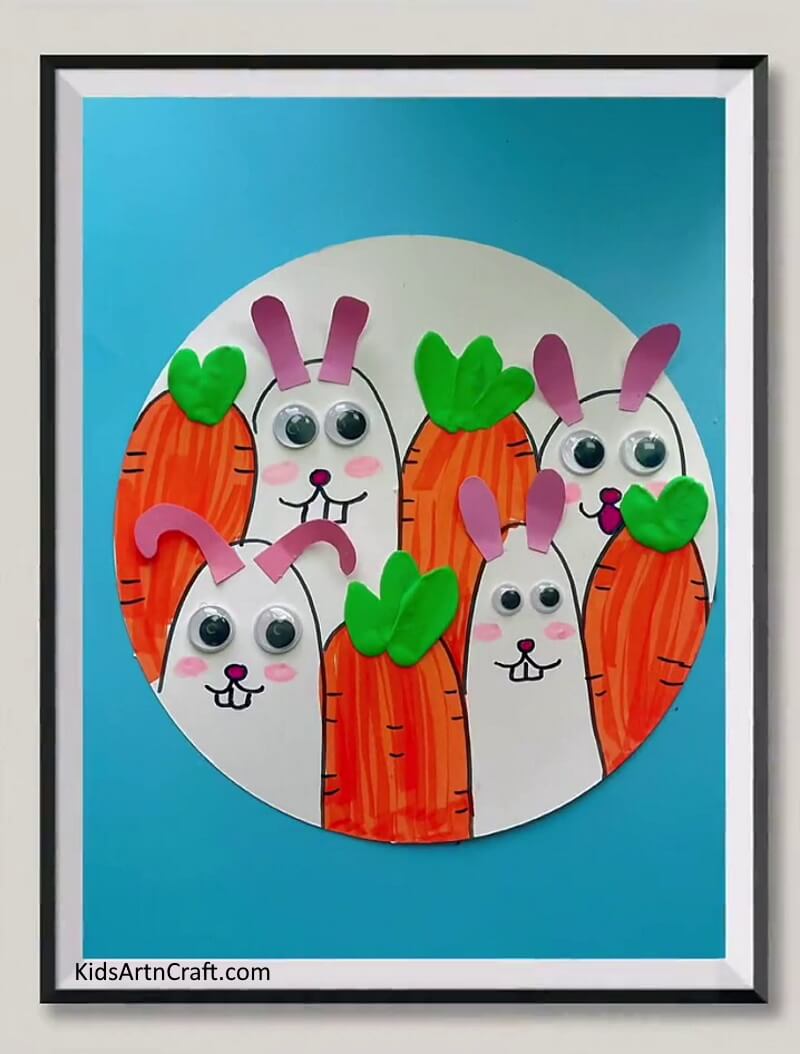
Now, here comes the final and exciting part. Stick your circular masterpiece of bunnies and carrots on blue-colored craft paper. Then, frame it in your house and show the world what a great artist you are!
Do you too want to show the world what a great artist you are? Then, what are you waiting for? Grab these materials and get started on a masterpiece of yours.
Some More Bunny Craft Tutorial
Constructing a Paper Easter Bunny For Toddlers
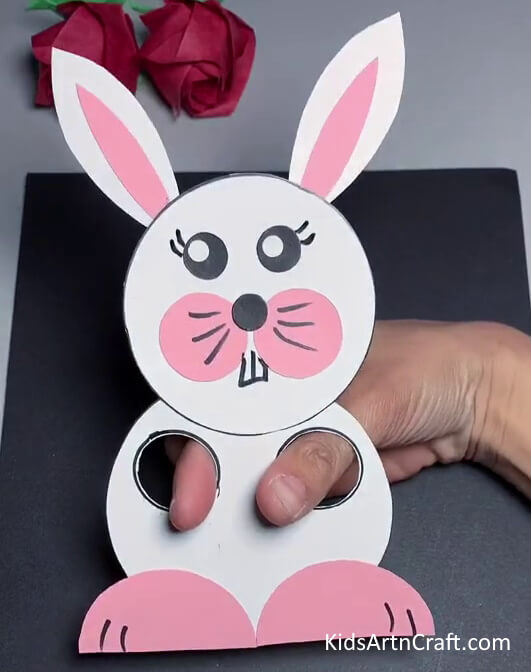
Image Source/Tutorial: Kids Art & Craft
Constructing a paper Easter bunny is a fun and easy activity to do with toddlers. It’s a great way to get creative and also enjoy the holiday. All you need is paper, glue, scissors, and some markers. Let the little ones design their own bunnies and then watch them come to life.
Follow us on Youtube for art and craft tutorials and much more.
More Articles from Kids Art & Craft
- Easy Drawing Tricks With Your Parents Video Tutorial for Kids
- Easy Drawing Video Tutorial for Kids
- Easy Drawing With Crayons Video Tutorial for Kids
- Creative Way To Make Sunflower Seed Shell Tree Craft For Kindergarteners
- Beautiful House Craft Tutorial With Cardboard And Cotton Swab


