Recycled Crafts
Recycled Chick Pattern Pencil Stand Craft Step by Step Tutorial

A step-by-step tutorial for you to create a DIY pencil stand that is a recycled craft & will look adorable with a chick pattern all over it!
If you are enthusiastic about making different crafts to brighten up your room, then you are in the perfect place! Today, we brought you an amazing idea to create a DIY cute pencil stand that is unique! This is a recycled craft and will use up only the material mostly that you have at home already! This step-by-step tutorial will serve as a guide to you and will provide instructions on each and every step of this craft-making! Unleash your creativity and make something pretty and useful out of mere waste! Let’s begin!
Simple Recycled Chick Pattern Pencil Stand Craft


Read More: Learn To Make Recycled Bottle Butterfly Tutorial
Materials Required
- Plastic Bottle
- Craft Cutter
- Colored Clay (Yellow And Orange)
- Black Marker
- Pink Sketch Pen
- Glue
- Clay Shaping Tool
Procedure
Step 1: Cutting Out A Plastic Bottle


Start this craft by taking a plastic bottle and a craft cutter. Using the craft cutter, cut out the bottle into halves.
Step 2: Taking Out The Bottom Half Of The Bottle
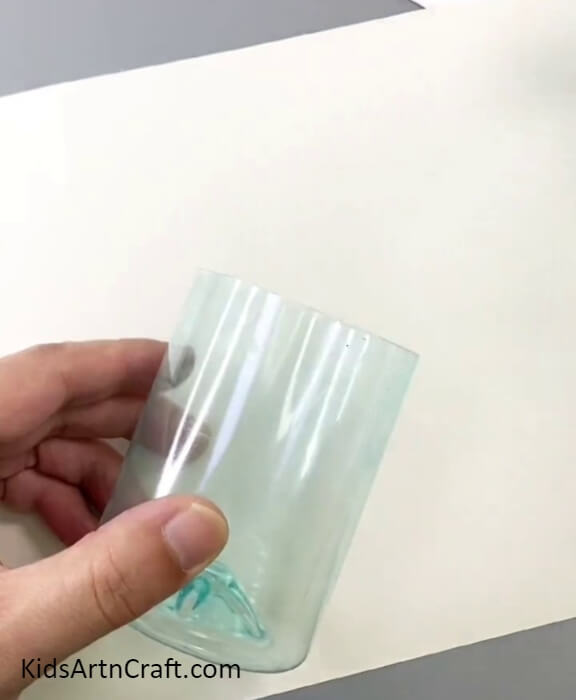
Cut the bottle wholely to take out the bottom part of it to make the stand base of the craft.
Step 3: Taking Out A Piece Of Yellow Clay
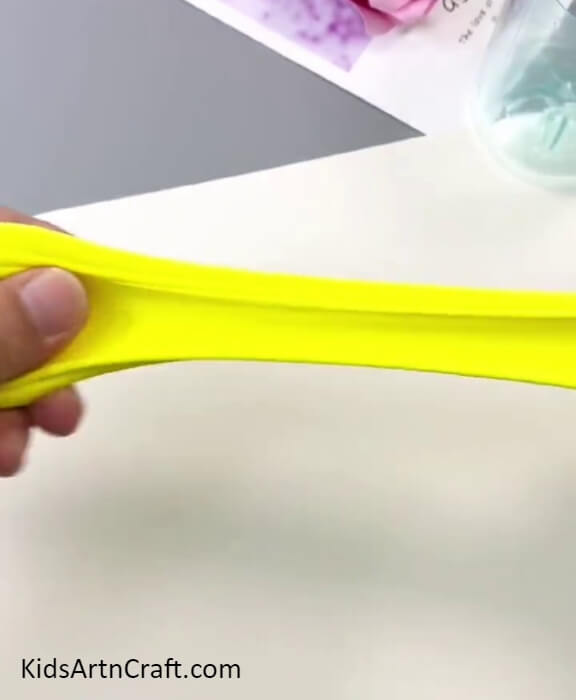
From the yellow clay, stretch and take out a piece from it for making the chicks over the base.
Step 4: Making A Clay Ball And Applying Glue
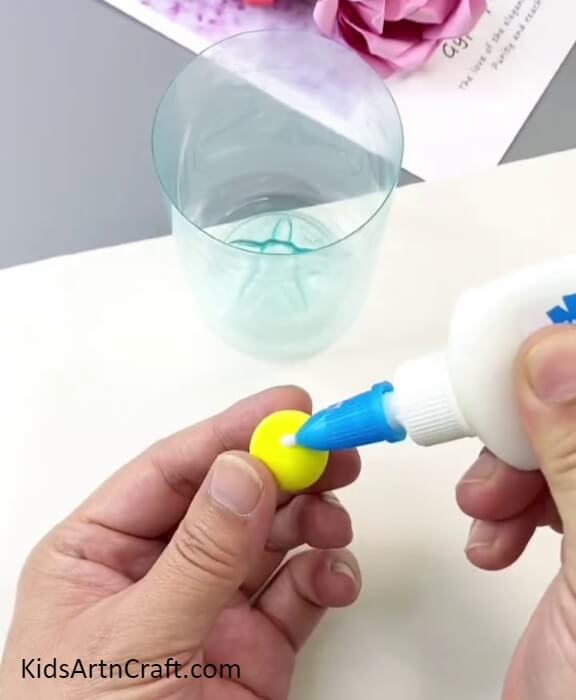
Dough the piece into a small yellow ball and apply a drop of glue over it.
Step 5: Sticking The Clay Ball Over The Stand Base
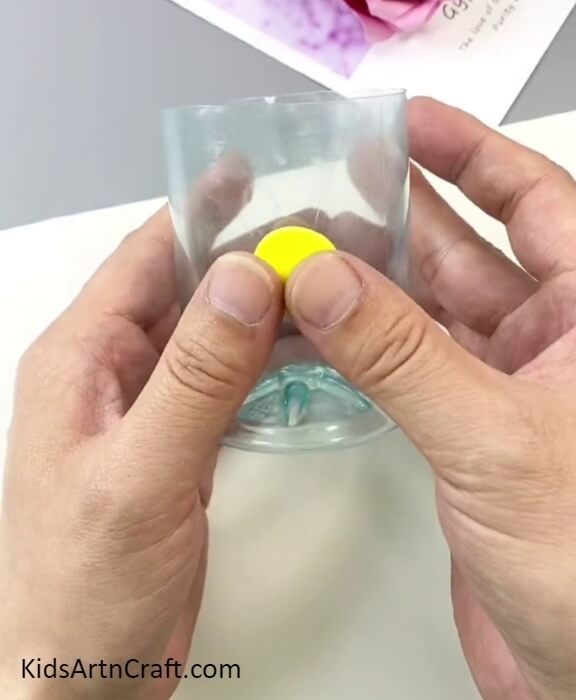
Paste the ball over the outer side of the plastic bottom base and press it to flatten it over the base. This will become a chick face.
Step 6: Making More Chick Faces
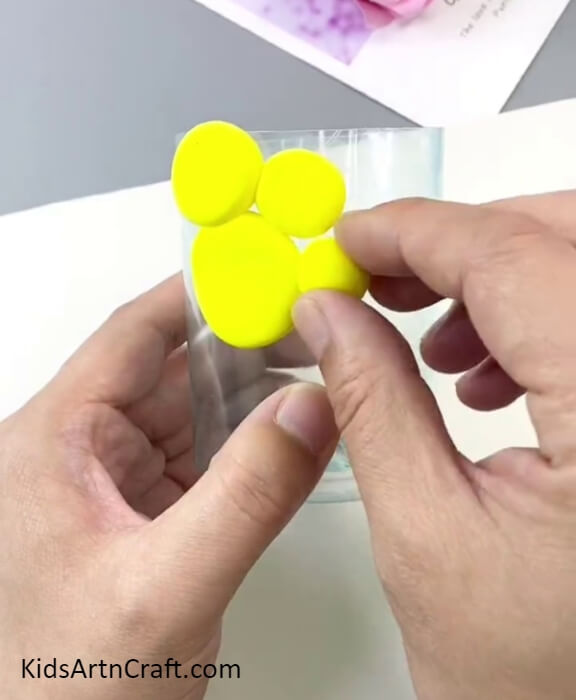
Following the same, make more chick faces by sticking and pressing the clay balls close to each other.
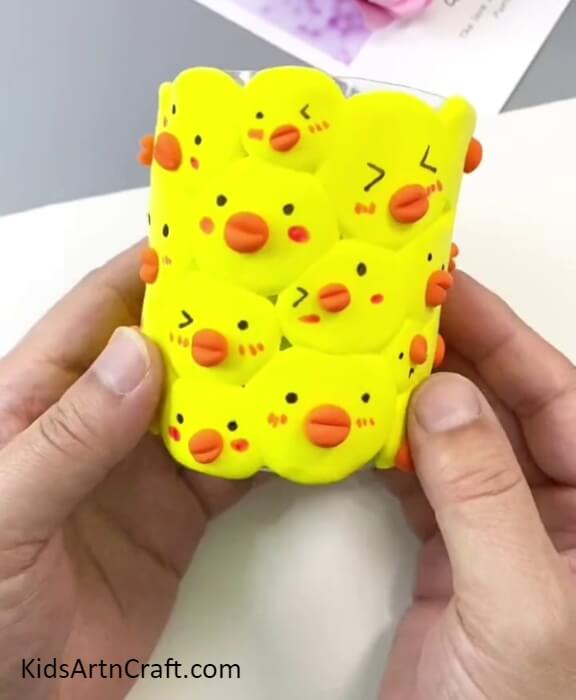
Step 7: Completing Making Chick Faces Over The Base
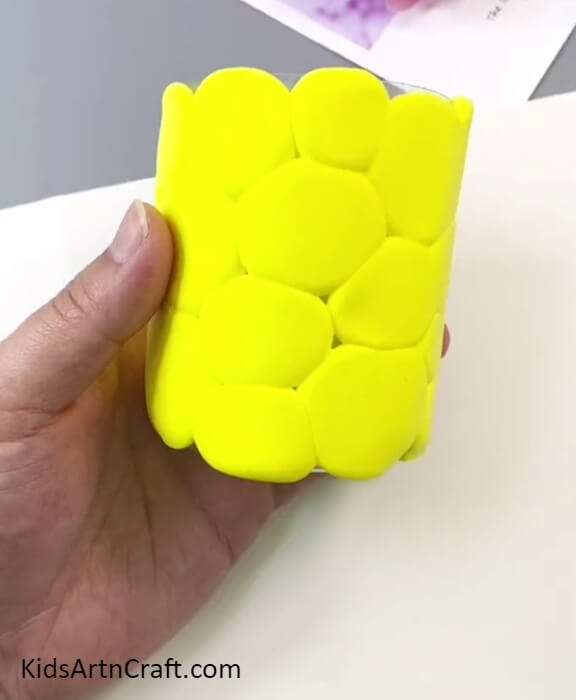
Completely cover the whole bottom bottle base with the clay chick faces.
Step 8: Making A Beak To The Chick Face

Dough a small piece of orange clay into a round ball and place it over the chick’s face, now, using a clay shaping tool, press and carve a horizontal line over the round ball to make 2 parts of the beak.
Step 9: Adding Beaks To All The Chicks
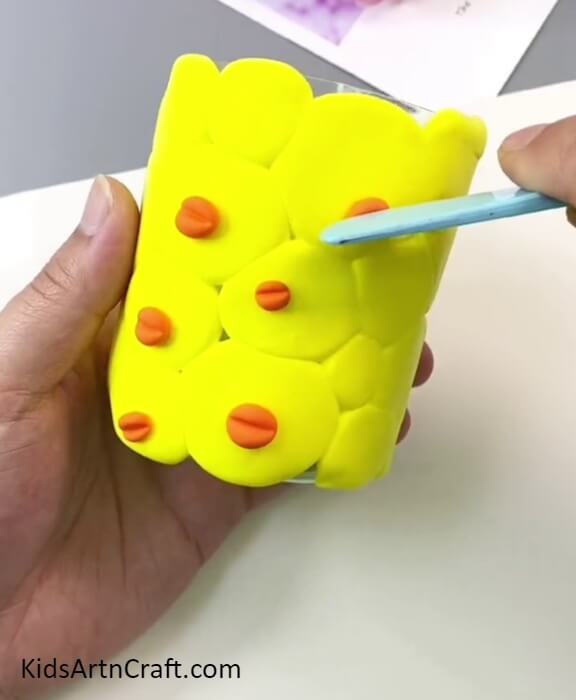
Following the same, make beaks randomly below the face of the chicks and carve the 2 parts using the clay tool.
Step 10: Drawing Eyes Of The Chicks
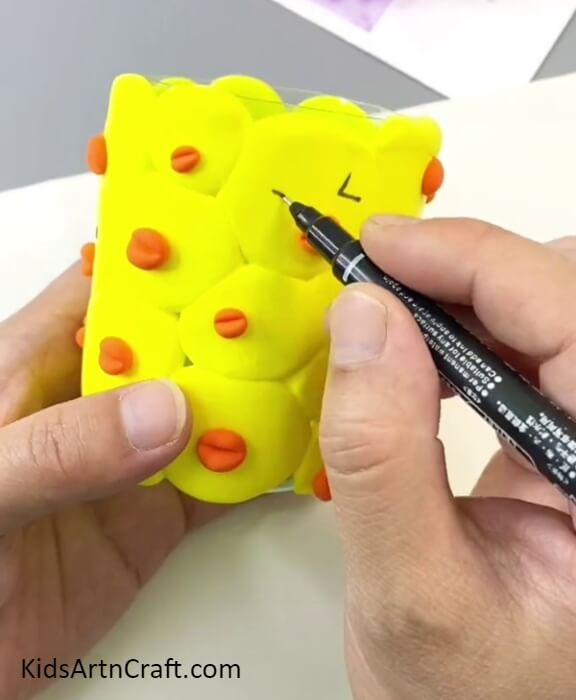
Make different-different eyes of the chicks to make the craft look funky, like, making dotted eyes, curved closed eyes, winking eyes, squeezed ‘><‘ shaped eyes, and more.
Step 11: Making Blush Over The Chick’s Faces
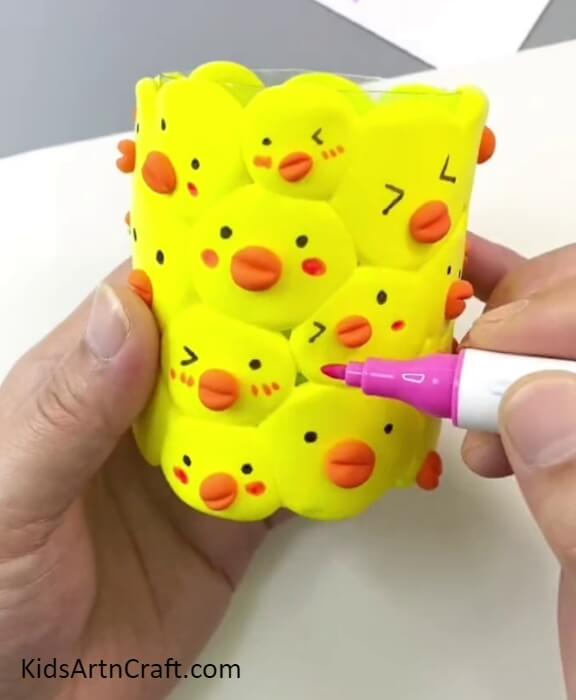
Using a pink sketch pen, make various types of blush on both sides of the mouth over the face.
Step 12: Completing Making The Blush
Make the blush on each and every cheek face as shown in the image.
The Final Look Of Your Chick Pattern Pencil Stand!
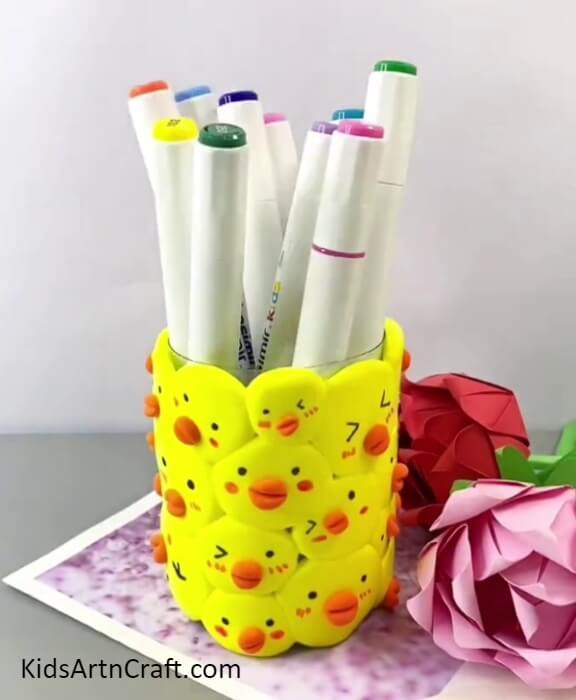
Congratulations! You have finally created your chick pattern pencil stand and it turned out to be amazing! Isn’t it?!
This craft is perfect for even a beginner to introduce him/her to the wonderful world of crating! You can now put your pen, pencil, scissors, markers, colors, and other stationery items in it. Put it over your study desk and let everyone see and admire it who passes by! You can even use it as a gift for your loved one, I’m sure they’ll love to receive such cute handmade decor which comes in handy too! What are you waiting for? Create it right now!!!!!
Follow us on Youtube for art and craft tutorials and much more.
More Articles from Kids Art & Craft
- Water Bottle Airplane Tutorial for Kids
- Easy to Make Snowman by Bottle Craft Tutorial
- How to Make Ladybug with Toilet Paper Roll
- DIY Foam Net Home Craft For Kids
- Easy Paper Cup Fish Craft In Simple Steps