

Christmas
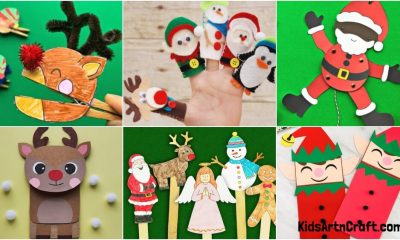
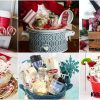
Christmas Crafts to Make for Home Decor – Video Tutorials

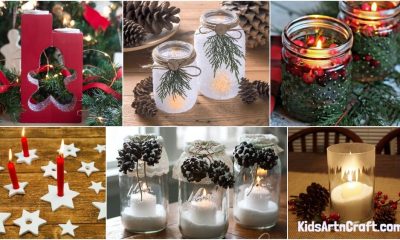
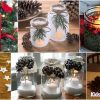
Christmas is almost knocking on the door! Christmas is the most favourite festival of many of you. It is celebrated in different countries all over the world. People like to decorate their house with Christmas trees, gifts, Santa’s look-alike toys and many more. There are many other decorations stuff people use for Christmas decorations like lights, bulb lights, small lights, artificial snow and many more. You must have wanted to decorate your house with some beautiful stuff. Today you’re going to learn to make a dazzling Christmas bottle, which will make your room brighter. We all use bottles and after using many of us throw them. So, without throwing them away, it will be nice to make something beautiful with it. So, without any words let’s get started!
How to make a Christmas Decoration Bottle
Materials:
- Bottle of champagne ( You can use any type of bottle you want to decorate)
- Decoupage napkins for Christmas or Santa Claus.
- Nail polish remover
- PVA glue
- A glue gun
- A small brush
- Hot glue
- Acrylic paint
- Glitter ( you can use any colour glitters, but we prefer grey colour)
- Acrylic lacquer.
Procedure:
- Take a bottle of champagne and nail polish remover, use the nail polish remover and clean the bottle.
- Use Acrylic paint to paint the whole bottle.
- Paint the cap part also properly.
- Take napkins of Christmas or Santa clause, split them up and stick them in the bottom-middle of the bottle with the help of PVA glue and a small brush.
- The napkins must cover all the bottom to middle parts of the bottle.
- After using the brush, use your hand to spread the glue properly in the bottle.
- Take a glue gun, put glue in a straight line all over the upper part of the bottle.
- You should apply the glue ashe snow melts over something.
- After applying the glue all over the upper part, dry the glue properly.
- Take the Acrylic paint and paint the parts of the bottle you glued previously with a brush.
- Take glitters( you can use any colour glitters but we prefer grey colour) and put glitters on the bottle, especially the upper white part.
- Put some Acrylic paint under the little bottom of the bottle’s circle part with the brush.
- Put glitter on the bottom part to make it shiny.
- Put the same paints and glitter on the napkins of Christmas or Santa Claus and shine it.
- Put the paint and glitter in the parts like Santa’s hat’s, coat’s white part etc.
- Then your beautiful bottle will be done!
Wow, it’s so shiny! Just look at how beautiful the bottle looks! This will shine in your home. You can easily make it with the materials that are all available in the market. Santa will love it! Without buying anything you can use your creativity to decorate your house. Your relatives, guests and kids will love them. You can also teach them to make it. Use your sense of creativity to do something different. So, hurry up, grab a bottle and make a dazzling Christmas bottle.
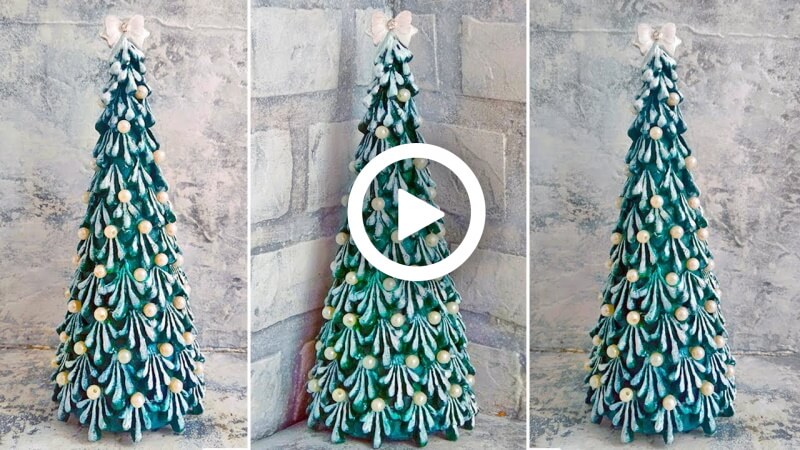
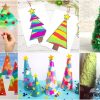
How to make a DIY Christmas Tree
Christmas is a very exciting time for everyone with all the bells jingling, smell of the fresh Christmas tree, nice cold and cozy weather, gifts, and of course Santa Clause. Christmas is almost around the corner and its time to prepare for it. Aren’t you all excited for best holidays ever? It is that time of the year to bring joy into the world and celebrate it with Lord Jesus Christ. Let’s create DIY small Christmas trees to decorate our home. You can also gift these cute trees to your loved ones.
Materials Required:
- A4 cardboard sheet
- Pencil
- Compass
- Scissors
- Super glue
- Plastic sheets
- Green and purple clay
- Decorative leaf mold
- Dark green acrylic paint
- White acrylic paint
- White decorative beads
- Small cute white ribbon
Procedure:
- Take the cardboard and place the pencil in the compass. Keep the needle of the needle of the compass in one corner of the board. Expand the compass across the breadth of the cardboard and draw it across the cardboard.
- Once its drawn, take a scissor and cut it out carefully. Be careful while handling a scissor.
- Once cut, make a cone like structure and glue the end so that it sticks on.
- Once the glue is dried, fill the cone with the plastic sheet so that it stays rigid.
- Close the cone with the left over cardboard by gluing it. Then cut-out the rest of the cardboard.
- Take the green and the purple clay and place it on the mold. Let it stay in the mold for a while, while it takes its shape. Then take out the clay from the mold. We will require around 40-50 clay leaf altogether.
- Start sticking the green leaves from the bottom, upside-down. Keep continuing till the top.
- From the middle, start sticking the purple ones. Finish it will the top.
- Using the dark green acrylic paints, start painting over the entire clay and the white spaces.
- Once the paint dries, take the white acrylic and slowly brush it over the leaves. Use more white on the top of the tree as if there is extra show there.
- In the empty small spaces, glue the decorative beads in there. It will give a fancy look.
- Lastly, at the top of the tree, stick the small white ribbon.
Your DIY Christmas Tree is Ready!
This looks so wonderful! You can be a little more creative and use your own imagination on the tree as well. This gives an elegant look to your house, especially during Christmas. You can also give this as personalized gift to someone. You can make more of such trees and keep it around different corners of your house. This will impress your guests as well. So what are you waiting for? Hurry up and start making your DIY Christmas trees.
Fun facts about Christmas:
- “Jingle Bells” was the first song played in space.
- In Ukraine, spiders are considered as good luck during Christmas.
- There is Christmas Tree in Spain which is worth $15 million.
- The Statue of Liberty was the largest Christmas gift ever given.
- Thomas Edison and his business partners invented the Christmas lights.
- The first Christmas card that was ever sent was worth $30,000.
- The smallest Christmas card in the world in invisible to human eye.
- The largest gingerbread house was as big as a real house.
- The largest snowflake ornament is 10 feet tall.
- There are more than 630 different kinds of Christmas trees.
Read More:
- Christmas Ideas with Up-cycled Wine Bottles
- Christmas Light Crafts And Activities For Kids
- Christmas Paper Crafts for Kids to Make
- Christmas Popsicle Stick Crafts for Kids
- Christmas Table Centerpieces Ideas