Clay Crafts
How to Make a Clay Bird Easy Artwork tutorial for kids

Learn how to make a beautiful piece of art using clay! This easy clay bird project will help to foster creativity in young children and will make a great addition to any home. With simple instructions and easy-to-find materials, this project is perfect for a fun and creative afternoon.
Are you looking for a creative and fun way to make art? Clay birds are a great way to express yourself and make some beautiful artwork. Whether it’s for a school project, a gift, or just to make something fun, making a clay bird is easy and enjoyable. In this article, you’ll learn how to make a clay bird, from gathering materials to completing the masterpiece. You will learn how to make a basic clay bird sculpture, as well as ideas for decorating it. With just a few simple steps, you will be able to create a beautiful piece of art that you can proudly display in your home Read on to learn more and get started!
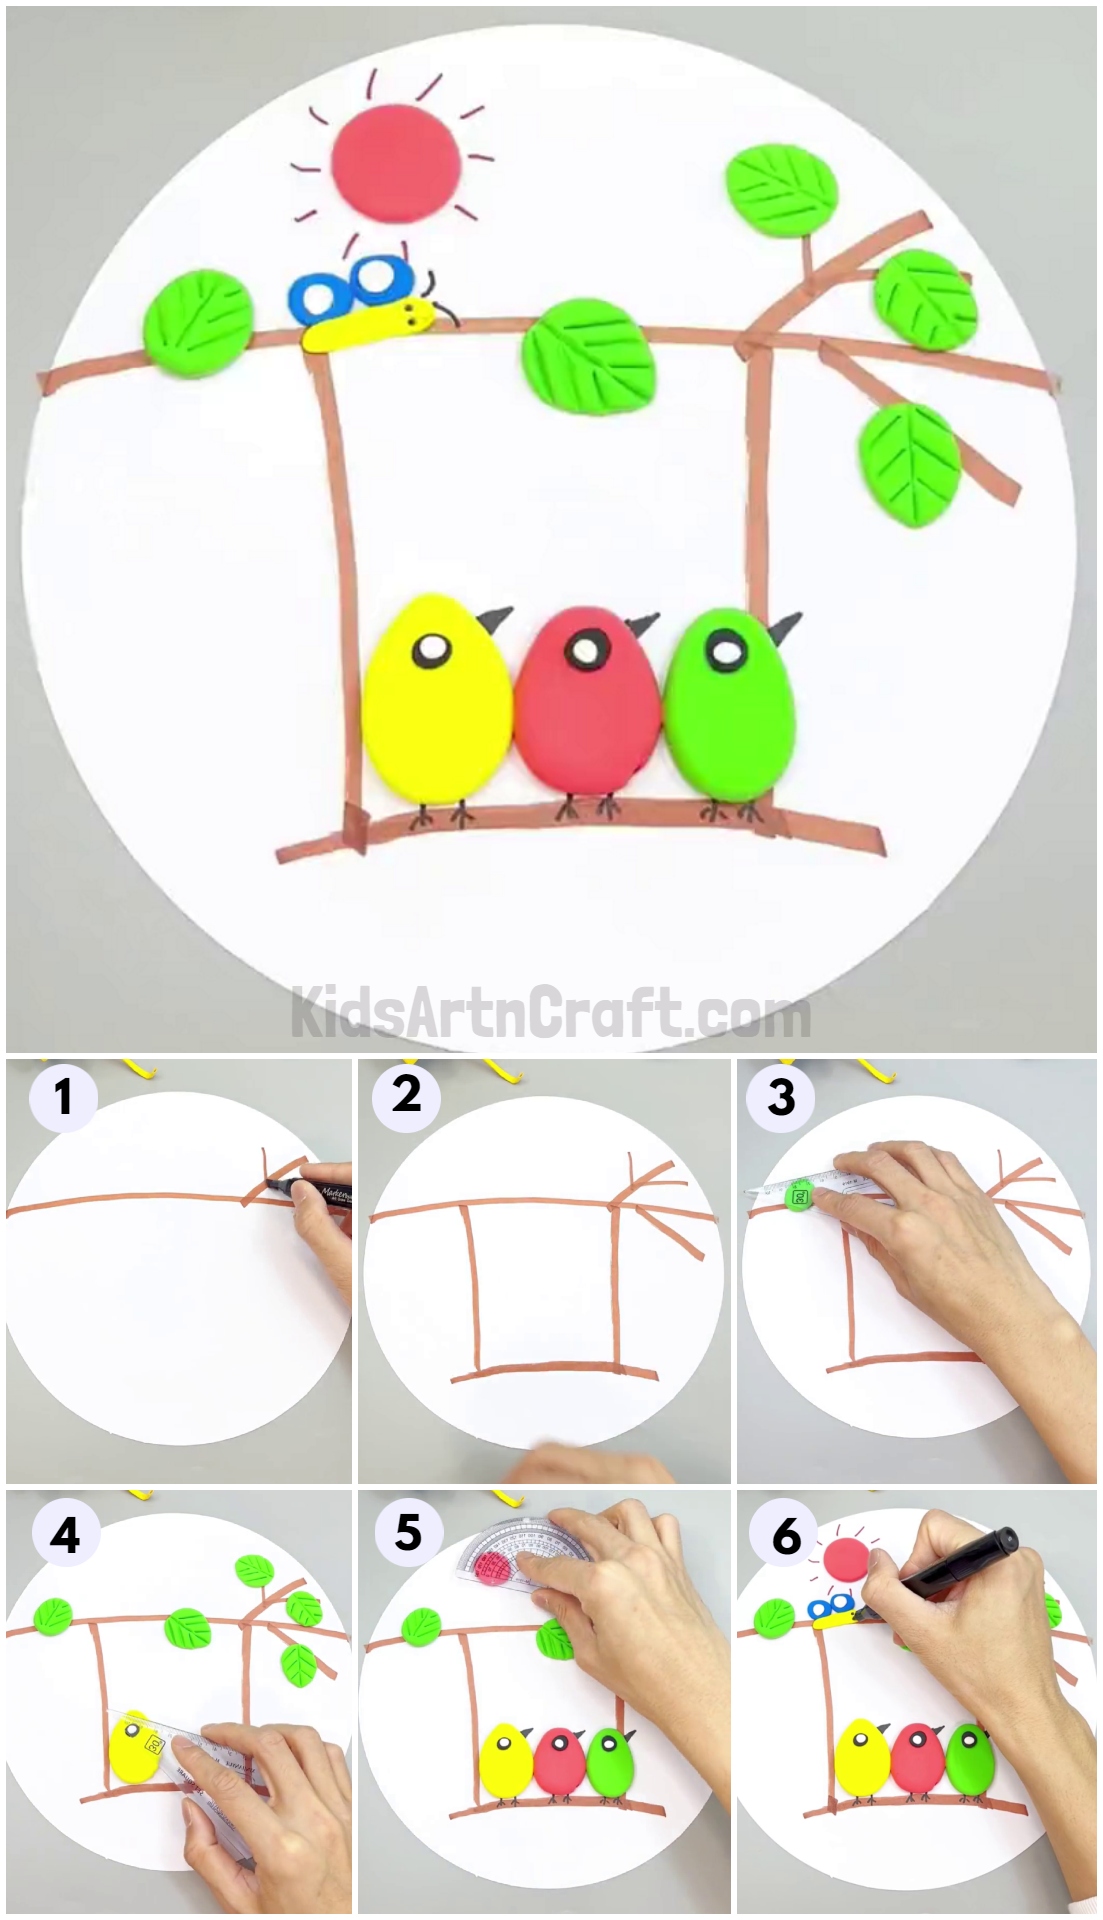
Adorable Clay Bird Artwork For Kids To Make At Home

Read More: Simple & Tasty Ice-Cream Craft Using Clay – Step-by-Step Tutorial
Materials Required
- Colored Clays
- Sketch Pens (Brown, Red, and Black)
- Ruler
Procedure
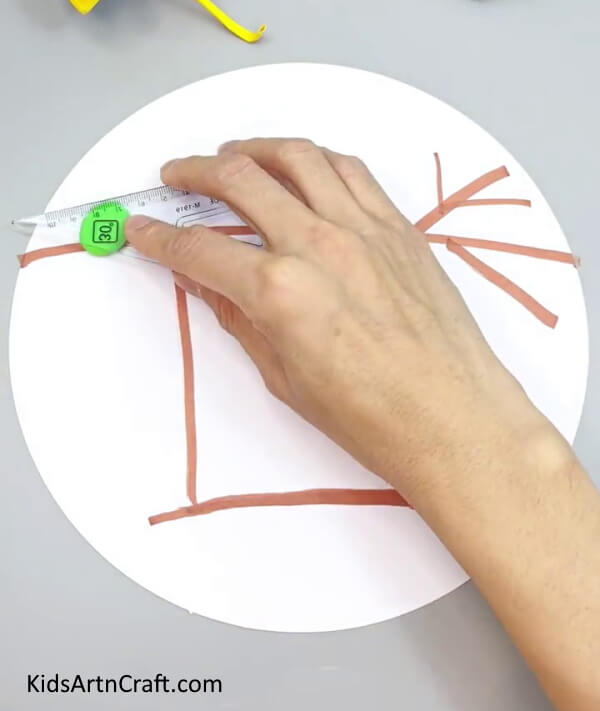
Step 1: Drawing Stems Of Tree
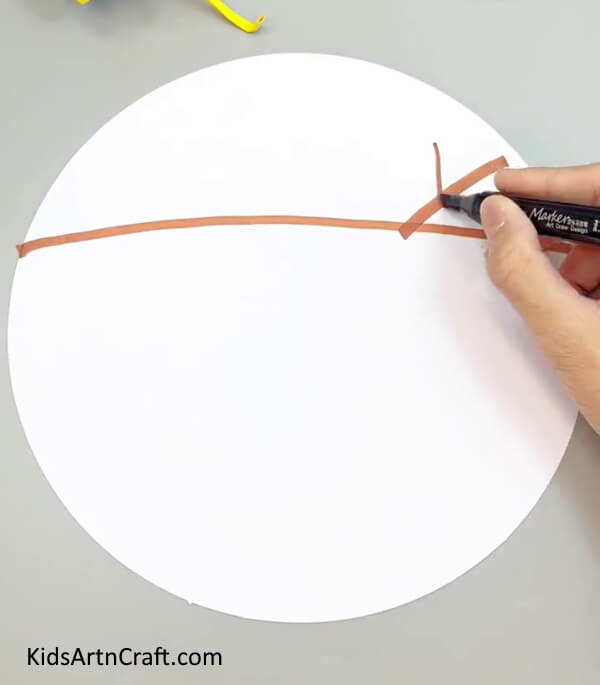

As a first step, take a white paper or cardboard circle base for the craft. Using a brown sketch pen, start drawing the stems of a tree.
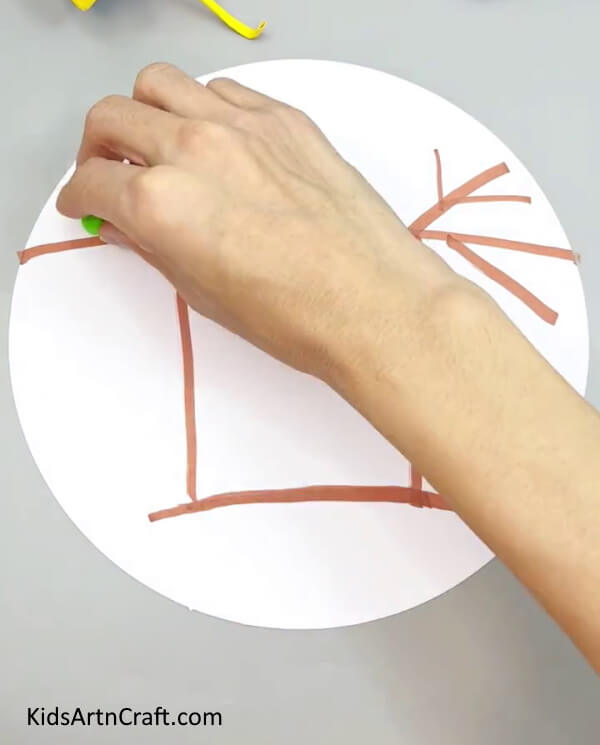
Step 2: Making Branches Of Tree
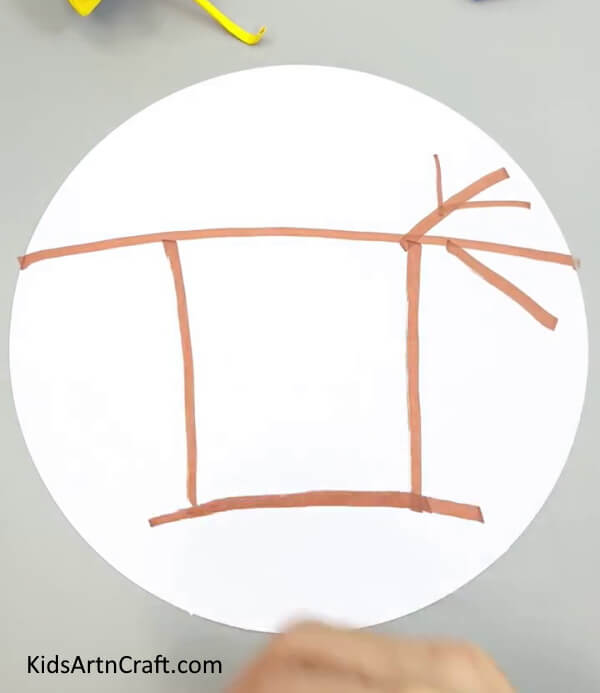

Draw branches and stems of a tree. Also, draw a swing hanging on the tree as shown in the above image.
Step 3: Putting Ball Of Green Clay

Next, take a small ball of green clay and place it on the top of the branch to make leaves of the tree.
Step 4: Pressing Clay Using Ruler

Gently, press the green clay using a ruler and give it a leaf shape. Using the same method, make a few green clay leaves on the tree.
Step 5: Adding Details On Clay Leaves
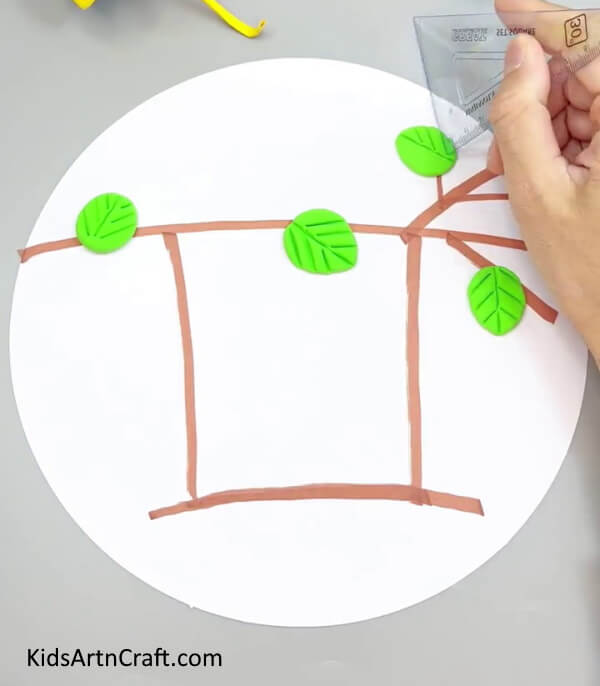

Now, add the texture and details on the clay tree using the sharp end of a ruler.
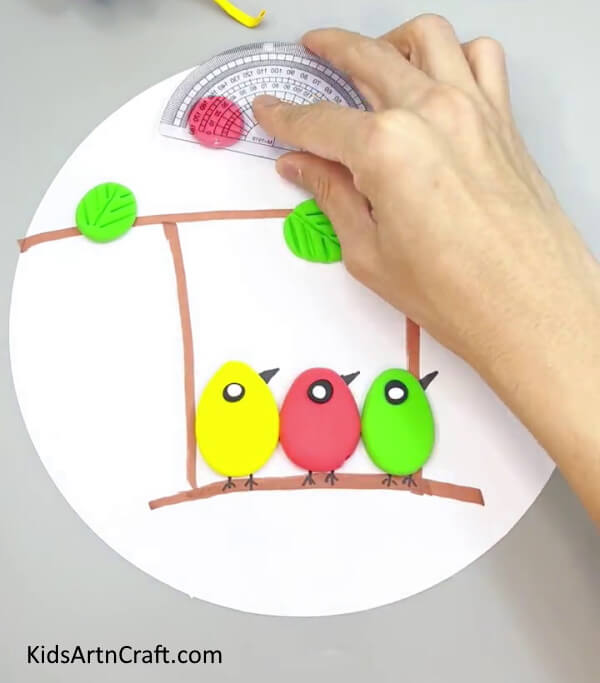
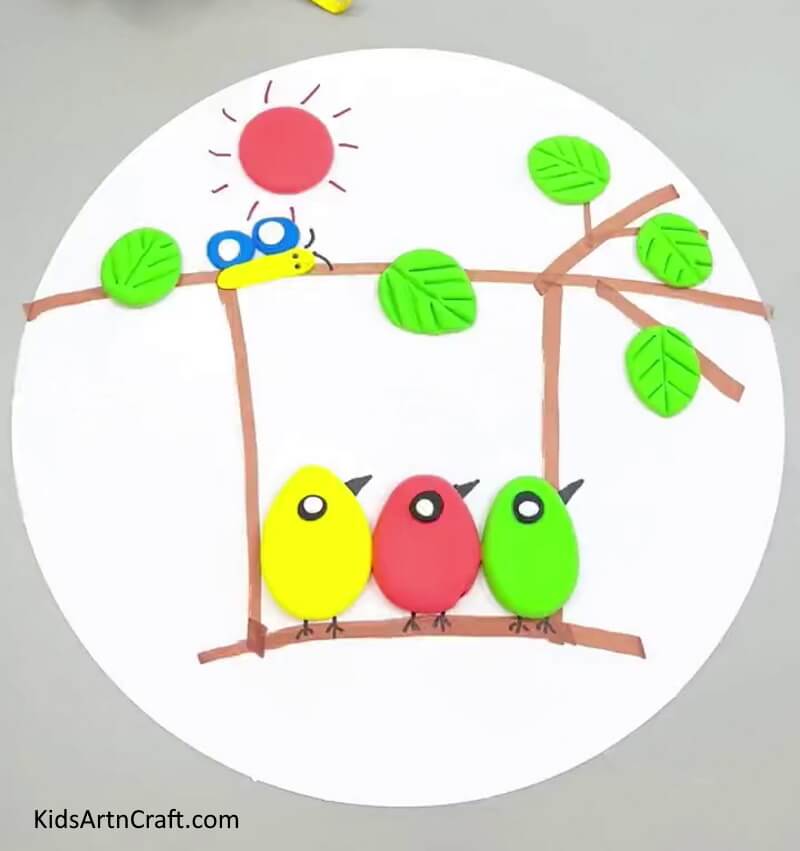
Step 6: Making Bird Using Clay
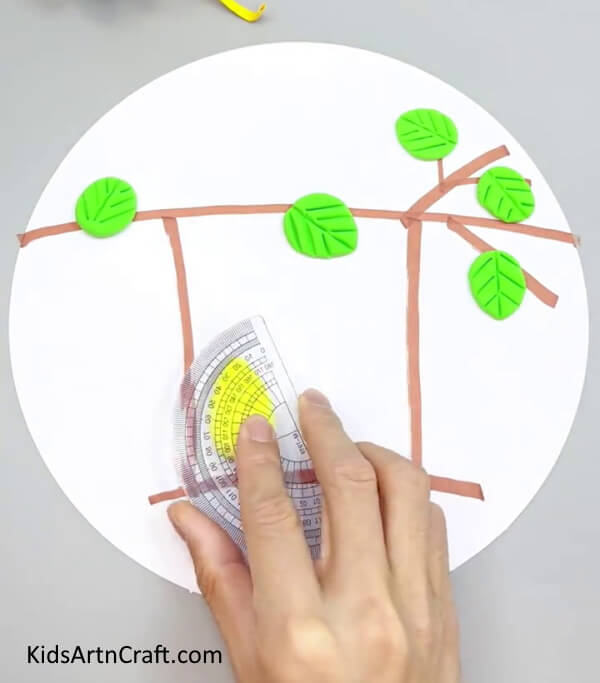

Let’s make the clay bird. To make a bird, put the clay in a leaf shape and place it upside down on the swing. Press it using a ruler.
Step 7: Pasting Eyes
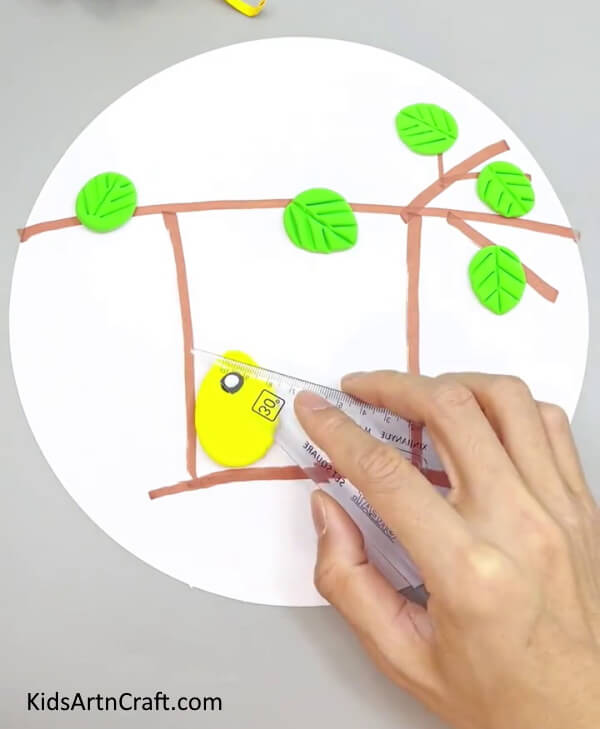

Using black and white paper, make the eye of the bird and paste it. Again, press the clay bird using a ruler.
Step 8: Drawing Beak and Legs Using A Black Marker
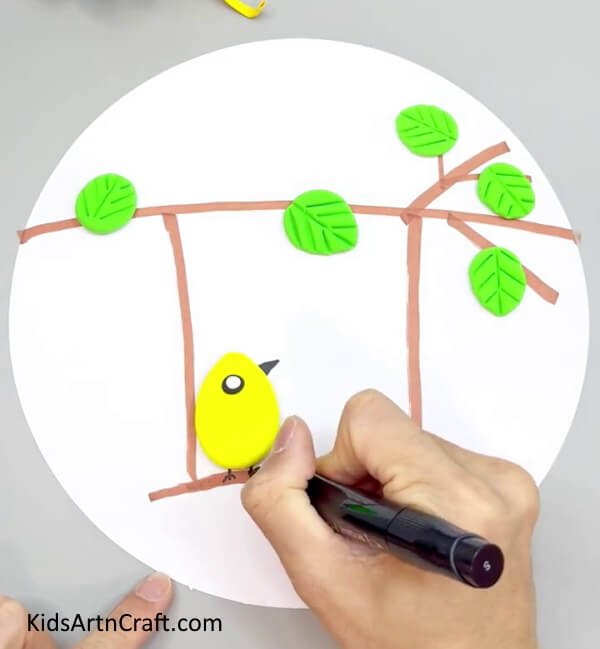

Draw the beak and legs of the bird using a black marker. Similarly, make two more different colored birds on the swing.
Step 9: Making Sun Using Clay
To make the sun, put a round ball of red color on the top and press to flatten it.
Step 10: Drawing Rays Of Sun
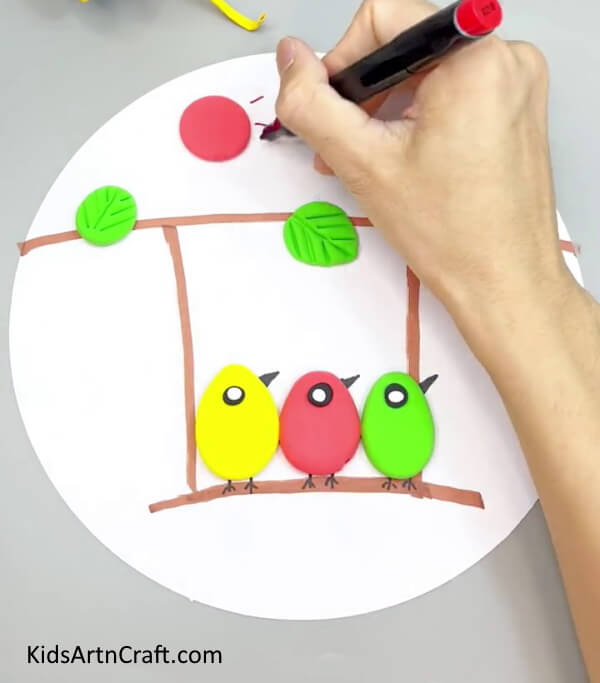
Draw sunlight rays around the sun using a red sketch pen or marker.
Step 11: Making Caterpillar Using Clay
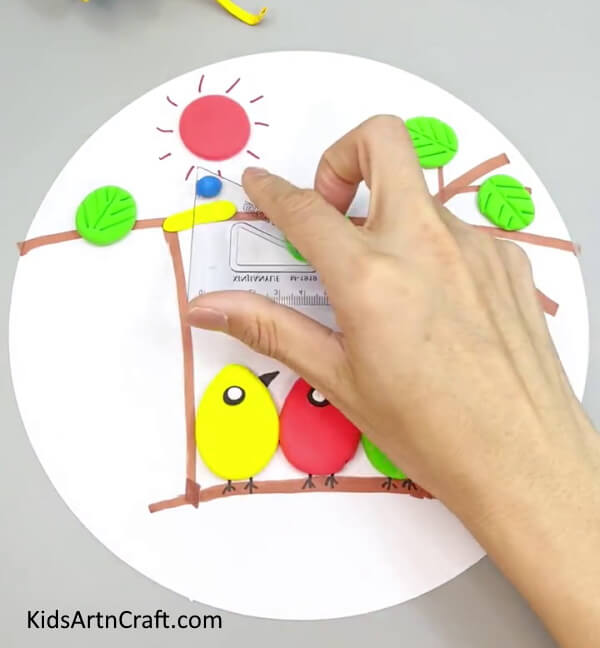

To make a caterpillar on the tree, put a rectangle-shaped clay on the branch of the tree. Put two round blue clay on the rectangle and press them using a ruler. Add white clay on the top of the blue clay.
Step 12: Drawing Caterpillar’s Eyes
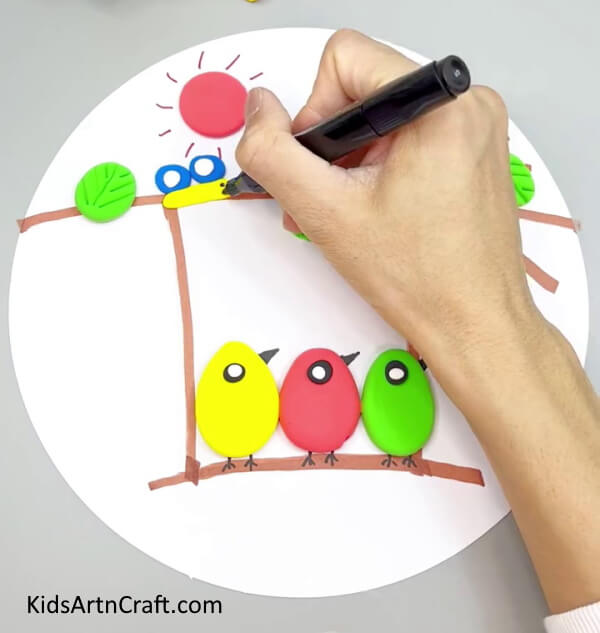

Finally, using a black marker, draw the eyes of the caterpillar.
Bird Clay Craft Is Ready To Be Displayed!

That’s great news! It looks like all of your hard work has paid off. Congratulations on completing this project! Making clay birds is a great way to get creative. Not only is it an easy art project, but it’s also a fun way to express yourself. Whether you’re a beginner or an experienced artist, clay birds are a great way to make art. Enjoy Crafting!
Some More Bird Craft Tutorial
Cool Paper Bird Craft Ideas For Kids

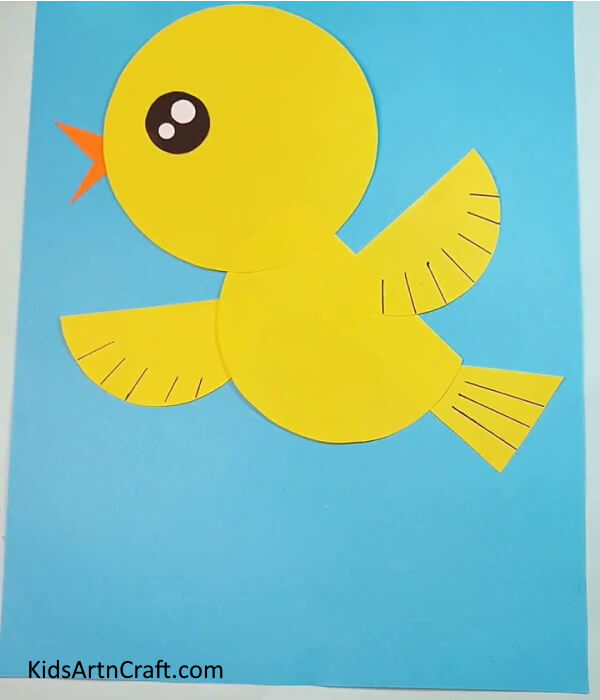
Image Source/Tutorial: Kids Art & Craft
Cool Bird Craft Ideas For Kids is a great resource for parents and teachers to help children unleash their creativity. It offers a wide variety of fun and easy-to-make bird-themed crafts that kids will love. With these ideas, children can express their creativity as well as learn new skills.
Cute Bird Nest Craft Using Paper For Kids

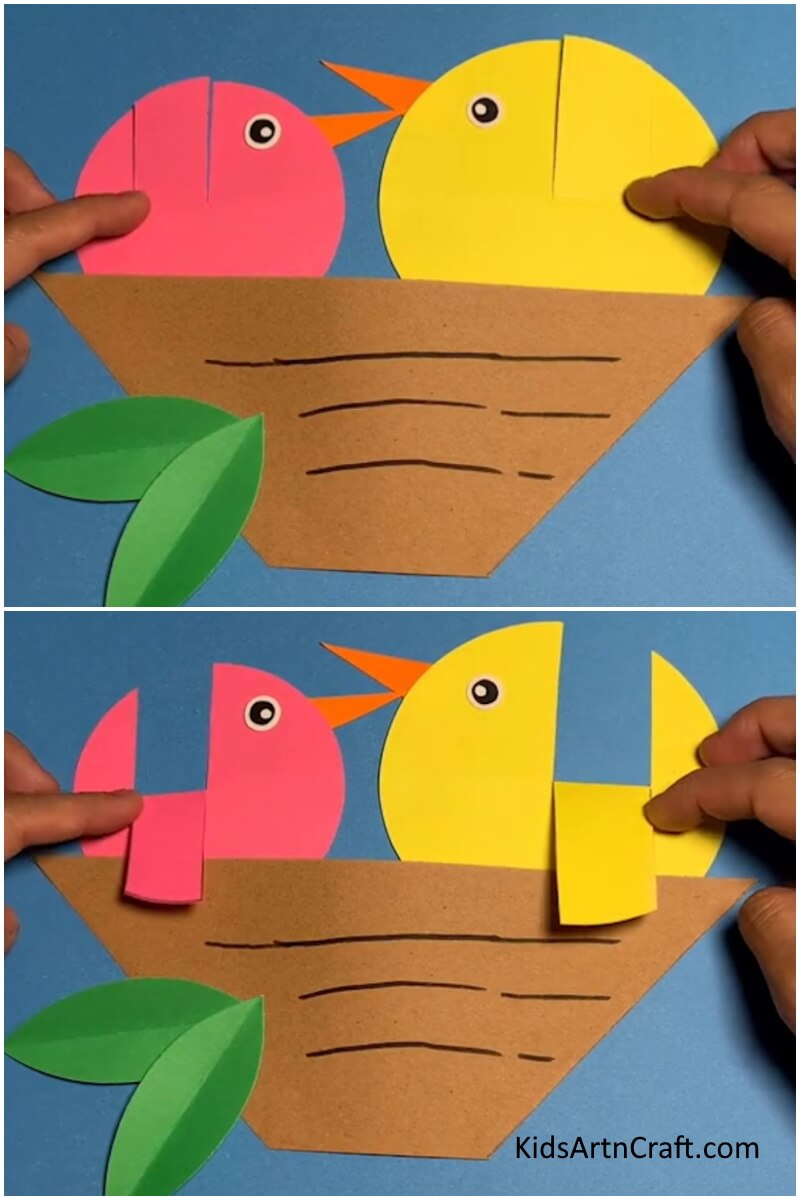
Image Source/Tutorial: Kids Art & Craft
This simple craft is perfect for kids and is great for developing their creativity. It involves using paper to create a cute bird nest with a bird in it. It is an enjoyable and easy craft that is sure to bring a smile to your little ones.
Enjoyable Paper Birds Craft Project For Kids


Image Source/Tutorial: Kids Art & Craft
Kindergarteners can make a fun and easy paper bird craft. This craft is perfect for younger children as it is simple to make and only requires a few materials. Kids will love creating their own bird and showing it off to their friends!
Creating a Paper Bird Craft with Kids

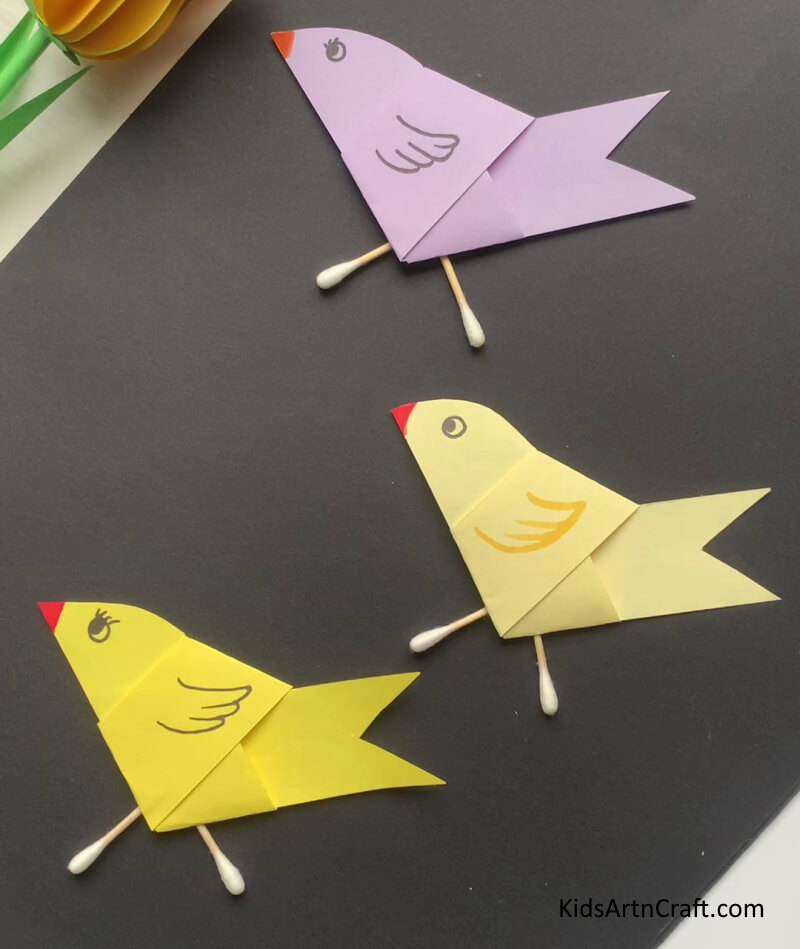
Image Source/Tutorial: Kids Art & Craft
Creating a paper bird craft with kids is a fun and creative activity. Kids can use colorful paper, scissors, and glue to create their own unique paper birds. This craft is a great way to encourage creativity and build fine motor skills.
Easy Process paper bird craft children For Kids

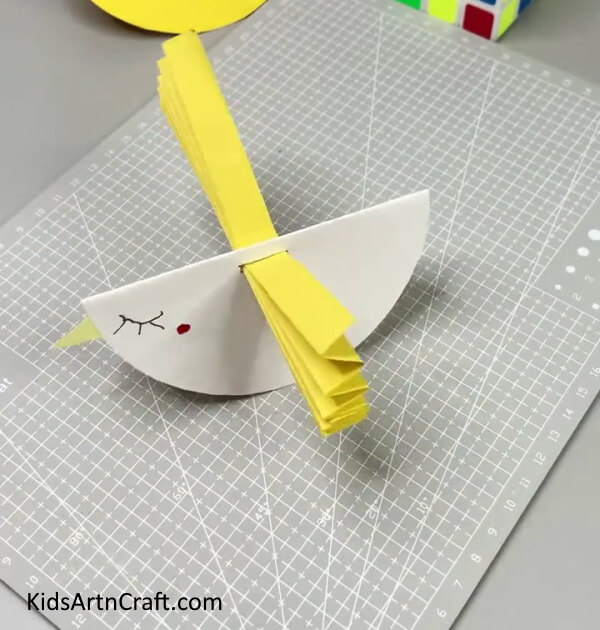
Image Source/Tutorial: Kids Art & Craft
This paper bird craft is a great activity for kids. With a few simple materials, they can create a fun and colorful paper bird. It is an easy process that will keep them entertained and engaged.
Simple To Make a Paper Bird Craft For Children

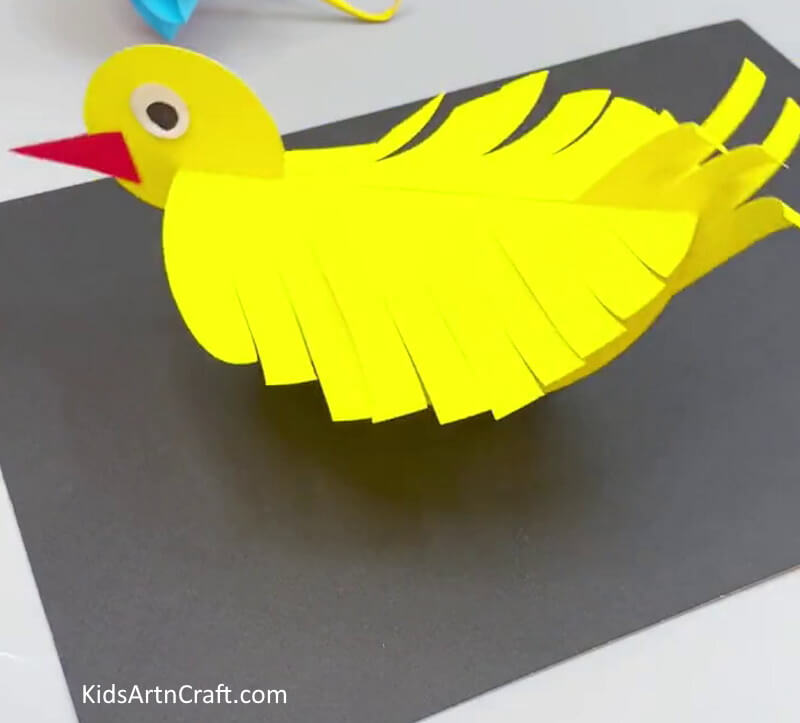
Image Source/ Tutorial: Kids Art & Craft
This paper bird craft is a great activity for children of all ages. It’s fun and easy to make and requires minimal materials. Children will love decorating their bird and watching it take shape. With just a few simple steps, this craft is sure to be a hit with the kids.
Craftwork For Kids To Make Bird Artwork Using Leaves

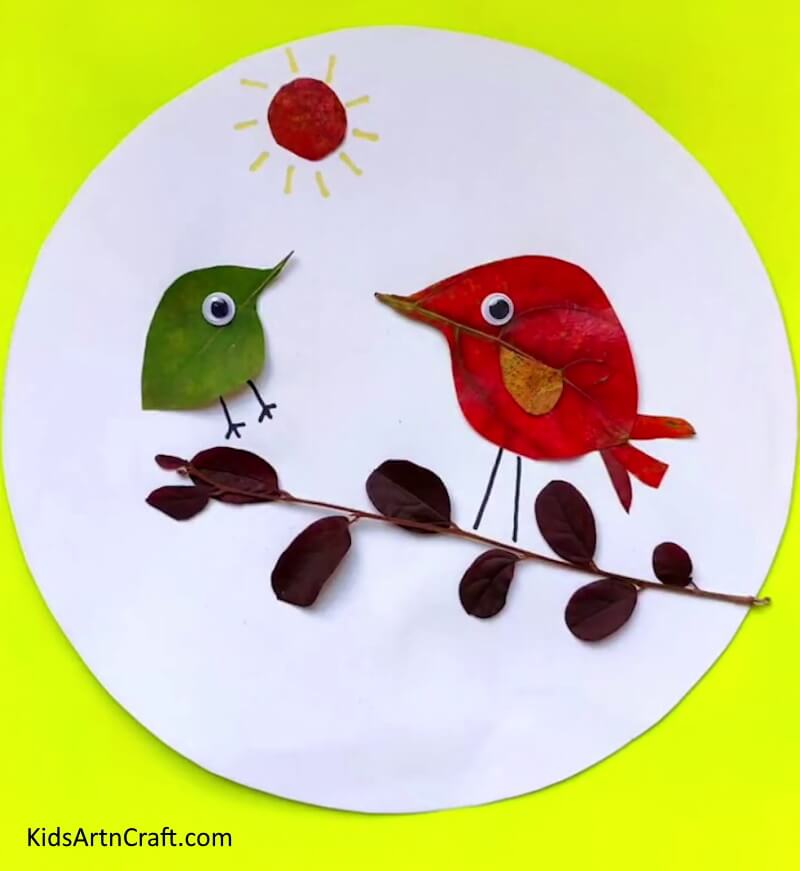
Image Source/Tutorial: Kids Art & Craft
This craftwork is perfect for kids who want to make bird artwork using leaves. They can use different colors of leaves to create a beautiful piece of art that will last for years. It is a fun and creative activity that will help them explore their creative side.
FAQs Related To How to Make a Clay Bird Easy Artwork
1. What supplies do I need to make a clay bird easy artwork?
You will need air-dry clay, sketch pens, and a ruler.
2. How do I prepare the clay?
Before you begin, knead the clay until it is soft and pliable.
3. How do I roll out the clay?
Use a rolling pin to roll out the clay.
4. How do I add details to the bird?
Use a black marker to add details like eyes, beak, and wings to the clay bird.
5. How do I make the bird waterproof?
Once the bird is dry, you can use a waterproof sealant to protect it.
Making a clay bird is a great way to create unique and beautiful artwork that can be used in a variety of different projects. It’s an easy activity that can be done with minimal supplies, and the results are sure to be stunning. With a little creativity, you can make a clay bird that will be sure to impress!
Follow us on Youtube for art and craft tutorials and much more.
More Articles from Kids Art & Craft
- Awesome Canvas Painting Video Tutorial for Beginners
- Easy Crayons Drawing At Home Video Tutorial for Beginners
- Easy Tree & Butterfly Art Using Leaves – Step-by-Step Tutorial
- Paper-Cutting Designs For Projects
- Bubble Wrap Printed Pomegranate Craft For Kids