Other
How To Make Clay Peacock Easy Tutorial For Kids

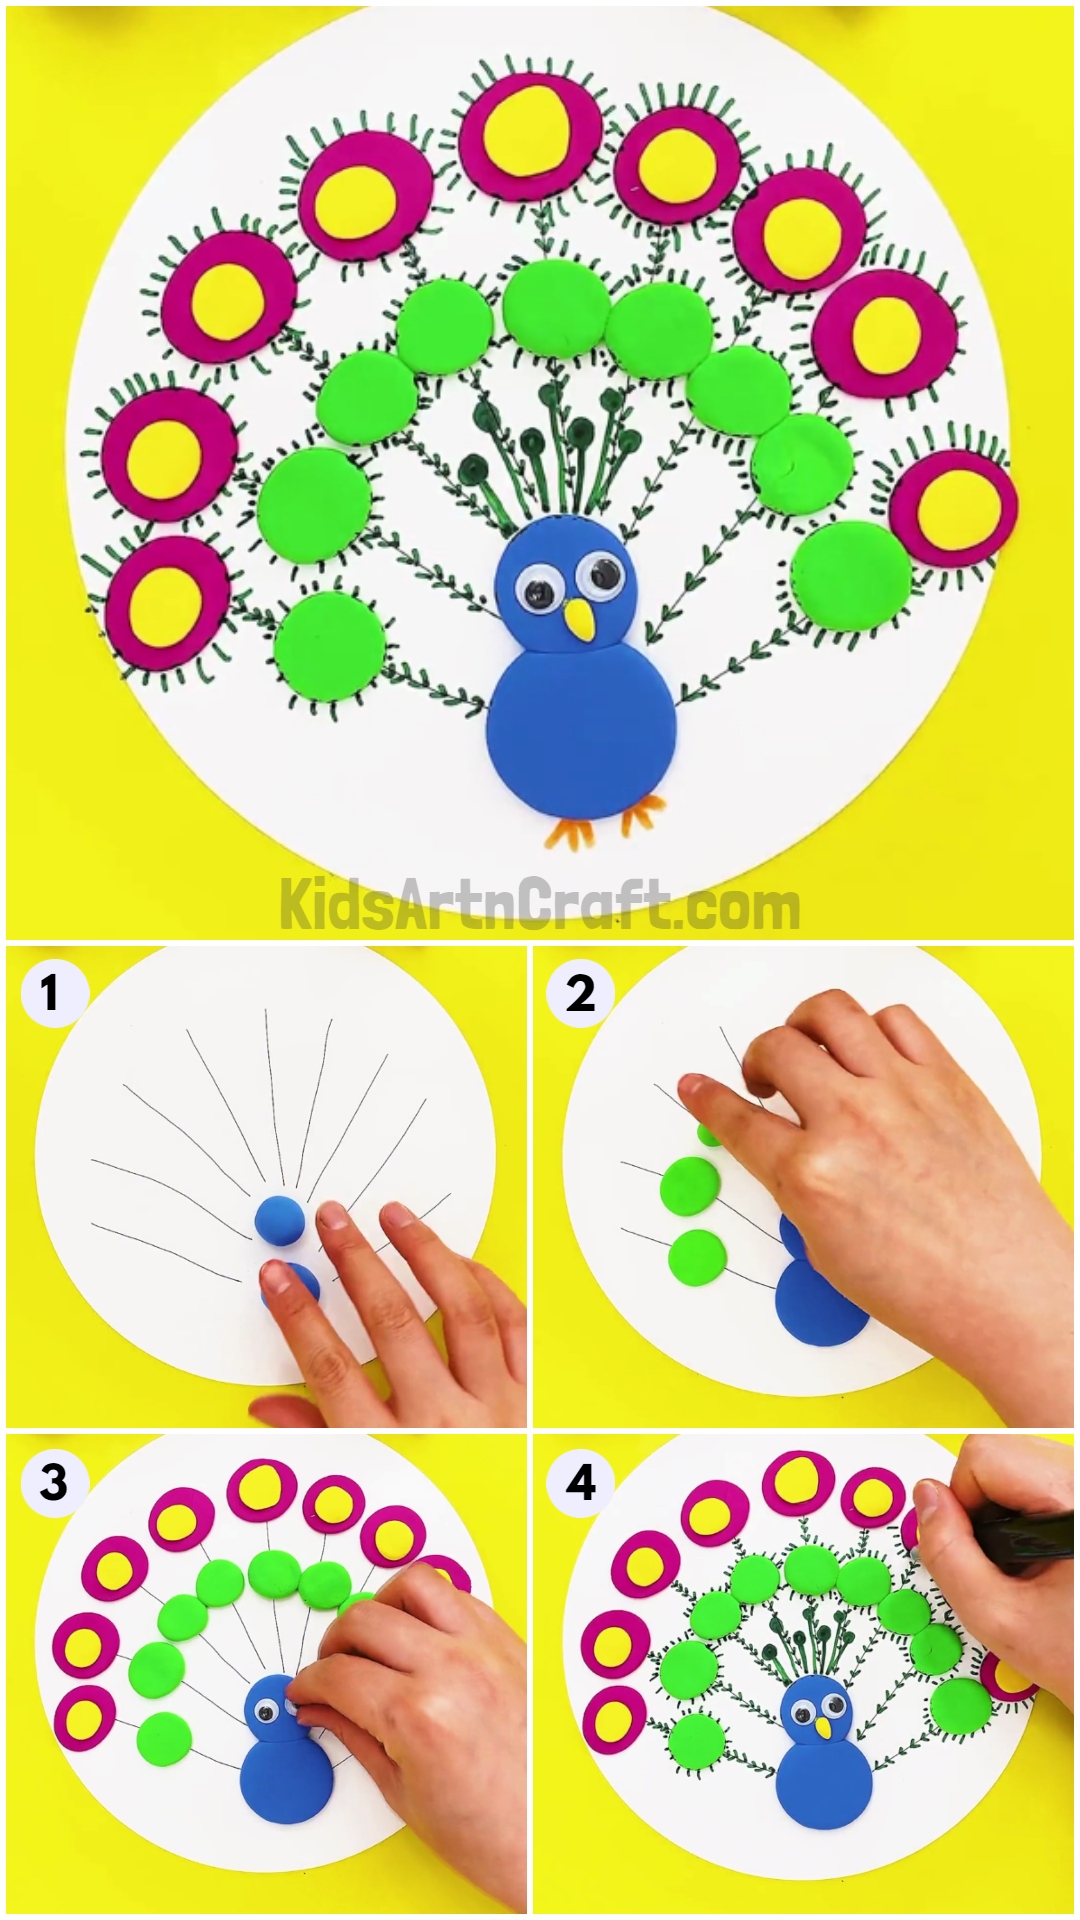
Want to make an easy but colourful peacock using clay. Welcome to this site. Here you can find simple tutorials and easy peacock craft ideas!Let us make a colourful peacock out of clay using this simple step-by-step tutorial
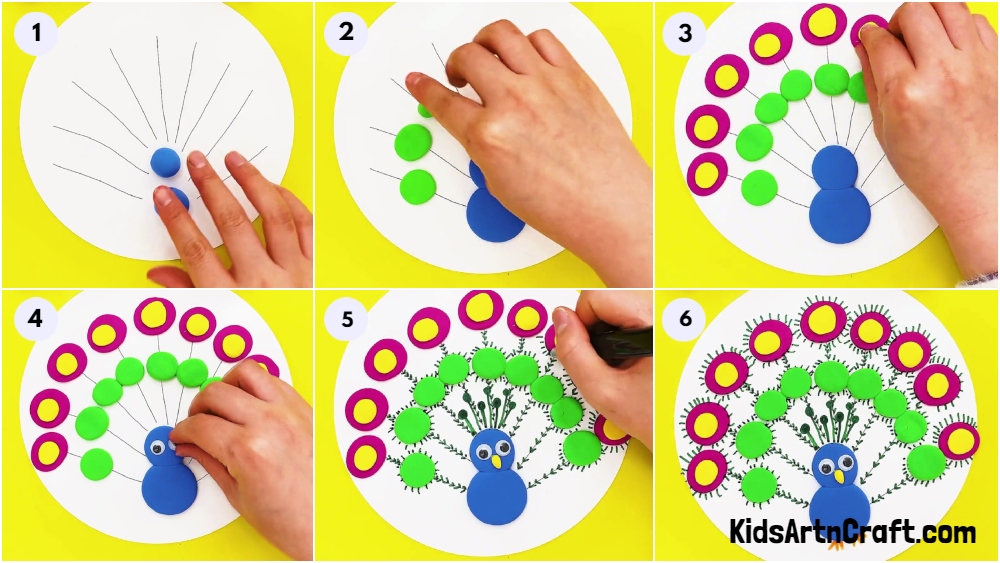
In this step-by-step tutorial, we will make a colourful peacock using clay. This activity can be tried by both kids and adults alike. Using some coloured clay and some marker, we can make a very beautiful peacock who is ready to fan its feathers and dance. We can make the peacock look more beautiful by adding in your creativity. Let’s get started!
DIY Clay Peacock Craft For Kids
Read More: Simple & Tasty Ice-Cream Craft Using Clay – Step by Step Tutorial
Materials Required
- White paper
- Coloured clay
- Markers or sketch pens (green, black, orange)
- Googly eyes
Procedure
Step 1: Starting With Some Blur
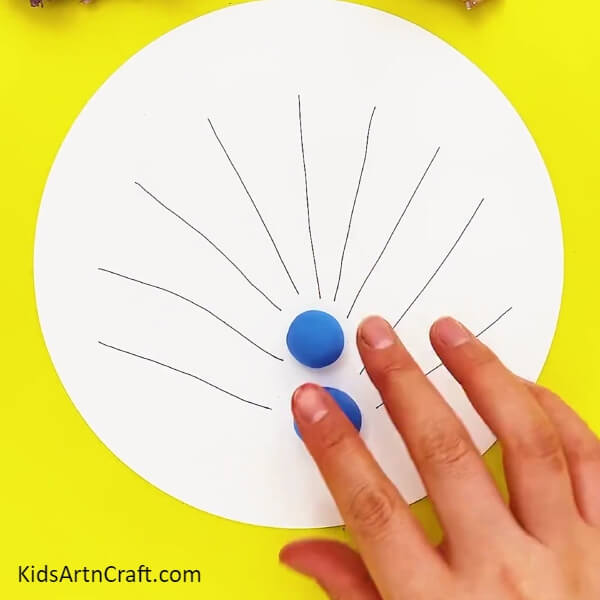
On white paper, draw lines as shown in the picture for the peacock’s feathers. Now take some blue-coloured clay and roll out two balls.
Step 2: Making The Peacock’s Body
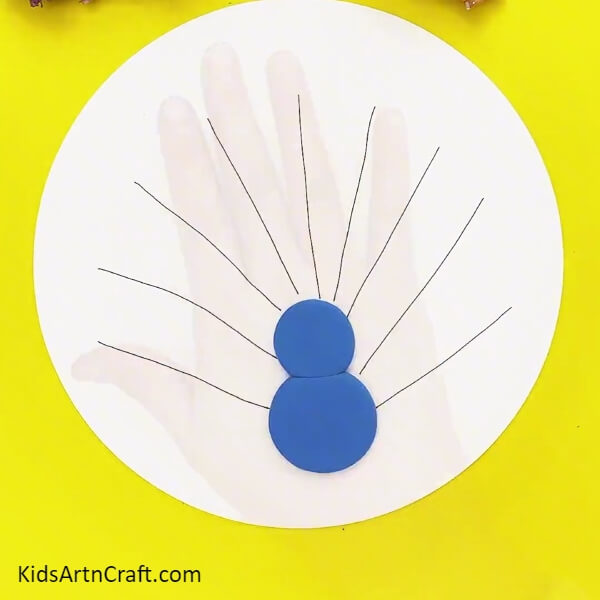
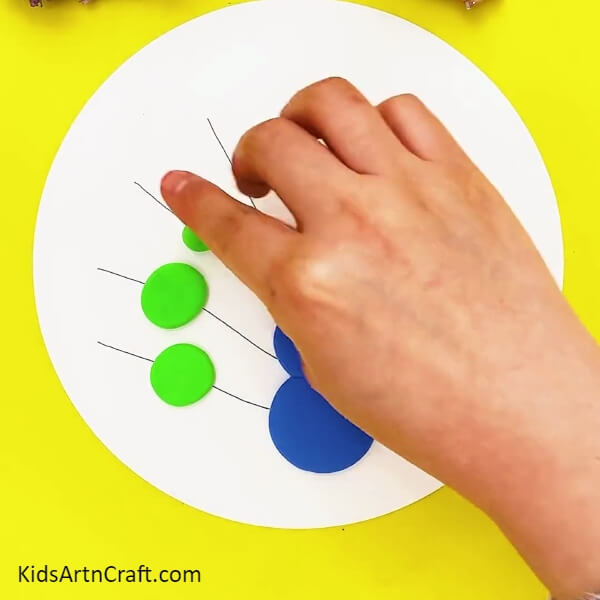
Flatten the two clay balls to make the peacock’s body.
Step 3: Adding Some Green Clay
Now take some green-coloured clay and roll it and flatten it to make feathers.
Step 4: Adding More Colours
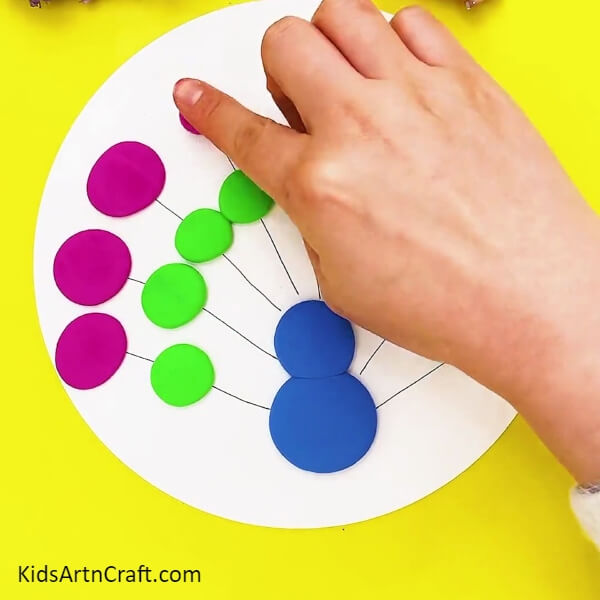
Let’s add some more colour to our feathers. Roll and flatten some violet-coloured clay and stick it to form the top portion of the feathers.
Step 5: Making The Feathers More Colourful
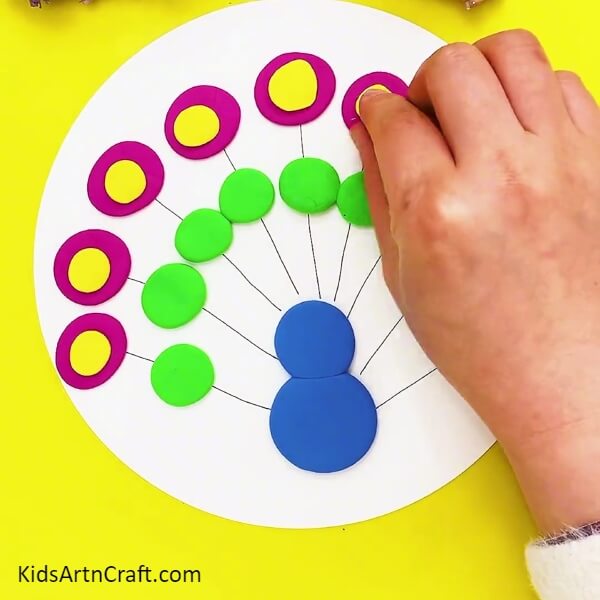
Now let us give some more detail to the feathers. Add some yellow-coloured clay to make the feathers appear more beautiful and fancy.
Step 6: Decorating Our Peacock
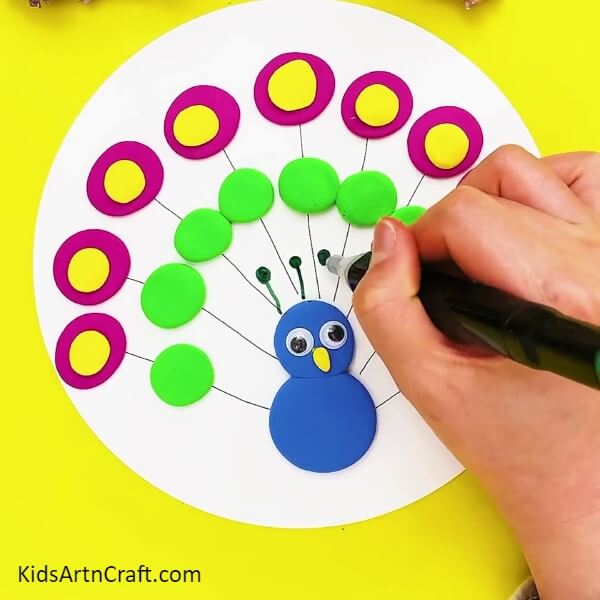
Paste the googly eyes on the peacock’s face. Take out a small piece of yellow-coloured clay for making the peacock’s nose. Now using a green marker or sketch pen, let us draw the peacock’s tuft on its head.
Step 7: Decorating The Feathers
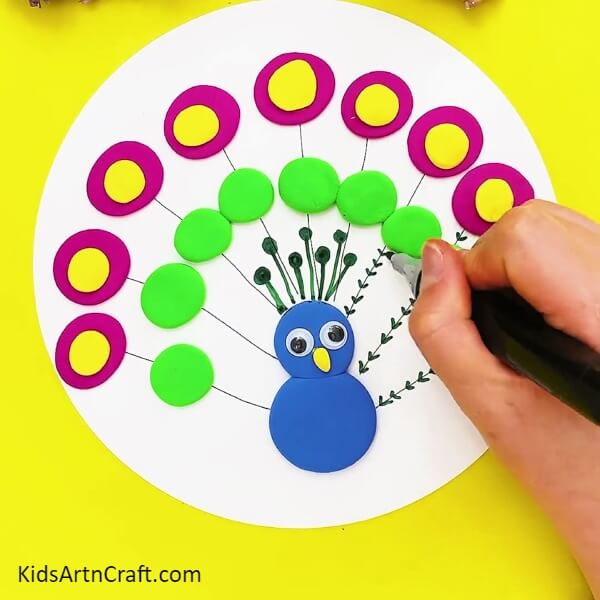
Use a marker to add more detailing to the peacock feathers. Draw small spokes on the feathers to make it more realistic.
Step 8: Drawing Our Peacock’s Feet
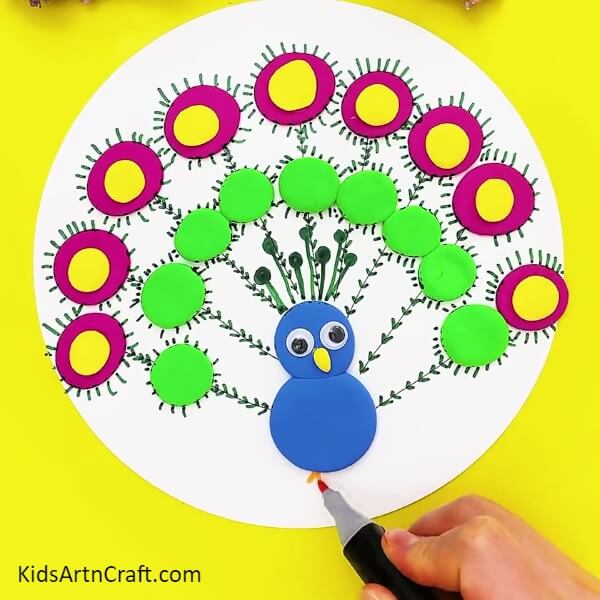
Now let us draw two tiny feet for our peacock using an orange marker.
Our Colourful Peacock Is Now Ready To Dance In The Rains
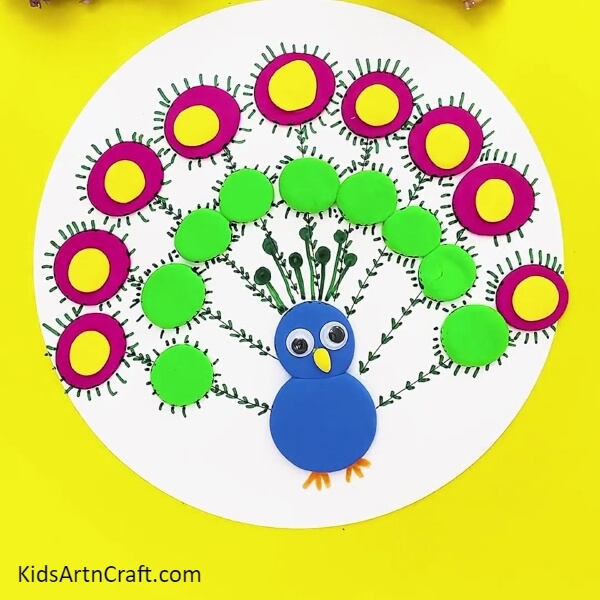
Our peacock is now ready! This is such a simple step-by-step tutorial that can be easily followed up by everyone, especially kids. This activity will definitely engage kids and will help them in learning colours and in developing their motor skills. Kids can use their own imagination to add more colours and patterns to make their own peacocks.
Hope you liked this simple tutorial on how to make a colourful clay peacock. We would love to hear what you think about this craft. Also, check out more of such cool peacock crafts on our website.
Thank you so much for visiting our site! Do check out more of our DIY and craft ideas.
Follow us on Youtube for art and craft tutorials and much more.
More Articles from Kids Art & Craft
- How to Make Clay Flower Easy Tutorial for Kids
- How to Make Worm Using Clay For Kids
- DIY Clay Giraffe Step by Step Tutorial For Kids
- Plant Garden Artwork Craft Using Clay And Peanut Shells
- Beautiful Tinker Bell House Craft Using Plastic Bottle And Super Clay


