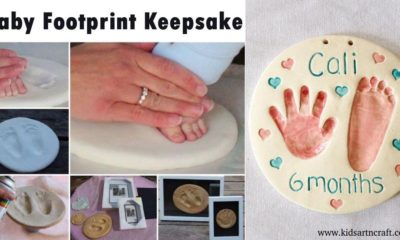


Clay Crafts
Hanging Plant Pot Clay Craft Tutorial For Kids

This tutorial will show children how to make a hanging plant pot using things they can find easily. They can decorate it however they want and put their favourite plants in it to make it look special in their room.
Wherever there are plants and flowers, that environment and surrounding looks so fresh that it automatically radiates positive energy amongst us. Plants gives us oxygen in return to our carbon dioxide. They give us life and so much more. So, today we will make some unique plant from which you will learn the importance of plants even more better. Let’s get started!
DIY Hanging Plant Pot Craft For Kids
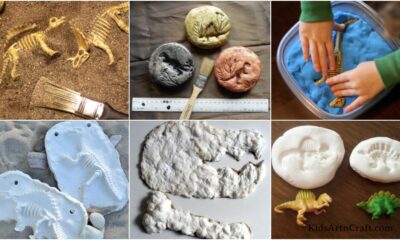
Read More: Clay Giraffe 3D Model Craft Project For Beginners
Materials Required
- White craft paper
- Plant pot template
- Black marker/sketch pen
- Clay (Blue, Light Green, Dark Green, Yellow, Orange)
- Glue
Procedure
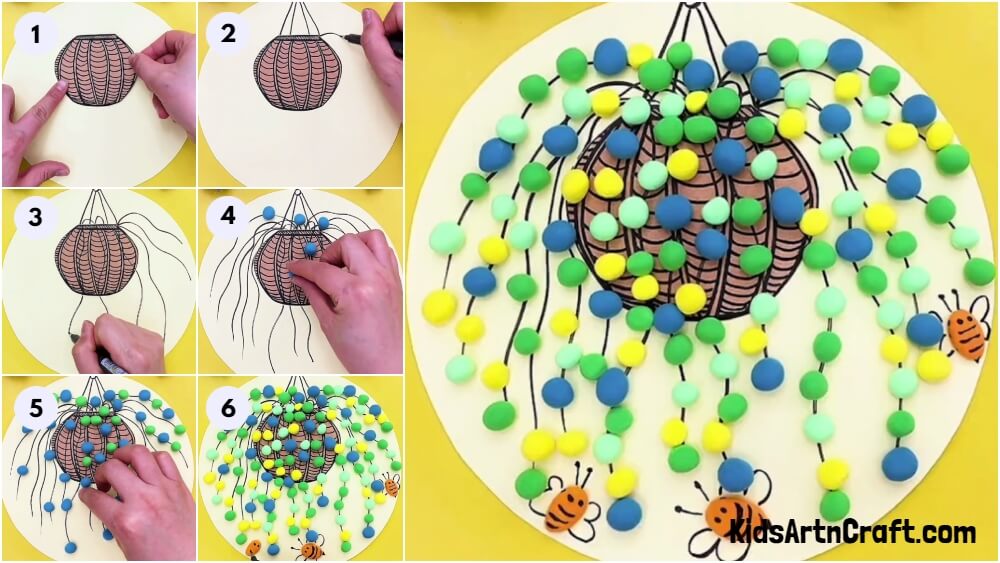
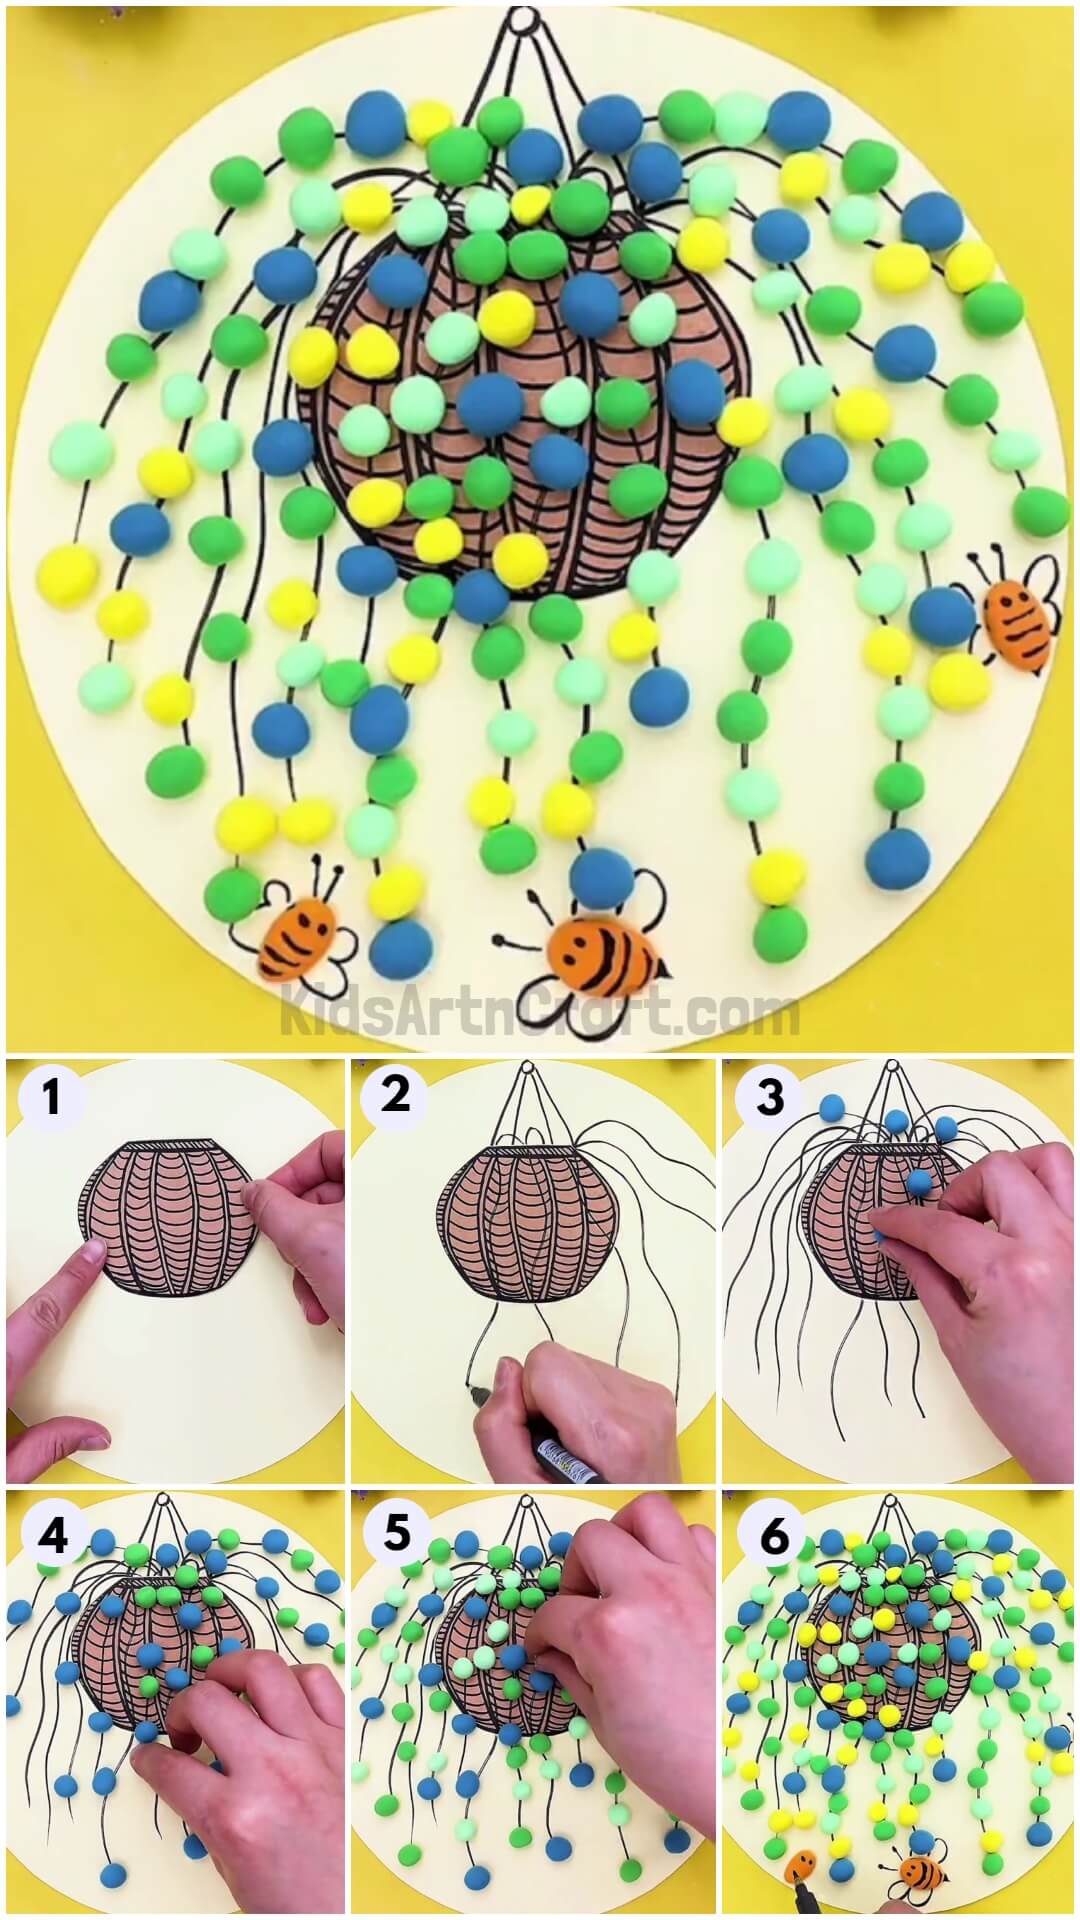
Step 1: Sticking The Plant Pot Template On White Craft Paper

Your first step is to take a white coloured craft paper. The white coloured craft paper should be circle in shape.
After taking a circular white coloured craft paper, you have to take a print of the plant pot template from the internet. After taking out the print of the plant pot template from the internet you have to stick the plant pot template on the top middle part of the white coloured craft paper with the help of glue.
Step 2: Making Slant Lines From Black Marker/sketch Pen
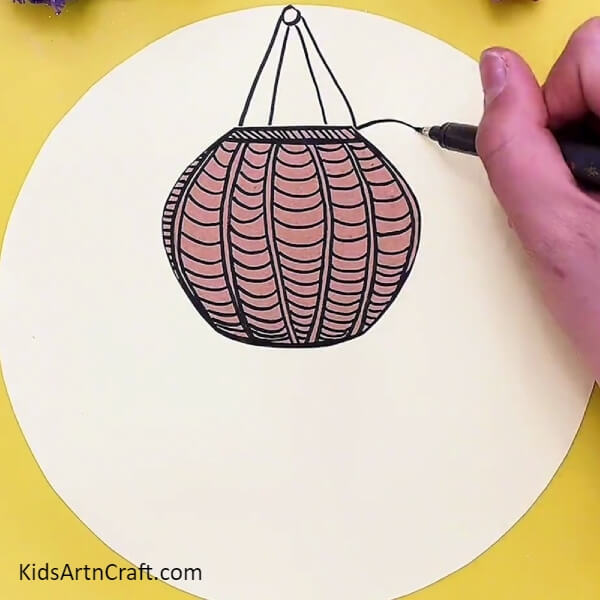
Now, take a black marker/sketch pen. After taking a black marker/sketch pen, you have to make four slant lines starting from the brim of the plant pot template and ending at the top of the white coloured craft paper. After making four slant lines, you have to make a circle with black marker/sketch pen that is touching all the four slant lines that you have made with the help of black marker/sketch pen.
Step 3: Making Wavy Lines From Black Marker/sketch Pen
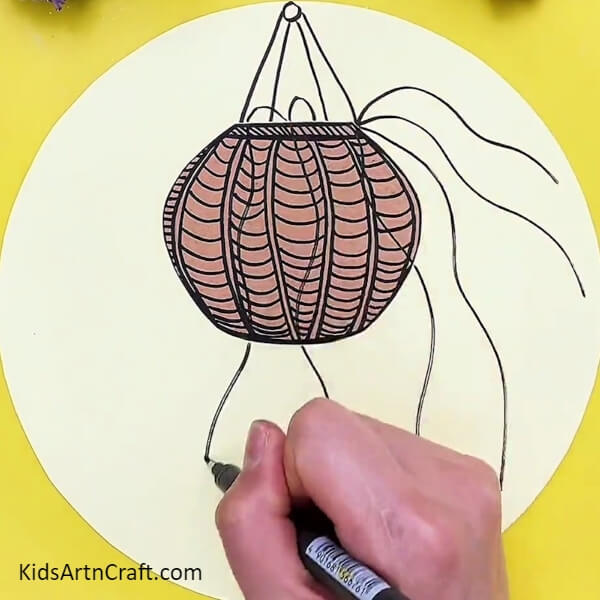
Take a black marker/sketch pen. After taking a black marker/sketch pen, you have to make wavy lines from the black marker/sketch pen starting from the brim of the plant pot template and ending the wavy lines at the bottom of the white coloured craft paper.
Step 4: Making More Wavy Lines With Black Marker/sketch Pen
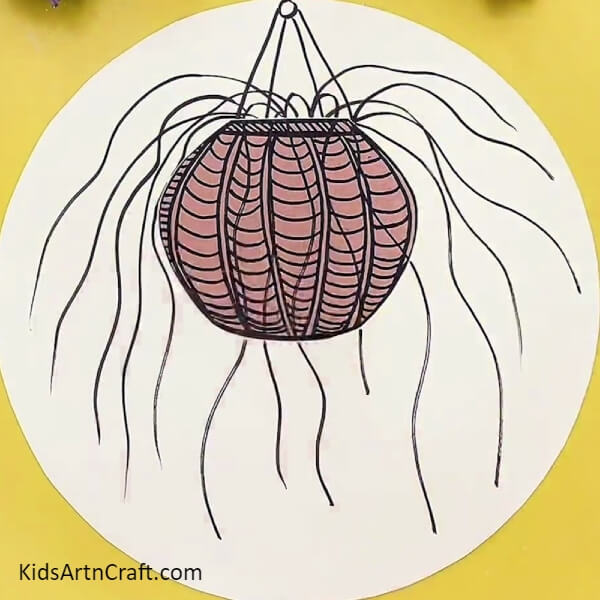
Keep repeating the step of making more wavy lines with the help of black marker/sketch pen starting from the brim of the plant pot template and ending the wavy lines at the bottom of the white coloured craft paper. You have to keep making the wavy lines from black marker/sketch pen till you have not filled the whole white coloured craft paper as shown.
Step 5: Making Balls With Blue Clay And Stick It On Wavy Lines
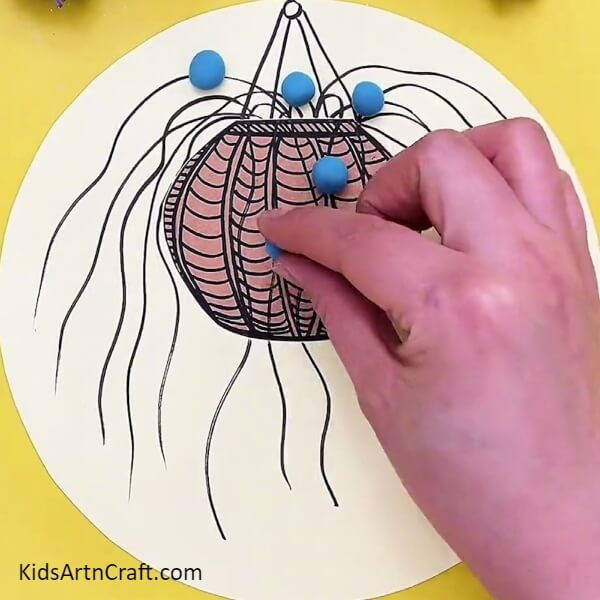
Now, take a blue coloured clay. After taking a blue coloured clay, you have to make balls with the help of blue coloured clay. After making balls with the help of blue coloured clay, you have to stick the blue coloured balls on the wavy lines which you have made from the black marker/sketch pen.
Step 6: Sticking More Blue Balls On The Wavy Lines From Blue Clay
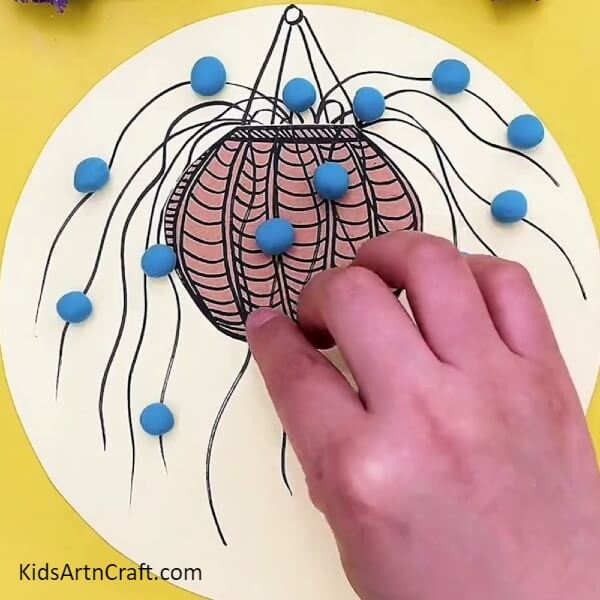
Keep repeating the step of making blue coloured balls with the help of blue coloured clay. After making blue coloured balls with blue coloured clay, you have to stick more blue coloured balls on the wavy lines which you made from black marker/sketch pen.
Step 7: Making Balls From Dark Green Clay And Stick It On Wavy Lines
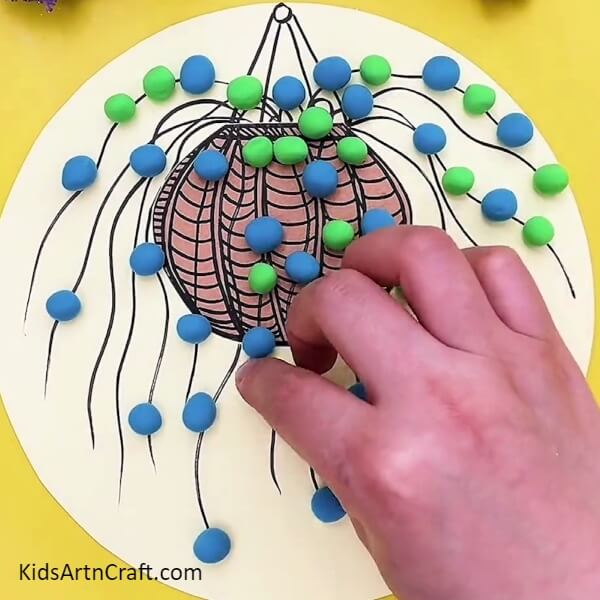
Now, take a dark green coloured clay. After taking a dark green coloured clay, you have to make balls with the help of dark green coloured clay. After making balls with the help of dark green coloured clay, you have to stick the dark green coloured clay on the wavy lines which you have made with the help of black marker/sketch pen.
Step 8: Making Balls From Light Green Clay And Stick It On Wavy Lines
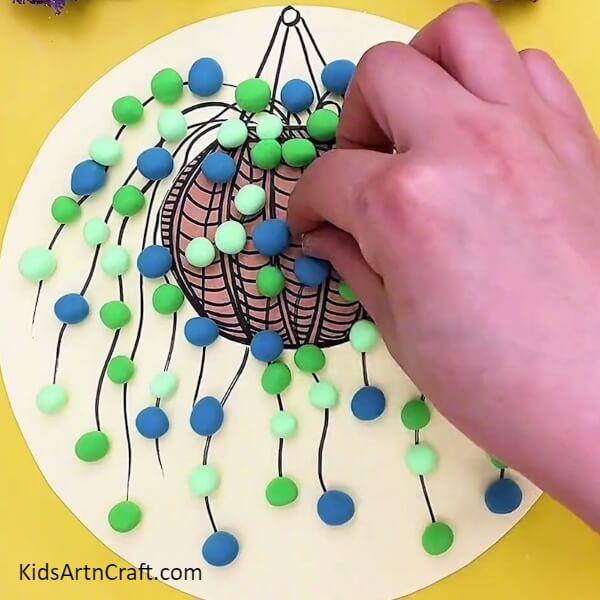
Take a light green coloured clay. After taking a light green coloured clay, you have to make balls with the help of light green coloured clay. After making light green coloured balls with light green coloured clay, you have to stick the light green coloured balls on the wavy lines which you made from the black marker/sketch pen.
Step 9: Making Balls From Yellow Clay And Stick It On Wavy Lines
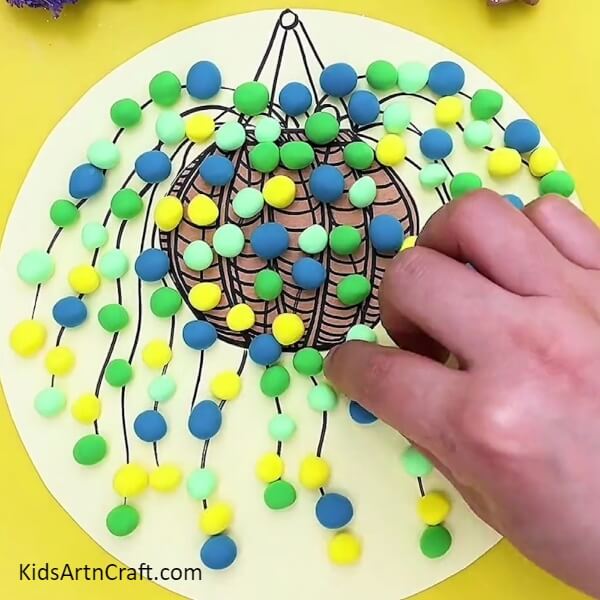
Now, take yellow coloured clay. After taking a yellow coloured clay, you have to make balls with the help of yellow coloured clay. After making yellow balls with the yellow coloured clay, you have to stick the yellow coloured balls on the remaining wavy lines which you made from the black marker/sketch pen.
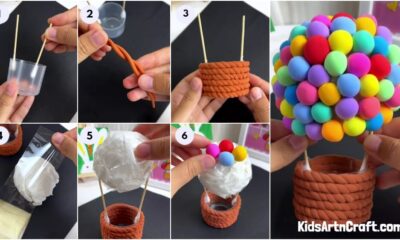
Step 10: Making Bees With Orange Clay And Stick It On White Craft Paper
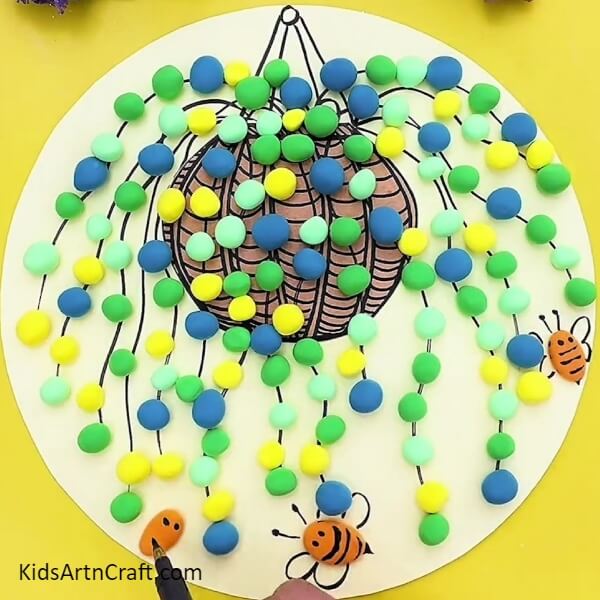
Take an orange coloured clay. After taking an orange coloured clay, you have to make ovals with the help of the orange coloured clay. You have to total make three orange coloured ovals. After making three orange coloured ovals, you have to stick the three orange coloured ovals on the white coloured craft paper.
After sticking the three orange coloured ovals on the white coloured craft paper, you have take a black marker/sketch pen. After taking a black marker/sketch pen, you have to make make features of a bee with the help of black marker/sketch pen (eyes, antenna, wing, body) as shown in the picture.
Finally, Your Beautiful Hanging Plant Pot Is Ready
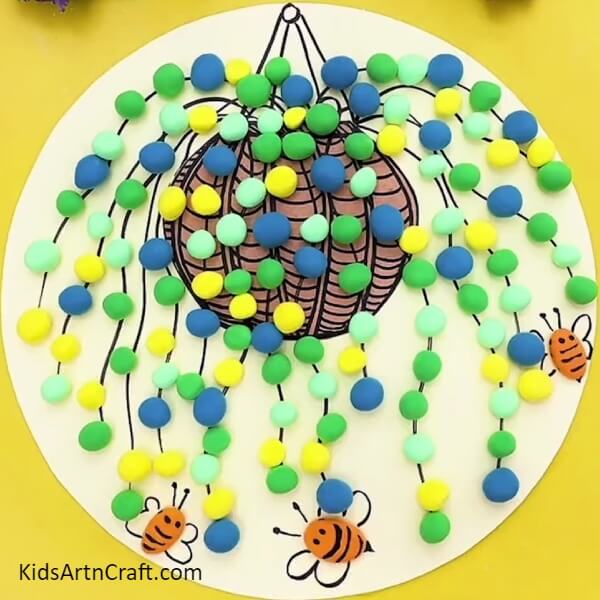
Finally your beautiful hanging plant pot is ready. This craft is looking so great and amazing. This plant craft is the most unique one that you will ever make. Your kids can learn so many things from this craft such as clay modelling, importance of plants and uniqueness of every craft. This craft is really very simple to make and it will really broaden your horizon.
So, what are you waiting for, go and grab your clay modelling kit now and start making some unique plant ideas into reality. And keep your environment clean and safe to make let the plants around you also breathe. Go green and stay safe! Let us know in the comment section about your unique design of the craft and more about the plants.
Follow us on Youtube for art and craft tutorials and much more.
More Articles from Kids Art & Craft
- Amazing Hot-air Balloon Clay Craft Step by Step Tutorial For Kids
- How to Make Clay Flower Easy Tutorial for Kids
- How to Make Worm Using Clay For Kids
- Easy Carrot Growing Artwork Craft Step-by-step Tutorial
- DIY Seed Germination Using Clay Easy Artwork For kids