


DIY and Crafts
Easy Origami Airplane Tutorial for Kids

This easy origami airplane tutorial shows kids step-by-step instructions for creating a fun and easy airplane paper craft. With just a few simple folds, kids will learn how to make an origami airplane quickly and easily!
Origami is an ancient Japanese art form that has been passed down through generations and continues to remain popular today. It is a great way to teach children the basics of paper folding and is a fun way to spend time with them.
Parents and teachers looking for an easy origami project to do with kids will love this tutorial on how to make an origami airplane. This easy origami airplane tutorial will teach kids how to make their own origami airplane in just a few steps. With just a few folds and a bit of imagination, kids can make a simple and beautiful origami airplane that they can fly around the house or school!
How To Make An Origami Airplane With Step-By-Step Tutorials
Materials Required:-
- Origami Paper
- Scissors
Read More: To Make Origami and Crafts Video Tutorial for Kids
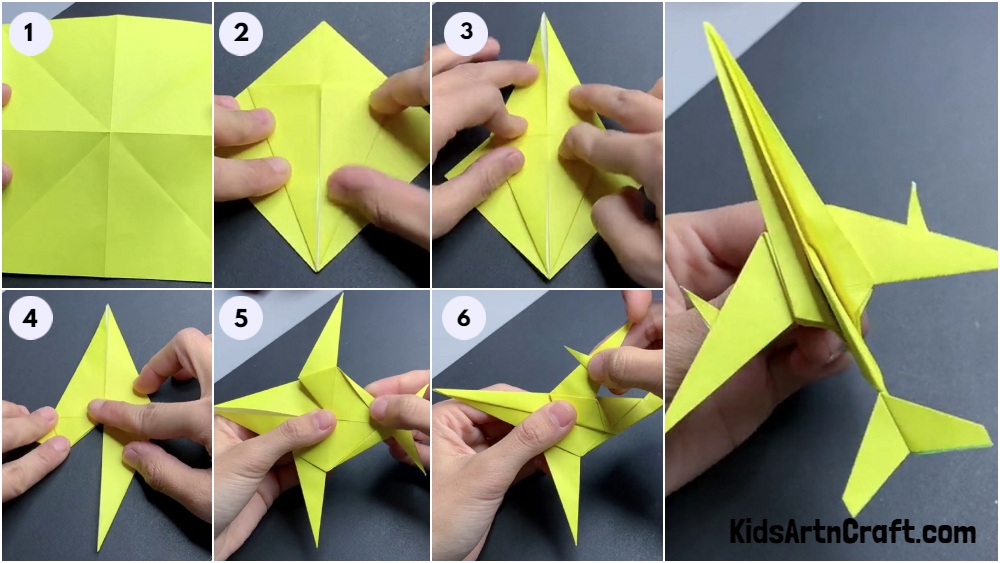
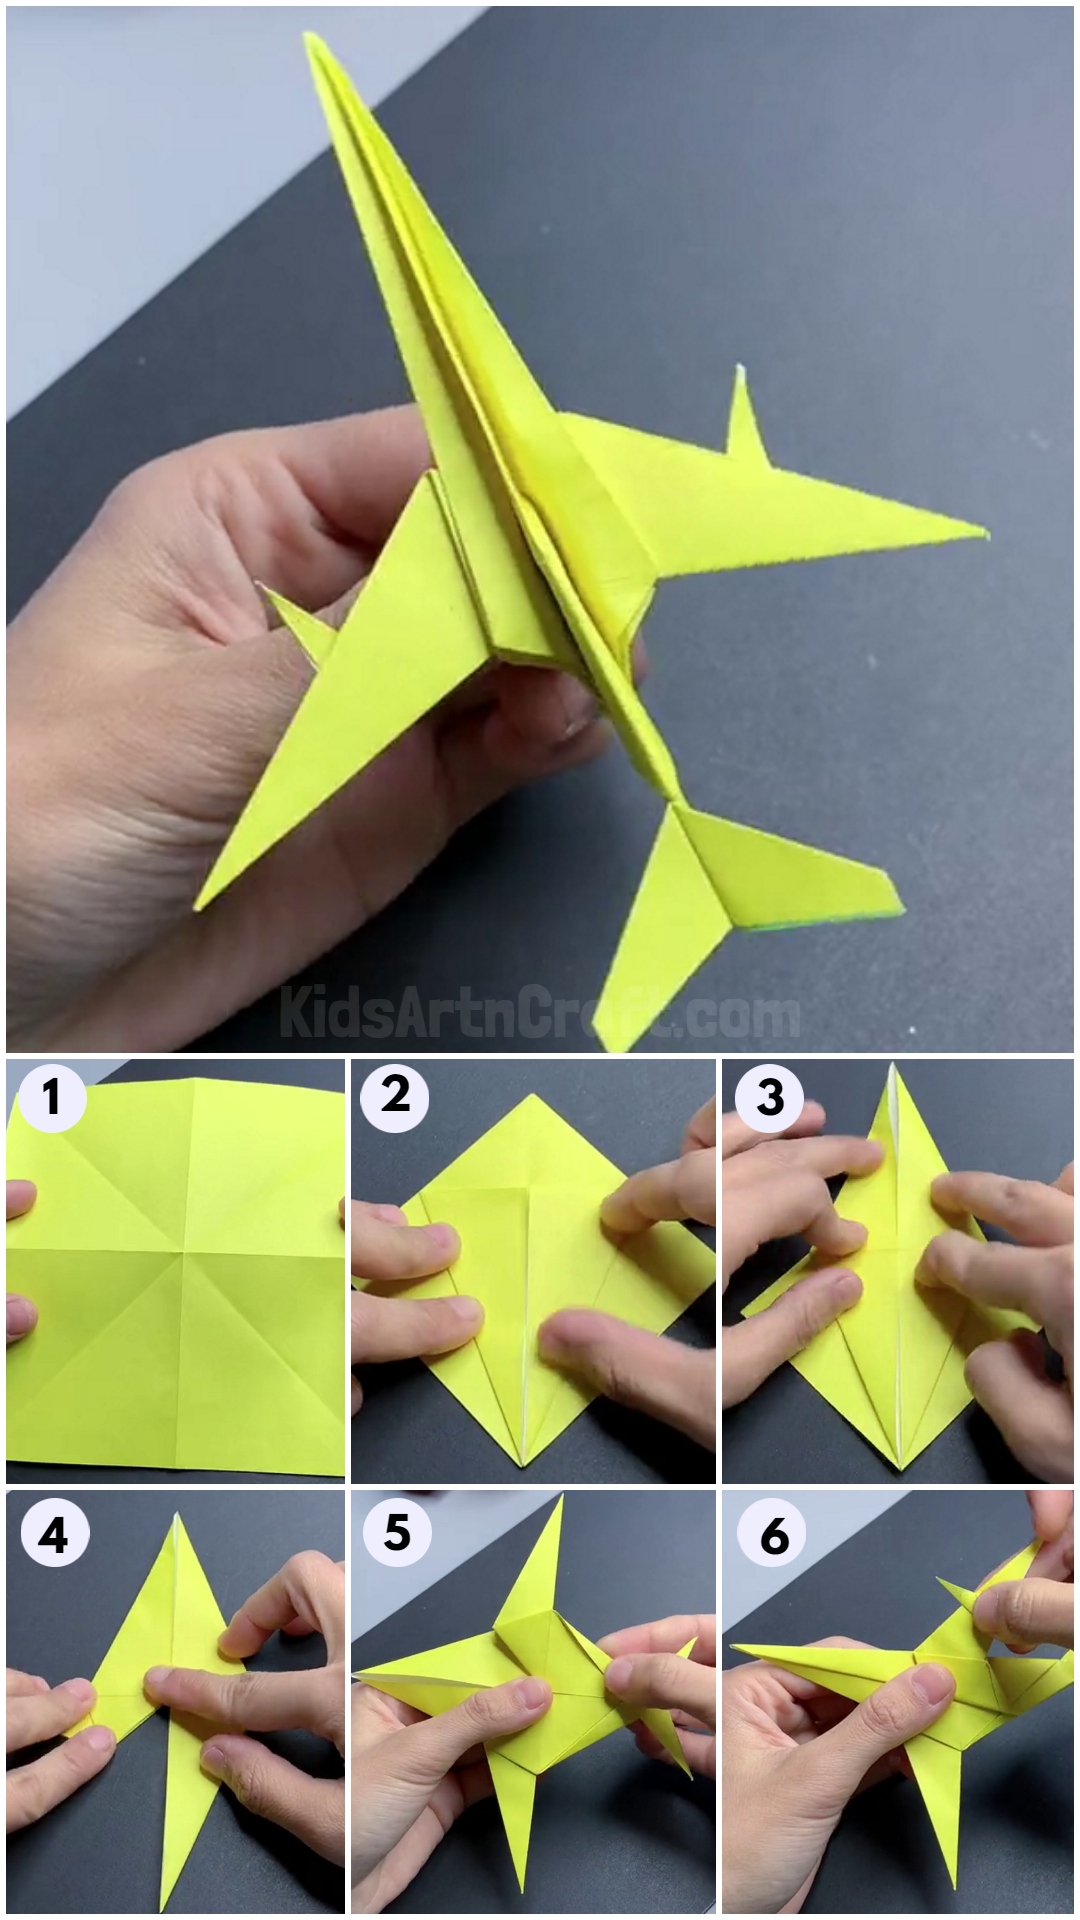
Step 1: Folding Square Paper In Diamond
To get started, take an origami paper. Fold it in half diagonally and unfold it to make a crease. In the same manner, make creases by folding them in half in other diagonally, vertically, and horizontally.
Now, hold the paper from the corners and push in. The square will turn into a diamond shape according to the creases formed.
Step 2: Folding Side Edges To The Middle
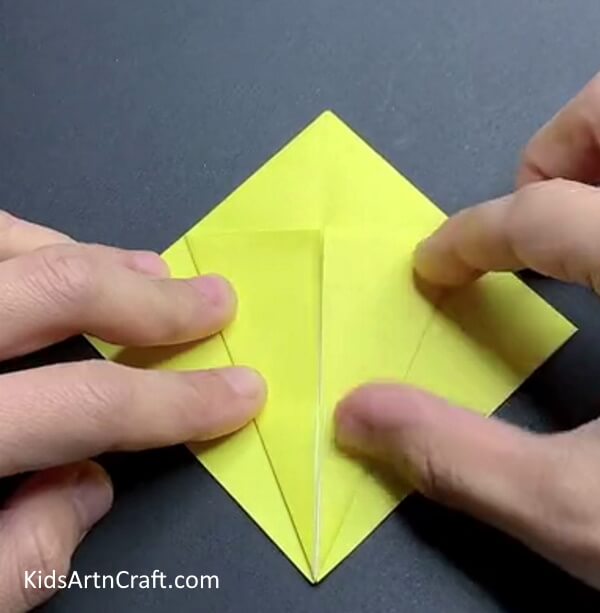
Now, bring the right side edge of the paper to the middle. Repeat the same with the left bottom edge.
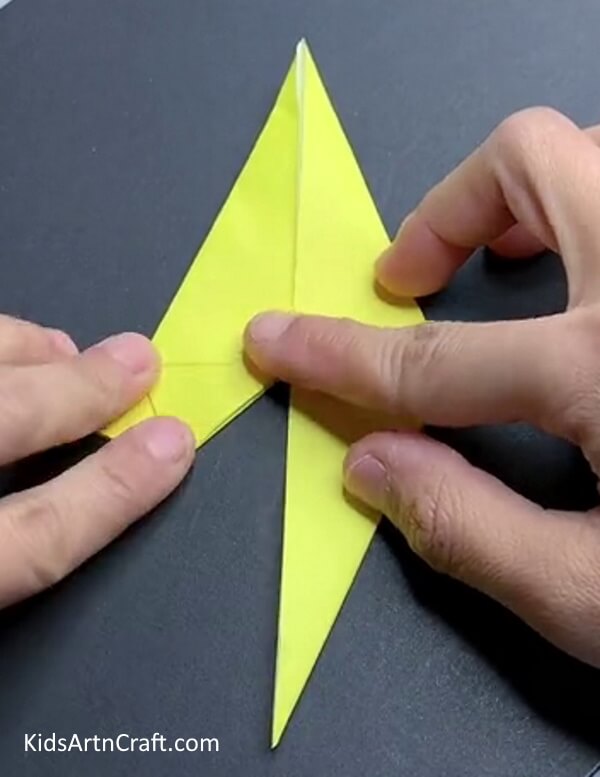
Step 3: Folding Top Corner
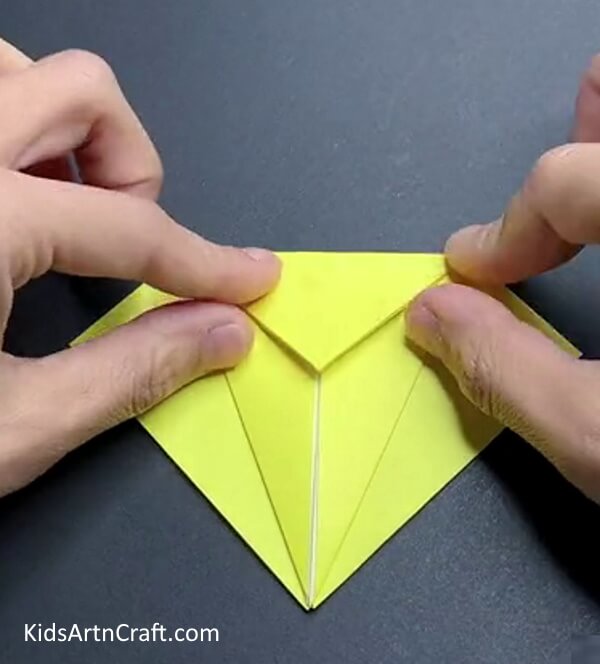
Fold the top corner of the diamond downwards. Crease it well. Unfold the triangle and side edges.
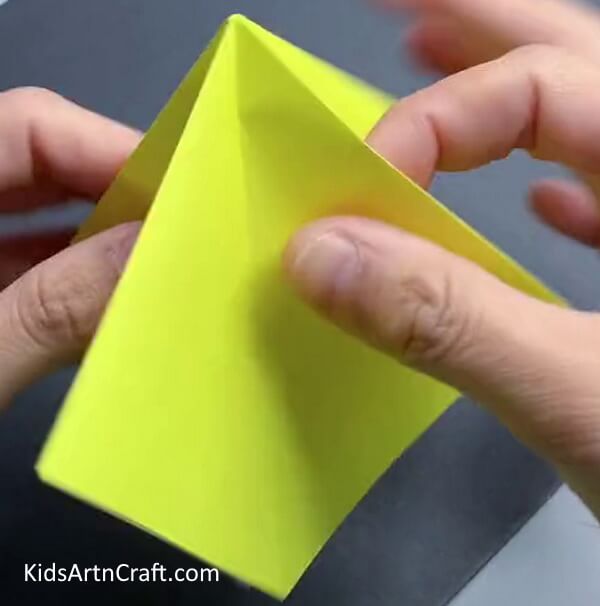
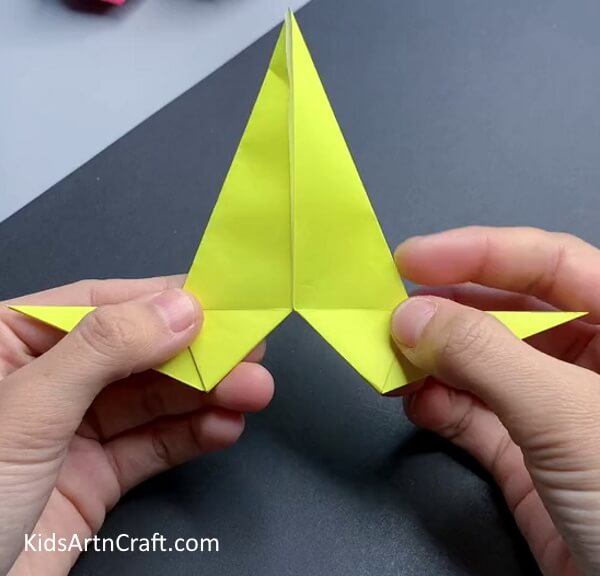
Step 4: Folding Paper Along Creases
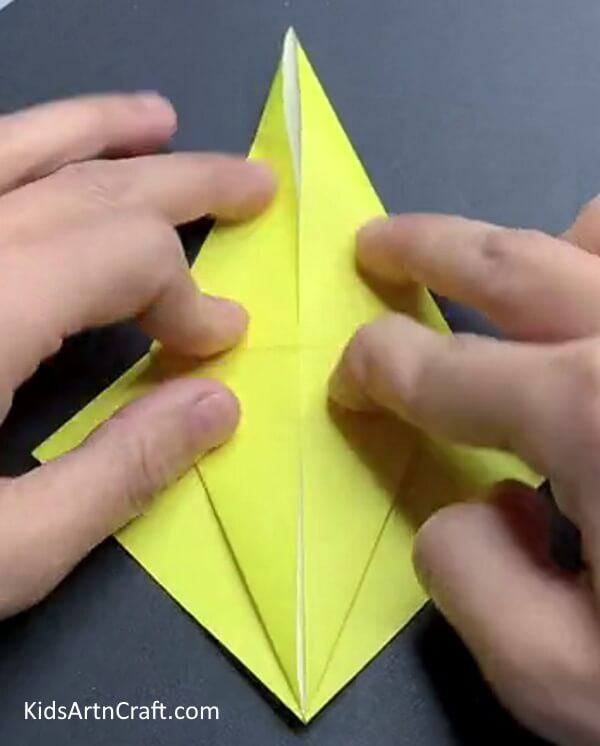
Now, take the top layer of the paper along with the creases made. Take the top layer in the upward direction along with the triangle crease and fold the two side edges to the middle. Crease it well now. Your paper model should look like the above image.
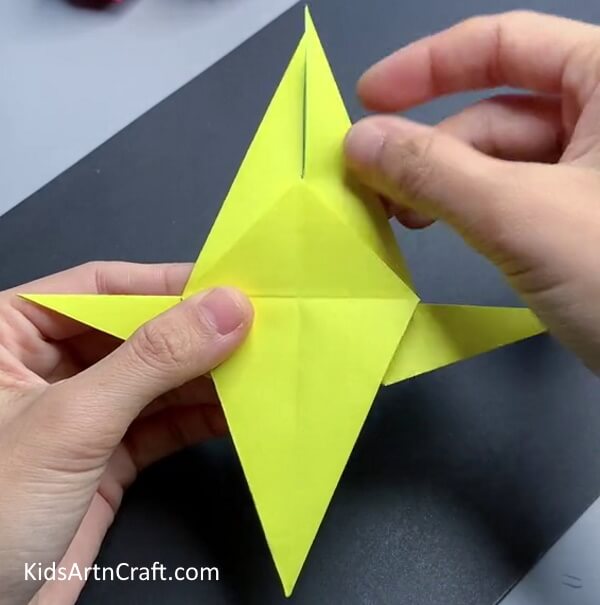
Step 5: Turning Paper & Repeating Folds
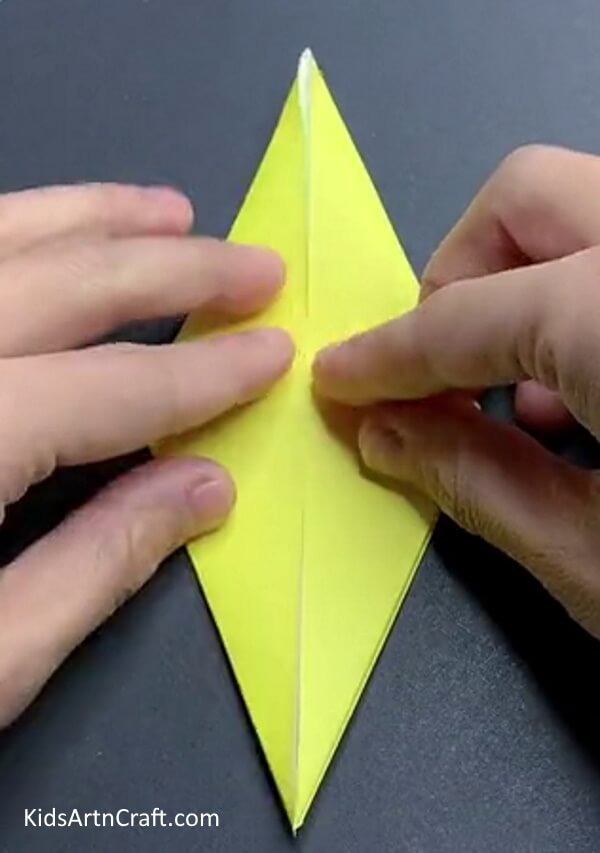
Flip the paper model and repeat the previous fold.
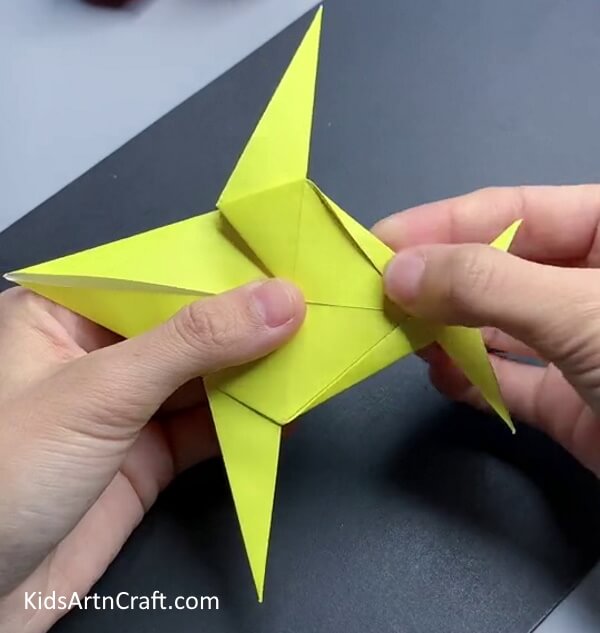
Step 6: Folding Bottom Left Part
You should get the separate parts on the bottom. Fold the left bottom part to the left side. Make a crease and unfold it again. Now, again fold it in the same direction but make insert the middle crease in the triangle crease, made during the previous crease.
Step 7: Folding Bottom Right Part
Repeat the same with the right bottom part.
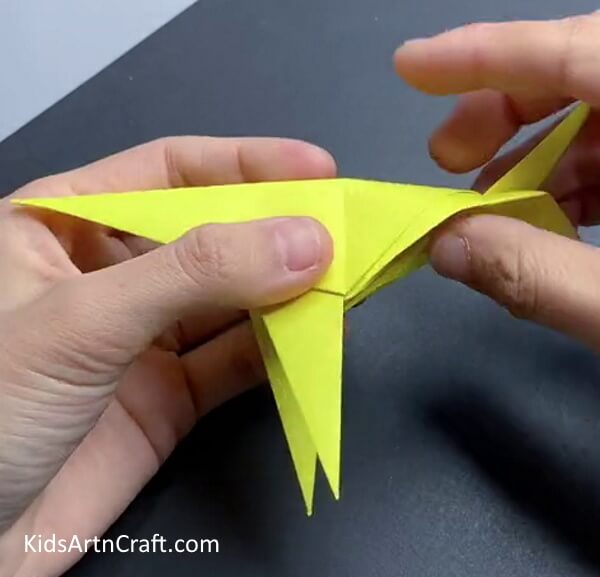
Step 8: Bringing the Top Triangle Downwards
Fold the top layer of the upper triangle in a downward direction. Using scissors, cut the top triangle into two halves.
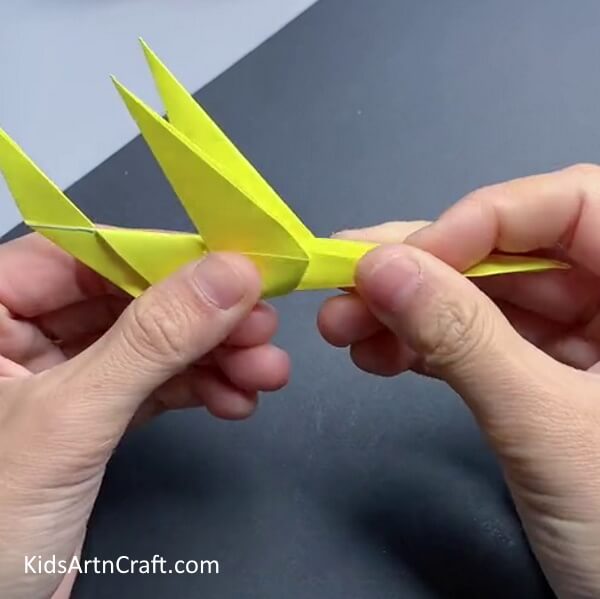
Step 9: Cross Folding Triangle Sides
Flip the paper and turn it in right. Make a cross fold in the right top and bottom sides of the triangle
Step 10: Folding Model In Half
Fold the model in half horizontally.
Step 11: Folding Paper Upwards
Bring the bottom part to the top, flip the model, and repeat the same.
Step 12: Folding Wing’s Top Layer Triangle
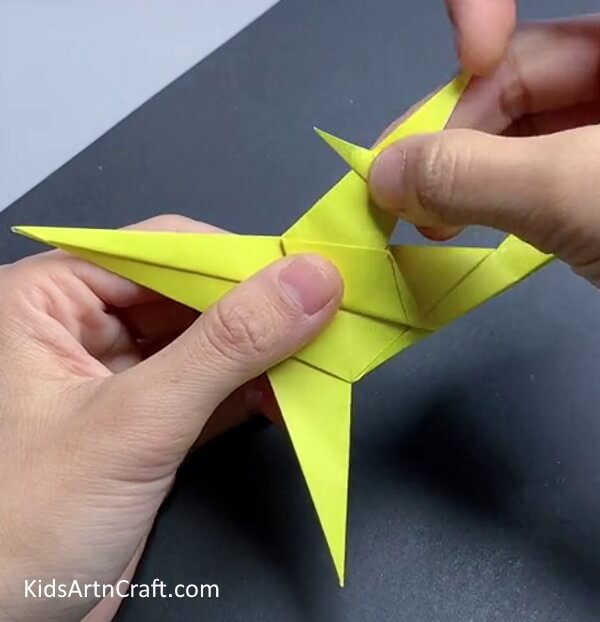
Cut the wings from the middle crease to separate the layer. Fold the top triangle layer in the right direction as shown in the above image. Repeat the same with the other wing.
Step 13: Cutting Top Of The Tail
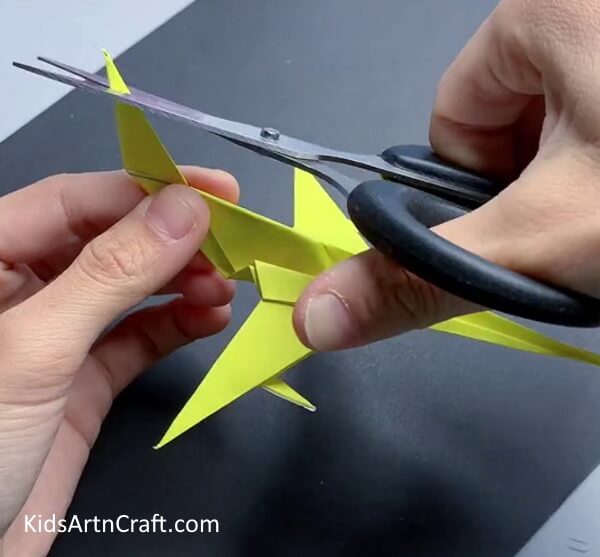
Cut the top of the tail of the airplane to separate it into two parts.
Step 14: Making Folds In Tail

Fold the right part of the tail in the right direction and the left part in the left direction.
Final Image – Origami Paper Airplane Is Done!
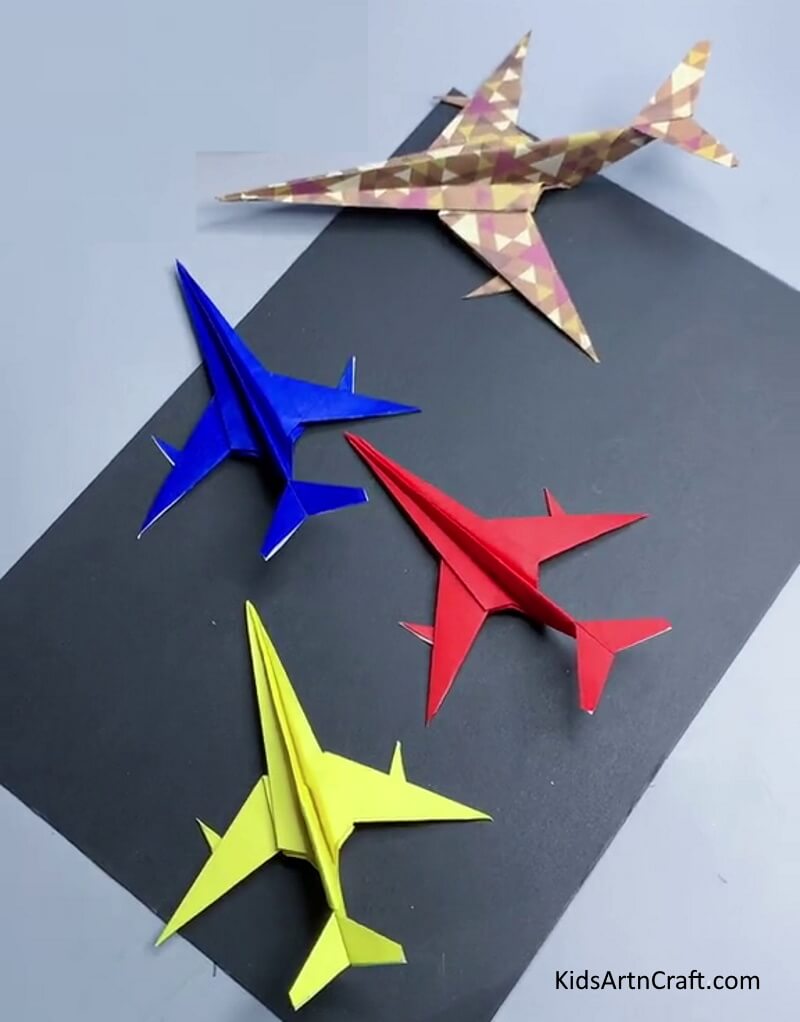
Now your origami airplane is ready for takeoff! This origami airplane tutorial is a great way to get children excited about paper folding. It’s easy to follow and the end result is something that the kids can be proud of. Plus, it’s a fun activity that can be done on a rainy day or during a school break. So, stop thinking and make your paper airplane today! Have Fun!
Some More Paper Airplane Craft Tutorial
Learn To Make Airplane From Paper
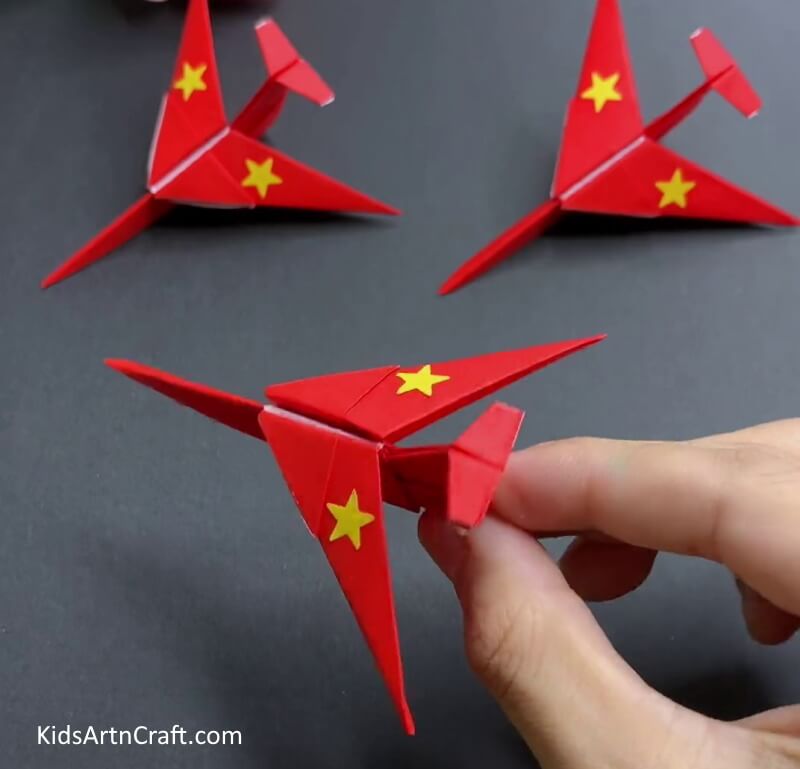
Image Source/Tutorial: Kids Art & Craft
Making an airplane from paper is a great activity for both kids and adults. It is easy to do, and the end result is both fun and rewarding. With some simple materials, you can create a paper airplane that can soar across the room.
FAQs Easy Origami Airplane Tutorial
1. What is origami?
Origami is the traditional Japanese art of paper folding.
2. What materials are needed to make an origami airplane?
You will need a square sheet of paper and scissors.
3. How do I start folding my origami airplane?
Begin by folding the paper in half diagonally, creasing it, then unfolding it.
4. How do I make the wings for my origami airplane?
Fold the bottom-left corner to the top-right corner, then the bottom-right corner to the top-left corner.
5. Are there any other steps to making my origami airplane?
Yes, you can make the engine by folding the bottom corner to the center line, and the propeller by folding the top corner to the center line.
6. How do I finish my origami airplane?
You can finish your origami airplane by pressing down gently on the creases.
Making origami airplanes is a great way to get creative with kids and have a lot of fun! Try this Easy Origami Airplane Tutorial for Kids today!
Follow us on Youtube for art and craft tutorials and much more.
More Articles from Kids Art & Craft
- Easy Creative Crafts That Anyone Can Make Video Tutorial
- Easy Paper Crafts DIY Video Tutorial for All
- DIY Paper Crafts Video Tutorial for All
- Easy Paper Crafts Activity Try At home Video Tutorial for All
- Easy Cute Crafts Video Tutorials for Kids